Best Chocolate Covered Strawberries Recipe: Shattering Snap
- Time: Active 15 minutes, Passive 20 minutes, Total 35 minutes
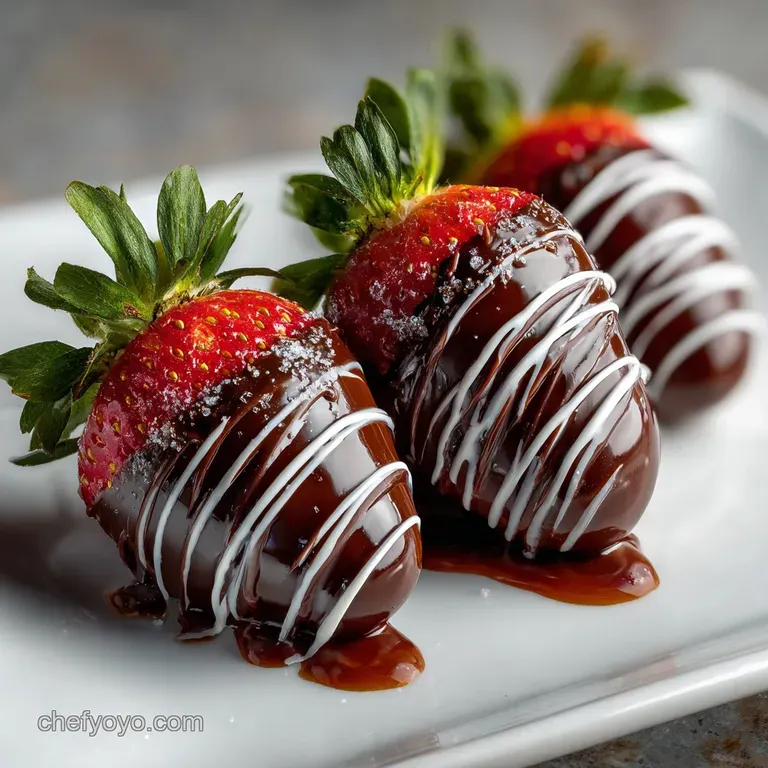
- Flavor/Texture Hook: Velvety chocolate shell with a shattering snap over juicy, cold fruit.
- Perfect for: Creative gifting, romantic dinners, or a sophisticated contemporary dessert platter.
- Crafting the BEST Chocolate Covered Strawberries recipe Ever
- The Science of Snap and Chocolate Crystallization
- Recipe Specs for Timing and Yield Success
- Selecting high-quality Ingredients for Creative Berry Fusion
- Essential Gear for a contemporary Professional Finish
- Precision Dipping Steps for a Velvety Smooth Coating
- Fixing Common Texture and Appearance Glitches
- Strategies for Adjusting Batch Sizes
- Debunking Common Kitchen Chocolate Myths
- Creative Variation Ideas for Diverse Palates
- Expert Storage and Freshness Protection Strategies
- Elegant Pairings to Enhance Your Berry Display
- Recipe FAQs
- 📝 Recipe Card
Crafting the BEST Chocolate Covered Strawberries recipe Ever
The first time I tried making these, I was getting ready for a big fusion themed dinner party. I thought I could just melt a candy bar and dunk some berries I'd washed two minutes prior. Big mistake.
The chocolate slid right off the berries like a wet raincoat, and by the time guests arrived, they were sitting in a puddle of pink "berry sweat." It was a mess, but it taught me everything about the science of a contemporary fruit coating.
Now, when I start this process, the kitchen smells like a high end chocolatier. There is that deep, earthy aroma of melting dark chocolate mixing with the bright, floral perfume of fresh strawberries. It is honestly one of the most comforting scents in the world.
When you get the temperature just right, the chocolate looks like liquid silk, and that first dip is incredibly satisfying.
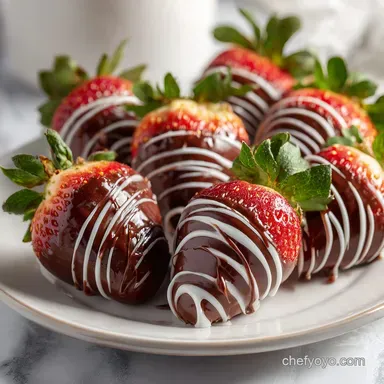
We are going for that specific, professional look where the chocolate is glossy, streak free, and stays firmly attached to the fruit. No one wants a "slumping" strawberry. We want a clean, creative presentation that looks like it came from a boutique shop.
Trust me, once you nail these few tricks, you will never settle for grocery store versions again.
The Science of Snap and Chocolate Crystallization
Fat Stabilization: Adding refined coconut oil introduces specific fats that help the chocolate set firmly while maintaining a velvety mouthfeel that doesn't feel waxy.
Surface Tension Management: Removing every microscopic drop of water from the berry skin allows the hydrophobic cocoa butter to bond directly to the fruit’s surface, preventing the "sliding" effect.
To Achieve a Shattering Snap
To get that satisfying sound when you bite in, you need to manage the cocoa butter crystals. By melting the chocolate slowly and not letting it exceed 115°F, you keep the stable crystals intact, which results in a firm, glossy finish.
To Stop the "Sweat" and Slumping
Condensation is the enemy. If you move berries from a cold fridge to a hot kitchen, they "sweat." I always let my fruit reach room temperature and dry them for at least 2 hours before dipping to ensure the surface is bone dry.
To Ensure a Glossy Finish
Gloss comes from constant stirring. As the chocolate cools slightly before dipping, stirring incorporates air and keeps the fat molecules suspended, preventing the dull, grey streaks known as bloom from forming on your contemporary treats.
| Method | Prep Time | Texture Result | Best For |
|---|---|---|---|
| The Flash Dip | 5 mins | Soft, matte finish | Immediate snacking |
| The Precision Chill | 20 mins | Shattering, glossy shell | Gifts and parties |
| The Double Coat | 30 mins | Thick, decadent crust | Extra large berries |
The choice between methods usually depends on how much time you have, but for the most creative presentation, the Precision Chill is the gold standard for this BEST Chocolate Covered Strawberries recipe.
Recipe Specs for Timing and Yield Success
When you follow this recipe, you are looking for a yield of 22 servings, which is perfect for a standard 1 lb container of berries. The active time is quite short, only 15 minutes, but do not ignore the passive time needed for the chocolate to set properly.
| Component | Science Role | Pro Secret |
|---|---|---|
| Dark Chocolate | Structural Base | Use at least 60% cocoa for the best snap and rich aroma. |
| Refined Coconut Oil | Emollient | This thins the chocolate just enough to create a thin, elegant coating. |
| Fresh Strawberries | Acidic Balance | Keep the green stems on; they act as a natural handle and keep juices inside. |
Selecting high-quality Ingredients for Creative Berry Fusion
- 1 lb fresh, firm strawberries: Look for bright red color all the way to the top. Why this? Firmness prevents the fruit from collapsing under the heat of the chocolate.
- Substitute: Firm raspberries or chilled orange segments.
- 12 oz semi sweet or dark chocolate, chopped: Avoid "chocolate chips" if possible, as they contain stabilizers that prevent a smooth melt. Why this? high-quality bars have better cocoa butter content for a contemporary finish.
- Substitute: high-quality milk chocolate bars.
- 1 tsp refined coconut oil: This must be refined to avoid adding a coconut flavor. Why this? It creates a glossy sheen and makes the chocolate easier to dip.
- Substitute: Cocoa butter (food grade).
- 4 oz white chocolate: For that professional looking drizzle. Why this? Provides visual contrast and a creamy sweetness to balance the dark chocolate.
- Substitute: Melted peanut butter or crushed nuts.
Essential Gear for a contemporary Professional Finish
You don't need a professional kitchen, but a few specific tools make this much easier. A microwave safe glass bowl is better than plastic because it retains heat longer, keeping your chocolate fluid. You'll also want a parchment lined baking sheet.
Chocolate sticks to wax paper or foil, but it releases beautifully from parchment with a clean bottom.
A small fork or a specialized dipping tool can help, but I honestly prefer using the strawberry stems. If your berries have short stems, use wooden toothpicks. Also, grab a small piping bag or even a plastic sandwich bag with the corner snipped off for the white chocolate drizzle.
This is how you get those thin, creative lines that make the berries look expensive.
Precision Dipping Steps for a Velvety Smooth Coating

- Prep the fruit. Wash the 1 lb fresh, firm strawberries gently in cold water. Note: Do not soak them, or they will absorb water and become mushy.
- Dry completely. Pat each berry with a paper towel and let them air dry for 2 hours until the skin feels completely matte and dry to the touch.
- Chop the chocolate. Break the 12 oz semi sweet or dark chocolate into uniform, small pieces. Note: Uniform pieces ensure the chocolate melts at the same rate without burning.
- Melt the base. Place the chopped chocolate and 1 tsp refined coconut oil in a glass bowl and microwave in 15 second bursts.
- Check the aroma. Stir between each burst until the scent is deeply roasted and the texture is like liquid silk.
- Monitor the temperature. Stop heating when most of the chocolate is melted but a few small lumps remain; stir to melt the rest. Note: This prevents overheating and preserves the "snap."
- The first dip. Hold a strawberry by the stem and submerge it into the chocolate until nearly covered but leaving a sliver of red at the top.
- The drip away. Lift the berry and shake gently, then tap your wrist until the excess chocolate stops dripping in a steady stream.
- Set the berries. Place the berry on the parchment lined sheet and repeat.
- The creative drizzle. Melt the 4 oz white chocolate, put it in a bag, and sweep it back and forth over the set berries until thin, crisp lines appear across the dark coating.
Fixing Common Texture and Appearance Glitches
My Chocolate Seized and Turned Grainy
This usually happens if even a tiny drop of water gets into your melting bowl. Water causes the sugar and cocoa particles to clump together. If it happens, you can sometimes save it by whisking in a teaspoon of boiling water, but the chocolate will no longer be suitable for dipping berries as it won't set hard.
It is better to start over and ensure your bowl is bone dry.
The Chocolate is Sliding Off the Berry
This is almost always due to moisture on the surface of the fruit. If the berries are even slightly damp, the chocolate cannot grip the skin. It might also happen if your chocolate is too hot and thin. Let the chocolate sit for 2 minutes to thicken slightly before dipping again.
| Problem | Root Cause | Solution |
|---|---|---|
| White streaks (Bloom) | Chocolate got too hot | Keep microwave bursts short (15s) and stir constantly. |
| Puddles at the base | Too much excess chocolate | Tap your wrist longer to remove the "tail" before placing. |
| Chocolate won't harden | Too much coconut oil | Measure oil precisely; don't eye ball the teaspoon. |
Common Mistakes Checklist
- ✓ Never dip berries straight from the fridge; let them reach room temperature first.
- ✓ Avoid using chocolate chips which contain additives that dull the final shine.
- ✓ Ensure the bowl and spatula are 100% dry before starting the melt.
- ✓ Don't rush the setting process in the freezer; use the fridge to avoid "thermal shock."
- ✓ Always use a fresh sheet of parchment paper for every batch to prevent sticking.
Strategies for Adjusting Batch Sizes
When you want to scale this recipe down for a solo treat, it is quite easy. For a 1/2 batch, use 1/2 lb of berries and roughly 6 oz of chocolate. Just remember that a smaller amount of chocolate in a large bowl will burn very quickly in the microwave.
Switch to a smaller, narrower bowl so the chocolate stays deep enough for dipping.
If you are scaling up for a large event, say 4 lbs of berries, don't melt all the chocolate at once. It will start to thicken and lose its luster before you get through the second pound. Work in 12 oz batches to keep the coating fresh and fluid. Just like with my Decadent Homemade Brownies recipe, the quality depends on the consistency of the chocolate temperature.
| Premium Chocolate | Budget Alternative | Flavor Impact | Savings |
|---|---|---|---|
| Valrhona/Guittard | Baker's Brand Bar | Slightly less complex fruit notes | Save $10-15 per batch |
| Lindt 70% Dark | Store Brand Dark | More sugar, less cocoa "snap" | Save $5-8 per batch |
| Callebaut Wafers | Hershey's Special Dark | Higher wax content, matte finish | Save $12-18 per batch |
Choosing the budget option is fine for a quick weeknight snack, but for the BEST Chocolate Covered Strawberries recipe, the premium bars really make a difference in that shattering texture we're chasing.
Debunking Common Kitchen Chocolate Myths
Many people think you need a double boiler to melt chocolate safely. While it is a great traditional method, a microwave is actually safer for contemporary home cooks because there is no risk of steam (water) rising up and seizing the chocolate.
As long as you use short bursts and stir, the microwave is your best friend.
Another myth is that you must add butter to make the chocolate shiny. Adding butter actually introduces water and milk solids, which makes the chocolate soft and prevents it from ever "snapping." Refined coconut oil is the true secret for that professional, creative sheen without the softening effects of dairy.
Creative Variation Ideas for Diverse Palates
For a Dark Chocolate Covered Strawberries Recipe
To lean into a more sophisticated profile, use a 72% or 85% dark chocolate bar. The bitterness of the dark cocoa pairs beautifully with the natural sugars in the berries. If you find it too intense, a sprinkle of flaky sea salt on top before the chocolate sets adds a brilliant contemporary touch.
For the "Christmas Chocolate Covered Strawberries Recipe" Twist
To make these festive, I like to dip the berries in white chocolate first, let them set, and then do a half dip in dark chocolate. You can also crush up candy canes and sprinkle them over the wet chocolate for a minty crunch. This is a great way to use the Chocolate for Chocolate recipe techniques to layer different textures.
For a Vegan Friendly Version
Since we are already using refined coconut oil, you only need to ensure your chocolate is dairy-free. Most high-quality dark chocolate bars (70% and up) are naturally vegan. This makes the recipe incredibly inclusive for guests with different dietary needs without sacrificing that authentic luxury feel.
Expert Storage and Freshness Protection Strategies
Storage: These are best eaten the day they are made. If you must store them, put them in a single layer in a container lined with paper towels. Keep them in the fridge for up to 24 hours. Do not seal the lid tightly; leave it cracked open so moisture can escape.
Zero Waste: If you have leftover melted chocolate, don't toss it! Spread it thin on parchment paper, sprinkle with nuts or dried fruit, and let it harden into a quick chocolate bark.
If you have bruised strawberries that weren't pretty enough to dip, chop them up and fold them into a morning yogurt or a quick smoothie.
Elegant Pairings to Enhance Your Berry Display
These berries are the star of the show, but they play well with others. Serve them alongside a glass of dry sparkling wine or a crisp Prosecco; the bubbles cut through the richness of the chocolate perfectly.
For a non alcoholic option, a cold glass of almond milk or a contemporary hibiscus tea provides a floral contrast that is very refreshing.
If you are building a full dessert board, I love placing these next to some salty elements like marcona almonds or even a sharp aged cheddar. The "sweet and salty" fusion is a classic for a reason.
You can also serve them with a dollop of lightly sweetened mascarpone cheese on the side for a deconstructed cheesecake vibe. Whatever you choose, keep the presentation clean and creative to let the natural beauty of the berries shine.

Recipe FAQs
What is the secret to chocolate covered strawberries?
Surface dryness and controlled temperature. The secret lies in ensuring the strawberry skin is completely dry so the chocolate can properly adhere, avoiding that sliding effect. Mastering fat stabilization through precise melting is key to achieving that professional, glossy shell.
What kind of chocolate is best for dipping strawberries?
high-quality chopped bars, typically 60% cocoa or higher. Chocolate chips contain stabilizers that prevent a smooth melt and a clean "snap." For the best results, look for bars with high cocoa butter content to achieve that velvety, non-waxy finish.
Should strawberries be warm or cold before dipping in chocolate?
They must be at room temperature. Placing cold berries into warm chocolate causes condensation ("sweating"), making the chocolate slide right off. Allow the fruit to sit out for at least two hours until the skin is completely matte before dipping.
How do I get chocolate to stick to my strawberries?
Ensure the fruit surface is completely free of moisture and oil. This allows the hydrophobic cocoa butter to bond directly to the skin instead of repelling off water residue. After dipping, tap the berry against the edge of the bowl until the chocolate stops dripping in a steady stream.
Is it true I must use a double boiler for melting chocolate for dipping?
No, this is a common misconception. A microwave set to 50% power works faster and is often easier to control for small batches. Just remember to melt in short, 15-second bursts, stirring thoroughly between each one to prevent scorching.
How do I prevent the chocolate coating from becoming dull or streaky (bloom)?
Maintain a low melting temperature and stir constantly. Overheating the chocolate causes the fat crystals to separate, leading to a dull grey finish instead of a glossy shine. If you enjoyed mastering the visual texture here, apply the same principle of gentle, controlled heating to our How to Make recipe recipe for smooth coatings.
How do I make the chocolate shell hard enough to "snap" when bitten?
Do not let the chocolate exceed 115°F during melting. This precise temperature control keeps the stable cocoa butter crystals intact, which is what creates that satisfying, crisp texture. After dipping, set the berries in the refrigerator, not the freezer, to avoid thermal shock.
Chocolate Covered Strawberries Recipe
Ingredients:
Instructions:
Nutrition Facts:
| Calories | 121 kcal |
|---|---|
| Protein | 1.2 g |
| Fat | 6.8 g |
| Carbs | 14.1 g |
| Fiber | 1.5 g |
| Sugar | 11.2 g |
| Sodium | 7 mg |
