Homemade Pizza Rolls the Ultimate Crispy Baked Pizza Pockets
- The Secret to Ultra and Crispy Homemade Pizza Rolls
- Curating Your Filling: Components for the Best Homemade Pizza Rolls
- Essential Kitchen Tools for Rolling and Sealing
- Detailed Blueprint: Achieving Perfectly Sealed Pizza Pockets
- Troubleshooting and Advanced Recipe Strategies
- Storage and Meal Prep: Freezing Your Homemade Pizza Rolls
- Recipe FAQs
- 📝 Recipe Card
The Secret to Ultra and Crispy Homemade Pizza Rolls
Okay, stop what you are doing. If you grew up with those little bags of frozen pizza bites that came out of the microwave tasting like vaguely cheesy, lukewarm sadness, I am here to redeem your childhood. Seriously. Homemade pizza rolls are not just better; they are a completely different species of snack food.
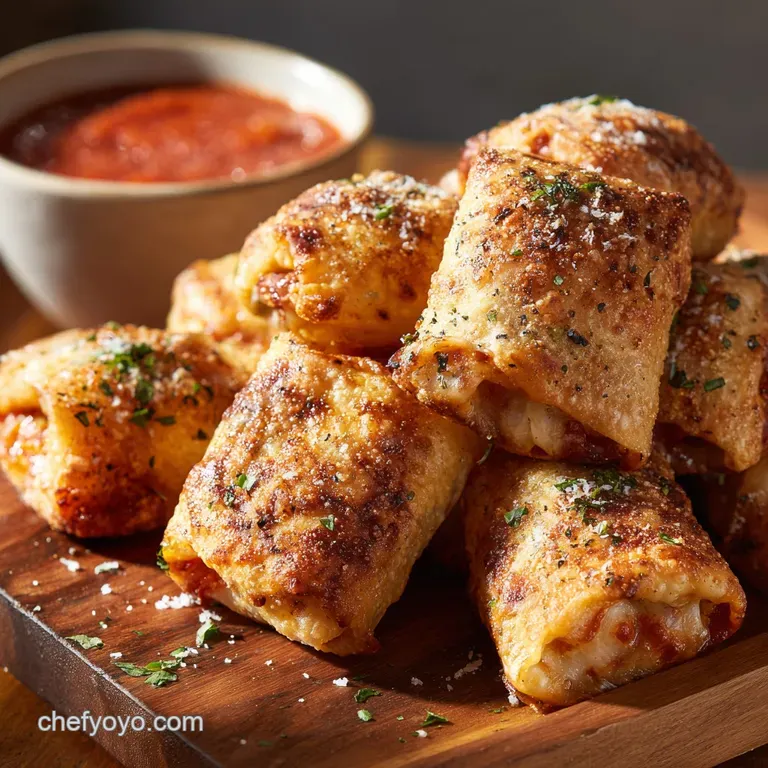
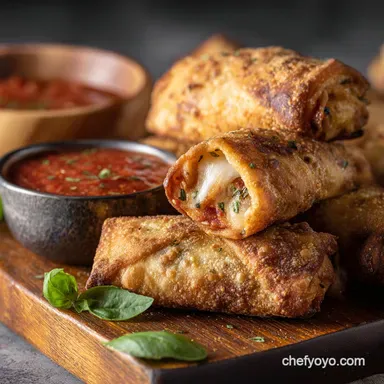
They’re crunchy on the outside, molten on the inside, and they absolutely demand a dunk in warm marinara.
The secret to actually getting that satisfying, audible crunch ? It’s two things: low and moisture filling and high, aggressive heat. We are going to treat these things like tiny little high and stakes gifts you are trying to wrap perfectly.
Why We Bake (Instead of Frying) for Maximum Crunch
Look, I love deep and frying. I really do. But for something small, fiddly, and wrapped in thin pastry like a homemade pizza roll (especially if you are using wonton wrappers), deep and frying can get messy fast. You risk immediate filling blowouts and that dreadful oil and soaked sogginess if the heat isn't perfect.
Baking, or air frying, is actually way cleaner and delivers a more reliable crisp. Why? Because the high, dry heat of the oven or air fryer works immediately on the surface of the wrapper, dehydrating it and crisping it up before the molten cheese inside has enough thermal energy to explode out the seams.
Plus, a quick brush of olive oil or melted butter on the surface ensures the exterior turns that deep, beautiful golden brown. It’s brilliant.
Essential Anatomy of the Perfect Pizza Pocket
A good pizza roll isn't just about flavour; it's about structural integrity. Think of it like a miniature calzone, but thinner and less forgiving. Every component has to pull its weight.
- The Wrapper: Needs to be thin enough to cook quickly (wonton or spring roll size) but sturdy enough to hold the filling.
- The Filling: Must be minimal, thick, and low and moisture. This is where most people fail. You want just enough sauce to colour the cheese, not enough to turn into hot tomato soup.
- The Seal: Non and negotiable. If you skimp on the sealing process, you will lose 90% of your cheese to the bottom of the baking tray. Trust me on this.
The Difference Between a Pizza Roll and a Mini and Calzone
This is mostly a semantics argument, but it’s important for expectations. A mini and calzone is typically made with actual pizza dough. That means you get a pillowy, bread and like texture that’s soft and chewy. They are substantial.
Homemade pizza rolls, especially using those thin wonton or spring roll wrappers, are designed for maximum surface area crunch. They are much lighter, closer to an egg roll structurally, and entirely appetizer and focused. If you want doughy, make a calzone. If you want crispy, stick with the wrappers.
| Feature | Homemade Pizza Roll (Wonton Wrapper) | Mini and Calzone (Pizza Dough) |
|---|---|---|
| Texture | Ultra and crispy, flaky, thin | Soft, chewy, bread and like |
| Filling Capacity | Low (1 1.5 tsp) | High |
| Primary Use | Appetizer, party snack | Small meal, substantial snack |
Curating Your Filling: Components for the Best Homemade Pizza Rolls
This is the phase where I learned the hard way that less is indeed more. I once tried to cram too much sauce and too much freshly diced mushroom into a roll. When I pulled them out of the oven, they looked less like rolls and more like little volcanic eruptions of cheese and liquid. Do not be me.
The key to the best filling is pre and mixing and pre and drying. Combine everything before you put it in the wrapper.
We are looking for binding ingredients. The shredded mozzarella is your structural cement. The sauce is merely the flavour binder. Make sure you use a thicker sauce (or even tomato paste cut with a dash of water and spices) rather than that watery stuff in the jar.
Essential Kitchen Tools for Rolling and Sealing

You don't need much, but a couple of things are non and negotiable for success.
- A tiny pastry brush. You must have this for the egg wash. Trying to dab the wash on with your finger is sloppy and applies too much liquid, which messes up the dough.
- Parchment paper. Don’t skip this. These rolls leak cheese occasionally, and scraping molten, baked and on cheese off a metal tray is a punishment I wouldn’t wish on my worst enemy.
- A fork. Not for eating, for crimping the edges.
Selecting the Ideal Dough (Pillsbury vs. Scratch)
When we talk about homemade pizza rolls, we are almost always talking about the wrapper, not scratch and made pizza dough.
Wonton wrappers are the champion here. They are thin, they crisp up beautifully, and their size is perfect for a single bite. If you can’t find those, grab spring roll wrappers (the square, wheat kind, not the rice paper kind).
You can use Pillsbury crescent roll dough, but you lose the light, crispy texture. Crescent dough makes them dense and chewy, essentially turning them into the mini and calzone category, which is fine, but it’s a different vibe. Don't even bother with tortillas; they dry out too much.
Mozzarella Matters: Shredded vs. Fresh
This is critical: always, always use the low and moisture, pre and shredded mozzarella you find in bags.
Fresh mozzarella (the kind packed in water) is wonderful for salads, but it contains way too much liquid. When heated, that water vaporises, creating steam inside the roll and potentially blowing out the seal, leading to that dreaded soggy bottom. The shredded stuff is drier and melts cleanly.
Beyond Pepperoni: Custom Filling Combinations
Once you master the basic Pepperoni Pizza Roll recipe, you can riff on the filling. Just remember the Golden Rule: Cook and drain everything first.
- Pesto Rolls: Skip the red sauce. Use a tablespoon of thick pesto, pine nuts, and mozzarella.
- Sausage and Fennel: Cooked Italian sausage (drained and cooled), a tiny pinch of fennel seeds, and provolone cheese.
- The Hawai’ian: Finely diced ham and tidbits of canned pineapple, blotted dry with a paper towel (this blotting step is vital).
Sealing Techniques: Fork Prongs vs. Egg Wash Glue
The egg wash is your initial adhesive. It’s the glue that makes the paper stick together. I use one large egg whisked with a tablespoon of water.
The fork is the structural reinforcement. After you paint the edges and fold the roll (envelope style is easiest), you must press the seams shut firmly with the tines of a fork. This crimps the edges and creates a textured, permanent seal. Skip this at your own risk. Seriously, why tempt fate?
Related Recipes Worth Trying
- Pizza Pasta Bake Super Easy Pepperoni Casserole Recipe — This Pizza Pasta Bake is the ultimate weeknight comfort food Learn how to make this super easy pepperoni pizza pasta bake recipe loaded with cheese and...
- Turkey Cranberry and Brie Egg Rolls The Perfect Holiday Appetizer — Turkey Cranberry and Brie Egg Rolls are the ultimate way to use Thanksgiving Turkey Leftovers Get the recipe for these crispy easy holiday snacks filled...
- Spinach and Artichoke Dip Pizza The Ultimate Proper Cheesy Comfort Feast — This Spinach and Artichoke Dip Pizza recipe transforms the classic dip into a spectacular rich main course Achieve a nonsoggy deep dish crust by following...
Detailed Blueprint: Achieving Perfectly Sealed Pizza Pockets
Right then. Let's get these rolls assembled. This isn't a race, so take your time and establish a clean assembly line.
Prepping the Wrappers: Cutting and Portioning Dough
If you are using larger spring roll wrappers, cut them into approximate 4 inch squares. If you are using standard wonton wrappers, they are usually ready to go. Keep the stack covered with a very lightly damp tea towel. If they get air exposure, they dry out, and dry wrappers crack when you fold them.
That’s just science being mean.
The Critical Art of Folding and Crimping
Lay the wrapper down in a diamond shape (a corner facing you). Place a measured teaspoon (maybe slightly more, but start small!) of the pre and mixed filling just below the centre.
A critical warning: You must leave a generous buffer zone around the edges. If the filling touches the area you need to seal, the egg wash won't stick, and your roll will explode.
- Brush all four edges lightly with the egg wash.
- Fold the bottom point up over the filling. Tuck it in snugly, pulling back toward you slightly to keep the filling compressed.
- Fold the left and right corners in toward the centre, overlapping slightly.
- Roll the entire packet up tightly towards the remaining top corner, like you're wrapping a little cigar.
- Use your fingers to press the seam shut, and then immediately run the tines of a fork along the entire perimeter to crimp and seal it.
Brushing for Bronze: Getting that Golden Finish
Once all your little pockets are sealed and lined up on the parchment and lined tray (seam and side down, please!), we need to ensure they turn golden brown. Don't just rely on the oven heat.
I always brush the tops with a touch of olive oil, but for maximum deliciousness and deep colour, mix 1 tbsp of melted unsalted butter with 1/4 tsp of garlic powder and brush that on. It gives the rolls an incredible, savoury crispiness.
Oven Baking Times for Deep Golden Results
We are baking at 400°F (200°C). This high heat setting is key.
Bake the rolls for 12 to 15 minutes. Set a timer to flip them halfway through (at the 6 or 7 minute mark). You are looking for a deep, even golden colour across the entire surface. If they look pale, give them two more minutes.
Converting the Recipe for Air Fryer Perfection
If you have an air fryer, use it. It is arguably the best way to get homemade pizza rolls super crispy, super fast.
Preheat the air fryer to 375°F (190°C). Spray the rolls lightly with oil (this is crucial for air fryer colour) and place them in the basket, ensuring they don't overlap. Cook for 10 to 12 minutes, shaking the basket halfway.
They are usually done slightly faster than in a conventional oven and come out incredibly crisp.
Troubleshooting and Advanced Recipe Strategies
My wrappers tore! You either let them dry out (keep that damp towel handy!) or you overfilled them. Try placing the filling closer to the edge, not right in the middle, to give yourself more surface area for folding.
The cheese is molten and running everywhere! Two problems: 1. You didn't crimp hard enough (use the fork!), or 2. Your filling was too wet (too much sauce, or you used fresh mozzarella).
Try chilling the rolls for 10 minutes before baking next time; a cold start helps the cheese set before the wrapper reaches explosion temperature.
Storage and Meal Prep: Freezing Your Homemade Pizza Rolls
These are fantastic for meal prepping. Seriously, make a triple batch on a Sunday and thank yourself all week.
Preventing Blowouts: Tips for Keeping Cheese Inside
The blowout happens when the internal pressure (steam from moisture) exceeds the seal strength.
- Pre and chill: As mentioned, chilling the sealed rolls for 15 minutes helps the wrapper adhere completely and slightly dries the surface.
- Ventilation: If you are using very large wrappers, you can poke one tiny hole with a toothpick, but this is usually overkill if you sealed properly. Focus on tight rolling and great crimping.
Making it Vegan or Vegetarian
Easy peasy. We already keep the sauce minimal, so just swap the cheese. Use a good quality vegan mozzarella alternative (shredded variety only, again for low moisture). Omit the pepperoni, and instead, add finely diced black olives, finely chopped roasted red peppers (blotted dry), and maybe a sprinkle of nutritional yeast for that cheesy flavour depth.
Sauces and Serving Suggestions
Yes, you need marinara sauce. Warm it up first. Don’t serve them with cold sauce; it pulls all the heat out of the roll instantly. Ranch dressing is also mandatory for dipping, especially if you added a little spice to the filling. If you want to get fancy, a quick homemade garlic aioli is surprisingly good.
Flash Freezing for Best Results
Do not just pile these uncooked rolls into a freezer bag. They will stick together into an inseparable, frozen lump.
Place the sealed, uncooked rolls onto a parchment and lined baking sheet and place that tray flat in the freezer. Freeze until rock solid (about 2 hours). Once frozen, transfer them to a freezer bag or airtight container.
Cook them directly from frozen no need to thaw! Just add about 5- 8 minutes to your standard baking time.
Reheating Day and Old Pizza Rolls
Did you save some? Good on you for your self control. Do not microwave them. They will turn instantly rubbery and sad.
Toss them back in the air fryer at 350°F (175°C) for 3– 5 minutes, or in the oven at 375°F (190°C) for 6– 8 minutes. They will crisp right back up and be almost as good as day one.

Recipe FAQs
Why did my filling leak out when baking the Homemade Pizza Rolls?
Ah, the dreaded cheese leak! The main culprit is usually either overfilling the wrapper or a weak seal. Make sure you only use about 1.5 teaspoons of filling, and remember to use the egg wash on all four edges before pressing the seam firmly if you want that professional finish, use the tines of a fork to crimp the edges closed.
Can I make a big batch of these ahead of time, and how do I freeze them?
Absolutely, they freeze brilliantly! Assemble the rolls completely, place them on a parchment lined tray (making sure they don’t touch), freeze until solid, and then transfer them to a freezer bag.
You can cook the homemade pizza rolls directly from frozen, but just add 5 8 minutes onto the total baking time.
Is air frying or baking better for achieving that proper crispy crust?
While both methods work a treat, the air fryer generally gives you the fastest and most consistently golden, blistered crust with minimal oil. If you are baking, ensure your oven is fully preheated to 400°F (200°C) and brush the rolls with olive oil or melted butter for a lovely crunch.
I’m a veggie what are the best meat free fillings I can use?
No worries! The Margherita style (fresh basil and extra mozzarella) is a classic choice, but you could also go for cooked, finely diced mushrooms mixed with ricotta, or a hearty filling of spinach and feta cheese. Crucially, always pre-cook and drain your vegetables properly to avoid creating a soggy centre.
How long should I wait before eating these? They look molten!
Hold your horses! That filling is practically lava fresh out of the oven, so a mandatory 5-minute cooling period is crucial to prevent burning your tongue. This rest time also allows the molten cheese to set slightly, meaning fewer messy run-outs when you finally take that first cheeky bite.
Crispy Homemade Pizza Rolls
Ingredients:
Instructions:
Nutrition Facts:
| Calories | 392 kcal |
|---|---|
| Protein | 27.4 g |
| Fat | 20.5 g |
| Carbs | 24.7 g |
