Deliciously Homemade Arepas: a Taste of Venezuela
- Discovering the Delight of Arepas: A Personal Journey
- Your Ultimate Essential Ingredients Guide: Unlock Deliciousness!
- Mastering the Art of Arepas: A Professional Cooking Journey
- Pro Tips & Secrets for Making Arepas
- Perfect Presentation: Let's Make It Pretty
- Storage & Make-Ahead Magic
- Get Creative with Variations
- Complete Nutrition Guide for Arepas Lovers
- Let's Wrap It Up
- Frequently Asked Questions
- 📝 Recipe Card
Discovering the Delight of Arepas: A Personal Journey
Oh my gosh, let me tell you about the first time i took a glorious bite of an arepa . i was at this cozy colombian café, and honestly, i had no idea what i was missing.
A crispy exterior, warm and cheesy inside it was like a big hug wrapped in corn. i remember thinking, “how have i lived this long without knowing how to make arepas ?” so if you’re like me and craving a taste of that hearty comfort, you’re in the right place.
Unpacking Arepas: From Venezuela to Your Kitchen
Now, let’s dive into this mouthwatering colombian food . arepas date back to indigenous cultures in venezuela and colombia. they’ve been a staple for centuries, made from ground corn dough.
And it’s not just history; they’ve become a trendy dish here in the states. these little corn cakes fit perfectly into any meal be it breakfast, lunch, or dinner making them a cozy brunch favorite!
In terms of time, you’re looking at a quick 30 minutes to have these golden disks ready for devouring.
Yes, you heard that right! just 15 minutes for prep and another 15 for cooking. the best part? making arepas is super easy! honestly, if you can mix and griddle, you’re golden.
What’s in It for You? The Benefits of Arepas
Arepa lovers, rejoice! not only do these corn cakes taste fantastic, they also pack a nutritional punch. with some shredded mozzarella cheese, your arepa becomes a delightful blend of carbs and protein.
Also, you can load them with whatever fillings your heart desires think shredded chicken , beans, or even avocado.
These little gems are perfect for any occasion; picture hosting friends for brunch or a casual family dinner. plus, they’re way more versatile than typical breads who doesn’t love a customizable dish? you can whip up cheese arepas for a cheesy goodness or go full-on savory with beef or veggies.
Why Arepas Are King in the Kitchen
Let’s chat about their unique selling points. arepas are gluten-free, making them great for those with dietary restrictions. and because they cook so quickly, they’re fantastic for busy weeknights! compared to other bread like dishes, they don’t require any fancy ingredients or techniques.
They’re an amazing gateway into colombian recipes and hispanic food culture. and trust me, everyone’s impressed when you bring out a platter of these beauties.
It’s like having a fiesta right in your kitchen!
So, are you ready to get cooking? here’s what you’ll need for the dough: two cups of arepa flour (masarepa), warm water, and a sprinkle of salt.
You might want to grab some cheese for stuffing later; i totally recommend going with mozzarella or any melty goodness your heart desires.
To break it down, using just a few ingredients to create something so comforting adds a personal touch to your meal.
A Taste of Arepas Awaits: Gather Up Your Ingredients
Now that we’re all pumped about these deliciously homemade arepas , let’s get into how you can make these tasty treats.
Just think about the warm kitchen aromas and those perfect golden circles ready for stuffing. are you as excited as i am? let’s gather our ingredients next and let this arepa adventure begin!
Your Ultimate Essential Ingredients Guide: Unlock Deliciousness!
Ready to dive into the premium core components of cooking? buckle up, because we’re about to make your culinary journey a whole lot easier.
Whether you're just starting or you're a seasoned pro, having the right ingredients at your fingertips is crucial.
Premium Core Components
First off, let's talk measurements . for all you folks in the u.s., we’re sticking to cups and tablespoons.
But hey, if you’re rolling with a metric crowd, i got you! just remember, 2 cups of flour equals about 240 grams .
Simple math, right?
When it comes to quality indicators , know this: freshness is your best friend. check for bright colors, firmness, and no funky smells.
For instance, fresh herbs should be vibrant green, not wilting away like last week’s leftovers!
And let’s not forget about storage guidelines . keep your spices in a cool, dark place, and they should last about 2-3 years .
For fresher items, like produce, aim to consume them within a week of buying them. if you want your cilantro to last longer, stick it in a glass of water in the fridge.
It’s like a little herb spa!
Signature Seasoning Blend: Spice It Up!
Now, let’s chat about creating a signature seasoning blend . honestly, spices can make or break a dish. essential combinations? think cumin and coriander for those aromatic vibes in colombian food , or paprika and garlic powder for a smoky kick.
Pairing herbs is an art. basil loves tomatoes, while cilantro’s best pals are lime and avocado. want to jazz up your cheese arepas ? toss in some oregano or a sprinkle of chili flakes for a zesty surprise.
Smart Substitutions: Cooking Made Easy
Here’s the deal: life doesn’t always give you the ingredients you need. so, let’s talk about smart substitutions . corn cakes calling your name but no arepa flour in sight? no worries! masa harina is a great alternative.
You might need to tweak the water a bit, but you’ll still create magic.
Dietary needs? no problem! swap out cheese for a vegan alternative , or ditch the chicken and go for beans if you’re feeling plant based.
Remember, cooking is all about creativity! and if you find yourself in an emergency situation (yeah, we’ve all had those!), something like greek yogurt can step in for sour cream in a pinch.
Kitchen Equipment Essentials: Gear Up!
Alright, onto the good stuff kitchen equipment essentials . you don’t need fancy gadgets to whip up tasty meals; just a few trusty tools will do.
A non-stick skillet is absolute gold when cooking arepas. it gives that perfect crispy outside without the sticking hassle.
If you happen to have a griddle , even better! And when it comes to measuring, a good set of measuring cups and spoons is non-negotiable. It'll make life SO much easier.
And let’s talk about storage. keeping your pantry organized can turn you into a kitchen ninja. use clear containers for your pantry staples and label them.
Trust me, your future self will thank you!
Wrapping Up
Now that you’re equipped with all this essential knowledge, it’s time to dive into the world of deliciousness. making cheese arepas , for example, is a breeze with the right ingredients and a sprinkle of confidence!
Imagine biting into a golden, crispy arepa, gooey cheese inside, and all those flavorful fillings you can just mix and match.
So are we ready to jump into the actual cooking? Check out the step-by-step instructions I’ve got lined up for you next! You’re gonna rock this! Happy cooking, my friend!
Mastering the Art of Arepas: A Professional Cooking Journey
Alright, amigos, let’s dig into the world of professional cooking, especially focusing on an amazing dish that makes your taste buds sing: arepas ! they’re like the cool cousins of corn cakes, always ready to party, whether it’s breakfast, lunch, or dinner.
With the right cooking methods and some pro tips, you’ll be whipping up these colombian delights in no time.
Essential Preparation Steps
Before you even think about heating up the pan, it’s all about that mise en place . you wanna set yourself up for success, right? here’s the deal: measure out your ingredients first.
Grab 2 cups of arepa flour and 2 ½ cups of warm water. trust me, this will save you from scrambling like a chicken with its head cut off later!
Time management is another biggie. when you're multitasking, keep an eye on those cooking times. arepas take about 15 minutes to cook, so plan your fillings while they’re on the skillet.
Remember, flipping them too soon? that’s a mistake you don’t want to make.
And don’t forget about organization! keep your workspace tidy. it’ll make the cooking process smoother than butter. lastly, always consider safety.
Use kitchen tools properly and don’t get burned while flipping those beautiful corn cakes!
Step-by-step Process
Let's get into the nitty gritty of how to make arepas . Here’s your clear, numbered guide:
Prepare the dough : in a large bowl, combine 2 cups of arepa flour and 1 teaspoon of salt . gradually mix in 2 ½ cups of warm water .
Get in there with your hands until you form a soft dough. let it rest for 5 minutes .
Shape the Arepas : Divide that dough into 8 equal portions . Roll them into balls and flatten them into discs that are about 1 inch thick .
Cook the arepas : heat a non-stick skillet over medium heat, and add a thin layer of oil if you please.
Cook each arepa for about 5- 7 minutes on each side. you're looking for a nice golden brown crust!
Check for Doneness : Your arepas should sound hollow when tapped. If they don't, throw them back on for a bit longer.
Stuff 'Em Up : Slice those babies open and load 'em up with your favorite fillings. Cheese, chicken, avocado? Go wild!
Expert Techniques
Now, if you wanna take it up a notch, here are some expert techniques. It’s all about the details:
- Quality Checkpoints : Always taste your dough for seasoning before cooking. A little extra salt won’t hurt!
- Troubleshooting Tips : If your arepas aren't cooking evenly, make sure they're all about the same thickness this is key to getting that perfect crispy exterior with that soft interior.
- Critical Steps Explained : Pay attention to temperature control —medium heat is your friend. Too high, and they burn; too low, and they’re raw.
Success Strategies
Here’s where it gets real simple. avoid common mistakes, like not hydrating the flour enough. you want soft dough, not a rock! always check the quality of your ingredients, especially the cheese.
Fresh is best, especially when making cheese arepas .
For quality assurance, remember: if one arepa doesn't turn out as you hoped? don’t sweat it! use that as a guide for the next batch.
And hey, if you’re feeling super prepared, consider make-ahead options. you can pre-cook arepas and freeze them for a busy weekday dinner.
Just reheat them on the skillet for that freshly made flavor.
Wrap-Up and Transition
Making arepas is all about patience and practice! try experimenting with different fillings experience with these colombian recipes can help you find your flavor.
Whether it’s a scrumptious cheese filling or a spicy meat mixture, the choice is yours!
One last reminder: cooking is as much about having fun as it is about the final dish. Pour your heart into it, and those arepas will be the life of the cozy brunch or dinner party!
Now, if you wanna dive even deeper into this tasty journey, I’ll transition you into some Additional Information , where we can explore even more delicious tweaks and tricks for your arepas! Let’s keep the cooking love going!
Pro Tips & Secrets for Making Arepas
Let’s talk about some insider tips to make your arepas extra special. Seriously, these aren’t just any corn cakes; they’re a fluffy canvas ready for deliciousness!
First off, when you’re mixing your dough, don't rush. give that bad boy about 5 minutes to rest after mixing.
This helps the flour absorb the water and results in a super soft texture. oh my gosh, it makes a huge difference!
Want to save some time? try mixing all your filling ingredients while the dough is resting. it’s like a cooking life hack.
This way, when your arepas come off the skillet, you’re ready to stuff ‘em right away.
And if you're looking to amp up the flavor in your cheese arepas , toss some spices like cumin or garlic powder into the dough.
You could even go wild with it and add bits of jalapeño for a kick your taste buds will thank you!
Perfect Presentation: Let's Make It Pretty
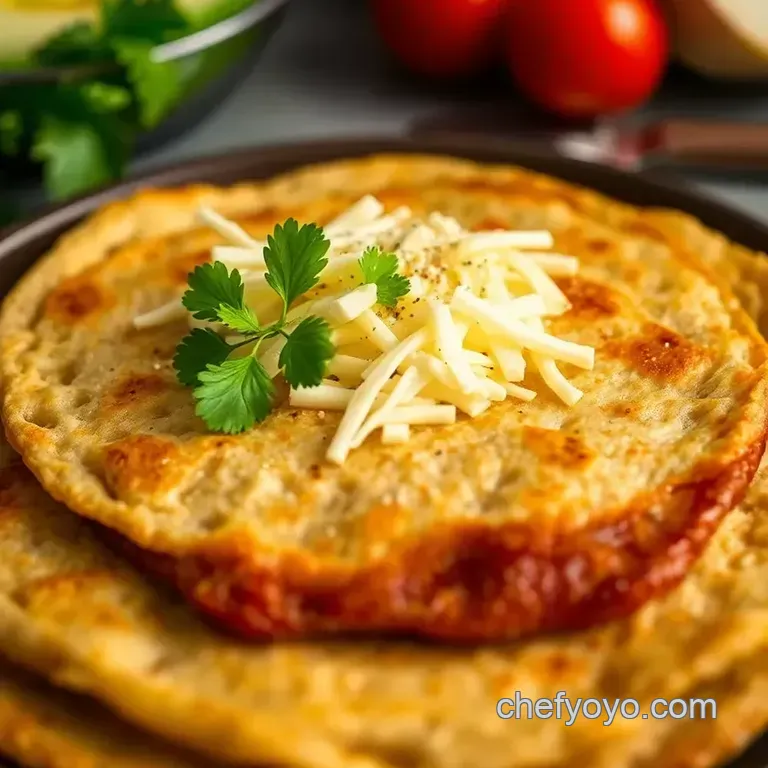
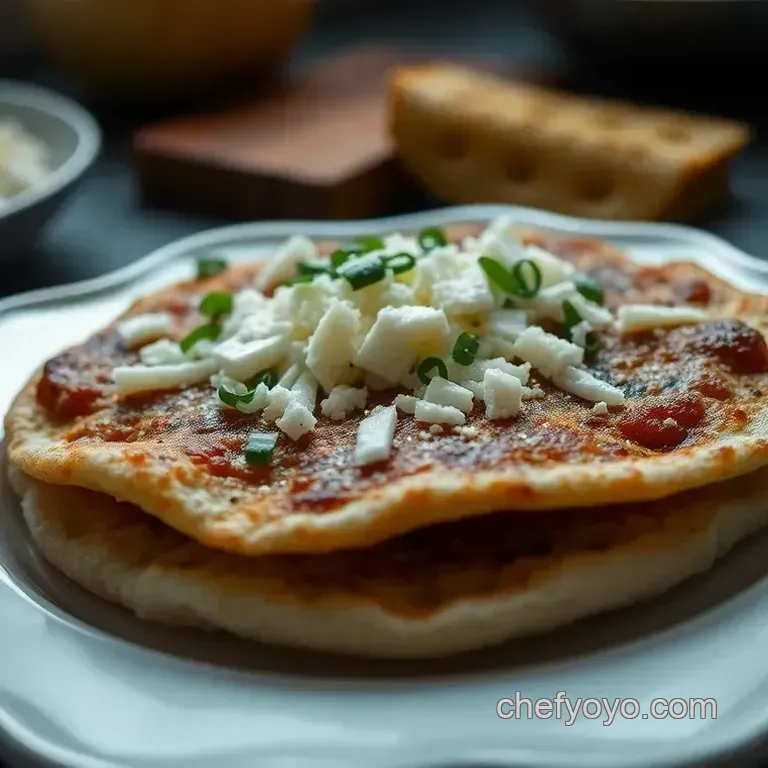
Presentation can take your arepas from “meh” to magnificent . When you’re plating, stack them a little high on a nice plate. Trust me, it looks gourmet without breaking a sweat.
Think about garnishing. A sprinkle of chopped cilantro or some sliced avocado on top can really pop against that golden color.
When you slice open an arepa , let those fillings ooze out just a bit. bonus points if there’s some melty cheese peeking out! a side of colorful salsa can also turn your plate into a fiesta.
Storage & make-ahead Magic
So, you made too many arepas and your fridge is looking like a corn cake factory? no worries! to store them, just wrap them tightly in plastic wrap or toss them in a ziplock bag.
They can hang out in the fridge for about 3-4 days .
Want to take it a step further? you can freeze cooked arepas! just let them cool completely first. when you’re ready to indulge, pop them in the toaster or pan for a quick reheat.
They’ll be almost as good as fresh out of the skillet!
Get Creative with Variations
Now, let’s get a little wild with our Arepas Recipe . How about a sweet twist? You can add a touch of sugar to the dough and fill your arepas with fresh fruit or a drizzle of honey for a breakfast treat!
Feeling a little adventurous? Make your own Hispanic Food flair by adding black beans and corn to the filling. It’s like a flavor explosion!
And hey, depending on what’s in season, why not try stuffing your arepas with roasted vegetables during summer or hearty beans in the winter? Use what you have you’ll be surprised at how versatile these little guys can be!
Complete Nutrition Guide for Arepas Lovers
You might be wondering about those stats… so here’s the scoop: each arepa has about 200 calories , with a nice balance of 6g protein and 5g fat .
They’re not just tasty; they pack a bit of nutrition, too.
If you’re trying to watch your sodium, adjust the salt in your fillings. and if you want a more wholesome take, load them up with veggies or lean proteins.
This way, you’ll turn your arepas into a complete meal!
Let's Wrap It Up
Honestly, making arepas is more than just cooking; it’s about bringing joy to the table. they're perfect for a cozy brunch with friends or as a quick weeknight meal.
Each bite is a journey, a comforting hug from the inside out.
So, don’t shy away try to make arepas today! look into into the process, have fun with it, and get creative with fillings.
You’re in for a major treat that’ll have everyone coming back for seconds. happy cooking, friends!
Frequently Asked Questions
What is arepa flour and where can I find it?
Arepa flour, or masarepa, is a precooked corn flour essential for making authentic arepas. You can usually find it in Latin American grocery stores or the international aisle of larger supermarkets. Brands like P.A.N. or Goya are popular choices!
How to make arepas without arepa flour?
If you can't find arepa flour, masa harina works as a substitute, but you'll need to adjust the water slightly. The texture might be a bit different, but it should still turn out tasty! Just make sure to follow the same water-to-flour ratio as closely as possible.
Can arepas be made ahead of time?
Absolutely! You can prepare the dough in advance and store it covered in the fridge for up to 24 hours. Cooked arepas can also be kept warm in a kitchen towel, or refrigerated and reheated in a skillet or toaster for a quick meal. Just remember, they're best enjoyed fresh!
What are some popular fillings for arepas?
The beauty of arepas is their versatility! Popular fillings include shredded beef, chicken, cheese, and even avocado for a fresh touch. You could also try black beans with plantains for a vegetarian twist. The options are endless just like your grandma's Sunday roast lineup!
How to make arepas crispy?
To achieve that crispy exterior, ensure your skillet or griddle is well heated before adding the arepas. You can also lightly grease the pan with oil for an extra crunch. Let them cook thoroughly on each side and listen for that hollow sound when you tap them it's your crispy victory bell!
Is there a vegan option for arepas?
Yes, you can enjoy vegan arepas easily! Just avoid animal based fillings and go for plant based options like sautéed veggies, black beans, or avocado. Don't forget to check the arepa flour, but most brands are naturally vegan. They're as adaptable as a British weather forecast!
Deliciously Homemade Arepas A Taste Of Venezuela