Homemade Seedless Raspberry Jam
- Homemade Seedless Raspberry Jam: A Sweet Summer Staple
- Your Essential Ingredients Guide for Homemade Jam
- Mastering Professional Cooking: The Path to Seedless Raspberry Jam
- Pro Tips & Secrets
- Perfect Presentation
- Storage & Make-Ahead
- Creative Variations
- Complete Nutrition Guide
- Expert FAQ Solutions
- 📝 Recipe Card
Homemade Seedless Raspberry Jam: A Sweet Summer Staple
Oh my gosh, have you ever tasted a homemade seedless raspberry jam that’s so good you just want to slather it on everything? i remember the first time i tried making jam.
It was summer, and my kitchen was flooded with bright red raspberries from the farmer’s market. i stood there, mashing away, thinking about how this jam would evoke those warm sunny days every time i opened a jar.
If you’re a jam lover like me, keep reading because this recipe is about to elevate your breakfast game!
What’s the Deal with Seedless Raspberry Jam?
Let’s take a quick dive into the history of this tasty spread. raspberry jam has been around for centuries, a delightful way to preserve those juicy berries.
You know, before fancy refrigeration became a thing, folks had to get creative! fast forward to today, and seedless preserves have become a modern favorite to avoid those pesky raspberry seeds.
And can we talk about how easy it is? seriously, if you can boil water, you can whip up a batch of easy raspberry jam no advanced cooking skills required!
Now, you’re probably wondering about the time commitment. this recipe takes about 1 hour in total ! want to grab a snack while it cools? that's totally fine! plus, it yields about 4 cups, which is enough to last you a while.
And the cost? you’re looking at around $5-$10 depending on berry prices, plus a little sugar and pectin. super budget friendly!
Why Make Seedless Raspberry Jam?
Okay, let’s talk about the key benefits of this jam. first off, it’s a nutritional powerhouse ! with fresh raspberries, you’re scoring fiber, antioxidants, and that sweet tart flavor that’s downright irresistible.
Homemade fruit spreads like this are great for knowing exactly what’s in your food not a jar full of mystery ingredients here!
This sweet and tart jam is not just for toast. oh no, it’s so versatile! you can spread it on pancakes, add it to yogurt, or even dollop it on cheese boards.
Perfect for brunch or a special occasion, don’t you think? and let’s be real: it’s way cooler than store-bought. nothing compares to cracking open a jar of homemade jam and slathering it on your favorite goodies.
Now, you're probably wondering how it stacks up against similar recipes. aside from the no-seed bonus, making your own jam means you can control the sugar content, too.
For those looking for a lower sugar option, i’ve got tips packed right into the recipe! not to mention, nothing beats that aroma of ripe raspberries simmering on the stove.
Trust me, it’ll have your house smelling like a summer festival.
Anyway, after that little ramble, I hope you’re as excited as I am! Next, let’s look at the star players of our jam-making adventure: the ingredients.
What You Need to Get Started
Here’s a sneak peek of what you’ll need. we’re talking fresh raspberries, sugar, fresh lemon juice, and pectin. it’s honestly super straightforward.
And if you don’t have fresh raspberries, no worries you can totally use frozen ones! these tips will help you get that perfect jam texture.
So grab your kitchen canning equipment and let’s dive headfirst into this summer fruit recipe adventure. Get ready to make some delicious fruit preserves !
Your Essential Ingredients Guide for Homemade Jam
Let’s take a moment to talk about homemade jam , particularly something that pops with color and flavor seedless raspberry jam .
There’s something undeniably satisfying about capturing the essence of summer in a jar, right? i remember the first time i made it; my kitchen smelled divine! so, let’s dive into the essentials you need to whip up this delicious treat.
Premium Core Components
First up, you gotta know your ingredients. for that perfect batch of easy raspberry jam , you’ll need 4 cups of fresh raspberries (roughly 600g ).
Don’t fret if they’re out of season, though! frozen raspberries work just fine just thaw and drain ‘em.
Next, grab 2 cups of granulated sugar (about 400g ) and 1/4 cup of freshly squeezed lemon juice for that tangy kick.
Oh, and don’t forget the fruit pectin a package of 1.75 oz (like sure jell or certo) seals the deal.
Now, about storage guidelines : your jam can sit pretty in a sterilized jar for up to a year if you keep it in a cool, dark place.
If you don’t seal it properly, it’ll only last a few weeks in the fridge. trust me, you don’t want to waste your efforts!
Signature Seasoning Blend
Now let’s talk about enhancing those flavors. raspberries are sweet and tart, which makes them perfect for a sweet and tart jam .
But if you want to jazz it up a bit, consider adding spices or herbs. a pinch of cinnamon or a splash of vanilla extract during cooking can make this seedless raspberry jam something special.
If you’re feeling adventurous, swap some raspberries for blueberries or strawberries for a mixed berry jam. just think about those summertime breakfasts scones slathered with homemade jam! wow, i’m salivating just thinking about it.
Smart Substitutions
Okay, let’s face it: sometimes the grocery store doesn’t have what you need. no biggie! for those moments, always remember: common alternatives exist! use frozen raspberries instead of fresh, or if you’re looking to cut sugar, check out sugar substitutes that are safe for canning .
Thinking of changing it up? Go for a low-sugar raspberry jam variation ! It’s easier than you think just tweak the amount of sugar while maintaining the pectin ratio.
Kitchen Equipment Essentials
Now, what about the tools? you don’t need a whole fancy setup to make this happen! here’s the must have equipment : a large pot, measuring cups, and those nifty canning tongs.
You’ll need a potato masher (to squish those berries) and a ladle to fill your jars.
If you’re unsure about sterilizing canning jars , boil them for about 10 minutes . This step is super important! You wouldn’t want any nasty bacteria ruining your hard work.
When it comes to storing your finished jars, jar sealing methods matter! make sure to leave about 1/4 inch of headspace when filling, and don’t forget to wipe the rims clean before sealing.
Your Journey Ahead
So there you have it a few essential ingredients and tips for making the best seedless raspberry jam that’ll have your taste buds dancing.
Whether you’re doing it solo or inviting friends over for a jam-making day, remember: it’s all about capturing that essence of summer and turning it into something you can enjoy all year long.
Next up, we’re diving into the step-by-step instructions for creating your delicious jam! Get ready for a kitchen adventure that’s bound to impress. Let’s make some magic happen!
Mastering Professional Cooking: The Path to Seedless Raspberry Jam
Ah, the art of cooking! it’s a glorious adventure where flavors and creativity collide. whether you're whipping up a quick dinner or diving into homemade goodies like seedless raspberry jam , having professional cooking methods under your belt can make all the difference.
So, grab that apron, and let’s get into it!
Essential Preparation Steps
Mise en place - it’s a french term that sounds fancy, but all it means is “everything in its place.
” before you even think about turning on the stove, measure and organize your ingredients. for our raspberry jam recipe , you’ll want to have 4 cups of fresh raspberries , 2 cups of sugar , and that fruit pectin all sorted out.
This keeps cooking smooth and stress free.
Time management tips - cooking isn’t just about following recipes it’s a dance of timing! keep an eye on your clock.
For our jam, you’ll need a prep time of about 15 minutes and 15 minutes to cook. the total time adds up to 1 hour , including chilling.
Set some timers, and you’ll be golden!
Organization strategies - this is where you shine! have your pots, utensils, and canned jars ready. oh, and don’t forget to sterilize those jars by boiling them for 10 minutes .
Clean jars are essential for sealing in all that sweet goodness.
Safety considerations - don't let kitchen accidents ruin your jam-making dreams! always be cautious with boiling water, and use tools like canning tongs to remove your jars.
Remember, it’s hot in the kitchen, and we want to keep it fun, not hazardous.
step-by-step Process
Ready to get cooking? Here’s a straightforward breakdown for your seedless preserves :
Prepare the Jars: Begin by sterilizing your mason jars. This is your first step in the jam-making adventure.
Mash the Raspberries: In a bowl, toss in your 4 cups of raspberries and mash 'em up real good. Some chunks are okay texture is part of the fun!
Cook the mixture: mix those mashed raspberries with 2 cups of sugar , 1/4 cup lemon juice , and a package of fruit pectin.
Soak all that in for 10 minutes let the sugar get cozy.
Heat the mixture: put it all in a big pot over medium heat. bring it to a rolling boil and keep stirring that’s the secret! aim for a boil for about 10 minutes until it thickens.
Use the cold spoon test (chill a spoon in the freezer beforehand) to check the texture.
Fill the Jars: Carefully ladle your hot jam into the sterilized jars, leaving about 1/4 inch of space at the top.
Seal the Jars: Wipe the rims clean, pop on the lids, and seal them tightly. This is where your jam gets its snug hug a good seal is key!
Process for Safety: Process the jars in boiling water for 5- 10 minutes . This helps them seal properly and ensures safety.
Cool and Store: Let the jars cool on a wire rack. Check those seals later if they pop when pressed, you nailed it!
Expert Techniques
So, what makes a pro chef shine? It’s all about those critical steps:
- Maintain that temperature control : Slow and steady wins the race. Always aim for the correct boiling point .
- Timing is everything: Stick to those times we’ve laid out this ensures the best flavor and consistency.
- Quality checkpoints: Don’t skimp on checking the jar seals. A proper seal keeps your homemade jam fresh and vibrant.
- Troubleshooting tips: If your jam doesn’t set, don't fret it might just need a little more time or pectin. Each fruit has its quirks!
Success Strategies
Okay, let’s summarize how to avoid the classic kitchen blunders:
- Common mistakes to avoid : Forgetting to sterilize jars or misjudging boiling times are big no-nos.
- Quality assurance tips : Ripe raspberries are key! Use only the best fruits for jam to ensure flavor bomb results.
- Perfect results guide : Follow the steps, and your jam will turn out luscious and ready to spread.
- make-ahead options : You can totally make this jam ahead of time; it stores beautifully for a year if sealed right.
So, there you have it! making seedless raspberry jam is a delightful experience that captures summer's essence. with these professional cooking methods, anyone can create homemade fruit spreads that wow family and friends.
Additional Information - If you’re eager to explore more about berry jam recipes or other summer fruit recipes, stick around! I’ve got plenty of tips and tricks to help you turn your kitchen into a jam-making paradise!
Pro Tips & Secrets

When it comes to homemade seedless raspberry jam , i’ve got a few nuggets of wisdom to share. one of my favorite jam-making tips is to use ripe raspberries .
They’re sweeter and pack more flavor. seriously, you want those juicy berries that practically scream summer! and while you're at it, grab a lemon.
The freshly squeezed lemon juice not only helps with flavor but also acts like magic in helping the jam set.
Oh, and here’s a time saver: supercharge your cooking time by mixing your sugar and fruit and letting it sit for about 10 minutes.
This helps draw out the juices from the raspberries, making for a smoother jam. plus, don’t shy away from testing for doneness with that trusty cold spoon trick better to check twice than end up with too-runny jam!
Perfect Presentation
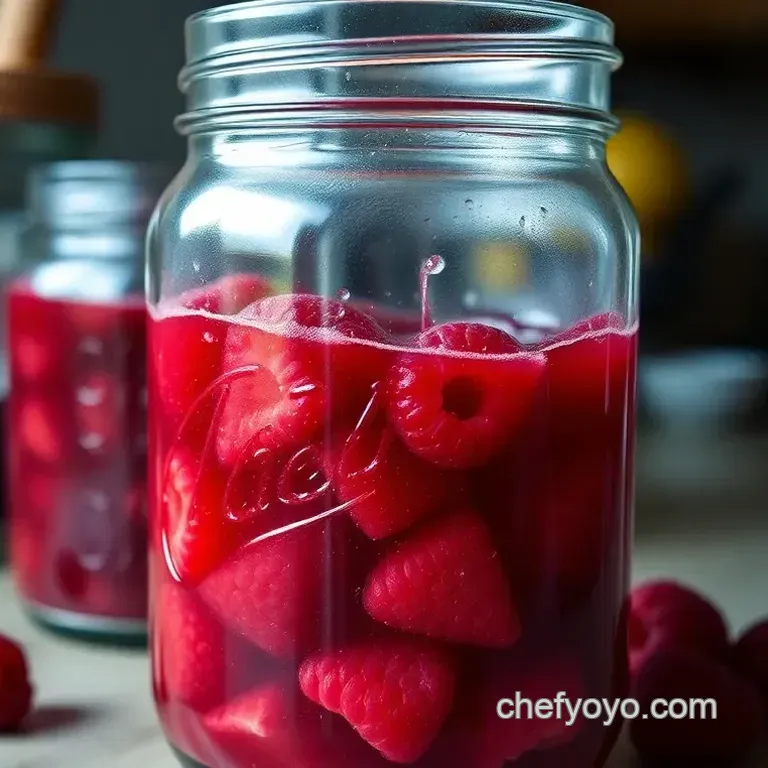
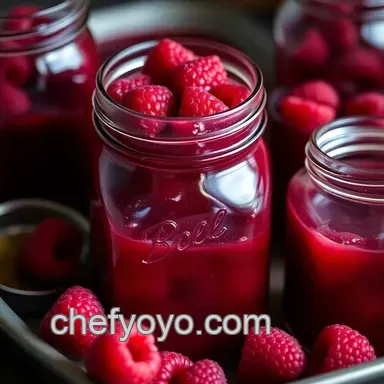
When your jam’s all done, the big moment arrives: plating and presentation ! i always use cute little jars because, let’s be honest, those glass beauties make anything feel special.
Using proper color combinations can elevate your jam. think about serving it on toasted, golden brown bread or freshly baked scones.
The contrast is drool worthy!
And don’t underestimate garnishes ! a sprig of mint or a couple of whole berries on top can make it pop.
You can also use those jars as gifts just tie a pretty ribbon around the lid. who wouldn’t want to find a jar of sweet and tart jam in their kitchen?
Storage & make-ahead
Now, let’s talk keeping that deliciousness safe and sound! after you make your seedless preserves , they can last for up to a year if stored properly.
Just place those jars in a cool, dark place. the fridge? it’s got your back for opened jars just make sure to enjoy them within three weeks.
If you’re wondering about preserving fresh fruit , sterilizing your canning jars is critical. just give them a good boil for about 10 minutes before filling them.
Trust me, it’s a game changer for preventing spoilage. and when you're ready to enjoy your jam, simply warm it gently in the microwave if it's a bit too cold nothing worse than having it tear apart your bread!
Creative Variations
What’s fun about making easy raspberry jam is the endless possibilities! want a change of pace? mix in strawberries or blueberries to create a mixed berry jam that sings about summer! you can also toss in a pinch of cinnamon or a splash of vanilla just a little will set your taste buds dancing.
For those looking for dietary modifications , you can substitute sugar with your favorite sugar replacement. and if you’re feeling super fancy, throw in some fresh herbs while cooking, like mint or basil, for a fresh twist.
This can elevate an ordinary jam into something pretty gourmet like.
Complete Nutrition Guide
Worried about what you're slathering? here’s a quick breakdown: one serving of this seedless raspberry jam serves up about 100 calories and packs in some sweetness with 23g of sugar .
It might not be a health food, but hey, moderation is key! plus, raspberries come with their own set of health benefits, including a good dose of fiber and antioxidants.
Not too shabby for a fruit spread recipe that’s a joy to eat!
Expert FAQ Solutions
I’ve had my fair share of jam disasters i promise you’re not alone! common questions about consistency pop up more than you’d think.
If your jam didn’t thicken as expected, it might be due to not boiling long enough. aim for that rapid boil for about 10 minutes and use the cold spoon test!
And if you've got any leftover berries, don’t hesitate to try different raspberry jam variations ; they’ve all got that fantastic raspberry flavor at their core.
Just try to keep it simple. after all, it’s all about having fun in the kitchen!
In Conclusion
So there you have it! i hope this inspires you to dive into canning raspberry jam or trying your hand at seedless raspberry jam if you haven’t already.
Remember, cooking is just as much about the journey as it is about the end result. don’t sweat the small stuff.
This jam isn’t just about preserving fruit it's about creating memories through flavors we all cherish. now grab those berries and get jamming!
Homemade Seedless Raspberry Jam
Ingredients:
Instructions:
Nutrition Facts:
| Calories | 100 |
|---|---|
| Protein | 0.2g |
| Fat | 0g |
| Carbs | 25g |
| Fiber | 1g |
| Sugar | 23g |
| Sodium | 0mg |
