Queso Seco: Traditional Mexican Dry Cheese
- look into Into Queso Seco: A Slice of Tradition
- What Makes Queso Seco So Special?
- Why You’ll Love Queso Seco
- Let’s Get Perfectly Cheesy
- Your Essential Ingredients Guide for Crafting Queso Seco
- Unlocking the Secrets of Professional Cooking
- Pro Tips & Secrets for Making Queso Seco
- Frequently Asked Questions
- 📝 Recipe Card
look into Into Queso Seco: A Slice of Tradition
Ever had one of those days where all you want is something that feels like a hug? for me, that’s when i reach for queso seco .
I remember the first time i tasted it at a cozy little taqueria in mexico. i was minding my own business, digging into tacos, when my buddy suggested i sprinkle this crumbly cheese on top.
Oh my gosh! my life changed in that moment. it’s like the flavor just danced on my tongue!
This memory is what pulls me into the kitchen every time i decide to whip up this mexican cheese recipe .
In the bustling world of traditional mexican cuisine , queso seco stands out. it’s not just another cheese; it’s a connection to a rich history that brings comfort and taste to every bite.
What Makes Queso Seco So Special?
Let’s take a quick journey back in time. queso seco has its roots deep in mexican culture, used by families for generations.
Historically, it’s made from cow’s milk, and that magic happens through some nifty cheese making techniques . this cheese offers a unique texture that’s both crumbly and nutty, perfect for gracing everything from tacos to salads!
These days, queso seco has gained popularity, not just in mexico but all over the u.s. it’s become a staple in many households, especially for those looking for savory cheese snacks .
Imagine sprinkling it on chili or melting it into quesadillas. i mean, how can you resist?
Making queso seco at home is entirely doable. sure, it has its complexities, but it falls under the medium difficulty level.
You’ll need about 3 hours total, thanks to the curd preparation methods and drying stages. but trust me, it’s worth every minute!
As for cost, making homemade queso seco is quite economical! you’ll yield about two cups of this glorious cheese, and with just a gallon of milk, some salt, and vinegar or lemon juice, you’re golden.
Why You’ll Love Queso Seco
Let’s talk benefits. first off, the nutritional benefits of cheese are hard to beat. queso seco packs in protein, healthy fats, and minimal carbs, making it a great option.
Plus, when you use authentic mexican ingredients , you know you’re keeping it real!
What sets queso seco apart from other dry cheese recipes ? its unique crumbly texture and pronounced flavor. you can easily mix it up with different herbs or spice it up with jalapeños for a kick.
It’s perfect for gatherings or to elevate those everyday meals. imagine impressing your friends with a homemade taco night, complete with your signature queso seco!
And if you’re worried about wine pairing , fear not! this cheese plays well with many drinks, whether it’s a cold mexican lager or a refreshing margarita.
It’s versatile enough to fit any occasion!
Let’s Get Perfectly Cheesy
Ready to give it a whirl? before we dive into the ingredients, just know this: crafting queso seco at home can be a fun journey.
You’ll find satisfaction in watching the curds transform into something delicious. trust me; it’s like going on a flavor adventure right in your own kitchen!
Now, let’s grab our ingredients and start making this delightful, crumbly cheese! You’re gonna love it.
Your Essential Ingredients Guide for Crafting Queso Seco
So, you’re ready to jump into the world of queso seco ? awesome! this dry cheese is a superstar in mexican cuisine , and trust me, it’s a game changer for your cooking.
Let’s break down the essentials, shall we?
Premium Core Components
When you’re gathering your ingredients, think quality first. You want your queso seco to shine in every dish. Here’s what you need:
Measurements: for the most part, we’re talking about 1 gallon of whole milk (that's around 3.78 liters ) for the curd.
Don’t forget 1/4 cup of vinegar or lemon juice! and, you'll need 1 teaspoon of sea salt for some flavor action.
Quality Indicators: Choose fresh milk with a good expiration date. If it smells off, toss it. That milk should be as fresh as your Friday night plans!
Storage Guidelines: Once you whip up that queso seco , keep it in an airtight container in your fridge. Eat it up within a couple of weeks to maintain that crispy greatness.
Freshness Tips: Check for a creamy but firm texture. If it crumbles easily, you’re golden.
Signature Seasoning Blend
Now, let’s jazz up your queso seco with some flavors.
Essential Spice Combinations: Ever tried paprika with cheese? Oh my gosh, it’s delicious! Think about a dash of chili powder to spice it up too.
Herb Selections: Fresh cilantro or even dried oregano can really deepen the flavor. Feel free to experiment!
Flavor Enhancers: Consider adding a sprinkle of garlic powder or onion powder to give your curds that oomph they need.
Regional Variations: Wanna switch it up? In some regions, people toss in jalapeños! Adds a fun kick to dry cheese recipes. Spice level take it as you will!
Smart Substitutions
Sometimes you might not have everything on hand, and that's okay!
Common Alternatives: Don’t fret if you're out of whole milk 2% works in a pinch, but it might change the texture just a tad.
Dietary Modifications: You can use a non-dairy milk alternative, like cashew milk, to make a vegan version. It's a little tricky, but totally doable.
Emergency Replacements: No vinegar? Lemon juice works just as well!
Seasonal Options: If the temperatures are hot, consider making a cooling herb infused queso seco to serve at your next BBQ.
Kitchen Equipment Essentials
Alright, here’s where it gets a bit techy, but stick with me.
Must Have Tools: You’ll need a heavy bottomed pot, a digital thermometer (seriously, you’ll want to know those temperatures), and cheesecloth for straining.
Alternative Equipment: If you’re fancy and have a dehydrator, that’s a great option for drying out your curds!
Preparation Tips: Make it a family affair get the kids involved in crumbling and sprinkling.
Storage Solutions: Airtight containers are key for storage. You can keep things fresh and ready to rock.
Now that you’re equipped with the essentials, it’s time to get into the nitty gritty of creating your very own queso seco ! trust me, once you master the art of queso recipes , your kitchen will never be the same.
You’ll impress friends and elevate those otherwise plain tortillas to the next level.
So, roll up your sleeves, grab that heavy pot, and let’s dive into the fun stuff instructions to make this crumbly delight!
Unlocking the Secrets of Professional Cooking
Whether you're an aspiring chef or just someone who loves experimenting in the kitchen, mastering professional cooking methods can elevate your dishes from "meh" to "wow!" today, let's dive into the nitty gritty of creating flavors that will knock your socks off, starting with one of my faves: queso seco .
This traditional mexican dry cheese is not just delicious it's an absolute game changer for your meals!
Essential Preparation Steps: Mise en Place & More
First things first: mise en place . it's a fancy way of saying, “everything in its place.” gather all your ingredients and tools.
Trust me, it makes the cooking process smoother than a salsa beat! when you're stirring that creamy queso or sautéing veggies, you want your stuff right at hand, not running around your kitchen like a headless chicken.
Time management is key! have a little timer ready. did you know that some pro chefs use five timers? yeah, they’re serious about that timing precision! i usually set mine for 10- 15 minutes when i'm focused on something especially tricky.
Keep it organized like having all your spices lined up and ready to go.
Don't forget safety! if you're handling hot oils or sharp knives, be careful. no one wants a trip to the er because they were too busy grooving to their favorite playlist.
Always use a cutting board, and maybe even wear cut-resistant gloves if you’re feeling fancy.
step-by-step Process: Monitor the Heat & Timing
Now, onto the juicy part! Here’s how to whip up that delicious queso seco .
Heat milk: start by pouring 1 gallon of whole milk into a heavy bottomed pot. heat it on medium, stirring occasionally.
You want to get it to a smooth 190° f ( 88° c) without letting it boil over!
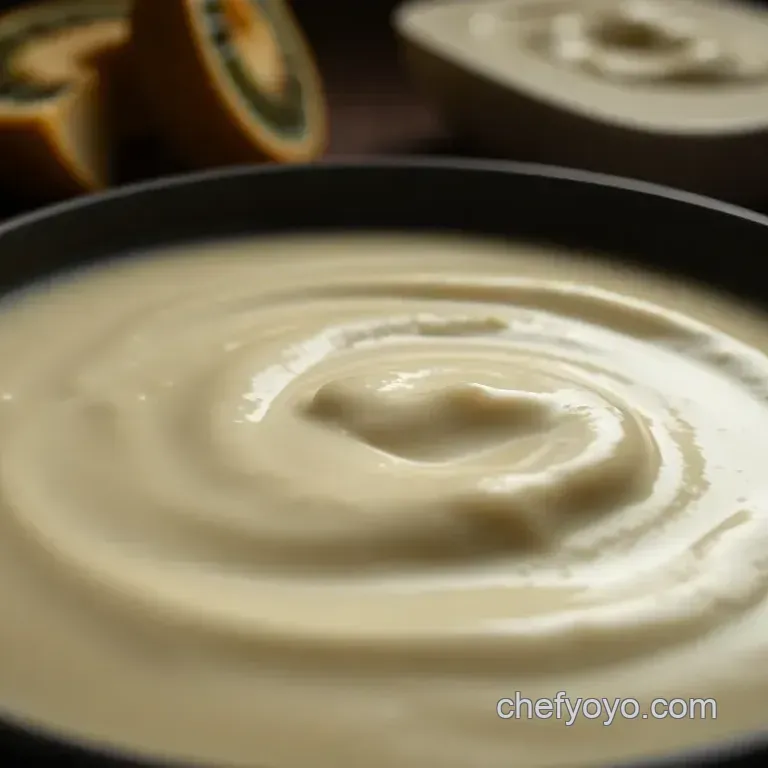
Curd formation: once it hits the mark, remove it from heat and add 1/4 cup of vinegar or lemon juice .
Stir it gently until you see those beautiful curds forming this is pure cheese magic happening right in your kitchen!
Straining: grab your colander lined with cheesecloth. pour the curd mixture into it, letting the whey drip out. this step is crucial; you want to get that moisture out for the perfect texture.
Seasoning: Once drained, mix in 1 teaspoon of sea salt until it’s well incorporated.
Molding: Press the curds into a round mold. Let it sit at room temperature for about 30 minutes .
Drying: Preheat your oven to 200° F ( 93° C) . Place the mold on a baking sheet and let it dry for 1- 2 hours . The longer, the crumblier!
Cooling and Storing: Remove it from the mold and cool it completely before you dive in. Store in an airtight container in the fridge!
Expert Techniques: Master Your Craft
Alright, pro tip time! you want the best out of your queso seco , right? first, control that temperature! a digital thermometer will be your best buddy.
And don’t rush. timing means everything, especially when crafting cheese. you should also look for those visual cues like how the curds look and feel that tell you when things are just right.
Sometimes things don't go to plan. Maybe your curds didn’t form. Don’t panic! It happens. Try adjusting the acidity by adding a bit more vinegar or lemon juice next time.
Success Strategies: Avoiding Pitfalls
We all make mistakes. One time, I forgot to check the milk temp and scorched it. Yikes! Here are a couple of tips to help you dodge those pitfalls:
- Pay attention to your timing . Over pressing the curds can make them too dry. A gentle touch is key!
- Store your queso seco properly. Wrap it well, or it’ll dry out beyond salvation, and nobody wants a crumble that turns to dust!
make-ahead options are golden. you can whip up multiple batches and store them, they make awesome savory cheese snacks later on! sprinkle it over salads, or toss it in tacos.
Total crowd pleaser, especially when paired with a refreshing drink!
Now that you're schooled on professional cooking methods , your kitchen adventures are about to be even more flavorful. Up next, we’ll dive into Additional Information for even more cooking adventures! Stay tuned!
Pro Tips & Secrets for Making Queso Seco
When it comes to crafting your own queso seco , i'm all about sharing the good stuff that makes cooking a breeze! honestly, making cheese at home can feel a bit daunting, but it’s worth it.
Here are some of my pro tips that might just lead you to cheese making glory.
First off, temperature control is key . when you're heating up that milk, aim for 190° f ( 88° c) . use a digital thermometer if you can.
Nothing worse than a scorched bottom! oh, and don't forget to stir occasionally. it helps prevent the milk from sticking.
Nobody likes cleaning burnt milk off a pot trust me!
Now, when you’re mixing in the vinegar or lemon juice, do it gently. this isn't a wrestling match; you want those curds to form nicely and not turn into a crazy blob.
Speaking of curds, press them well! i know it seems like a small detail, but pressing really helps to give that classic crumbly texture that’s perfect for crumbling into tacos.
Perfect Presentation
Now let’s talk presentation . nobody wants to eat ugly food, am i right? when serving your freshly made queso seco, think about how you plate it.
A simple twist can turn a dish from drab to fab! try crumbling the cheese over a vibrant salsa salad or next to some warm tortillas .
Pairing it with colorful ingredients just adds more appeal.
For garnish, sprinkle some fresh herbs or even pomegranate seeds on top. the color contrast will wow anyone who sees it! you can even drizzle a little olive oil for that gourmet touch.
Seriously, it's those little things that make your meal instagram worthy, too.
Storage & make-ahead Hacks
Let’s get real for a second sometimes life gets busy, and you've got to think ahead. once you make your queso seco, make sure to cool it completely before storing.
An airtight container in the fridge is your best bet for keeping it fresh. it should stay good for about a week .
Want to make a big batch? go for it! just remember that you can always use it as a savory cheese snack or sprinkle it on salads when you're in a pinch.
And if you find yourself with leftover cheese (which i highly doubt because it's so tasty), don’t sweat it. just shred up what you have left, toss it into a bag, and freeze it.
It can last a bit longer this way, and you’ll have ready-to-use cheese for when the craving strikes again!
Creative Variations
Thinking outside the cheese box? there are so many creative variations to explore! you can spice things up by adding in some diced jalapeños or herbs like oregano when you’re mixing the curds.
This adds an extra flavor punch that truly embraces those mexican culinary traditions .
And hey, if you're vegan or just experimenting, you can always try making a similar cheese with cashew milk . It gives the same satisfying texture, and you won’t miss out on that cheese-y goodness!
Complete Nutrition Guide
Let’s not forget the nutritional benefits of cheese, right? queso seco is not only delicious but also protein packed. with about 8g of protein per serving and only 120 calories , it makes for a guilt free indulgence.
While enjoying it, keep in mind portion control especially if you’re pairing it with some of your favorite tortilla chips.
And don’t hesitate to experiment with flavoring your cheese curds ; whether you're adding spices or blending in seasonal ingredients, you can create something new and flavorful.
Just remember to consider dietary restrictions there's always room for dietary modifications if needed.
In Conclusion
Making queso seco from scratch can be a little labor intensive, but with these tips, you'll be a cheese hero in no time! whether you're crumbling it over your favorite tacos or enjoying it with a cold drink (hello, margaritas!), it's sure to bring a taste of traditional mexican cuisine right to your kitchen.
So roll up your sleeves and embrace the art of cooking with cheese ! don't be afraid to make mistakes along the way like i always say, every great cook learns a thing or two from their kitchen flops.
Happy cheese making, friends!
Frequently Asked Questions
What exactly is queso seco?
Queso seco is a traditional Mexican dry cheese known for its crumbly texture and nutty flavor. It's made from cow's milk and is often used in dishes like tacos, salads, or as a snacking cheese. Think of it as the British equivalent to crumbled feta or grated cheddar, bringing a unique flair to your meals!
How do I store queso seco?
To store your queso seco, let it cool completely after making it, then place it in an airtight container in the fridge. It should last about a week, but if you want to keep it longer, consider freezing it in small portions. Just remember to thaw it in the fridge overnight before using!
Can I use other types of milk to make queso seco?
Yes, you can experiment with different types of milk when making queso seco! While whole cow's milk is traditional for the best flavor and texture, you can also try goat's milk for a tangy twist or low-fat milk, though the latter may result in a less creamy cheese.
Just bear in mind that the texture and flavor may vary!
What are some popular ways to serve queso seco?
Queso seco is incredibly versatile! You can sprinkle it over salads or tacos, mix it into a bean dip, or enjoy it alongside warm tortillas. For a proper British twist, try it crumbled over a baked potato, and enjoy the rich flavors that it adds!
How long does it take to make queso seco?
Making queso seco takes about 3 hours in total, including prep, cooking, and drying time. The key steps involve heating the milk, allowing the curds to form, and then drying the cheese. While it requires a bit of patience, the results are oh-so-rewarding!
What are some variations of queso seco I can try?
There are several delightful variations you can try, like adding chopped jalapeños for a spicy kick or mixing in dried herbs like oregano for a fragrant flavor boost. You could even create a vegan version with cashew milk. Get creative, and make it your own!
Queso Seco Traditional Mexican Dry Cheese

Ingredients:
Instructions:
Nutrition Facts:
| Calories | 120 |
|---|---|
| Fat | 9g |
| Fiber | 1g |
