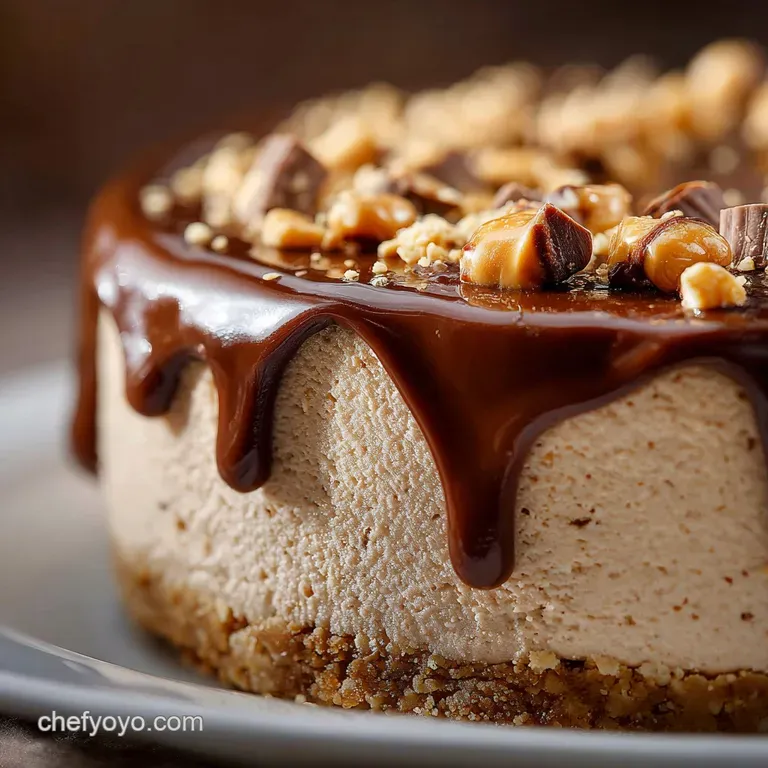
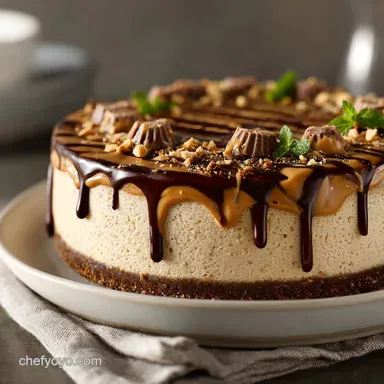
Vegan Peanut Butter Cup Cheesecake: the Ultimate No-Bake Dessert
Decoding the Ultimate Vegan Peanut Butter Cup Cheesecake
You know the feeling, right? You crave that dense, impossibly creamy texture of a classic cheesecake, but you’re trying to keep things plant and based. Or maybe you just hate turning the oven on in the summer (I certainly do).
For years, I avoided making a vegan cheesecake because every recipe I found was either complicated, used strange ingredients, or promised a smooth texture but delivered gritty, coconut and heavy disappointment.
Not anymore.
I finally cracked the code for the ultimate No and Bake Vegan Cheesecake that’s so rich, so satisfying, your dairy and loving friends won't even realize it’s secretly good for the planet (and probably better for their digestion).
And because we’re adults who deserve joy, we’re making it a glorious Vegan Peanut Butter Cup Cheesecake . Right then. Let’s get to the good stuff.
Why No and Bake Reigns Supreme in Dessert Preparation
Honestly, baking a traditional cheesecake is stressful. You’re dealing with water baths, worrying about cracks, and hoping it doesn’t deflate when you pull it out. A no and bake format eliminates all that drama.
It relies on fat (namely, high and quality coconut oil and cream) and a long chill time to achieve structural perfection. It’s also incredibly flexible.
The real beauty of the no and bake method for this particular dessert is the crust. By chilling, you skip the risk of a soggy bottom, which is the number one enemy of a good chocolate biscuit crust. You want that snap when you bite into the base, not a mushy mess.
Plus, blending the filling means you can taste and adjust the sweetness and tanginess before you commit to setting the entire cake. It’s brilliant.
The Secret Ingredient: Unlocking Silky Smooth Cashew Cream
Yes, we are using cashews. Don’t roll your eyes; they are non and negotiable for this particular Vegan Chocolate Peanut Butter Cheesecake . They don't taste like cashews once blended; they simply provide the fat, body, and protein needed to mimic the texture of cream cheese.
The secret isn't just having cashews, though. The secret is preparation. They have to be raw, and they have to be absolutely soaked to death. I usually dump boiling water over mine and let them sit for a minimum of four hours, but overnight is better.
I once tried to shortcut this process by just soaking them in warm water for an hour, thinking my powerful blender could handle it. Mistake. Huge mistake. The resulting texture was gritty, almost sandy.
If you want that impossibly smooth, luxurious, "is this actually dairy?" mouthfeel, you must soften those nuts completely.
Proving Plant and Based Treats Can Be Absolutely Spot On
This isn't some bland, health and food replica. This is a legitimate dessert, packed with salty peanut butter goodness and dark chocolate depth. We are replicating the joy of biting into a freezer and cold Reese’s (but, you know, vegan).
The key is balancing the richness of the peanut butter and coconut fat with a necessary hit of acidity (hello, lemon juice!) and salt. Without that tiny bit of acid and salt, the whole thing tastes flat, sugary, and heavy. With them? It’s dimensional. It’s perfect.
Essential Components for Cheesecake Success

Mastering the Accidentally Vegan Chocolate Crust
I am not above using accidentally vegan products. Why reinvent the wheel when a chocolate sandwich biscuit (like many generic store brands, or certain classic brands, check the label!) makes the ideal crust? They’re already sweet, chocolatey, and they crumble perfectly.
We are binding them with melted vegan butter, not oil. Butter or margarine gives the crust a much more palatable flavor and a better setting structure than straight coconut oil does in the base. Make sure you crush them into very fine crumbs; you want the crust to be uniform so it packs down tightly.
Use the bottom of a measuring cup or a glass to press it down hard. Seriously, hard. This is the foundation of your amazing Easy Vegan Dessert , treat it with respect.
Selecting the Perfect Peanut Butter Consistency and Type
This is where people mess up a lot. You absolutely must use smooth, natural peanut butter that contains only peanuts and salt. Do not use the heavily processed kind that has added sugars and hydrogenated oils. Why?
Because the processed stuff is already too firm, and it will result in a much denser, almost stiff filling.
We need the natural, runnier oils from the quality peanut butter to incorporate smoothly with the cashews and coconut oil. If your jar of natural peanut butter has separated (oil on top), give it a good, vigorous stir before measuring.
Necessary Kitchen Tools: Beyond the High and Speed Blender
Let's be clear: a high and speed blender is your MVP. If you are serious about making any kind of No and Bake Vegan Cheesecake , invest in one if you can.
| Essential Tool | Why You Need It |
|---|---|
| High and Speed Blender | Critical for eliminating grit; provides silky texture. |
| Springform Pan (9 inch) | Necessary for easy removal without destroying the base. |
| Food Processor | The easiest way to make a fine, uniform crust. |
The rubber spatula also deserves a shout and out. You need to scrape down the blender constantly when making the filling to ensure everything blends evenly. Don't underestimate the power of thorough scraping!
Related Recipes Worth Trying
- Brussels Sprouts Butternut Squash Pasta with Sage Brown Butter Sauce — Brussels Sprouts Butternut Squash Pasta is the ultimate fall comfort dish. Master the Sage Brown Butter Sauce for this rich and hearty Fall Pasta Dinner...
- Chicken Bacon Ranch Lettuce Cups: Easy Keto Low Carb Wraps — Our recipe for Chicken Bacon Ranch Lettuce Cups transforms classic flavors into a light, low-carb meal. Enjoy crispy bacon, seasoned chicken, and zesty...
- Twice Baked Butternut Squash with Goat Cheese and Crispy Sage — Twice Baked Butternut Squash with Goat Cheese and is the ultimate autumn side dish. This Best Butternut Squash Recipe features creamy chèvre, nutty brown...
Step and by-Step Guide to Crafting the Vegan Peanut Butter Cup Cheesecake
Here’s the step and by-step breakdown. We’re working in phases, but none of them are difficult. It’s mostly waiting and blending.
Phase One: Constructing the Sturdy Chocolate Base
Start by prepping your pan lightly grease it and line the bottom circle with parchment paper. This will make removing the cake from the base of the pan so much easier later. Pulse your biscuits and salt until fine.
Add the melted vegan butter (make sure it’s cooled slightly!) and pulse until it feels like wet sand. Press that into the pan firmly, taking care to create a little lip up the sides (about half an inch). Pop it straight into the freezer.
Phase Two: Blending and Setting the Peanut Butter Filling
While the crust chills, grab your soaked cashews (drained and rinsed!). Add them, along with the peanut butter, maple syrup, lemon juice, coconut cream (remember: only the thick, solid part scooped from a chilled can!), vanilla, and salt into the blender jug. Blend, starting slow, and increasing to max power.
This takes patience. Stop, scrape, and blend again. You need zero flecks of cashew remaining.
Once it’s perfect, and trust me, you’ll know because the texture just changes to liquid velvet, keep the blender running and drizzle in the melted (and slightly cooled) refined coconut oil.
That coconut oil is the setting agent for this whole operation; it turns liquid at room temp but solidifies nicely when chilled. Pour the filling over your frozen crust. Give the pan a few gentle taps on the counter to level the surface and burst any air bubbles.
Phase Three: Preparing the Luxurious Dark Chocolate Ganache
You need to save the ganache for when the filling is almost completely set. If you pour warm ganache onto a soft filling, they will mix. We want defined layers!
The ganache is simple: melt the chocolate chips and the solid coconut cream together gently. I prefer doing this over a very low double boiler (a bowl over simmering water) rather than the microwave, as it prevents scorching.
Once it’s perfectly smooth and shiny, take it off the heat and let it cool until it’s still pourable but has thickened slightly (maybe 5 minutes). Pour it over the chilled, firm cake.
The Critical Chilling Time: Why Patience Is Key
This is the hardest part. You've done all the work. Now you must wait.
WARNING: Do not attempt to slice this Vegan Peanut Butter Cup Cheesecake until the center is rock solid. If you poke it gently and it gives way, it is not ready. Attempting to slice a soft cheesecake results in a catastrophic mess and tears. It needs at least 6 hours, but overnight in the fridge is the only way to guarantee success.
This chilling time allows the coconut oil and fats to fully solidify, giving the cheesecake that characteristic dense slice we are looking for.
Adapting and Troubleshooting Your Dessert
If you’ve made it this far, congratulations! But what happens when you run out of an ingredient, or you need to accommodate a different dietary need?
Addressing Common Ingredient Substitutions (Oils, Sweeteners, Nuts)
We already talked about the absolute necessity of cashews for the texture. But if you have a nut allergy, you can substitute firm silken tofu for the cashews. You’ll need a bit more lemon juice to cut the blandness, and the final texture will be lighter, but it works.
If you don't like maple syrup, agave or date syrup are fine substitutes, though date syrup will darken the filling significantly.
What about the oil? Refined coconut oil is crucial because it sets hard and it has no coconut flavor. If you must substitute it, cocoa butter is an option (it also sets hard), but it requires careful melting and will impart a slight chocolate aroma, which isn't a bad thing for this Vegan Chocolate Peanut Butter Cheesecake .
Making It Gluten and Free: Alternative Crust Ideas for Celiacs
If you need this to be totally gluten and free, ditch the chocolate sandwich creams. Here are a couple of excellent alternatives:
- Nutty Oat Base: 1 cup gluten and free rolled oats, ½ cup almonds, ground finely in the food processor, mixed with 4 Tbsp melted vegan butter and 2 Tbsp maple syrup.
- Seed and Date Base: Use a mix of sunflower seeds and pumpkin seeds (1 ½ cups total) blended with 4 soft Medjool dates and a pinch of salt until sticky. This gives a lovely, complex flavor.
Storage and Freezing: Keeping the Cheesecake Fresh
Since this is a no and bake, high and fat cake, it stores beautifully. Keep it covered in an airtight container in the refrigerator for up to 5 days.
You can absolutely freeze this. Wrap the fully set cheesecake (before adding the peanut butter cup garnish) tightly in plastic wrap, then foil. It will keep for 2 3 months. When ready to serve, transfer it to the refrigerator 8 hours before you plan to slice it to allow for a slow thaw.
Frequently Asked Questions About Raw Vegan Desserts
- "My filling is grainy, help!" You didn't blend long enough, or your cashews weren't soft enough. Next time, soak longer and blend, blend, blend until you can't hear any gritty sound coming from the blender.
- "My cake won't slice cleanly." It’s too soft (didn’t chill long enough) or it’s too cold (you sliced it straight out of the deep freeze). Always slice 15– 20 minutes after pulling it from the fridge, using a hot, dry knife between cuts.
Nutritional Overview and Serving Suggestions
Yes, this is a decadent cake. It is high in calories and healthy fats, primarily from the cashews and coconut. It’s perfect for a special occasion or when you need a serious chocolate and peanut butter fix. Don’t expect a light dessert; expect deep, rich satisfaction.
Serve it with a strong, unsweetened espresso. The bitterness of the coffee cuts through the richness and enhances the dark chocolate notes. If you want to go totally over the top (and why wouldn't you?), a drizzle of homemade vegan sea salt caramel is always welcome.
Just make sure the peanut butter cups you chop for the top are added right before serving, so they don't lose their beautiful crisp texture. Enjoy!

Recipe FAQs
My Vegan Peanut Butter Cup Cheesecake filling seems a bit runny have I messed up the setting process?
Keep calm and carry on! The structure of this no-bake beauty relies heavily on two things: the full setting time (at least 6-8 hours) and the precise amount of melted refined coconut oil, which is the crucial setting agent.
Ensure you used the full amount of oil and resisted the urge to slice it before it’s completely firm in the centre.
Do I actually need a high speed blender, or can my standard gadget handle the soaked cashews?
A high speed blender is non-negotiable if you want that truly 'spot on' silky, classic cheesecake texture, as standard blenders often leave behind a slightly gritty mouthfeel. If you only have a regular blender, you must boil the cashews vigorously for 15 minutes instead of just soaking them, ensuring they are as soft as possible before blending.
I’m not keen on cashews (or they’re too pricey), is there a good substitute for the creamy filling base?
The best alternative is usually raw macadamia nuts, which provide a similar fat content and richness when soaked and blended, but they are often just as expensive. For a budget friendly option, you can substitute up to half of the cashews with chilled, firm silken tofu, though this will result in a slightly lighter, less dense finish.
This looks massive! Can I freeze slices of this cheesecake for a rainy day treat?
Absolutely, this cheesecake freezes beautifully! Once fully set, cut it into individual slices, wrap each piece tightly in cling film followed by foil, and freeze for up to three months. Thaw individual servings in the refrigerator overnight, or at cool room temperature for about two hours before serving.
Will the refined coconut oil make the filling taste like suntan lotion?
Not if you use refined coconut oil! Unrefined (or virgin) oil carries a strong tropical coconut flavour, but the refined version is neutral tasting and purely functions as a solid fat to give the cheesecake its excellent, dairy-free structure.
Vegan Peanut Butter Cup Cheesecake No Bake
Ingredients:
Instructions:
Nutrition Facts:
| Calories | 480 calories |
|---|---|
| Fat | 35 g |
| Fiber | 3 g |
