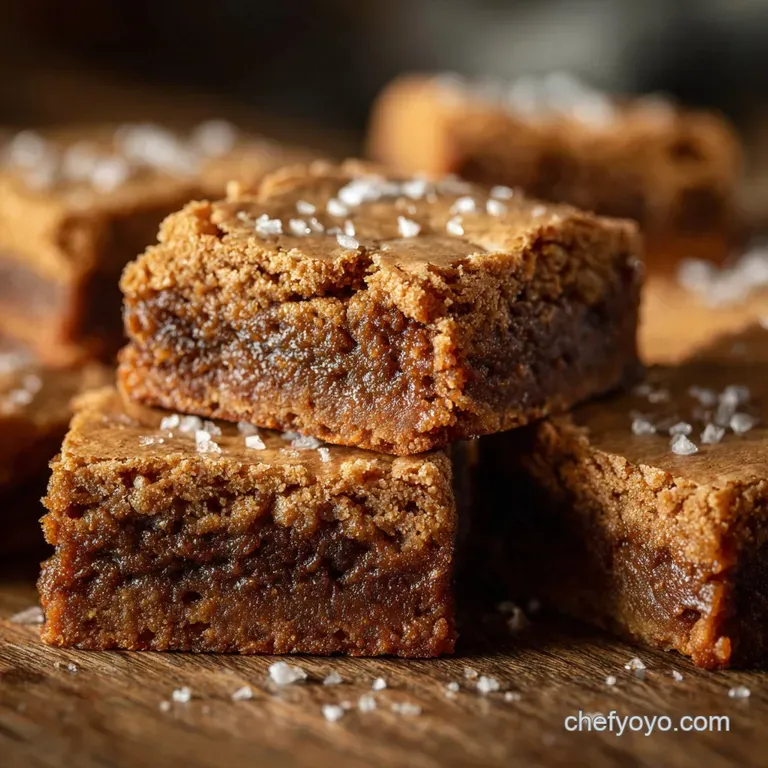
The Cracking Good Brown Butter Maple Blondies with Flaky Sea Salt
The Culinary Magic of Brown Butter: Why This Recipe Works
Look, I’ve tried a million cookie bar recipes that are fine, just fine . But you and I both know we aren't chasing "fine" in the kitchen. We’re chasing that jaw and dropping, what and is-that and flavour, I-need and another piece feeling.
That feeling is delivered almost entirely by one ingredient in this brown butter maple blondies recipe: the brown butter.
Browning the butter is your secret weapon. It’s what transforms a standard, sweet blondie into something complex, nutty, and almost caramelised. If you skip this step, you’re essentially baking a really sweet cake bar. If you take the time to toast those milk solids, you get pure alchemy.
The butter itself becomes infused with a deep, toffee and like aroma that stands up beautifully against the earthiness of the maple syrup. Seriously, this step is non and negotiable for true depth of flavor.
Achieving That Perfect Nutty Aroma and Depth
When we brown butter, we’re performing a mini and Maillard reaction right on your stovetop. We’re heating the butter past its melting point until the water evaporates and the tiny milk solids fall to the bottom of the pan and start to toast.
You’re looking for a colour that resembles toasted hazelnuts or pecans.
The key to perfecting this step for these particular salty maple brown butter blondies is patience. Medium heat is your friend. High heat will burn the solids quickly while leaving the overall flavor thin. We want the butter to be consistently bubbling and foaming until you smell that deep, nutty aroma.
It literally takes the flavour profile from 0 to 60.
Elevating Sweetness: Using Pure Maple Syrup vs. Imitation
I'm going to be really clear here: If you use imitation pancake syrup, you might as well scrap the whole thing. It’s a waste of your time and effort. The whole point of a Maple Brown Butter Blondie Recipe is to layer quality flavors that complement the deep base note of the butter.
Pure maple syrup (preferably a Grade A Dark Robust, which used to be called Grade B) has an intense, woody sweetness that artificial syrup just can’t replicate. Artificial syrup is thin and tastes mainly of corn syrup and vanilla. Pure maple is thick, complex, and earthy. It matters.
We’re using half a cup, so it needs to pull its weight! Trust me, buy the good stuff.
The Fudgy Center vs. The Crinkly Top: Decoding Blondie Texture
The texture is everything here. It just is. We want a dense, chewy, almost fudgy center, crisp edges, and that signature flaky, crinkled top.
The fudgy center comes from two things: controlled mixing (we want minimal gluten development) and under and baking slightly. The crinkly top is a bit of baking magic achieved by using warm, melted fat (the brown butter) and aggressively mixing the eggs into the sugars.
That combination helps dissolve the sugar, which creates a thin, sugary shell on top that collapses slightly when it cools, giving you that beautiful crinkle. If your toothpick comes out clean (like when baking a cake), you’ve lost the fudgy center, and the resulting bar will be dry and brittle.
Crucial Note: The key to chewiness in any Brown Butter Blondie Recipe is a powerful, thirty and second whisking after adding each egg. Do not skip this step.
Assembling Your Mise en Place: Essential Ingredients and Tools

Before you even think about lighting the stove, we need to talk prep. Baking is 80% organization, 20% execution. Get everything out and measured first.
Specialized Equipment for Bar Baking Success
You can technically bake this in any square pan, but an 8x8 inch metal pan is superior. Why metal? It conducts heat better and more consistently than glass. Glass pans can make the edges bake too quickly while the center remains gooey (and not in the good way).
Also, please, please use a parchment paper sling. Line your pan so you have overhangs on two sides. This is how you lift the entire slab out of the pan easily once it's cooled. Attempting to cut or serve these directly from a pan without parchment is just asking for a messy disaster. Don't do it.
The Role of Room Temperature Eggs and Butter
I know we are melting the butter for these Brown Butter Maple Blondies, so you might think the temperature of the other ingredients doesn't matter. You’d be wrong!
The eggs must be room temperature. If you toss cold eggs into the slightly warm brown butter and sugar mixture, they will seize up the sugars and prevent proper emulsion. This makes the batter lumpy, sticky, and ultimately prevents that lovely, shiny, uniform batter that gives you a chewy texture.
If you forgot to take them out, just put them in a bowl of warm (not hot) tap water for five minutes. Easy fix.
Why Flaky Sea Salt Is Non and Negotiable
We use fine salt in the batter for seasoning (which is vital, too), but the flaky sea salt (like Maldon) on top is a finishing touch that makes these feel proper gourmet.
When you sprinkle it over the top right before they go into the oven, those little crystals stay intact. They provide a tiny, perfect burst of salty crunch that cuts through the deep richness of the brown butter and the sweetness of the maple syrup. It makes the whole thing sing. Without it, the bar is too sweet.
With it, you get balance. It’s brilliant.
Here’s a quick comparison of our key flavoring components:
| Component | Flavor Contribution |
|---|---|
| Brown Butter | Deep, nutty, caramel base |
| Maple Syrup | Earthy, complex sweetness |
| Flaky Sea Salt | Texture contrast, balances sweetness |
Related Recipes Worth Trying
- Vegan Peanut Butter Cup Cheesecake: The Ultimate No-Bake Recipe — Vegan Peanut Butter Cup Cheesecake delivers incredible, silky decadence. This No-Bake Vegan Cheesecake Recipe features a rich chocolate crust and sets...
- Brussels Sprouts and Bacon Recipe: Ultra Crispy Roasted with Maple Glaze — The ultimate Brussels Sprouts and Bacon recipe guarantees crispy roasted perfection. This easy Thanksgiving side dish is finished with a sweet, tangy maple...
- Brussels Sprouts Butternut Squash Pasta with Sage Brown Butter Sauce — Brussels Sprouts Butternut Squash Pasta is the ultimate fall comfort dish. Master the Sage Brown Butter Sauce for this rich and hearty Fall Pasta Dinner...
- Twice Baked Butternut Squash with Goat Cheese and Crispy Sage — Twice Baked Butternut Squash with Goat Cheese and is the ultimate autumn side dish. This Best Butternut Squash Recipe features creamy chèvre, nutty brown...
- Chicken Francese With Lemon Butter Sauce RestaurantQuality in 40 Minutes — Master classic Chicken Francese With Lemon Butter Sauce tonight Our definitive Chicken Francaise recipe yields golden cutlets and a perfectly emulsified...
- Chocolate Fudge Caramel Brownies The Ultimate Fudgy Swirl Recipe — Chocolate Fudge Caramel Brownies are the triplethreat dessert you need Learn how to make Fudgy Salted Caramel Brownies with crackly tops and an irresistible...
Step and by-Step Guide to Mastering These Chewy Brown Butter Maple Blondies
Right then. Let's crack on with the cooking.
The Art of Browning Butter Without Burning the Milk Solids
Get your diced butter in a light and coloured, heavy and bottomed saucepan. Why light and coloured? Because you need to see the colour change of the milk solids at the bottom! Medium heat only.
- Melt: The butter will melt fully.
- Foam: It will start to foam aggressively. Stir constantly now!
- Silence & Clarity: The foam subsides slightly, and you’ll see cloudy bits starting to settle.
- The Toast: The solids will quickly turn golden, then amber, then deep brown. As soon as it smells intensely nutty like toasted pecans and the bits are amber, pull it off the heat immediately. It will continue cooking for a moment.
- Pour: Dump all of it (solids and liquid) into your mixing bowl. Don’t scrape the very bottom if there are obvious burnt black bits, but you want those amber and brown solids for maximum flavour. Let it cool for about 10 minutes until it’s warm, but not scorching hot.
Achieving Optimal Dough Consistency: Mixing Techniques
Once your brown butter is ready and slightly cooled, this whole process comes together very fast.
Add your sugars and maple syrup to the butter and whisk until smooth. Now, for the eggs. This is where the chewiness is built. Add one egg, whisk vigorously for 30 seconds until the batter looks shiny and thick. Add the second egg, and repeat the vigorous whisking.
The mixture should become pale and ribbon and like. This is key for the chewy texture we crave in a Maple Blondie.
Next, the flour mixture (flour, baking powder, and fine salt). Add it all at once, and switch to a rubber spatula. Fold gently. Stop the very second you see the last streaks of flour disappear. A few lumps are fine. Overmixing develops gluten rapidly and turns your beautiful, chewy bar into a tough, dry brick.
Don't do it.
The Visual Cues: Knowing Exactly When Your Blondies Are Baked
You’ve got your dough in the pan. You’ve sprinkled the flaky sea salt on top. Into the 350°F oven they go. We are aiming for 30– 35 minutes.
The edges should be firmly set and slightly pulling away from the sides of the pan. The top should be uniformly golden brown. The center is the trickiest part. When you insert a toothpick into the center, it should not come out clean. If it comes out clean, they are overdone.
You want moist, sticky crumbs clinging to the pick. Those moist crumbs are your promise of a fudgy center once they cool. Pull them out when they look slightly underdone in the very middle.
Troubleshooting and Enhancements for Your Brown Butter Maple Blondies
I've made every mistake in the bar and baking book. Here is what I learned so you don't repeat my failures.
Common Mistakes and How to Prevent Sinking or Drying
-
Mistake:
My blondies sank in the middle!
- Fix: Usually, this is because they were taken out of the oven too soon, or you cut them while they were too warm. They need the heat to finish setting the internal structure.
-
Mistake:
They are tough and dry.
- Fix: You overmixed the flour. See the warning above: Fold gently until just combined. That’s it!
-
Mistake:
The brown butter tastes burnt.
- Fix: Lower your heat next time. If you use high heat, the solids burn quickly before the fat develops the deep nutty aroma. You can try adding a splash of fresh, cold butter to stop the cooking process if you catch it immediately.
Optimal Cooling, Cutting, and Long and Term Storage
I know they smell incredible. I know you want to eat them now. But step away from the pan. Seriously, cooling is 50% of the baking process when it comes to dense bars like these.
You must allow the Brown Butter Maple Blondies to cool completely in the pan on a wire rack for a minimum of two hours. If you cut them warm, they will crumble, and the fudgy texture will be lost. Once cool, use the parchment sling to lift the entire slab out, then cut into neat squares.
Store them in an airtight container at room temperature for up to four days. They actually taste even better the next day, once the flavors have fully melded.
Customizing the Bars: Add and ins and Flavor Swaps
This base recipe is fantastic as is, but if you want to jazz things up, these additions are reliable:
- Fold in 1/2 cup of chopped toasted pecans or walnuts right before you pour the batter into the pan for a classic Maple Blondie vibe.
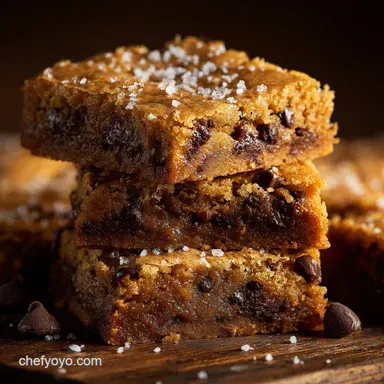
- Add 1/2 cup of white chocolate chips . They melt beautifully into the fudgy center. (I don't recommend milk or dark chocolate here; they overpower the maple.)
- If you’re feeling extra grown and up, swirl 1/4 cup of thick salted caramel sauce over the top of the batter before baking. Use a knife to make a marble pattern.
The Perfect Pairing: Serving Suggestions for Maple Dessert Bars
These are rich bars. You need something to cut that richness and refresh your palate.
For a comforting dessert, serve them warm (a quick 15 seconds in the microwave is perfect) with a scoop of premium vanilla bean ice cream. The cold, creamy ice cream against the warm, chewy blondie is unbeatable.
Alternatively, pairing them with a small spoonful of slightly tart, spiced crème fraîche or plain Greek yogurt balances the intense sweetness of the salty maple brown butter blondies brilliantly.
They are also killer alongside a strong, slightly bitter French Press coffee or a bold black tea. They truly are the perfect cookie bar recipes upgrade. Enjoy!

Recipe FAQs
Crikey, how do I brown the butter without burning the kitchen down?
Keep the heat medium and watch for the swift transition from foam to amber solids. Pull it off the hob immediately when it smells deeply nutty, like toasted biscuits, to ensure flavour without the burnt taste.
My blondies ended up a bit dry and cakey; what went wrong?
You likely overmixed the batter, which developed the gluten too much. Also, remove the tray when a toothpick still has moist, sticky crumbs attached a clean poke means they are overbaked.
I fancy serving these at a picnic; can I bake these Brown Butter Maple Blondies the day before?
Absolutely! Cooling is vital for texture, so baking ahead is ideal. Store them tightly wrapped at room temperature in a biscuit tin for up to four days; they travel brilliantly.
I've run out of maple syrup; is it alright if I substitute it with something else?
Honey is the best substitute, but reduce the amount by a quarter as it’s significantly sweeter. For a different twist, try folding in 1/2 cup of dark chocolate chips instead.
These are incredibly rich; what’s the best way to keep them fresh for longer?
Store them in an airtight container at room temperature for up to 4 days. If you're serious about long term storage, freeze tightly wrapped squares for up to three months.
Brown Butter Maple Blondie Bars
Ingredients:
Instructions:
Nutrition Facts:
| Calories | 216 kcal |
|---|---|
| Protein | 2.0 g |
| Fat | 8.0 g |
| Carbs | 34.0 g |
