The Ultimate Chewy Oatmeal Chocolate Chip Cookies a Proper Classic

- Mastering the Chewy Oatmeal Chocolate Chip Cookie Formula
- Tools of the Trade and Essential Provisions
- Step-by-Step Guidance for Your Baking Session
- Troubleshooting Common Cookie Calamities
- Preservation and Planning: Keeping Your Cookies Fresh
- Creative Twists and Recipe Adaptations
- Recipe FAQs
- 📝 Recipe Card
Mastering the Chewy Oatmeal Chocolate Chip Cookie Formula
The world of Oatmeal Chocolate Chip Cookies is vast, but only a truly masterful recipe achieves that perfect balance: hearty, deeply flavourful, and spectacularly chewy.
This isn't just a standard chocolate chip cookie with oats thrown in; it’s a robust classic defined by specific texture markers. Our formula is designed to deliver a treat so satisfying, it instantly qualifies as a top-tier Comfort Dessert .
We achieve this through meticulous attention to sugar ratios and crucial resting periods.
The Secret to That Perfect Soft Center and Crispy Edge
Achieving the perfect structure for these Chewy Oatmeal Chocolate Chip Cookies relies on two major factors: moisture retention and specific baking duration. We use a high ratio of light brown sugar (one cup, packed) versus granulated sugar (half a cup).
Brown sugar contains molasses, which is hydroscopic, meaning it draws and retains moisture, resulting in a significantly softer, chewier final product. The second secret is the cooling process.
We instruct bakers to pull the cookies from the oven when the edges are set and golden but the centers still look slightly pale and puffy in other words, slightly underbaked.
Allowing them to rest on the hot baking tray for a critical ten minutes post bake ensures they finish cooking gently without drying out, setting that soft, gooey center while firming up the exterior edge.
Elevating the Pantry: Why Ingredient Quality Matters
While the oatmeal chocolate chip cookies recipe uses standard pantry staples, the temperature and quality of your ingredients are paramount. Always use real vanilla extract; one full tablespoon is required here to enhance the depth of the flavor profile, moving beyond simple sweetness.
Crucially, your two large eggs and one cup of unsalted butter (two sticks) must be brought completely to room temperature. Fats and liquids at room temperature emulsify more effectively during the creaming stage, maximizing the air incorporated into the batter, which translates to a more tender and better structured cookie crumb.
Assessing Your Baking Skill Level (Easy to Medium Explained)
This recipe is classified as Easy to Medium . The methodology itself standard creaming is simple for anyone, making it an accessible project for Easy Treats .
However, to achieve the specific soft and chewy result, the recipe demands a keen eye for detail that nudges it into the medium category. Specifically, success hinges on two mandatory steps that beginners often skip: the minimum 30-minute dough chilling period and the precise art of underbaking.
If you follow these critical time markers precisely, the process will feel easy, but rushing these steps will compromise the integrity of the chewy texture we are aiming for.
Tools of the Trade and Essential Provisions
Preparation is half the battle when baking, especially when preparing large batches for Holiday Platters . Having the right gear and the correct provisions laid out ensures a smooth, efficient baking session, preventing last minute rushes or measurement errors.
Required Kitchen Gear for Cookie Success
A few key pieces of equipment make this process significantly easier. While you can certainly make the dough manually, an electric stand mixer fitted with the paddle attachment or at least a sturdy hand mixer is highly recommended for achieving the necessary lightness during the creaming stage.
You will also need a few large mixing bowls, a rubber spatula for folding, and, most importantly, a standard 2-ounce cookie scoop (size #30). Using a scoop guarantees uniform size, which is essential for ensuring all cookies bake evenly within the tight 12 15 minute window.
Finally, always line your baking trays with parchment paper or a silicone mat to prevent sticking and aid in the post bake transfer.
The Dry and Wet Components: A Full Shopping List
Before beginning, ensure you have precise measurements for the full list of components. The wet mixture requires one cup of softened unsalted butter, one cup of packed light brown sugar, half a cup of granulated sugar, two room temperature eggs, and one tablespoon of vanilla.
For the dry elements, you'll need one and a half cups of all-purpose flour, one teaspoon of baking soda, one teaspoon of fine sea salt, and the optional but highly recommended half teaspoon of ground cinnamon.
Finally, the stars of the show are two and a half cups of rolled oats and one and a half cups of semi sweet or milk chocolate chips. These ratios are perfectly calibrated for ultimate moisture and chew.
The Role of Oats: Choosing Between Rolled and Instant
The texture of your final cookie is determined almost entirely by your choice of oat. For this definitive oatmeal chocolate chip cookies recipe , you must use Old-Fashioned Rolled Oats .
These oats provide significant body and retain their shape, delivering that desirable, hearty chew. Avoid attempting oatmeal chocolate chip cookies with quick oats or instant varieties.
Quick oats are pre-steamed and cut into smaller pieces; they break down too rapidly during the mixing and baking process, absorbing excess moisture from the dough and resulting in a cakey, less satisfying cookie rather than a truly chewy one.
step-by-step Guidance for Your Baking Session
Once all your ingredients are measured and your oven is preheated to 350°F (175°C), you begin by whisking your dry ingredients (flour, baking soda, salt, cinnamon) together in a separate bowl.
In the stand mixer, beat the softened butter and both sugars for three to four minutes until the mixture turns noticeably pale and fluffy this is the creaming method at work. Incorporate the eggs one at a time, followed by the vanilla.
Next, reduce the mixer speed and gently incorporate the dry mixture just until the last streaks of flour disappear. Immediately fold in the rolled oats and chocolate chips with a rubber spatula.
Once combined, the dough must be chilled for a minimum of 30 minutes (or up to 24 hours for enhanced flavour). Scoop the chilled dough onto lined trays, spaced two inches apart, and bake for 12 to 15 minutes.
Remember to pull them when they are just set on the edges, and allow the cookies to rest on the hot trays for ten full minutes before moving them to a wire rack to cool completely.
Related Recipes Worth Trying
- The Ultimate Chewy Sugar Cookies From Scratch Recipe — Tired of spreading dough This easy sugar cookies recipe guarantees crisp edges and a lovely chewy centre perfect for decorating with buttercream frosting...
- The Best Classic Soft Sugar Cookies Recipe Chewy Tender — Tired of brittle biscuits Master the truly perfect Classic Soft Sugar Cookies This easy recipe guarantees a delightfully chewy centre every time
- Best Bakery Style Chocolate Chip Cookies Recipe — Achieve the best big chocolate chip cookies This scratch recipe yields thick gooey centres and crispy edges Get the blueprint now
Troubleshooting Common Cookie Calamities
Even experienced bakers run into minor roadblocks. Understanding the physics of cookie dough is essential for resolving issues and ensuring the perfect outcome.
Pre-Bake Preparation: Getting Your Dough Ready
Skipping the chilling step is the most common reason for cookie failure. The minimum 30-minute chill is not just about firming up the dough for easier handling; it allows the fats (butter) to re-solidify, which drastically prevents excessive spreading during baking.
On top of that,, this rest period allows the flour and the rolled oats to hydrate fully, resulting in a more complex flavour and a much thicker, satisfyingly chewy center.
The Creaming Method: Achieving Maximum Air and Volume
When creaming the softened butter and sugars, the goal is to beat them until they are light and fluffy. This process incorporates small pockets of air that give the final cookies their tender structure. If your butter is too cold, the air won't incorporate; if it’s melted, the structure collapses.
You should beat the mixture for a full three to four minutes, scraping the bowl frequently, until the volume increases and the colour lightens significantly.
Scooping, Spacing, and Optimal Oven Timing
Uniformity is key. Use your standard 2-ounce cookie scoop to ensure every portion is identical. Place the dough balls two inches apart on the lined baking tray to allow for necessary spreading. Optimal oven timing means watching the color, not the clock.
For the best result, the cookies should be removed from the oven when the edges are visibly golden brown and firm, but the centers still appear slightly shiny and underdone. Over baking even by two minutes can turn a chewy cookie into a dry, crisp one.
Post Bake Protocol: The Crucial Cooling Rack Stage
Never try to move these cookies immediately after pulling them from the oven. They are too fragile and will fall apart. The mandatory ten-minute rest period on the hot baking tray allows the residual heat to finish setting the undercooked center without drying out the already established edges.
After ten minutes, transfer them carefully to a wire rack where air circulation can complete the cooling process, cementing that perfect texture.
Why Did My Cookies Spread Too Thinly?
Excessive spreading is typically caused by four factors: not chilling the dough (warm fat spreads instantly), using melted butter instead of softened, oven temperature inaccuracy (if the oven is too low), or over creaming the butter and sugar, which incorporates too much air.
Ensure you follow the specific notes on room temperature ingredients and the mandatory dough rest.
Dealing with Undercooked Centers and Burnt Edges
If you find your edges are burnt while the centers are still raw, your oven likely runs hot or you are placing the tray too close to a heating element. Try reducing the oven temperature by 15-20 degrees and ensure you bake your cookies on the middle rack only, rotating the tray halfway through the 12 15 minute bake time to ensure even exposure to heat.
Preservation and Planning: Keeping Your Cookies Fresh
These cookies are best enjoyed fresh, but thoughtful planning can ensure you always have access to quick, warm Comfort Desserts .
Freezing the Dough for Future Baking Needs
This oatmeal chocolate chip cookies recipe is ideal for freezing. Scoop the raw, chilled dough into uniform balls using your #30 scoop, then place them close together on a parchment lined sheet pan. Flash freeze the balls until rock solid (about one hour).
Once frozen, transfer the dough balls to a heavy duty freezer bag or container. They can be stored for up to three months. When ready to bake, place the frozen dough balls on a lined tray, allowing them to sit at room temperature for 20 minutes before baking them straight from frozen.
Air-Tight Secrets: Extending the Life of Baked Oatmeal Chocolate Chip Cookies
Once fully cooled, store the baked cookies in an air-tight container at room temperature. They will remain beautifully chewy for up to five days. To maintain maximum freshness and moisture, many bakers add half a slice of plain white bread to the container; the cookies absorb the bread's moisture, keeping them soft.
For the absolute best experience, microwave the cookies for 10 15 seconds before serving for that warm, straight from-the-oven melt.
Creative Twists and Recipe Adaptations
The structure of the classic Oatmeal Chocolate Chip Cookies is versatile, allowing for simple substitutions that cater to dietary needs or flavor cravings.
Swapping Chips: Nuts, Raisins, and Different Chocolate Types
The base recipe is perfect for customization. While we stick to semi sweet chips here, you can substitute the full 1.5 cups with milk chocolate or even white chocolate. For a classic twist, eliminate half a cup of the chips and substitute them with dried cranberries or raisins, perhaps adding a touch of nutmeg for a Harvest Spice variation.
Alternatively, for a Nutty Crunch element, fold in one cup of toasted, chopped pecans or walnuts alongside the chocolate chips for added crunch and depth.
Making the Recipe gluten-free or dairy-free
It is perfectly achievable to adapt this into an oatmeal chocolate chip cookies gluten-free version. Simply substitute the all-purpose flour with a high-quality 1:1 gluten-free baking blend that already contains xanthan gum for structure.
For those requiring a dairy-free option, which addresses the need for oatmeal chocolate chip cookies no butter , you can swap the dairy butter with an equal amount of high-quality vegan butter sticks or refined coconut oil.
If seeking a truly vegan approach, the two large eggs can be replaced by two flax eggs (two tablespoons of ground flaxseed mixed with six tablespoons of water, allowed to gel for five minutes).
While these adaptations change the nutritional profile, making them slightly closer to oatmeal chocolate chip cookies healthy options due to the fiber content, they retain the essential chewy heartiness of the original.

Recipe FAQs
Why do I need to chill the dough for these Oatmeal Chocolate Chip Cookies? Can I skip it?
Chilling the dough is absolutely crucial, mate! It solidifies the butter, which stops your cookies from spreading into flat, thin puddles a proper tragedy. Crucially, it also allows the rolled oats time to hydrate fully, guaranteeing that satisfyingly thick, chewy texture we’re aiming for in these ultimate Oatmeal Chocolate Chip Cookies.
Skipping this step means sacrificing the structure and the chew, so don't you dare!
My cookies came out too crispy, not chewy. What went wrong?
If they’re coming out like hard crackers rather than soft biscuits, you’ve likely overbaked them slightly. For maximum chew, you must take the trays out when the edges are set and golden, but the centres still look slightly pale, puffy, and underdone.
Remember the golden rule: let the cookies cool entirely on the hot baking sheet for 10 minutes before moving them to the wire rack to finish setting.
Can I use quick oats instead of the rolled oats listed?
Resist the temptation, pal! Quick or instant oats are processed much finer than the proper old-fashioned rolled oats required for this recipe. If you use instant oats, they will disintegrate during baking, leading to a cakier, less substantial texture.
Stick firmly to the old-fashioned rolled variety for the desired robust chew and sterling result.
What’s the best way to store these biscuits and how long do they keep?
These lovely treats keep brilliantly! Store completely cooled cookies in an airtight biscuit tin at room temperature for up to five days, though they rarely last that long in a hungry household.
If you fancy batch cooking, you can also freeze the raw, scooped dough balls in a freezer bag for up to three months; just bake them straight from frozen (adding a couple of minutes to the baking time).
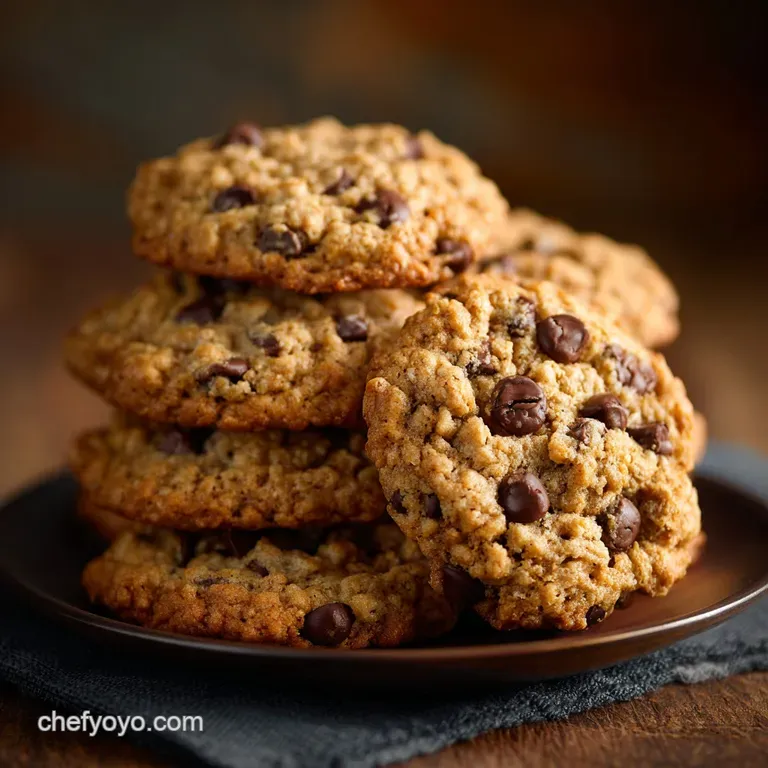
Chewy Oatmeal Chocolate Chip Cookies

Ingredients:
Instructions:
Nutrition Facts:
| Calories | 176 kcal |
|---|---|
| Protein | 2.4 g |
| Fat | 6.5 g |
| Carbs | 25.1 g |
| Fiber | 2.7 g |
| Sodium | 3380 mg |
