Mimosa Cake: the Ultimate Torta Mimosa Recipe
- Unveiling the Torta Mimosa: Italy’s Celebration Cake
- The Science of Sunlight: Why This Classic Mimosa Cake Recipe Shines
- Essential Components: Ingredients for Your Italian Patisserie Masterpiece
- From Sponge to Splendor: Step-by-Step Assembly of the Torta Mimosa
- Troubleshooting Your Cake: Chef's Secrets and Avoiding Common Baking Errors
- Preservation Guide: Storing Your Elegantly Layered Dessert
- Elegant Pairings: Serving Suggestions for the Celebration Cake
- Recipe FAQs
- 📝 Recipe Card
Unveiling the Torta Mimosa: Italy’s Celebration Cake
Oh, darling, if you think I’m talking about sparkling wine and orange juice, think again. The real star of the show, the culinary icon, is the glorious Torta Mimosa , an Italian cake that looks exactly like sunshine and tastes like a dream.
This dessert is pure joy light, airy, intensely creamy, and dusted with those little yellow crumbs that instantly remind you of soft, vibrant Mimosa blossoms. Seriously, the aroma of vanilla mingling with fresh lemon syrup as you slice into it is just intoxicating.
I know what you're thinking: isn't a celebration cake a huge fuss? Absolutely not! This particular Mimosa recipe, while appearing fancy, relies on incredibly simple pantry staples.
It’s perfect when you need a showstopper dessert that feels high effort but actually lets you do the heavy lifting hours or even a day ahead. It’s the ultimate make-ahead secret weapon for holidays, big brunches, or Mother's Day celebrations.
Ready to trade your whisking arm for a little bit of patisserie glory? I promise that mastering the fluffy sponge and the silky pastry cream is easier than you think. Let's get into the step-by-step method for creating the definitive Italian Mimosa dessert.
The Science of Sunlight: Why This Classic Mimosa Cake Recipe Shines
This Torta Mimosa recipe isn't complicated, but it is precise. The reason my version consistently works isn't magic; it's structure. We are focused on maximum airiness in the sponge and intense flavor concentration in the cream.
The History Behind the Mimosa Flower Cake
The Mimosa cake was traditionally created in the 1950s in Rome to honor International Women's Day (March 8th), the same time the vibrant yellow Mimosa flower blooms across Italy.
That flower, a symbol of strength and sensitivity, lends its name and beautiful visual texture to the cake. Knowing the story just makes the final presentation that much sweeter, doesn’t it?
Deconstructing the Dessert: What Makes the Cake So Airy?
The secret sauce here is the Pan di Spagna , or Genoise sponge. Unlike American sponges that rely on chemical leaveners, the Genoise uses only air whipped into warmed whole eggs.
This is why we absolutely must hit the "ribbon stage" it ensures the sponge is structurally sound and feather light, ready to soak up that citrus syrup like a thirsty cloud.
Preparation Time and Difficulty Rating
Don't let the multi stage process scare you off! Most of the time listed is passive chilling. The active prep time, where you’re actually whisking and mixing, is less than an hour. If you organize your ingredients, making this classic Mimosa cake feels incredibly manageable.
Achieving the Signature Airiness of the Pan di Spagna (Sponge)
Remember how I mentioned warming the eggs? This small step makes a huge difference. Heating the eggs and sugar over a gentle water bath dissolves the sugar crystals completely, allowing the eggs to trap maximum air when whipped. Maximum volume equals maximum fluff.
Balancing the Citrus Soak with Sweetened Pastry Cream
The pastry cream, Crema Pasticcera , is rich, but the syrup prevents the final Mimosa from feeling heavy. The syrup must contain lemon; that acidity cuts through the fat of the custard perfectly, making the whole dessert taste incredibly balanced.
Without the soak, the cake would be dry it’s crucial!
The Perfect Texture: Creamy Center, Crumbly Exterior
The contrast is what makes this Mimosa stand out. We have the soft, melt-in-your mouth interior layers, saturated with syrup, hugging that smooth, vanilla laced cream. Then you get the satisfying, slightly coarse texture of those little "blossom" cubes on the outside.
It’s a textural symphony!
Essential Components: Ingredients for Your Italian Patisserie Masterpiece
If you’re attempting any celebratory baking, using the highest quality ingredients is always my first piece of advice. Good butter, fresh eggs, and real vanilla will always shine through in a simple Mimosa cake recipe.
Choosing the Best Ingredients for Authentic Pastry Cream (Crema Pasticcera)
Please, please, use whole milk here. The higher fat content prevents the custard from tasting chalky and helps it set up luxuriously firm. As for the vanilla, skip the cheap extract if you can.
A vanilla bean or vanilla bean paste will give you those tiny, beautiful black flecks and a deeper, more aromatic flavor that screams bakery quality.
Selecting the Right Citrus for the Simple Syrup Soak
A classic Mimosa uses lemon, and sometimes a splash of orange. I love adding a little orange liqueur, like Cointreau or Grand Marnier, to the cooling syrup. It adds a sophisticated layer without making the cake taste overtly boozy.
But if you're serving little ones, just stick to pure lemon and maybe a teaspoon of orange zest.
Ingredient Swaps: Making the Torta dairy-free or Gluten Friendly
I hear you! Allergies or dietary choices shouldn’t stop you from enjoying a beautiful Mimosa dessert. Here are my tried and true substitutions that actually work.
| Component | Standard Ingredient | Viable Substitute | Notes |
|---|---|---|---|
| Flour | All-Purpose Flour | 1:1 gluten-free Baking Blend | Measure by weight for best results. |
| Milk | Whole Milk | Oat Milk or Full Fat Coconut Milk | Oat milk is neutral; coconut milk adds a subtle flavor. Increase cornstarch slightly. |
| Butter | Unsalted Butter | high-quality Plant Based Butter (Stick) | Crucial for the richness of the pastry cream. |
Detailed Shopping List: Pantry Staples and Specialty Items
Make sure your eggs are room temperature before you start it truly affects the height of the Genoise. You’ll also need good parchment paper and cornstarch, which is absolutely mandatory for thickening the crema .
From Sponge to Splendor: step-by-step Assembly of the Torta Mimosa

Let’s crack on! This three phase approach breaks down the baking, the filling, and the spectacular "Mimosa" application.
Phase 1: Baking the Perfect Pan di Spagna and Creating the Crumb
When whisking the eggs, that mixer should be running for a full eight to ten minutes. You know you’ve hit the ribbon stage when you lift the whisk and the batter falls back into the bowl, leaving a visible, slow-to-disappear trail that’s your ribbon.
When folding in the flour, use the lightest hand imaginable. If you hear the batter sigh, you’ve overworked it!
Chef's Note: Melt the butter and let it cool slightly while you whip the eggs. Hot butter will destroy the delicate air bubbles you worked so hard to create. Tempering the butter with a small bit of batter before folding it all in ensures it integrates without collapsing the foam.
Phase 2: Mastering the Smooth Crema Pasticcera
The tempering stage is where most people panic, but it’s simple: you are acclimatizing the cold yolks to the hot milk slowly. Whisk aggressively as you pour in the milk. Once you return the mixture to the heat, switch to a sturdy rubber spatula.
You must stir constantly, especially the edges and bottom, until it suddenly thickens into a gorgeous, bubbling mass. Cook it for 30 seconds after it starts bubbling to deactivate the enzymes in the cornstarch.
Phase 3: Soaking, Layering, and Affixing the "Mimosa" Topping
The assembly is the fun part where the Torta Mimosa finally comes to life! First, cool that syrup completely. If you apply warm syrup, the cream will melt right off the cake.
- Cut & Hollow: Take your first cake layer and use a long serrated knife to cut it into two thin discs. Take the second layer and cut the top crust off, then carefully cube the entire rest of that sponge. Those are your precious Mimosa crumbs.
- Soak: Place the base disc on your platter. Use a pastry brush to apply the syrup liberally don't be shy! We want the cake to be damp but not soggy.
- Fill: Layer half the pastry cream, then the second disc, then soak again, and finish with the remaining cream.
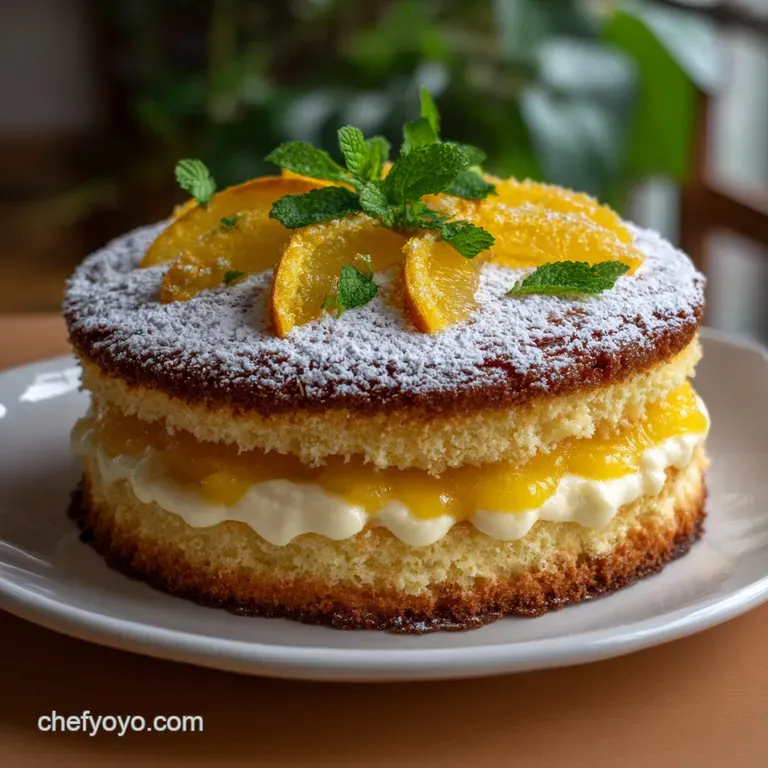
- Blossoms: Use the last of the cream to smooth a very light layer around the sides. Then, cup your hands full of those fluffy sponge cubes and gently press them all over the cake. The goal is complete coverage, making it look like a yellow, fragrant cloud. This is the hallmark of the perfect Torta Mimosa .
Troubleshooting Your Cake: Chef's Secrets and Avoiding Common Baking Errors
I’ve made every mistake in the book, including serving a leaning tower of Pisa version of this cake once. Learn from my tragic errors!
Why Did My Custard Split? Quick Fixes for Pastry Cream
If your pastry cream looks curdled or greasy after you stir in the final butter, it means the temperature shifted too quickly or you added the butter too soon. Don’t panic! Simply place the bowl over a mild bain marie (very low heat) and vigorously whisk in 1 2 tablespoons of cold milk or heavy cream.
The fat and water will re-emulsify beautifully, yielding a smooth texture again.
Ensuring the Cake Keeps Its Shape During Soaking and Assembly
The Mimosa cake must be sturdy. The biggest structural risk is over soaking the base layer. If the sponge is too saturated, it will compress and squish when you stack the second layer and the heavy cream on top. Use firm, controlled strokes with your pastry brush, avoiding the very edge.
The Critical Importance of Adequate Chilling Time
I know, waiting is torture, but you cannot skip the final chill. This period allows the syrup to penetrate the cake fully, marrying the flavors. More importantly, it firms up the pastry cream filling so when you cut that first slice, the cake holds its elegant, layered shape instead of squishing out.
Preservation Guide: Storing Your Elegantly Layered Dessert
This cake tastes even better the next day, which is why it’s my go-to celebration bake!
Short Term Refrigeration: Keeping the Cake Fresh for Days
Keep the Torta Mimosa covered loosely a cake dome is perfect in the refrigerator for up to 3 days. Because of the fresh pastry cream filling, I would avoid leaving it out for longer than 30 minutes at room temperature.
The subtle vanilla notes truly deepen as the cake chills.
Can You Freeze Torta Mimosa? Best Practices for Long Term Storage
Yes, you can! Freezing this delicate Mimosa requires care. Wrap the entire chilled cake tightly in plastic wrap, followed by a layer of aluminum foil. It will last in the freezer for about 1 month. To thaw, unwrap the foil and plastic, and let it thaw slowly in the refrigerator overnight.
Do not attempt to refreeze this specific Mimosa recipe once thawed.
Elegant Pairings: Serving Suggestions for the Celebration Cake
You've built the ultimate Mimosa dessert; now let’s talk about how to serve it like a professional patisserie chef.
Complementary Beverages: From Sparkling Wine to Espresso
If you’re serving this Mimosa cake for a brunch, a dry Prosecco or a strong, dark espresso are your best friends. The bitterness and warmth of the coffee contrast beautifully with the sweet, creamy notes of the cake.
For an after dinner treat, a small, chilled glass of Limoncello enhances the citrus notes perfectly.

Recipe FAQs
Why is my sponge cake (Pan di Spagna) dense instead of light and airy?
A dense sponge is usually the result of overmixing the batter after the flour has been added, which causes the delicate whipped eggs to deflate. Ensure you fold the dry ingredients gently by hand using a spatula, working quickly to maintain the maximum volume of the meringue mixture.
Also, make sure your oven temperature is accurate, as baking at too low a temperature can prevent the cake from rising properly.
My Pastry Cream (Crema Pasticcera) is lumpy or too runny. How do I fix it?
If the cream has slight lumps, you can quickly run an immersion blender through it or press it through a fine mesh sieve while it is still warm, then chill immediately. If the cream is too runny, return it to the stovetop and cook for an additional 1-2 minutes while whisking vigorously, ensuring it reaches a full rolling boil to properly activate the starches.
How far in advance can I assemble the Torta Mimosa, and how should I store it?
This cake is ideally assembled 12 to 24 hours before serving, as the time allows the liqueur syrup and pastry cream to fully moisten and integrate into the sponge layers, enhancing the flavor and texture. Store the finished cake tightly covered in an airtight container or under a dome in the refrigerator.
I don't want to use alcohol in the soaking syrup. What is a good substitute?
For a non-alcoholic version, replace the liqueur (such as Limoncello or Rum) with an equal amount of freshly squeezed orange or pineapple juice. You can also use a simple sugar syrup infused with a teaspoon of vanilla extract or citrus zest to maintain moisture without the alcohol content.
My sponge cubes don't look like fluffy mimosa flowers; they look flat. What went wrong?
The "mimosa" effect requires the sponge cubes to be light, airy, and irregular, replicating the pollen flowers. Ensure your trimming knife is very sharp, and try pushing the diced cubes through a coarse wire sieve just before placing them on the cake to give them a fresh, fluffy lift.
Avoid pressing the cubes too hard onto the cake surface.
Can I add fruit to the filling, and if so, which fruits work best?
Yes, adding fruit is a wonderful variation; traditional additions include canned peaches or sliced fresh pineapple layered over the pastry cream. If using fruit, make sure it is extremely well drained or patted dry before inclusion, as excess moisture will cause the pastry cream to thin and potentially seep out of the layers.
Can Torta Mimosa be frozen for later use?
It is generally not recommended to freeze the fully assembled Torta Mimosa because the high moisture content of the pastry cream tends to separate and become grainy upon thawing. However, the plain sponge layers (Pan di Spagna) can be wrapped tightly and frozen successfully for up to three months.
Thaw the sponge in the refrigerator before assembling the cake.
Classic Italian Mimosa Cake Recipe

Ingredients:
Instructions:
Nutrition Facts:
| Calories | 1000 kcal |
|---|---|
| Protein | 22.5 g |
| Fat | 41.3 g |
| Carbs | 107.7 g |
