Strawberry Jam: the Perfect Small Batch Preserve
- The Perfect Preserve: Cracking Good Classic Strawberry Jam (Small Batch)
- Essential Components: Ingredients and Pre-Jam Preparation
- Detailed Instructions for Making Perfect Strawberry Jam
- Mastering the Set: Why This Method Guarantees Success
- Expert Tips and Troubleshooting the Jam Process
- Storage, Safety, and Serving Your Classic Strawberry Preserve
- Recipe FAQs
- 📝 Recipe Card
The Perfect Preserve: Cracking Good Classic Strawberry Jam (Small Batch)
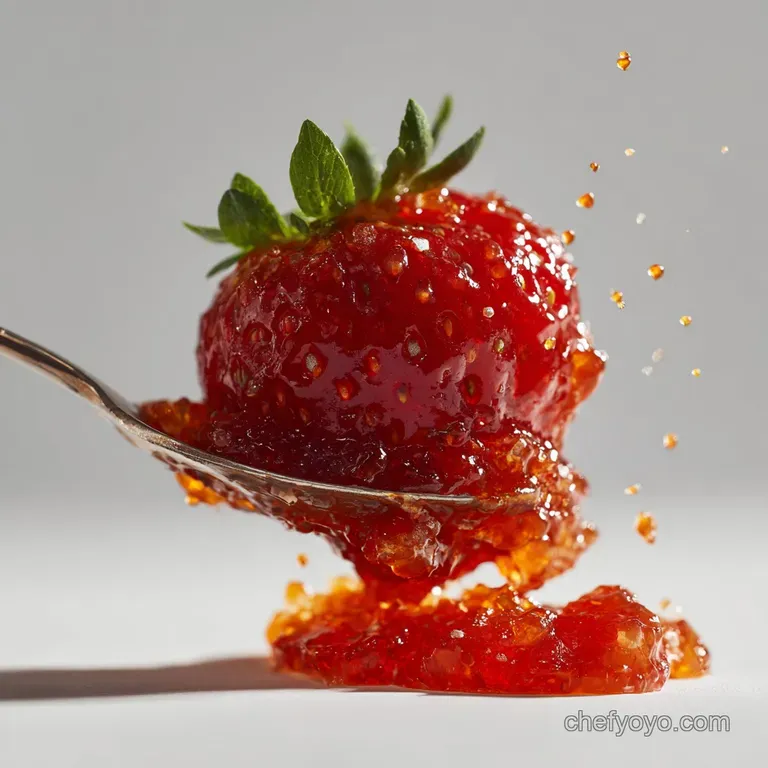
Did you know sunshine has a scent? It smells exactly like this perfect Strawberry Jam bubbling gently on the stove. That deep, vibrant ruby red colour and the way the berries burst into submission it’s pure magic.
Trust me, the texture is miles away from that gloopy, sickly sweet stuff you find in the supermarket aisle.
I know, making preserves sounds like a chore for a bygone era, but honestly, this small batch method is ridiculously simple. It uses only four ingredients, and because we’re not wrestling with 10 pounds of fruit, the whole process is low-stress, faster, and way cheaper than buying artisanal pots.
You are going to wonder why you waited so long to make homemade Strawberry Jam .
We are skipping the commercial pectin here, relying instead on old-school technique and the natural acidity of lemon juice. If you’re ready to capture the peak flavour of summer in a jar, let’s crack on and make the best Strawberry Jam recipe you’ve ever tasted.
Capturing Summer: The Essential Small Batch Strawberry Preserve
This recipe works beautifully because we treat the strawberries with respect. We are not just boiling fruit; we are encouraging natural processes. Maceration is the secret weapon here.
Letting the sugar pull the moisture from the berries before cooking means the sugar dissolves perfectly, which prevents scorching and guarantees a clear, jewel like finish.
The key to preserving that vibrant red colour in your Homemade Strawberry Jam is speed. We use a wide pan to maximize evaporation. A faster evaporation rate means less time the fruit spends oxidizing over heat, ensuring the flavour is bright, fresh, and intensely strawberry-y, not dull and muddy.
This high fruit, low-sugar ratio makes a true preserve, where you can still feel the texture of the fruit.
The Appeal of High Fruit, Low-Stress Jam Making
Forget the terrifying canning guides of yesteryear. We are making a modest, manageable batch. This volume allows you to focus purely on hitting that crucial setting point without getting overwhelmed.
If you’ve been intimidated by preserving before, this simple method for Easy Strawberry Jam Recipe is your entry ticket.
Jam vs. Jelly: Understanding the Texture Difference
Jam, like the Strawberry Jam we are making today, includes the actual fruit pieces suspended in a gelled syrup. It’s chunky and spoonable. Jelly, conversely, is made only from the strained juice, resulting in a perfectly clear, solid gel with no fruit solids whatsoever.
Preserves are generally looser than jams, though many people use the terms interchangeably these days.
Preparation Timeline and Difficulty Snapshot
The actual cooking time is quite short, maybe 20 minutes tops. However, you absolutely must account for the maceration period. This is the difference between mushy, scorched fruit and perfect, glistening jam. Don’t skip the rest period.
Essential Components: Ingredients and Pre-Jam Preparation
To make truly incredible Fresh Strawberry Jam , you need the best possible ingredients. Since there are only four, quality is paramount. If you start with bland berries, your jam will be bland, too. It’s science.
Selecting the Best Strawberries for Jamming
Always choose ripe, firm berries that smell intensely sweet. Don’t worry if you find a few that are slightly under ripe that’s actually a good thing! Slightly greener berries contain higher levels of natural pectin, which helps the jam set beautifully without the need for commercial powder.
Farmers' market finds always win here.
Hulling and Prepping the Fruit: Techniques for Efficiency
Wash your berries gently and thoroughly. I prefer to hull them using a small pairing knife or even a metal straw to pop the core out cleanly. Slice the strawberries evenly halving smaller ones and quartering large ones ensures they break down uniformly during the boil.
Chef’s Note: Consistency in size matters. Unevenly cut strawberries will result in some pieces dissolving entirely while others remain too firm. Aim for half inch pieces.
Using Frozen Berries: Adjusting the Process
Can you use frozen strawberries for Homemade Strawberry Jam ? Yes, absolutely! Just make sure they are completely thawed before you begin the maceration stage.
Frozen berries release significantly more water, so be prepared for a slightly longer cooking time (add 5- 10 minutes) to boil off that extra liquid and hit the setting temperature.
Sugar Ratios: Finding the Sweet Spot for Natural Pectin
The ratio of fruit to sugar (typically 1:1, or slightly less sugar for a softer set) is crucial for the set, not just the sweetness. Sugar acts as a preservative and helps the pectin bond.
For this particular Small Batch Strawberry Jam , the ratio is slightly weighted towards the fruit, giving that intense flavour burst.
| Ingredient | Substitute/Alternative |
|---|---|
| Granulated Sugar | Use superfine (caster) sugar for faster dissolving, or light brown sugar for a subtle molasses depth (though this will mute the bright red color). |
| Fresh Lemon Juice | Bottled lemon juice works in a pinch, or 2 tablespoons of white wine vinegar will provide the necessary acidity. |
| Fresh Strawberries | Fully thawed frozen strawberries (as mentioned above) or mixed berries (like raspberries or blueberries, though cooking times may vary). |
Detailed Instructions for Making Perfect Strawberry Jam

This is where the magic happens. Follow these steps meticulously, and you will have perfect preserve consistency every time.
The Maceration Process: Drawing Out Natural Juices
After hulling and slicing, combine the strawberries and sugar in your wide, heavy bottomed pan. Give it a gentle toss to coat everything evenly. Cover the pan and let it sit at room temperature for a minimum of two hours.
If you have the time, letting it sit overnight in the fridge is ideal; this creates a beautiful, thick, clear syrup base ready for cooking.
Achieving a Rapid, Rolling Boil
Place your pan over the lowest heat setting. Stir constantly until every last crystal of sugar has dissolved. Do not raise the heat until the liquid is perfectly clear. When you drag a spoon across the bottom, there should be no gritty residue.
Once dissolved, stir in the lemon juice and crank the heat to high. Bring the mixture to a hard, rolling boil the kind that continues bubbling vigorously even when you stir it. Start timing the cooking process from this point forward.
The Cold Plate Test: Checking for Doneness (The 'Setting Point')
You are aiming for 105°C (221°F). Use a candy thermometer, keeping the bulb fully submerged but off the bottom of the pan. Stir occasionally to prevent scorching. Once the temperature is reached, remove the pan from the heat immediately.
This step is essential for fantastic Strawberry Preserves Recipe .
I once completely forgot to dissolve the sugar properly before bringing it to a boil. My entire batch of jam crystallized in the jar, turning into strawberry rock candy. Dissolve that sugar!
Skimming Foam and Bottling Safely
Once the set point is reached, turn off the heat. Use a small knob of butter (if you choose) stirred in now it works wonders on dissipating that white foam. If not, use a skimmer spoon or large regular spoon to carefully lift the foam off the surface.
Letting the jam rest for about five to ten minutes off the heat allows the fruit pieces to distribute evenly, stopping them from floating to the top of the jar later. Now you can ladle the smooth, bright red Strawberry Jam into your sterilised jars.
Mastering the Set: Why This Method Guarantees Success
The combination of three factors guarantees success for this Homemade Strawberry Jam : acidity (lemon juice), sugar (preservation and bonding), and heat (concentrating the solution). The rapid, high temperature boil strips water quickly, concentrating the natural pectin and sugar.
This method for Strawberry Jam No Pectin works because strawberries, while generally low in pectin, respond beautifully to the acidic environment of the lemon juice, which activates whatever pectin they do have.
Expert Tips and Troubleshooting the Jam Process
The Role of Lemon Juice in Achieving a Natural Set
Lemon juice isn't just for flavour; it's the chemistry activator. The acidity lowers the pH of the jam, which allows the pectin molecules to bond together and form the necessary gel structure.
Without enough acid, your jam will remain a sweet, sticky syrup instead of a luscious Fresh Strawberry Jam .
Maximizing Fruit Flavor and Vibrant Red Color
Keep your cooking time short! A longer boil results in a deeper, duller red and a more caramelized flavour. By using a wide pan and monitoring the temperature strictly, you reduce cooking time significantly, preserving that incredible, bright red hue and fresh berry taste. We want summer captured, not cooked to death.
Dealing with a Jam That Won't Set (Fixing Runny Jam)
Uh oh, the wrinkle test failed, and your jam is runny. Don’t panic! This is the most common mistake. Simply return the jam to the heat and boil for another 2– 4 minutes. Re-test using a fresh, cold plate.
If it still won't set, you can stir in 1 teaspoon of commercial pectin mixed with a tablespoon of sugar and boil rapidly for one minute. The beauty of this Easy Strawberry Jam Recipe is that it's very forgiving.
Preventing Crystallization and Burnt Jam
Crystallization usually happens because the sugar didn't dissolve completely before the hard boil. Burnt jam is caused by stirring too infrequently or using a pan that’s too thin. Use a heavy bottomed pan and stir every minute or so once the rolling boil begins.
Sterilizing Jars: Hygiene and Best Practices
Safety first! Jars must be clean and sterile. You can wash them thoroughly in hot, soapy water and then bake them in an oven (120°C / 250°F) for 15 minutes. Alternatively, simmer them in a deep pot of water for 10 minutes.
Keep the jars warm right up until filling to prevent thermal shock (jar cracking).
Guide to Water Bath Canning This Small Batch
While this small batch of Strawberry Jam is fine for simple fridge storage, if you want long term pantry stability, you need to process it. Fill the jars, leaving 1/2 inch headspace, wipe the rims, and seal them tightly.
Place the jars in a boiling water bath, ensuring the water covers the lids by at least one inch. Process for 10 minutes (adjusting for altitude). Carefully remove them and let them cool on a towel undisturbed. You should hear that satisfying ping as the lids seal.
Storage, Safety, and Serving Your Classic Strawberry Preserve
Once your glorious Homemade Strawberry Jam has cooled, check the seals the centre of the lid should be concave. Store sealed jars in a cool, dark place for up to 12 months. Once a jar is opened, it needs to live in the refrigerator and should be consumed within 3 weeks.
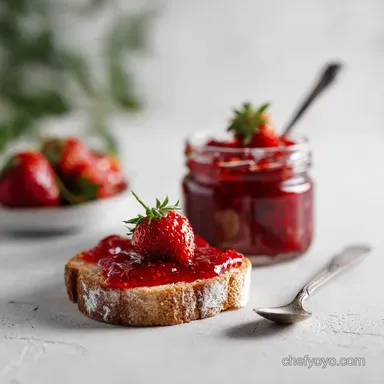
Delicious Ways to Use Your Jam
You know the classics: toast, scones, or dolloped over a fantastic homemade Roasted Strawberry Banana Bread: The Brown Butter Summer Loaf Recipe . But you can also swirl this rich Strawberry Jam into yogurt, use it as a filling for chocolate tarts, or pair it with cheese.
For dessert, I love using this exact jam as the filling for little No Bake Strawberry Pie Bites: Simple, Creamy Summer Dessert . Or, when I’m feeling really ambitious, it’s the best partner to the flaky crust in my famous Strawberry Rhubarb Pie: Ultimate Flaky Crust Recipe . This recipe yields such a pure, intense flavour, it elevates everything it touches. Go forth and jam!

Recipe FAQs
Why didn't my strawberry jam set properly, and how can I fix it?
Setting issues often stem from insufficient cooking time or not reaching the crucial setting point of 105°C (221°F). To rectify a runny batch, return the jam to the heat, add another tablespoon of lemon juice for extra pectin, and boil rapidly until the temperature is reached again or the wrinkle test proves successful.
Can I reduce the amount of sugar in this small batch recipe?
While possible, sugar is a critical ingredient that aids in preservation, texture, and achieving a proper set, not just sweetness. If you reduce the sugar content by more than 20-25%, you must compensate by adding commercial low-sugar pectin, otherwise the jam will be too runny and will spoil quickly.
My jam developed a white foam or 'scum' on top; is it safe, and how do I prevent it?
The foam is safe; it is simply air trapped with fruit impurities that rises during the hard boil. To prevent excessive foaming, try stirring in a tiny knob (about half a teaspoon) of butter or margarine during the last few minutes of cooking, or simply skim the foam off with a slotted spoon before filling the jars.
Do I absolutely have to sterilize the jars for a small batch recipe?
Yes, sterilizing your jars and lids is non-negotiable for safety and preservation, regardless of the batch size. Skipping this crucial step introduces bacteria and mold spores, which will cause the jam to spoil quickly even if stored properly.
What type of strawberry is best for making jam?
Choose firm, slightly under ripe strawberries, as these contain higher levels of natural pectin, which helps the jam set without commercial additives. If using very ripe or soft berries, ensure you add the maximum amount of lemon juice stipulated in the recipe to assist with the gelling process.
How long will this homemade jam last once sealed and opened?
If the jars are properly sterilized and sealed, the jam will maintain its quality for 1 to 2 years when stored in a cool, dark pantry. Once a jar is opened, it must be refrigerated and consumed within 3 to 4 weeks to ensure the best flavour and safety.
Can I freeze the jam instead of canning it?
Yes, you can certainly skip the traditional canning process and use freezer storage, though this usually requires a specific low-sugar freezer jam recipe. If freezing this classic high sugar jam, ensure you use freezer safe plastic containers and leave at least half an inch of headspace before sealing.
Classic Small Batch Strawberry Jam
Ingredients:
Instructions:
Nutrition Facts:
| Calories | 55 kcal |
|---|---|
| Fat | 0 g |
| Fiber | 0.5 g |
