Peppermint Meringues Jolly Good Crisp Swiss Kisses for Christmas
- Why the Swiss Method Guarantees the Best Peppermint Meringues
- Essential Elements for Festive Peppermint Meringue Baking
- Required Kitchen Tools: Precision Equipment for Swiss Meringue Success
- Building Stability: Preparing the Swiss Meringue Base
- Shaping and Setting Your Holiday Peppermint Meringues
- The Low and Slow Approach to Baking and Drying
- Expert Troubleshooting: Common Meringue Mistakes and Fixes
- Storage and Serving: Maximizing the Shelf Life of Crisp Meringues
- Recipe FAQs
- 📝 Recipe Card
Why the Swiss Method Guarantees the Best Peppermint Meringues
Listen, I've tried all the meringue methods. French? Too often ends up dusty and sad, collapses if you look at it funny. Italian? Fantastic for stability, but requires molten sugar syrup and a lot of nerve, frankly. We are home cooks, not professional confectioners trying to build edible architecture.
But the Swiss method? Good heavens, it is the absolute sweet spot. It takes the simplicity of the ingredients, adds a critical step of gentle heat, and delivers reliability every single time.
If you’ve struggled to get those gorgeous, glossy peaks that hold their shape perfectly for Cute Meringue Cookies , this is the key. The stability you gain from gently cooking the egg whites before you whip them means these little treasures won't slump on the sheet pan, and they won't cry later.
Understanding the Magic of the Bain and Marie for Stability
Why bother with this extra step? It’s all about protein structure. When you warm the egg whites and the sugar together over simmering water (that’s the bain and marie, or double boiler, setup), two things happen. First, the heat pasteurizes the eggs, which is always nice.
Second, and crucially for structure, the heat starts to denature the egg white proteins. They begin to unravel just slightly, making them much more receptive to receiving air when you hit them with the whisk. The dissolved sugar then binds to these partially cooked proteins.
The result is a highly concentrated, thick, brilliant white marshmallow fluff before the whisk even touches it. It’s brilliant.
The Difference Between Crisp and Delightfully Chewy Meringue Centers
The texture of your final peppermint meringues comes down entirely to time and temperature. Meringues don't truly "bake"; they dry out. If you want that gorgeous, shatteringly crisp shell and an interior that is completely dry and hollow, you need to go low, slow, and cool even slower.
A higher oven temperature (say, 250°F) might make them crisp faster, but you risk browning them turning them into beige lumps. We want pure white, pristine Meringue Christmas beauties, right? Stick to 200°F and commit to the drying time.
If you prefer a slightly chewy center (I know some people do!), reduce the drying time by about 20 minutes, but still cool them completely in the turned and off oven.
Essential Elements for Festive Peppermint Meringue Baking
You need three things for successful meringues: patience, precision, and an absolutely spotless mixing bowl. Honestly, if you can measure correctly and wait patiently for the peaks to form, you’re 90% of the way there.
The ingredients list is minimal, which is why sourcing high and quality elements like pure peppermint extract and superfine sugar makes a real difference to the final flavour and texture of these Christmas candy recipes. We’re aiming for glossy, stripey, candy and cane goodness.
Required Kitchen Tools: Precision Equipment for Swiss Meringue Success
Meringues are a scientific endeavor disguised as a delicious cookie. You need the right gear. Trying to make a Swiss meringue base by hand whisking? Don’t. Save your arm strength.
| Essential Tool | Why You Need It |
|---|---|
| Stand Mixer | Sustained high and speed whisking is non and negotiable for volume. |
| Digital Thermometer | Guarantees the necessary 160°F for stability and safety. |
| Piping Bag/Tip | Creates beautiful, uniform shapes (consistency helps with even drying). |
Sourcing the Finest Flavor: Egg Whites and Granulated Sugar
Always, always weigh your egg whites. Measuring by volume (cups) is too vague. Four large egg whites typically weigh 120 grams, and we need that ratio of sugar to be exactly double (240 grams). Use caster sugar also called superfine sugar.
It dissolves faster than standard granulated sugar, which is critical in the Swiss method, because if the sugar hasn't completely dissolved, the finished peppermint meringues will weep or feel gritty. Yuck.
The Critical Role of Cream of Tartar or Lemon Juice (Stabilizers)
This is the safety net. Cream of tartar (an acidic powder) or lemon juice (another acid) helps ensure those protein bonds stay strong while you’re whipping. It essentially gives the meringue structure a backbone.
You can absolutely make peppermint meringues without cream of tartar , but you should swap it out for the lemon juice or a tiny splash of white vinegar. Don't skip the acid; it helps prevent deflation when you add the extract later on.
Perfecting the Peppermint Flavor and Color Palette
We are making peppermint meringues, so use pure peppermint extract, not that imitation stuff. Imitation extracts often contain oils that can destabilize the meringue structure. A teaspoon is usually plenty, as the flavor concentrates while the meringues dry. For color, use a high and quality gel food coloring.
Liquids add too much moisture. I love the simple, festive look of red stripes for Meringue Christmas cookies.
Ensuring Your Mixing Bowl is Absolutely Fat and Free
I cannot stress this enough. Fat is the grim reaper of meringue volume. If there is a single speck of egg yolk, grease from a previous batch of butter cookies, or even residue from soap, your meringue will struggle to whip up. It might reach soft peaks, but it will absolutely fail to get to the stiff, glossy stage.
Wipe your metal or glass bowl and your whisk attachment down with a paper towel dampened with white vinegar or lemon juice just before you start. It’s cheap insurance.
Choosing the Right Piping Tip for Elegant Meringue Shapes
For the classic, cute meringue cookies look (the "kiss" or rosette), the Wilton 1M star tip is your best friend. It creates gorgeous swirls, adding elegance instantly. If you want something chunkier, a simple round tip (like the Ateco 808) works too, but the star tip really makes the stripes pop.
Building Stability: Preparing the Swiss Meringue Base

Right then. Let's crack on. This stage is where the magic (and the thermometer) comes into play. You need gentle heat, meaning the water in your saucepan should be simmering gently, not boiling vigorously. We are looking for steam to heat the bowl, not direct heat.
Put your egg whites, sugar, salt, and cream of tartar in the clean bowl and place it over the simmering water (make sure the bottom of the bowl doesn’t touch the water!). Whisk constantly by hand until that mixture is warm to the touch.
Related Recipes Worth Trying
- Rich Fudgy Christmas Brownies with Peppermint Glaze — Make the ultimate Chewy Frosted Brownies this holiday These rich fudgy Christmas brownies feature a stunning marble swirl and a bright peppermint topping...
- Easy Peppermint Bark Recipe: Christmas Treat Perfection! — Whip up this classic Peppermint Bark recipe! Easy, foolproof, and utterly delicious - like After Eights meet a Terry's Chocolate Orange! Get festive, Guv'nor!
Shaping and Setting Your Holiday Peppermint Meringues
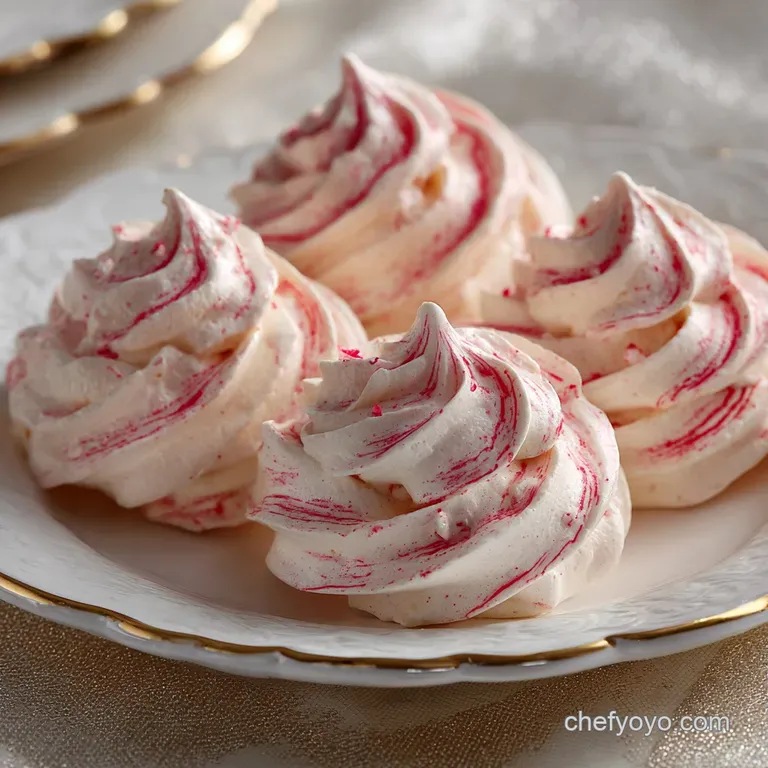
Once the meringue is whipped, stiff, and glossy, it’s ready for its close and up. If you want that gorgeous candy and cane swirl, take a fine paintbrush and paint a couple of vertical stripes of red gel coloring right up the inside of your piping bag before you load it with meringue.
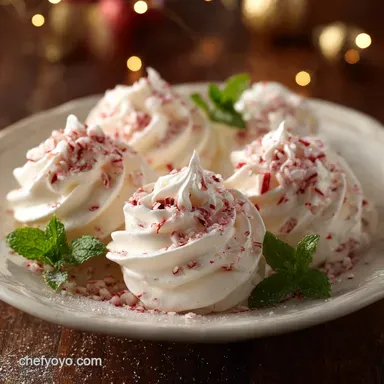
This ensures the color transfers beautifully as the meringue is forced through the tip. Pipe neat, consistent little rosettes onto your prepared baking sheets. Consistency is key for even drying time. Immediately after piping, shower them with a little crushed candy cane.
These are perfect peppermint meringues with candy canes .
The Low and Slow Approach to Baking and Drying
Remember, 200°F (or even 190°F if your oven runs hot) is your friend. We aren't cooking them; we are drying them out over a period of almost two hours. If you start to see them turning even slightly brown, your oven is too hot.
Reduce the temperature and consider propping the door open slightly with a wooden spoon to let humidity escape.
Gently Heating the Whites to Dissolve Sugar Crystals Completely
This is where the finger test comes in, and trust me, you can't skip it. While whisking the mixture over the bain and marie, pinch a tiny bit of the mixture between your thumb and forefinger. If you feel any grittiness, the sugar isn't dissolved. Keep whisking gently until it is completely smooth.
If you have a thermometer, aim for 160°F (71°C). This temperature ensures the proteins are ready to whip beautifully.
Whipping the Meringue from Soft Clouds to Stiff, Glossy Peaks
Transfer the warm, syrupy mixture to your stand mixer and start whipping on medium speed. After a few minutes, crank it up to medium and high. You will see the volume expand rapidly. Don't stop until those peaks are incredibly stiff, glossy, and hold their shape perfectly when you lift the whisk.
More importantly, touch the bowl it should feel completely cool. If the bowl is still warm, the meringue will collapse when piped.
Incorporating Flavor and Color Without Deflating the Volume
Once the meringue is stiff and cool, turn the mixer down to the lowest setting and drizzle in the peppermint extract. Stop the mixer the second it is incorporated. If you are adding stripes, that happens in the bag.
If you were folding in something chunky (like the crushed peppermint meringues dipped in chocolate variation), use a rubber spatula and fold gently, using the minimum number of strokes necessary.
CRITICAL NOTE: Do not overmix after adding the flavorings. Extracts can slightly destabilize the structure, so incorporate them quickly on the lowest speed possible.
Piping Techniques for Uniform and Beautiful Meringue Kisses
Aim for uniformity. If one meringue is twice the size of its neighbor, it will take twice as long to dry. Hold the piping bag perpendicular to the tray (straight up) and press down consistently, pulling the bag straight up when you’ve reached the desired height.
Practice a few on a spare piece of parchment if you need to.
Testing for the Perfect Crisp Shell and Dry Interior
After about 1 hour 45 minutes, check them. They should lift easily and cleanly off the parchment paper. If they stick at all, they need more time. Carefully tap the bottom of one meringue; it should sound hollow and feel completely solid. If it gives way or feels damp, leave it in longer.
Expert Troubleshooting: Common Meringue Mistakes and Fixes
Meringues can be temperamental, but failures usually come down to one of three things: fat, heat, or humidity.
Why Your Meringue Failed to Reach Stiff Peaks
The most common culprit is fat contamination. See the "Fat and Free" section above. The second reason is usually rushing the process; you must wait until that mixture is completely cool after whipping before you stop the mixer. Warm meringue simply won't hold structure. The third reason? Humidity.
If you try to make meringues on a rainy, muggy day, you're fighting a losing battle. Save them for a crisp, dry day.
Avoiding the Weeping and Sticky Meringue Phenomenon
Weeping, sticky meringue is a sign of either undissolved sugar or high humidity during baking/storage. If the sugar didn't dissolve over the bain and marie, it eventually sweats out of the baked meringue. If you notice stickiness after they come out of the oven, it usually means the air in your kitchen is too damp.
Try storing them immediately (see below) or, if they are fresh out of the oven, leave them in the oven with the door cracked to cool, using the oven itself as a dry box.
Storage and Serving: Maximizing the Shelf Life of Crisp Meringues
The enemy is moisture. Air moisture, residual moisture in the oven, or moisture from your counter. Treat them like delicate moisture and haters.
Best Practices for Airtight Storage Post and Baking
Once they are totally, completely cool (and I mean hours later, not minutes), transfer them to an airtight container. Use metal tins or rigid plastic containers. Do not use Ziploc bags, as they don't offer enough protection against crushing or moisture changes.
If you layer them, put a sheet of parchment between the layers. Stored correctly, these peppermint meringues recipe cookies will last up to two weeks at room temperature. Never refrigerate meringues!
Creative Festive Variations on the Peppermint Meringue Recipe
If you need a break from pure peppermint, these are easy to jazz up:
- Hot Chocolate Meringues: Swap the peppermint extract for half vanilla and half almond, and fold in cocoa powder just before piping.
- Chocolate Dipped: After the meringues are fully cooled and crisp, dip the bottoms into melted dark chocolate. You can then sprinkle them with more crushed peppermint meringues with candy canes .
- Meringue Wreaths: Instead of kisses, pipe the meringue into small circular wreath shapes and decorate with tiny green sugar pearls before drying.

Recipe FAQs
I’m aiming for a shatteringly crisp texture, but my meringues ended up chewy. What went wrong?
Chewiness or “weeping” is usually down to moisture. Ensure your sugar is entirely dissolved during the bain marie phase (the finger test is crucial!), and make sure you leave the meringues to cool completely inside the turned off oven that slow process is vital for drawing all the remaining moisture out.
How do I store these delightful Peppermint Meringues so they stay crisp for Christmas?
Once completely cool, store your Peppermint Meringues immediately in a truly airtight container at room temperature, away from the oven or any heat source. Avoid the fridge entirely, as the condensation is their nemesis and will turn them sticky almost instantly!
My oven seems to run a bit hot; what’s the secret to stopping the meringues from browning?
Meringues don’t bake; they dry. If you notice any hint of colour, immediately drop the temperature further, and consider propping the oven door slightly ajar using a wooden spoon. This allows damp air to escape and keeps those little peaks gloriously white, like fresh snow.
Is it really necessary to use cream of tartar, or is there something else I can use in a pinch?
Cream of tartar acts as a stabilizer, helping the egg proteins hold their air. If you are fresh out, you can absolutely substitute it with 1 teaspoon of fresh lemon juice or white vinegar it’s the acidity that does the trick!
Can I skip the crushed candy canes or use a different topping for a more refined look?
Absolutely, feel free to skip the candy canes if you prefer less crunch! For a sophisticated variation, simply dust the piped kisses with edible silver glitter or fine cocoa powder (if using a vanilla/chocolate meringue variation) immediately before placing them in the oven.
Crisp Swiss Peppermint Meringues Recipe
Ingredients:
Instructions:
Nutrition Facts:
| Calories | 416 kcal |
|---|---|
| Protein | 6.6 g |
| Fat | 6.0 g |
| Carbs | 81.5 g |
