Oven Fried Chicken: Chefs Crispiest Buttermilk Brined Recipe
- Achieving Truly Crispy Oven Fried Chicken at Home
- The Science of the Shattering Crust: Why This Oven Fried Chicken Recipe Excels
- Essential Ingredients and Smart Swaps for Your Coating
- Step-by-Step: Preparing Your Crispiest Batch of Oven Fried Chicken
- Chef's Pro Tips and Troubleshooting Common Oven Fried Chicken Errors
- Reheating and Storing Leftover Crunchy Pieces
- Perfect Side Dishes and Pairing Recommendations
- Recipe FAQs
- 📝 Recipe Card
Achieving Truly Crispy Oven Fried Chicken at Home
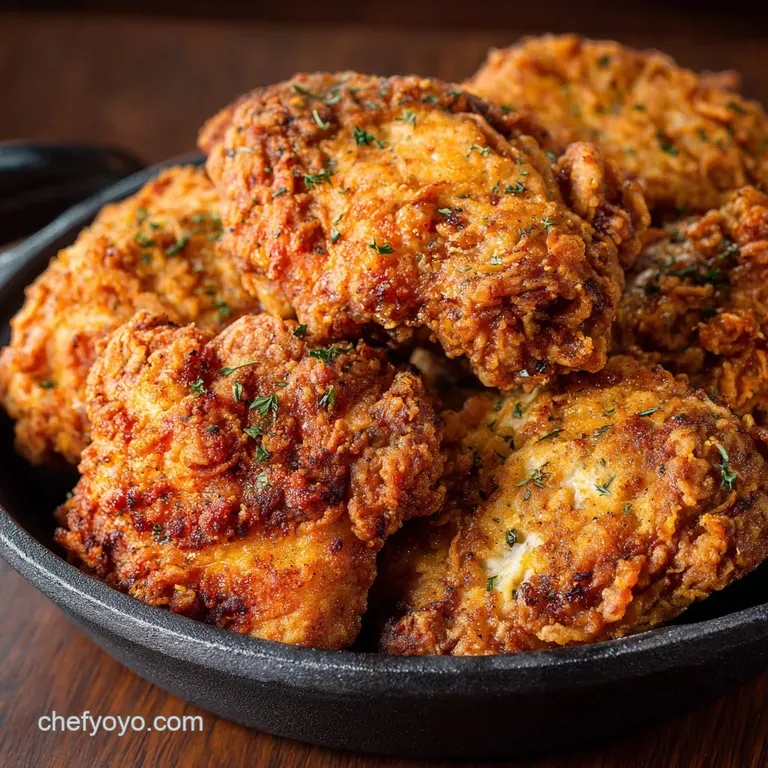
Forget everything you think you know about "healthy" baked versions of fried food. When this Oven Fried Chicken hits the plate, you don’t just see the deep golden colour; you hear the crunch as you cut into it, which is the ultimate sensory test.
It’s got that signature shattering crust that is completely addictive, making you forget the greasy mess of traditional frying immediately.
Deep frying is a huge commitment it smells up the house, demands oil disposal, and frankly, I’m too lazy for all that effort on a Tuesday. This recipe is an absolute lifesaver because it gives you maximum comfort food reward with minimal cleanup.
It’s shockingly easy to master and way cheaper than buying a fryer full of oil, too.
So, how do we ditch the deep fat fryer without ending up with sad, flabby chicken pieces? The secret lies in chemistry, a tiny bit of butter, and mastering the breadcrumb-to-buttermilk ratio. Let’s crack on and get you that perfect, truly crispy Oven Fried Chicken batch tonight.
The Science of the Shattering Crust: Why This Oven Fried Chicken Recipe Excels
I spent years making baked chicken that was just "okay." It wasn't until I figured out the exact ratio of moisture, fat, and high surface-area crumbs that this recipe went from good to truly incredible. This isn't just baking chicken; it's replicating the deep fry process using controlled oven heat.
The Deep Fried Texture Without the Mess
In a deep fryer, the oil fully surrounds the coating, forcing it to crisp up rapidly and simultaneously. When baking, you rely on hot air, which is slower. The wire rack is crucial because it lets the hot air hit the underside of the chicken, ensuring 360 degree crispness.
How Buttermilk Delivers Max Tenderness
Buttermilk is non-negotiable for true comfort food chicken. The mild lactic acid in the buttermilk breaks down the tough protein fibers, leading to incredibly tender, juicy meat. It’s not just for flavour; it’s basically an insurance policy against dry pieces, especially when using bone-in cuts.
Defining the Butter Crisped Panko Coating
This is the holy grail discovery. Standard breadcrumbs are often too fine and can get gummy when moistened by the buttermilk. Panko provides massive, flaky surface area, which is what traps the air and creates that wonderful jagged texture.
The Buttermilk Brine Effect: Moisture Retention
The brine does two jobs simultaneously: tenderising the meat (thank you, acid) and seasoning it deeply. Even after a long bake, the internal moisture levels stay remarkably high because the acid and salt solution has conditioned the meat fibers to hold onto liquid. This means juicy pieces every single time.
The Melted Butter & Panko Secret Weapon
This step is revolutionary, trust me. Instead of relying on the chicken's fat or spraying oil only on the surface, we rub melted butter directly into the Panko mixture before coating. This pre-greases every single crumb, which allows the coating to immediately start "frying" itself the second it hits the hot oven.
High Heat and Convection: Maximizing Crispness
We start the cook at a higher temperature (400°F / 200°C) to blast the coating and set the crunch instantly. Then, we drop the temperature slightly to ensure the meat cooks through without burning the perfectly golden crust. This two-stage temperature approach is key to success.
Essential Ingredients and Smart Swaps for Your Coating
You don't need fancy ingredients for perfect Oven Fried Chicken, but you do need the right ingredients. Layering your spices is essential; don't just rely on salt and pepper!
Selecting the Right Cut for Optimal Baking
I highly recommend bone-in, skin-on thighs and drumsticks for this method. They have enough fat and moisture to withstand the longer bake time without drying out. White meat fans can use breasts, but you must pound them slightly thinner and reduce the baking time significantly.
Mastering the Spice Blend Ratio
The combination of smoked paprika, garlic powder, and onion powder is my foundation for that classic, savoury Southern flavour. The smoked paprika is essential because it gives the coating a rich, deep colour instantly, making it look authentically fried.
My personal quirky touch is a pinch of dried thyme; it adds a subtle, earthy depth you just can’t replicate with anything else.
Buttermilk Alternatives and dairy-free Options
| If You Need... | Substitute With... | Why It Works |
|---|---|---|
| No Buttermilk? | 1 ¾ cups standard milk + 1 Tbsp white vinegar or lemon juice. | The acid creates a quick, slightly curdled tenderizer (though true buttermilk is better). |
| No Butter? | Neutral vegetable oil (rapeseed, canola) rubbed into the Panko. | Provides the necessary fat content for browning and crisping. |
Why Panko Breadcrumbs Are Non-Negotiable
Seriously, skip the fine, dusty stuff. Panko creates a flaky, rugged terrain on the surface of the chicken that holds up against the high heat and the moisture of the buttermilk. If you must go gluten-free, crushed cornflakes work wonders and are almost as crunchy.
step-by-step: Preparing Your Crispiest Batch of Oven Fried Chicken
This process takes a little planning, primarily because of the brining time, but the active steps are quick and easy.
Brining and Draining the Pieces Correctly
Once your chicken is chilling in the buttermilk (ideally 4- 8 hours!), the first crucial step is draining. Don't rinse the chicken you want that thick, tacky buttermilk residue to remain on the surface.
This moisture is what helps the Panko stick like glue, so let the excess drip off but keep that sticky coating intact.
The Triple Dredge Technique Explained
While we only use one bowl for the dry ingredients, the dredging needs commitment. You must press the chicken firmly into the butter coated Panko mix. Don't just roll it lightly; actively press and massage the crumbs onto the surface, ensuring there are absolutely no wet patches left exposed.
The harder you press, the less likely the coating is to flake off later.
Chef’s Note: Before dredging, I once forgot to rub the butter into the Panko and just drizzled it over the top afterwards. It was a disaster. The crumbs clumped unevenly, resulting in scorched patches next to pale, sad ones. Rub the fat in first!
Arranging the Pieces for Even Baking
The enemies of crispiness are crowding and moisture. Arrange your coated pieces on the wire rack so that there is at least an inch of space between each piece. If they are touching, steam gets trapped, and you will get soggy sides.
Then, lightly spray the tops of the pieces with oil this is the final assurance of deep gold colour.
Achieving the Golden Internal Temperature
We rely on time and sight, but an instant read thermometer is your best friend. Bone-in pieces, especially thighs, take about 45– 50 minutes to cook through.
The only true indicator of safety is reaching 74°C (165° F) in the thickest part of the meat (avoiding the bone).
Chef's Pro Tips and Troubleshooting Common Oven Fried Chicken Errors
We all make mistakes, but usually, they boil down to a few simple fixes. Mastering oven frying means anticipating where things might go wrong.
Preventing a Soggy Underside
This is the number one complaint about baked "fried" dishes. You must use a wire rack set over a baking sheet. The rack lifts the chicken, allowing air to circulate and preventing condensation from pooling underneath the pieces. Trust me on this; ditching the rack means ditching the crunch.
Fixing Coating Flaking Issues
Flaking happens if the chicken wasn't tacky enough when you dredged it, or if you didn't press the Panko hard enough. Remember that buttermilk residue is the sticky binder. If you have trouble, you can try a quick alternative dip: whisk one egg into the leftover buttermilk and dip the Panko coated chicken back into this mixture before pressing on a second, thinner coat of Panko.
Preheating the Pan: An Essential Step
Preheating your oven to 400°F (200°C) is mandatory, but go one step further: put the wire rack and baking sheet inside while the oven preheats. Placing the cold coated chicken onto a hot pan helps start the crisping process immediately upon contact, exactly mimicking the effect of dropping chicken into hot oil.
Reheating and Storing Leftover Crunchy Pieces
But does it freeze well? You bet, but only if you handle the leftovers correctly.
The Best Way to Reheat for Maximum Crispness
The microwave is the enemy of all things crispy it will turn your delicious coating into spongy sadness. The only way to revive that incredible shatter is with high, dry heat.
Pop the leftover pieces on a rack in a 180°C (350°F) oven or in an air fryer for about 8– 10 minutes, until piping hot and crackling again.
Guide to Freezing Fully Coated Buttermilk Pieces
You can freeze cooked leftovers for up to three months. Cool them completely, then wrap them tightly in foil and seal them in a freezer bag. Reheat them straight from the freezer on a rack in a hot oven (around 200°C/400°F) for 20 minutes until heated through.
Perfect Side Dishes and Pairing Recommendations
This incredibly rich, savoury chicken demands some contrast. We need brightness and acidity to cut through the beautiful fat and spice.
Classic Comfort Food Pairings
- Cool and Creamy: A vinegary Coleslaw or a simple, sharp green salad provides essential crunch and acid.
- Starchy Goodness: Creamy mashed potatoes are an obvious win, but I also love this with baked macaroni and cheese.
- A Contrasting Meal Idea: If you’re looking for a completely different flavor profile to serve the next night, try the sticky sweetness of my [Air Fryer AsianGlazed Boneless Chicken Thighs: Sticky Weeknight Winner] it’s a total palate cleanser!
- The Perfect Sauce: Serve with plenty of tangy BBQ sauce or a simple honey mustard dipping sauce.

Recipe FAQs
Why is my "oven fried" crust soggy or falling off?
A soggy crust is usually caused by excess moisture. Ensure the chicken pieces are patted extremely dry after removing them from the buttermilk brine before you begin the coating process.
Also, verify that the baking sheet is preheated and that the chicken is placed on a wire rack, allowing air to circulate completely around the pieces.
Can I skip the buttermilk brine to save time?
While you can technically skip it, the buttermilk brine is highly recommended as the acid tenderizes the meat fibers, guaranteeing a juicy result even when baking at high heat. If buttermilk is unavailable, you can substitute it with regular milk mixed with a tablespoon of vinegar or lemon juice, allowing it to curdle slightly before use.
How do I know the chicken is fully cooked without drying it out?
The only accurate way to guarantee safety and prevent dryness is using an instant read thermometer. Insert the thermometer into the thickest part of the thigh, ensuring it reads a minimum internal temperature of 165°F (74°C).
If the crust browns too quickly before the meat is cooked, loosely tent the chicken with foil for the remaining bake time.
Can I prepare the chicken ahead of time and bake it later?
It is not recommended to coat the chicken too far in advance, as the moisture from the meat will quickly saturate the Panko crumbs, leading to a soggy crust. If you need to prep ahead, complete the buttermilk soak, pat the chicken dry, and refrigerate for up to 24 hours; only coat the chicken just before placing it in the oven.
What is the best way to store and reheat leftovers to keep the crunch?
Store leftovers in an airtight container in the refrigerator for up to three days. To restore the beautiful crispness, reheat the chicken on a wire rack in a 350°F (175°C) oven or toaster oven for 10 15 minutes until heated through.
Never use the microwave, as this process will steam the coating and eliminate all crispiness.
Can I make this recipe gluten-free?
Yes, this recipe adapts very well to gluten-free dietary needs by simply substituting standard Panko breadcrumbs with a quality gluten-free Panko alternative. Alternatively, finely crushed gluten-free corn flakes or rice cereals also provide excellent texture and crunch when mixed with the melted butter.
Can I use boneless chicken breasts instead of bone-in pieces?
While boneless chicken can be used, it requires a significant adjustment to the cooking time to prevent dryness, typically reducing the bake time by 10 to 15 minutes. Ensure the boneless pieces are uniformly thick and check the internal temperature early, aiming for 165°F (74°C).
The bone-in pieces, however, usually remain juicier due to the bone insulation.
Crispy Buttermilk Oven Fried Chicken
Ingredients:
Instructions:
Nutrition Facts:
| Calories | 420 kcal |
|---|---|
| Protein | 4.2 g |
| Fat | 21.5 g |
| Carbs | 54.0 g |
