Chocolate Crinkle Cookies: Fudgy and Homemade
- Time: Active 10 minutes, Passive 135 minutes, Total 145 minutes
- Flavor/Texture Hook: A velvety chocolate center that shatters into a fudgy, brownie like crumb with every bite.
- Perfect for: Stress free holiday baking or a wholesome weeknight dessert treat.
- Creating Easy Chocolate Crinkle Cookies with Ease
- Essential Numbers for Every Batch
- Wholesome Components for Rich Fudgy Results
- Minimal Tools for a Rustic Kitchen
- Step by Step Assembly and Baking
- Correcting Common Texture and Appearance Issues
- Natural Adaptations for Modern Holiday Flavors
- Keeping Your Batch Fresh and Wholesome
- Perfect Presentations for Homemade Gifts
- Myths About The Crinkle Effect
- Recipe FAQs
- 📝 Recipe Card
Creating Easy Chocolate Crinkle Cookies with Ease
Forget everything you know about needing expensive couverture chocolate or heavy blocks of butter to make a rich, decadent cookie. There is a common myth in the baking world that a fudgy texture only comes from melted bars, but I am here to tell you that high-quality cocoa powder and simple vegetable oil are the real secrets to a rustic, artisanal finish.
When I first started making easy chocolate crinkle cookies, I used to think the cracks were a matter of luck, but it's actually all about the moisture balance in the dough.
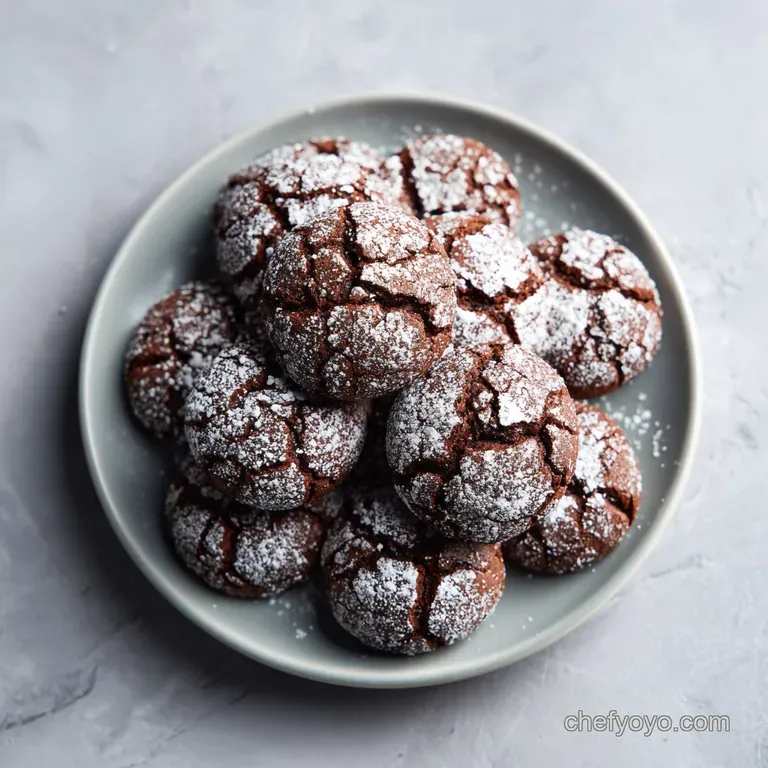
The first time I pulled a tray of these out of the oven, the aroma of deep, roasted cocoa filled my kitchen, smelling more like a professional patisserie than a home cook's hobby. I watched through the oven glass as the white powdered sugar began to separate, revealing the dark, volcanic chocolate beneath.
It was a sensory revelation. The contrast between the snowy exterior and the midnight dark interior makes these look like they took hours of effort, yet the hands on time is shorter than most laundry cycles.
We are going for a specific texture here - a delicate shatter on the outer edge that leads directly into a soft, almost underbaked center. This isn't a crunchy biscuit, nor is it a cakey muffin. It sits in that glorious middle ground where the chocolate feels intense but not overwhelming.
By sticking to a few simple rules about chilling and coating, you'll produce 24 cookies that look like they belong in a rustic bakery window.
Essential Numbers for Every Batch
Getting the timing right is the difference between a fudgy masterpiece and a dry, crumbly disappointment. This recipe thrives on patience, specifically during the chilling phase. If you rush the dough, it will simply melt into a flat puddle on your baking sheet.
We want height, we want cracks, and we want that velvety mouthfeel that only comes from properly hydrated flour and cocoa.
| Cookie Style | Prep Method | Chilling Time | Final Texture |
|---|---|---|---|
| Fast Version | Room temp dough | 0 minutes | Flat, crispy, greasy edges |
| Classic Version | Cold set dough | 135 minutes | Thick, fudgy, deep cracks |
| Overnight | Extended chill | 12 hours | Extra chewy, intense chocolate |
The logic behind the long wait is quite simple. Because we use vegetable oil instead of butter, the fats don't "solidify" in the same way. Instead, we are waiting for the flour and cocoa powder to fully absorb the moisture from the eggs and oil.
This creates a cohesive structure that can withstand the heat of a 180°C oven without losing its shape immediately. It is a slow motion transformation that pays off the moment you take that first warm bite.
The Physics of the Crack
When the dough balls hit the hot oven, the exterior sets faster than the interior. As the middle of the cookie heats up, the leavening agents (baking powder) create gas that forces the cookie to expand.
Since the outside has already started to form a crust from the sugar coating, it has nowhere to go but to pull apart, creating those beautiful, rustic fissures. It's a tiny volcanic eruption happening right on your baking tray, and it's spectacular to watch.
Wholesome Components for Rich Fudgy Results
The beauty of these easy chocolate crinkle cookies lies in the simplicity of the pantry. We aren't using anything fancy, just wholesome ingredients that, when treated with respect, produce an artisanal result.
I always reach for a dark, unsweetened cocoa powder because it provides the necessary bitterness to balance out the sweetness of the sugar coatings.
| Ingredient | Science Role | Pro Secret |
|---|---|---|
| Vegetable Oil | Fat Source | Keeps the crumb moist and fudgy even after the cookies have cooled completely. |
| Large Eggs | Structure | Provides the "lift" and binds the cocoa and sugar into a cohesive, scoopable dough. |
| Cocoa Powder | Flavor Base | Acts like flour but adds the intense, dark chocolate profile and helps with the "set." |
| Baking Powder | Leavening | Essential for the rapid expansion that creates the signature "crinkle" look. |
When selecting your ingredients, make sure your eggs are at room temperature. Cold eggs can sometimes make the oil and sugar mixture feel disjointed. I've found that whisking the sugar and oil until they are truly combined creates a better foundation for the eggs to emulsify into.
This results in a glossy, beautiful batter that looks like melted chocolate before you even add the dry ingredients.
Minimal Tools for a Rustic Kitchen
You don't need a heavy stand mixer or any specialized gadgets for this recipe. In fact, I prefer making these by hand with a simple whisk and a sturdy silicone spatula. There is something very grounding about feeling the resistance of the dough as it thickens.
It helps you understand when the flour is perfectly incorporated without overworking the gluten, which would lead to a tough, bread like cookie.
Equipment Essentials
- Large Mixing Bowl: Plenty of room for whisking without splashing cocoa powder everywhere.
- Whisk: For emulsifying the oil, sugar, and eggs into a silky base.
- Silicone Spatula: Best for gently folding in the flour to keep the texture tender.
- Baking Sheets: I recommend light colored aluminum for even heat distribution.
- Parchment Paper: Non negotiable for ensuring the sugar coating doesn't stick to the pan.
If you find yourself enjoying the process of making these, you might also love the tactile nature of my Proper Classic Chewy Oatmeal Cookies. Both recipes value the feel of the dough over the speed of a machine. Using a simple 1 tablespoon scoop or a basic measuring spoon is all you need to ensure all 24 cookies are the same size, which is the real secret to even baking.
step-by-step Assembly and Baking

This process is about layering textures. We start with a wet, almost liquid base and slowly build it into a dough that can be handled. The most important thing to remember is the order of operations.
Whisking the wet ingredients thoroughly ensures the sugar begins to dissolve, which contributes to that shiny, brownie like top we all love.
- Emulsify the Base: In your large bowl, whisk 60ml vegetable oil, 200g granulated sugar, and 60g cocoa powder. Note: Whisk until it looks like thick, dark syrup.
- Incorporate Eggs: Add 2 large eggs one at a time, then 1 tsp vanilla extract. Whisk until the mixture is glossy and smooth.
- Fold Dry Ingredients: Use your spatula to fold in 125g flour, 1 tsp baking powder, and 0.25 tsp salt. Note: Stop as soon as the white streaks disappear to keep the texture velvety.
- The Chilling Phase: Cover the bowl and refrigerate for 135 minutes. Wait until the dough is firm and no longer sticky.
- Oven Prep: Preheat to 180°C (350°F) and line your sheets.
- The Double Coating: Roll 1 tablespoon portions into balls. Roll in granulated sugar first, then heavily in 100g powdered sugar.
- Placement: Space balls 5cm (2 inches) apart. They will spread and crack, so they need their room.
- The Bake: Bake for 10 minutes. Observe until the edges feel set but the centers look slightly soft.
- The Cool Down: Let them rest on the sheet for 5 minutes before moving. They need this time to "set" their fudgy heart.
Chef's Tip: Do not skip the granulated sugar step before the powdered sugar. The granulated sugar creates a barrier that prevents the powdered sugar from absorbing the moisture of the dough, keeping the white coating bright and crisp.
Correcting Common Texture and Appearance Issues
Even with a straightforward recipe, sometimes the kitchen gods have other plans. The most common heartbreak with easy chocolate crinkle cookies is seeing that beautiful white sugar disappear into a brown, muddy mess.
This usually happens because the dough was too warm or the oven wasn't quite hot enough to set the exterior quickly.
Troubleshooting the Crinkle
| Problem | Root Cause | Solution |
|---|---|---|
| No Cracks | Dough was too dry or oven was too cool. | Check baking powder freshness and ensure oven is preheated to 180°C. |
| Melted Sugar | Dough was too wet or skipped the first sugar coat. | Use the "Double Sugar" method: granulated sugar then powdered sugar. |
| Flat Cookies | Dough wasn't chilled long enough. | Chill for the full 135 minutes until the dough feels like cold clay. |
If you find your cookies are coming out a bit dry, you might be over baking them. Remember, these continue to cook on the hot tray for a few minutes after you pull them out. To learn more about how chocolate behaves under heat, check out my guide on Mastering Chocolate for Texture, which explains how different fats and sugars interact with cocoa.
Common Mistakes Checklist
- ✓ Never measure flour by scooping the cup into the bag (it packs it down); spoon it in and level it off.
- ✓ Always use a fresh box of baking powder for the best "explosive" crackling effect.
- ✓ Sift your powdered sugar if it has lumps, otherwise, you'll have "snowballs" instead of "snowdrifts."
- ✓ Don't crowd the pan - 12 cookies per standard sheet is the absolute maximum.
- ✓ Let the dough chill for the full 2 hours and 15 minutes; patience is a literal ingredient here.
Natural Adaptations for Modern Holiday Flavors
Once you have mastered the base version of these easy chocolate crinkle cookies, the variations are endless. I love keeping the wholesome, artisanal spirit while adding small tweaks that make them feel special for different occasions.
Since this is a cocoa based recipe, it plays incredibly well with spices and extracts.
Enhancing with Espresso
Adding a teaspoon of instant espresso powder to the dry ingredients doesn't make the cookies taste like coffee; instead, it acts as a flavor booster for the cocoa. It makes the chocolate taste "darker" and more complex.
It's a trick professional bakers use to give their treats that "what is that secret ingredient?" quality.
Infusing Peppermint for Christmas
For a festive twist, swap the vanilla extract for half a teaspoon of peppermint extract. After the cookies are baked and cooled, the cool mint against the rich chocolate is exactly what a winter evening needs. You can even roll them in crushed candy canes along with the powdered sugar for an extra crunch.
| Original Ingredient | Substitute | Why It Works |
|---|---|---|
| Vegetable Oil | Melted Coconut Oil | Adds a very subtle tropical aroma. Note: Cookies will be firmer when cold. |
| Vanilla Extract | Almond Extract | Provides a "cherry chocolate" artisanal vibe. Use only 0.5 tsp as it is strong. |
| All Purpose Flour | GF Measure for-Measure | Works well due to the high fat and sugar content. Note: May spread slightly more. |
Keeping Your Batch Fresh and Wholesome
Because these cookies are made with oil, they actually stay moist longer than butter based cookies. Butter has a tendency to go stale or hard after a few days, but the oil in this recipe keeps the starches in the flour feeling "hydrated" and soft for quite some time.
Storage Guidelines
- Room Temperature: Store in an airtight container for up to 5 days. They actually get slightly fudgier on day two!
- Freezing Dough: You can freeze the rolled balls (uncoated) for up to 3 months. When ready to bake, roll them in the sugars while still frozen and add 2 minutes to the bake time.
- Freezing Baked Cookies: Wrap them well in parchment and then foil. They freeze beautifully for 2 months. Just be careful, as the powdered sugar may lose some of its brightness.
Zero Waste Tips
If you have leftover powdered sugar from the coating process, don't throw it away! It often has bits of cocoa mixed in now. I save it in a small jar to use for my next batch of hot cocoa or to dust over a simple chocolate cake.
Also, if you find yourself with a few "broken" cookies, crumble them over vanilla bean ice cream for a rustic sundae.
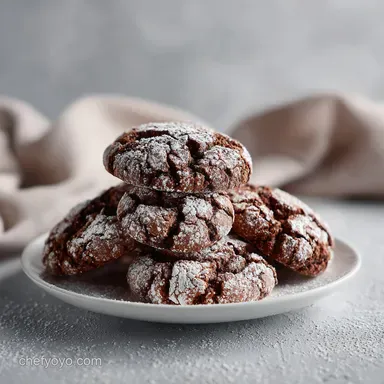
Perfect Presentations for Homemade Gifts
There is something so charming about a stack of these tied with a bit of kitchen twine. Because of their striking black and white appearance, they don't need much help to look beautiful. I prefer placing them in a simple brown paper box lined with parchment paper.
It emphasizes the artisanal, handmade nature of the bake.
Serving Suggestions
These are best served with something that can cut through the richness. A cold glass of milk is the classic choice, but if you are serving these at a dinner party, a small glass of red wine or a sharp espresso provides a sophisticated contrast.
The way the sugar "shatters" when you bite into them makes them a very tactile dessert experience.
If you are looking for other treats to fill a gift box, these pair wonderfully with a batch of Homemade Buckeye Candies. The peanut butter and chocolate combo alongside the fudgy crinkle creates a variety of textures that any chocolate lover would appreciate.
Scaling the Recipe
- To Double (48 cookies): Double all ingredients exactly. You may need to chill the dough in two separate bowls to ensure even cooling.
- To Halve (12 cookies): Use 1 large egg. Reduce the flour to 62g and the cocoa to 30g. Use a small bowl for chilling so the dough doesn't dry out.
Myths About The Crinkle Effect
I’ve heard so many "rules" about these cookies that simply aren't true. Let's clear some things up so you can bake with confidence.
Myth: You must use butter for a "real" cookie texture. Truth: Oil is actually superior for crinkle cookies because it results in a more consistent spread and a much fudgier interior.
Butter contains water which can turn to steam and make the cookies puff up like cake, which ruins the dense, brownie like goal.
Myth: The sugar melts because the oven is too hot. Truth: It’s usually the opposite! If the oven is too cool, the cookie takes too long to set, allowing the sugar to absorb moisture from the dough and dissolve.
A hot oven (180°C) "shocks" the sugar and sets the crust immediately, preserving that white on-black look.
Myth: Sifting the cocoa isn't necessary. Truth: Cocoa powder is notoriously prone to clumping. If you don't whisk it thoroughly into the oil or sift it first, you’ll end up with "cocoa bombs" bitter pockets of dry powder in your finished cookie.
Taking thirty seconds to whisk it properly is the mark of a thoughtful home cook.

Recipe FAQs
Is it necessary to chill the dough for 135 minutes?
Yes, this is critical for the correct texture. Chilling the dough until it feels like cold clay prevents the cookies from spreading too much in the oven, ensuring they maintain that signature thick, crinkle top shape.
How to ensure the cookies get that perfect crackled surface?
Use the double sugar coating method. Roll your dough balls first in granulated sugar, then immediately in a thick layer of powdered sugar before baking; the granulated layer prevents the powdered sugar from dissolving into the dough, creating the classic high contrast look.
Is it true I can bake the cookies at 400°F to save time?
No, this is a common misconception. You must maintain the temperature at 350°F (175°C) to allow the edges to set properly while keeping the center soft, as higher temperatures will cause the exterior to burn before the inside finishes baking.
How to tell if the cookies are finished baking?
Look for set edges while the center remains slightly soft. Since these bake for only 10 12 minutes, they will firm up significantly as they cool on the tray, so do not be tempted to bake them until the middle feels hard.
Can I freeze the dough balls for later use?
Yes, you can freeze them for up to 3 months. When you are ready to bake, roll the frozen balls directly in your sugar coatings and add 2 extra minutes to the total bake time.
Why is whisking the oil, sugar, and cocoa so important?
Whisking ensures a smooth, glossy emulsion. If you enjoyed mastering this emulsification process here, you can apply the same technique for a perfectly stable Buckeye candy batter.
How long will these stay fresh?
Store them in an airtight container for up to 5 days. They often taste even better on the second day as the texture becomes slightly fudgier after sitting at room temperature.
Easy Chocolate Crinkle Cookies
Ingredients:
Instructions:
Nutrition Facts:
| Calories | 107 kcal |
|---|---|
| Protein | 1.5 g |
| Fat | 3.0 g |
| Carbs | 20.0 g |
| Fiber | 0.8 g |
| Sugar | 14.6 g |
| Sodium | 28 mg |
