Artisanal Hardening Sugar Cookie Icing
- Effort/Time: 10 minutes total
- Flavor Hook: Rich vanilla-almond infusion with a rustic Mediterranean sweetness
- Perfect for: Intricate holiday decorating and Make-Ahead gifting
- Master the Artisanal Finish for Your Sugar Cookie Icing
- The Molecular Synergy Behind This Glossy Sugar Cookie Icing
- Precision Decorating Checkpoints for Optimal Consistency
- The Alchemy of Textures: Selecting Your Elements
- Essential Artisanal Tools for Crafting Smooth Finishes
- Master the Technique for This Easy Sugar Cookie Icing Recipe
- Why Your Finish Dulls and How to Rescue It
- Artisanal Flavor Profiles for Your Custom Sugar Cookie Icing
- ⚗️ The Scaling Lab: The Physics of Quantity
- Common Myths Debunked
- Preserving the Vibrancy and Structural Integrity of Your Icing
- Occasion-Ready Presentation Tips for Your Best Sugar Cookie Icing
- Recipe FAQs
- 📝 Recipe Card
Master the Artisanal Finish for Your Sugar Cookie Icing
There is nothing more heartbreaking than spending hours baking artisanal biscuits only to have the decoration smudge or remain tacky for days. I’ve lived through the nightmare of packing 50 holiday cookies into gift tins, only to find them fused into a singular, sugary mass the next morning.
It wasn't just a loss of ingredients; it was the total erasure of hours of careful, rustic craftsmanship.
I once destroyed a batch by over whisking, creating thousands of tiny air bubbles that made the dried surface look like a piece of porous pumice. I tried to "fix" it by adding more milk, which only made the colors bleed into a muddy mess.
That failure taught me that the secret to a professional finish isn't just about the ingredients it's about managing the molecular tension of the glaze.
The scientific revelation lies in the balance of corn syrup and hydration levels. While traditional royal icing relies on egg whites for structure, this sugar cookie icing uses corn syrup as an "interference agent." This prevents the sugar from recrystallizing, ensuring a velvety, high gloss finish that shatters delicately when bitten.
The result is an opaque, mahogany ready shine that reflects light rather than absorbing it.
The Molecular Synergy Behind This Glossy Sugar Cookie Icing
- Interference Chemistry: Corn syrup prevents sucrose molecules from bonding into crystals, ensuring a smooth, non-gritty texture on the tongue.
- Surface Tension Mastery: The specific ratio of 5 tbsp whole milk to 4 cups sugar creates a viscosity that allows for "self leveling" without running off the edges.
- Opacity Suspension: Sifting the C&H Confectioners' sugar ensures air is removed early, allowing the gel-based pigments to suspend evenly for vibrant, rustic colors.
- Hygroscopic Stability: The almond extract and vanilla work with the sugars to lock in moisture, preventing the icing from becoming brittle or "dusty" over time.
Precision Decorating Checkpoints for Optimal Consistency
- 1. The 10 Second Rule
- When you drop a spoonful of icing back into the bowl, the ribbon should vanish completely into the surface in exactly 10 seconds for flood consistency.
- 2. Internal Temperature
- Maintain a room temperature of 68°F to 72°F while drying; excessive humidity will prevent the icing from setting with a high gloss shatter.
- 3. Sift Density
- Sift the sugar twice if the humidity is over 50% to ensure 480g of aerated powder before the liquid hits the bowl.
The Alchemy of Textures: Selecting Your Elements
Crafting a high-quality sugar cookie icing requires ingredients that prioritize structural integrity and artisanal flavor. Always start with a high-quality base, such as this Butter Cookie Recipe, to ensure the cookie can support the weight of the glaze.
| Ingredient | Chemical/Physical Role (Science) | The Pro Secret (Why This Matters) |
|---|---|---|
| C&H Confectioners' Sugar | Finely ground sucrose provides the bulk and structure | Sifting removes packed clumps that cause "clogs" in piping tips |
| Whole Milk | Hydration agent that dissolves sucrose | Fat content (3.25%) provides a richer, more opaque finish than water |
| Light Corn Syrup | Liquid glucose acts as a crystallization inhibitor | Provides the signature "mirror shine" and prevents the icing from cracking |
| Pure Vanilla Extract | Flavor aromatic | Use clear vanilla if you require a stark, snow white aesthetic |
- 4 cups (480g) C&H Confectioners' sugar, siftedWhy this? Powdered sugar provides the essential fine grain structure for a grit free mouthfeel.
- 5 tbsp (75ml) Whole milkWhy this? The proteins in milk help the icing set with a velvety, matte-to-gloss transition.
- 5 tbsp (75ml) Light corn syrupWhy this? This is the key to the "shatter" and the glossy sheen.
- 1 tsp (5ml) Pure vanilla extract
- 1/4 tsp (1.25ml) Almond extract
- King Arthur Baking Gel-based food coloring
Essential Artisanal Tools for Crafting Smooth Finishes
For this recipe, skip the wooden spoons. You need tools that minimize air incorporation while maximizing emulsification. If you find yourself short on the primary ingredient, you can learn how to make powdered sugar using a high speed blender.
- KitchenAid Stand Mixer (with paddle attachment): Use the lowest speed to combine without whipping air into the mixture.
- OXO Fine Mesh Sieve: Essential for removing the micro clumps that plague commercial sugar.
- Stainless Steel Whisk: For hand mixing small batches of color with precision.
- Tipless Piping Bags: Allows for finer control over "flood" vs. "outline" work.
- Scribe Tool or Toothpick: Necessary for popping micro bubbles and dragging icing into tight corners.
Master the Technique for This Easy Sugar Cookie Icing Recipe
- Sift the 4 cups of C&H Confectioners' sugar into a large Lodge ceramic mixing bowl. Note: This prevents "pockmarks" in the dried finish.
- Add 5 tbsp of whole milk and 5 tbsp of light corn syrup to the center of the sugar mound. Note: Centralizing liquids ensures even hydration without dry pockets.
- Stir slowly by hand or on low speed until the mixture resembles thick, molten lava and no white streaks remain.
- Incorporate 1 tsp vanilla and 1/4 tsp almond extract, whisking gently until the aroma shifts from purely sweet to floral and complex.
- Test the consistency by lifting the whisk; the trail should disappear in 10 seconds for flooding or 15 seconds for piping.
- Divide the sugar cookie icing into small bowls until you have the number of colors required for your design.
- Add King Arthur gel coloring one drop at a time until the shade is one notch lighter than your goal (it darkens as it dries).
- Transfer the mixture into piping bags, squeezing out all air until the icing reaches the tip without resistance.
- Pipe an outline around your cookie until a distinct border forms that holds its shape.
- Fill the center (flood) immediately until the icing meets the border and the surface looks like a smooth, wet lake.
Why Your Finish Dulls and How to Rescue It
The most common issue with any sugar cookie icing recipe is the loss of shine or the dreaded "color bleed." Understanding the atmospheric conditions of your kitchen is vital.
| Problem | Root Cause | The Fix | Pro Protocol |
|---|---|---|---|
| Dull/Matte Finish | High Humidity or Slow Drying | Use a fan to circulate air | Place cookies near a dehumidifier or in a very cool, dry room |
| Color Bleeding | Over hydration (too much milk) | Add more sifted sugar to thicken | Let the base coat dry for 4 hours before adding dark colors on top |
| Air Bubbles | Aggressive Whipping | Tap the bowl on the counter | Let the icing sit for 30 mins before bagging to let air rise |
Why Your Icing Is Runny
When the icing refuses to hold its "border," it is usually a result of excessive hydration. Sugar is highly hygroscopic, meaning it absorbs moisture from the air. If you are baking on a rainy day, you may need to reduce the milk by 1/2 tbsp.
The starch in the sugar cannot provide enough tension to hold the liquid if the ratio is off even by a few milliliters.
Preventing Color Migration
Color migration happens when the pigment molecules travel through the moisture in the icing. If you are decorating something complex, like Crinkle Cookies recipe variations, ensure your base is completely set. This "sets" the sugar matrix, locking the pigments in place so they don't blur into the adjacent colors.
Artisanal Flavor Profiles for Your Custom Sugar Cookie Icing
While the vanilla almond base is a classic, you can adjust the profile to suit specific themes.
| Original Ingredient | Substitute | Why It Works |
|---|---|---|
| Whole Milk | Lemon Juice | Acids provide a bright tang and speed up the drying time slightly |
| Corn Syrup | Agave Nectar | Provides a similar shine but with a more earthy, honey like flavor profile |
| Almond Extract | Peppermint Extract | Creates a cooling, winter themed aroma; use sparingly as it's potent |
Decision Shortcut:
- If you want a matte finish: Replace corn syrup with additional milk (note: will be more brittle).
- If you want a hard, stackable finish: Ensure you use the full amount of corn syrup and let dry for 24 hours.
- If you want ultra white icing: Use "Bright White" gel food coloring to counteract the yellow tint of the vanilla.
⚗️ The Scaling Lab: The Physics of Quantity
When you double this sugar cookie icing recipe to 8 cups of sugar, the physics of hydration changes significantly.
- The Evaporation Paradox: In a larger bowl, the surface area to volume ratio decreases. Reduce the added milk by 10% initially (use 9 tbsp instead of 10) because you will lose less moisture to the air during the longer mixing time.
- Flavor Saturation: Scale the almond extract to 1.5x, not 2x. Almond is a powerful aromatic that can become "soapy" when doubled linearly.
- Maillard Killer (The Cookie Base): If baking more cookies to match the icing, do not crowd your pans. Overcrowding creates steam, making the cookies soft, which leads to the icing cracking when the cookie bends.
Common Myths Debunked
Myth: You must use royal icing with egg whites for cookies to dry hard. Truth: This sugar cookie icing recipe dries just as firm thanks to the corn syrup's ability to create a stable sugar glass, without the risk of salmonella or the metallic taste of meringue powder.
Myth: Adding more milk will make the icing shinier. Truth: Excess milk actually dilutes the corn syrup, leading to a duller finish once the water evaporates. Stick to the 5:5 ratio.
Preserving the Vibrancy and Structural Integrity of Your Icing
Storage: Store unused sugar cookie icing in an airtight container with a piece of plastic wrap pressed directly against the surface. It will stay fresh in the fridge for up to 2 weeks. Before using, let it come to room temperature and stir gently to reintegrate any separated liquid.
Freezing: You can freeze iced cookies once they are completely set (24 hours). Place them in a single layer in a freezer bag. To thaw, move the bag to the fridge for 24 hours, then to the counter.
Do not open the bag until they are room temperature, or condensation will form on the icing and ruin the gloss.
💡 ZERO WASTE PHILOSOPHY: Don't discard leftover colorful icing. Transform: Drizzle the remaining colors over a parchment sheet in "splatter art" patterns. Science: Once dried, these shatter into artisanal sugar shards that can be used as "sprinkles" for your next batch or as a garnish for a Pumpkin Pie recipe.
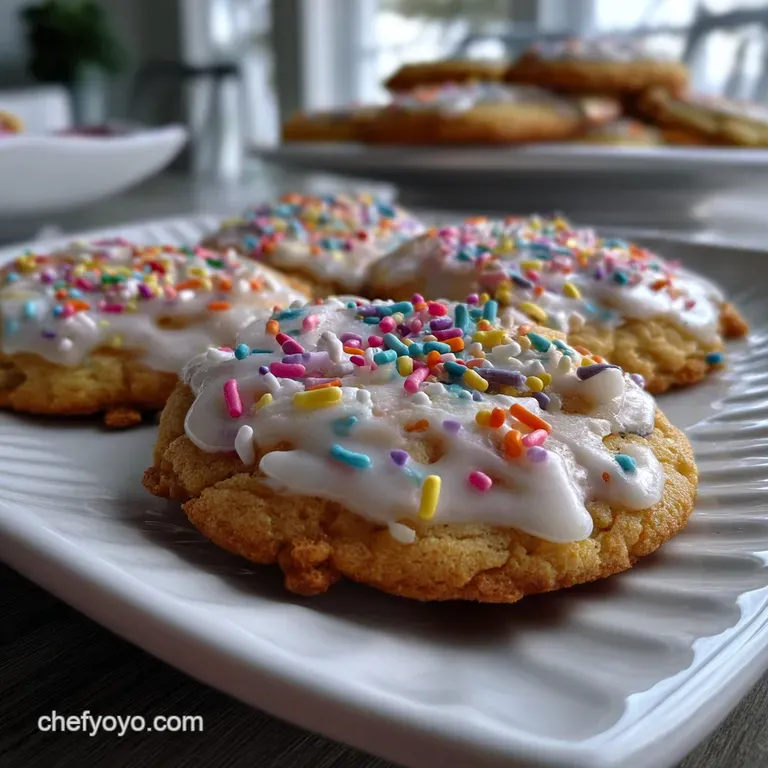
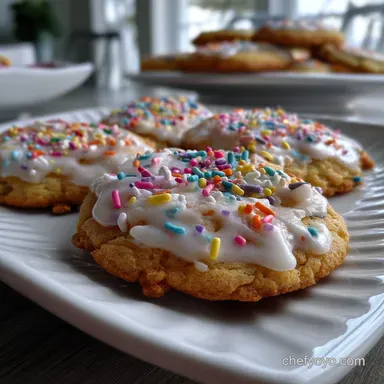
Occasion Ready Presentation Tips for Your Best Sugar Cookie Icing
For a rustic, Mediterranean presentation, use a "wet-on-wet" technique. Pipe small dots of a contrasting color into the wet flood icing, then drag a toothpick through them to create a marble effect. This artisanal touch looks incredibly complex but requires zero extra equipment.
If you are prepping for a large event, the "make-ahead Protocol" is your best friend. Pipe your outlines on day one, let them set for 2 hours, then flood them. This creates a structural "dam" that prevents the icing from overflowing, even if the table is slightly unlevel.
This sugar cookie icing is the gold standard for anyone looking to bridge the gap between "homemade" and "professional bakery" results. Regardless of the season, this easy sugar cookie icing recipe provides the reliable, glossy finish every baker deserves.

Recipe FAQs
What is the fastest way to dry the icing?
Use a fan for surface air circulation. Air movement rapidly increases the rate of evaporation, stabilizing the sugar matrix.
- Place cookies near dehumidifier
- Avoid high heat sources
- Ensure room temperature is below 72°F
Why does my icing look dull or matte instead of shiny?
Excessive water content or poor corn syrup integration causes dullness. If the icing is too wet, the water evaporates before the corn syrup can effectively inhibit full sucrose recrystallization.
- Reduce milk by 1/2 tbsp
- Ensure 10-second flood consistency
- Use room temperature ingredients for proper mixing
Is using water acceptable instead of milk?
Whole milk provides necessary fat content for opacity. Water evaporates completely, yielding a thinner, potentially crackly finish lacking the velvety richness provided by milk fat. If you mastered controlling spread in this recipe, the same fat ratio logic applies to our Sugar Cookies: Buttery Snap and Almond Velvet.
How can I make the icing harder for stacking?
Increase corn syrup ratio slightly and allow 24 hours minimum to set. The liquid glucose acts as a plasticizer, creating a stable sugar glass structure when fully dehydrated. This resilience is key for gift preparation.
What causes micro bubbles on the dried surface?
Aggressive whisking whips air into the thick sugar solution. Tap the bowl repeatedly on the counter to encourage trapped air pockets to rise before piping. If you enjoyed mastering sensory doneness cues here, apply them to our Thumbprint Cookie Recipe: Velvety Crumb, Tart Jam Center for perfect results.
Can I substitute corn syrup with granulated sugar?
No, granulated sugar will cause immediate crystallization. Granulated sugar forces rapid sucrose bonding, creating a gritty, sand like texture instantly instead of the required glassy inhibition. The corn syrup prevents large crystal formation, which is essential for smooth application.
Myth: I must use meringue powder for strong royal icing.
Myth: You must use meringue powder for strong royal icing. Reality: This icing formula relies on corn syrup for its non-crystalline structure, achieving necessary hardness without powdered egg whites or commercial additives.
Easy Hardening Sugar Cookie Icing
Ingredients:
Instructions:
Nutrition Facts:
| Calories | 93 kcal |
|---|---|
| Protein | 0.1 g |
| Fat | 0.1 g |
| Carbs | 23.5 g |
| Fiber | 0 g |
| Sugar | 23.4 g |
| Sodium | 3 mg |
