Resese Squares: the Easiest Decadent No-Bake Peanut Butter Bars
- The Cheeky Chocolate Fix: Why You Need These No-Bake Resese Squares
- Decoding the Decadence: The Science Behind Perfect Peanut Butter Squares
- Essential Toolkit: Ingredients for No-Fuss Chocolate Resese Squares
- The Method: How to Assemble Your No-Bake Peanut Butter Bars
- Troubleshooting and Pro Tips for Bakery-Quality Squares
- How to Store and Preserve Your Decadent Treat
- Serving Suggestions: Perfect Pairings for Your Chocolate Squares
- Recipe FAQs
- 📝 Recipe Card
The Cheeky Chocolate Fix: Why You Need These No-Bake Resese Squares
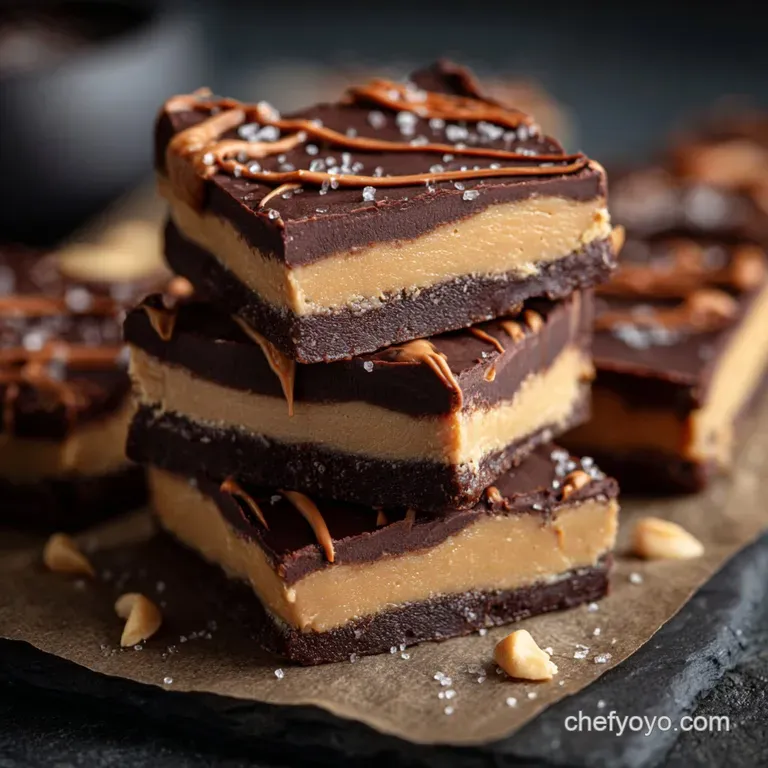
You know that perfect smell? The one where rich, dark chocolate meets salty, roasted peanuts in a heavenly cloud? These Resese Squares deliver that moment, big time. One bite gives you that glorious, satisfying crunch from the biscuit base, immediately followed by the creamy, intensely fudgy filling total texture heaven, right?
Honestly, this recipe is a lifesaver when the oven is busy or the weather is just too hot for heavy baking. We are talking about maximum flavor for minimum effort, which is exactly how I like my desserts when I’m short on time.
They are cheap to make, travel beautifully, and disappear faster than I can grab a square myself, making them the ultimate no-bake dessert.
Forget those messy, complicated bake sale recipes that require six different steps and a stand mixer. I’ve refined this method over years of successful tea parties and kitchen disasters, and now it works perfectly every single time.
Let’s dive into how we create the ultimate, perfectly balanced Peanut Butter No Bake bar.
Decoding the Decadence: The Science Behind Perfect Peanut Butter Squares
The Magic of Salt, Sweet, and Crunch
The reason these squares are so addictive isn’t a secret ingredient; it's the perfect harmony of textures and flavors. We absolutely nail the saltiness in the peanut butter layer, which cuts through the intense sweetness of the icing sugar.
You need that tiny hit of sea salt to prevent the whole thing from tasting flat, trust me on this.
Ditching the Oven: The Ultimate No-Bake Dessert
The beauty of a no-bake bar is that the melted butter acts as the primary binder instead of eggs or flour. This technique guarantees a dense, rich texture that you simply cannot achieve through baking.
It means you get that signature fudgy mouthfeel, rather than a crumbly cake, which is exactly what we want in a Reese's Peanut Butter Bar copycat.
What Makes Digestive Squares the Perfect Base?
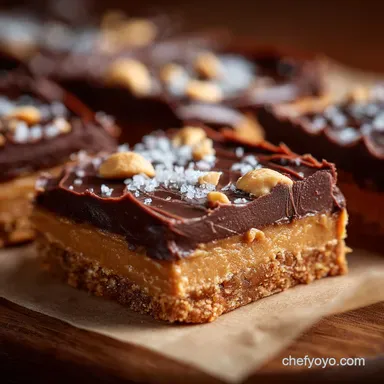
American recipes often call for Graham Crackers, but digestives offer a sturdier, richer texture, in my opinion. They are already slightly sweet and have a whole wheat crunch that provides incredible structural integrity for the dense peanut butter filling.
Balancing Saltiness and Intense Sweetness
If you use commercial peanut butter, it’s already got some salt, but we need more to make this pop . The two cups of icing sugar are necessary to create the stiff, almost dough like consistency that holds up when sliced.
Without that crucial salt addition, the sweetness would just overwhelm your tastebuds entirely.
Achieving the Dreamy, Non-Greasy Peanut Butter Filling
The trick here is the ratio of butter to peanut butter. If you use too much melted butter, the squares become oily and leak when they warm up. We use just enough butter to bind the crushed digestive biscuits and the sugar, ensuring a smooth, dense filling that sets cleanly in the fridge.
Why Buttery Biscuit Crumb is Superior to Graham Cracker
Digestive biscuits, crushed and saturated with melted butter, create a darker, more satisfyingly dense crumb layer than standard graham crackers. It’s less airy and more stable, allowing the intense filling layer to shine without collapsing.
Essential Toolkit: Ingredients for No-Fuss Chocolate Resese Squares
Getting the right ingredients makes this simple recipe even simpler, honestly. You don't need fancy tools, but you need to pay attention to your peanut butter quality. Never use natural peanut butter that separates with oil on top; it will ruin the texture.
Ingredient Spotlight: Choosing the Right Peanut Butter (Smooth vs. Crunchy)
I prefer smooth peanut butter because it guarantees the filling is ultra creamy, just like the center of the famous cup. If you love a little texture, you can absolutely substitute crunchy, but make sure it’s the stable, processed kind.
Perfect Crumb: Measuring and Preparing the Digestive Biscuits
You need to crush the biscuits until they are almost sand like; any big lumps will compromise the sturdy base. A food processor makes this job incredibly fast, but whacking them in a Ziploc bag with a rolling pin works too it’s excellent for stress relief!
dairy-free and gluten-free Adaptation Notes
| Ingredient | Substitute (Adaptation Notes) |
|---|---|
| Digestive Biscuits | gluten-free shortbread biscuits or GF Graham Crackers |
| Unsalted Butter | high-quality, solid vegan butter sticks (for the base) |
| Chocolate Chips | dairy-free semi sweet chocolate chips or dark chocolate (70%+) |
The Method: How to Assemble Your No-Bake Peanut Butter Bars

Step 1: Crafting the Sturdy Digestive Crust
Line your 9x13 pan with parchment paper, leaving a sling on the sides for easy removal this is non-negotiable! Combine your finely crushed biscuits with the melted butter, peanut butter, salt, and vanilla. Mix this thoroughly before you even touch the sugar; it ensures the fat is evenly distributed.
Step 2: Whipping Up the Silky Smooth Peanut Butter Layer
Gradually introduce the sifted icing sugar to the wet mixture. You’ll know you’re done when the mix is stiff enough to hold a thick ribbon shape, almost like a dense dough. Press this firmly into your prepared pan; remember, the firmer the press, the better the final square will hold.
Step 3: Achieving a Flawlessly Smooth Chocolate Glaze
You need high-quality chocolate here, honestly, because it’s the glamorous finish that seals the deal. Melt the chocolate chips slowly with the extra butter or coconut oil until it is totally glossy. Do not let it boil or steam, or the chocolate will seize up and look dull.
The Crucial Chilling Time: Setting the Squares
Pour that gorgeous glaze over the pressed base and spread quickly to the edges. Now, patience is the hardest ingredient here! The squares must chill for a minimum of 2 hours, but 3 is safer, until the chocolate is firm and cool to the touch.
Rushing this step will result in a chocolate layer that slides off when you try to cut it.
Chef’s Note: If you want a fun pattern, sprinkle some chopped peanuts or flaky sea salt on top before the chocolate totally sets.
Troubleshooting and Pro Tips for Bakery Quality Squares
Why Is My Filling Too Crumbly? (Fixing Dry Peanut Butter Mix)
If your peanut butter mix seems too dry or won't stick together when you press it, you probably skimped on the butter or didn't measure the icing sugar correctly. Fix this immediately by melting 1 2 extra tablespoons of butter and mixing it in until the dough feels pliable.
It should be moist and easily pressed.
Getting Ultra Clean Cuts (The Hot Knife Secret)
The secret to picture perfect squares is the hot knife. Run a long, sharp knife under piping hot water for about 30 seconds, wipe it completely dry (very important!), and then slice. Clean the knife between every single cut for the cleanest, most professional edges.
Enhancing the Filling with a Pinch of Flaked Salt
I use fine salt in the base, but finishing with a sprinkle of chunky, flaky sea salt (like Maldon) on top of the wet chocolate layer is a game changer. It gives you a beautiful textural contrast and emphasizes that delicious sweet and salty profile these Decadent Peanut Butter Squares are famous for.
How to Store and Preserve Your Decadent Treat
Optimal Freshness: Storing Peanut Butter Squares in the Fridge
Because of the high butter content, these squares must be kept refrigerated. Store them in an airtight container, separated by sheets of parchment paper if stacking. They will last beautifully for up to one week in the fridge.
Freezing Baked Goods: Guide to Flash Freezing Resese Squares
But does it freeze well? You bet it does! Once the squares are completely firm, arrange them on a baking sheet and flash freeze for one hour. Once solid, transfer them to a heavy duty freezer bag or container. They will keep for up to three months.
Thaw them overnight in the fridge or just let them sit on the counter for 30 minutes before serving.
Serving Suggestions: Perfect Pairings for Your Chocolate Squares
The Ultimate Milk Pairing: Hot Chocolate or Iced Coffee?
There is nothing better than pairing the dense richness of a Peanut Butter Chocolate Bar with something cold and strong. A big glass of cold milk or a perfectly strong iced coffee is my favorite partner for this level of peanut butter goodness.
For those mornings when you need a swift savory option instead, I highly recommend making a batch of my Sausage Frittata Squares MakeAhead Breakfast Bliss , but for pure dessert bliss, stick to these beauties. A little variety keeps life fun!

Recipe FAQs
Why is my biscuit base falling apart or too crumbly?
A crumbly base usually means you needed slightly more melted butter to bind the crushed biscuits properly. Ensure the digestive crumbs are tightly coated, resembling wet sand before you press them firmly into the prepared tin. If it’s too sloppy, add a few more crushed biscuits to stabilize the mixture.
My peanut butter filling seems too oily or greasy, what went wrong?
This common issue occurs if you use natural peanut butter where the oil has separated, or if the mixture was overheated during combining. Make sure your peanut butter is thoroughly stirred before use, or try adding an extra tablespoon of icing sugar to help absorb any excess moisture or oil.
Chilling time is essential to set the fats firmly.
Can I use different cookies or biscuits instead of Digestives?
Absolutely. Graham crackers are the classic American choice for this base and work perfectly, but shortbread or even Rich Tea biscuits are excellent substitutes that provide a satisfying crumb. Just be aware that sweeter biscuits may require a slight reduction in the amount of added sugar for balance.
Can I make this recipe vegan or dairy-free?
Yes, modifying this no-bake recipe for vegan diets is very simple. Substitute the standard butter in the base for a solid plant based margarine stick or coconut oil, and use a certified vegan dark chocolate or milk chocolate alternative for the topping.
Ensure your digestive biscuits are free of milk products, as some brands contain dairy.
Why is my chocolate topping dull or not setting firmly?
A dull, greyish finish, often called ‘bloom,’ happens if the chocolate overheats during melting or cools too slowly. Ensure you melt the chocolate gently over a double boiler or in short bursts in the microwave.
Additionally, always pour the chocolate over a base that has been thoroughly chilled to encourage rapid, stable setting.
How long do these squares last and where should I store them?
These peanut butter squares are best stored in an airtight container in the refrigerator, where they will maintain their freshness and texture for up to 5 to 7 days. The cold helps keep the peanut butter filling firm and the chocolate layer satisfyingly snappy when served.
They do not hold up well at warm room temperatures.
Can I freeze the Resese Squares for later?
Yes, these squares freeze very well due to their high fat content. Once fully set, cut them into portions and place them in a freezer safe container, separated by sheets of parchment paper to prevent sticking. They can be frozen for up to 3 months; simply thaw them overnight in the refrigerator before serving.
Easy No Bake Resese Squares
Ingredients:
Instructions:
Nutrition Facts:
| Calories | 132 kcal |
|---|---|
| Protein | 0.0 g |
| Fat | 0.1 g |
| Carbs | 35.0 g |
