Flaky Love: Your Go-To Easy Pie Crust Recipe

- Flaky Love: Your Go-To Easy Pie Crust Recipe
- Your Essential Ingredients Guide to Pie Perfection
- Mastering Professional Cooking: Your Essential Guide
- Pro Tips & Secrets for Your Pie Crust Perfection
- Storage & Make-Ahead Tips
- Creative Variations for Every Craving
- Nutrition Breakdown: It’s All in the Details
- Wrapping Up with Encouragement
- Frequently Asked Questions
- 📝 Recipe Card
Flaky Love: Your Go-To Easy Pie Crust Recipe
Honestly, i remember the first time i attempted to make my own pie crust. i was feeling fancy, you know? i thought, “how hard could it be?” spoiler alert: it was harder than i thought! i spent way too long wrestling with that dough, and.
Well, let's just say my kitchen looked like a flour bomb went off. but don’t worry! i’ve learned a thing or two since then, and this recipe for easy pie crust is my go-to.
It’s flaky, buttery goodness that even a novice can whip up.
The Joy of Pie Crust: A Little History
Did you know pie crust has been around since the ancient egyptians? they used it to hold meats! fast forward to good ol’ america, where we’ve turned it into both savory and sweet masterpieces.
Nowadays, everyone’s raving about homemade pies especially during the holidays. you know, nothing says "warmth" like a freshly baked pie wafting through your house.
This crust isn’t just a one-trick pony, either; it can handle everything from a classic apple pie to that rich chocolate cream you’ve been dreaming of.
Plus, it takes about 15 minutes to prep , followed by a little chilling, and voila! dinner is served with a side of nostalgia.
Why This Recipe Is a Game Changer
Let me tell you, this pie crust recipe easy has become my secret weapon for impressing guests. it’s so straightforward that even my dog can give it a shot.
Well, i wouldn't recommend letting your dog anywhere near flour, but you get the point! it yields one 9 inch pie crust enough for about eight slices of happiness.
You might be thinking, "What's the catch?" None! The only thing you will spend is about $5 on ingredients. And trust me when I say it’s well worth every penny.
Benefits You Can't Ignore
If you’re trying to make healthier choices, this coconut oil pie crust fits the bill. just swap the butter out for coconut oil for a healthy pie crust that still gives you that satisfying flakiness.
Seriously, it’s like the dough knows you’re trying to be good! this crust is also the perfect base for special occasions think thanksgiving or birthdays.
People love a classic pie, and when you bring it, you’ll be the star of the show. plus, you have the freedom to personalize it go sweet, go savory, or mix it up!
Now, if you’re like me and once faced the daunting task of creating a beautiful pie crust, remember: don’t overmix! just give it enough love until it holds together, and it’ll be the talk of your next family gathering.
If you’re ready to make something scrumptious, let’s dive into the ingredients you’ll need. Trust me, you’ll want to keep this simple crust in your back pocket for future baking adventures!
Your Essential Ingredients Guide to Pie Perfection
So, you wanna whip up a pie that’ll knock everyone’s socks off? well, diving into the world of pie making can be a magical experience, trust me! before we get into the nitty gritty of crafting that amazing recipe for easy pie crust , let’s chat about what you really need in your kitchen.
I promise, having the right ingredients and tools makes all the difference.
Get Cozy with Your Core Ingredients
First things first, having premium core components is key. We're talking about wonderful world of flour, sugar, butter, and more! Here are the details:
- Detailed Measurements: Whether you’re a fan of cups or grams, knowing your quantities is a must. For instance, you’ll need about 1 ¼ cups (155 g) of all-purpose flour for our pie crust.
- Quality Indicators: Not all flour is created equal! Look for brands that are finely milled. When butter is your star, go for unsalted and make sure it’s super cold.
- Storage Guidelines: Keep your flour in a cool, dry place. It’s got a shelf life of about 6-12 months . Trust me, that expired flour can ruin your pie dreams!
- Freshness Tips: Always sniff and look for any funky smells. Freshness is everything!
Spice It Up with Signature Seasonings
Let’s jazz up that crust! It’s not just about keeping it plain. Here’s how to add some flair:
- Essential Spice Combinations: Don’t underestimate the power of a pinch of salt or sugar. It really enhances the flavor!
- Herb Selections: Depending on your pie, consider adding dried herbs like rosemary or thyme a delightful touch for savory pies.
- Flavor Enhancers: Ever tried adding a dash of vinegar? It helps make that crust super flakey!
- Regional Variations: Depending on where you live, you might come across recipes that include different spices. Embrace them!
Smart Substitutions: Your Best Friend
We’ve all been there mid-recipe and suddenly realize we’re out of something! Here’s how to salvage things:
- Common Alternatives: Out of butter? No sweat! Try coconut oil instead for a Coconut Oil Pie Crust . Not only does it hold up well, but it gives a unique flavor twist.
- Dietary Modifications: gluten-free? Look into coconut flour pie crust or a gluten-free all-purpose flour.
- Emergency Replacements: Running low on sugar? You can use honey or maple syrup, just adjust the wet ingredients.
- Seasonal Options: Fresh herbs can elevate your recipe, so consider what's ripe and in season!
Must Have Kitchen Equipment Essentials
Now, let’s get down to the gear you’ll need to bring that crust to life:
- Tools to Invest In: You definitely want a mixing bowl, a rolling pin, and a trusty pastry cutter. These are essentials.
- Alternative Options: No pastry cutter? Use two forks! Just get those butter chunks into the flour.
- Preparation Tips: When rolling out the dough, flour your surface well to prevent sticking. You know the struggle, right?
- Storage Solutions: You can chill your dough in plastic wrap, but consider using wax paper for a neat package.
With this guide, you're equipped to tackle your easy pie crust recipe like a pro! remember, the journey might come with a few hiccups, but learning to innovate is all part of the fun.
So, get ready to roll up your sleeves and dive into the instructions of making that magical, flaky pie crust! Your taste buds are gonna thank you. Happy baking!
Mastering Professional Cooking: Your Essential Guide
When you think of professional cooking, do you imagine those perfectly plated dishes you see on tv? honestly, cooking like a pro is all about mastering a few key methods.
Let’s dive into the nitty gritty of professional cooking methods and how to turn your kitchen into a culinary dreamland.
Essential Preparation Steps
First thing’s first: mise en place . it’s a fancy french term that basically means “everything in its place.” before you start cooking, gather all your ingredients and tools.
Trust me, it saves you from that last minute mad dash around the kitchen. i remember once i was whipping up a coconut oil pie crust and lost track of my flour.
Talk about chaos!
Now, onto time management . timing is everything when you’re in the kitchen. use a timer your best friend while baking and keep an eye on it.
Those cookies can go from perfectly baked to burnt faster than you can say “bake sale.”
And, of course, let’s not forget organization strategies . keep your workspace clean and clutter free. invest in a few measuring cups and spoons.
Makes life a whole lot easier. oh, and safety is key! always be cautious with knives and hot surfaces. i’ve had my fair share of kitchen accidents, and they’re no fun.
step-by-step Process
Now that you're prepped and ready, let’s get into the cooking itself. Here’s a basic outline:
Gather Your Ingredients : Sounds simple, right? But it’s vital.
Preheat Your Oven : Depending on what you’re making, this could be anywhere from 350° F to 425° F . Follow your recipe for specifics.
Mix ingredients : pay attention to what you're combining. for example, in your easy pie crust recipe , you’ll want to mix flour, salt, and cold butter until crumbly.
Visual cue : it should look like coarse crumbs no lumps allowed!
Temperature control : use a good oven thermometer. i baked a cake once without checking, and let’s just say it became a science experiment.
Aim for accurate temperatures like baking that crust at 375° f to get that golden color.
Timing precision : stick to your timer! for the pie crust, you’ll bake it for about 20- 30 minutes if pre-baking.
Check for doneness based on color; it should be golden brown not burnt.
Expert Techniques
Ready for some pro tips? first, let’s talk about professional methods. butter vs. oil pie crust : both can yield delicious results, but butter gives a richer flavor.
If you're going healthier, try a coconut flour pie crust instead.
Next, don't skip those critical steps . If your dough feels too sticky, don’t panic! Just flour your surface before rolling. And remember your quality checkpoints : a well made crust shouldn’t shrink.
If you find that your crust isn’t turning out how you’d hoped, don’t sweat it! Here are some troubleshooting tips:
- Dough too crumbly? Add a dash more water.
- Crust too tough? Handle it less next time.
Success Strategies
We all mess up sometimes, right? So, let's chat about common mistakes. Overworking your dough can lead to tough results. No one wants that disco floor of a pie crust.
Also, always trust your instincts when it comes to quality assurance . taste as you go. if it doesn’t pop for you, it won’t for others! and remember, a perfect results guide starts with good ingredients.
Try fresh, organic items when possible.
Oh, and let me share something genius: make-ahead options. Chill your healthy pie crust a day in advance. It’s like giving yourself a break for future baking!
So, whether you're crafting a classic oil pie crust for a savory quiche or whipping up an all butter pie crust for your grandma's apple pie, a few professional cooking methods will get you on the right path.
Additional Information
Never underestimate the transformation that happens with just a few steps in the kitchen. with practice and some solid pro tips, you’ll feel like a chef in no time.
And speaking of transformation, if you want to explore different pie crust styles, check out the alternatives i mentioned like using a food processor for that crust recipe easy approach.
The world of pies and pastries is your oyster, so dive in and get baking!
Pro Tips & Secrets for Your Pie Crust Perfection
Baking pie crust is kind of like a rite of passage, isn't it? i mean, one minute you're mixing flour and butter, and the next, you could be on your way to impressing everyone at thanksgiving dinner! here are some of my personal insights and tricks to make your recipe for easy pie crust just that easy .
Quick Time Savers and Flavor Boosts
You want your crust to be flaky and buttery, right? first tip: keep your butter super cold! even a wee bit warmer can spoil the flake factor.
If you're feeling fancy, you can cut your butter into the flour with a food processor. it’s a total game changer! also, think about mixing in a touch of sugar (only if you're making a sweet pie).
It adds that extra depth of flavor.
Chillin’ Time: Always chill your dough after mixing at least 30 minutes. This isn’t just a suggestion; it’s crucial to the crust's success!
Make Your Crust Eye-Catching
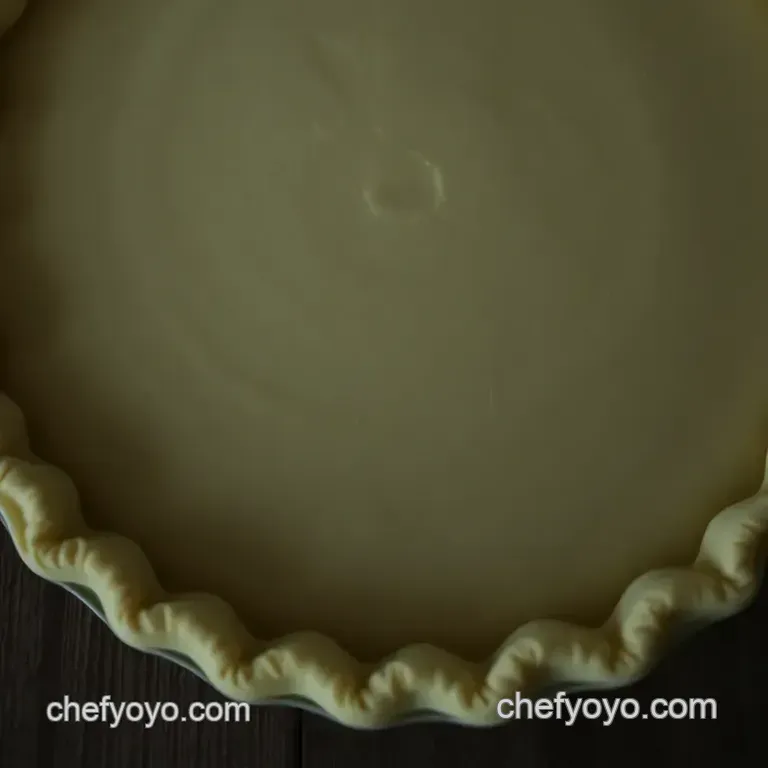
Okay, presentation is key when it comes to impressing your friends. when rolling out your crust, aim for about ¼ inch thick thinner if you’re feeling brave! the crimping of the edges? that’s your chance to shine!
you can crimp with a fork for a rustic look or even use your fingers to make beautiful waves.
Don’t forget about garnishes. a sprinkle of coarse sea salt can add a lovely touch to savory pies, while some fresh herbs or a dollop of whipped cream can elevate sweet creations.
Trust me; your friends will think you’re a pro!
Storage & make-ahead Tips
One of the best things about this crust recipe easy is that you can make it ahead of time! after you’ve chilled and rolled it out, you can freeze it for up to three months .
Just wrap it good in plastic wrap. i like to pop it directly in the pie plate; it makes for super easy baking later.
If you need to store baked crusts, cover them tightly. use them within a few days for the best freshness.
When reheating, just warm it up in the oven at 350° f for about 10 minutes to bring that crisp back.
No soggy bottoms allowed!
Creative Variations for Every Craving
Let’s talk variations , shall we? if you're feeling adventurous, try a coconut oil pie crust for a dairy-free treat.
Or, if you're like me and have a soft spot for chocolate, swap out a bit of the flour for cocoa powder for a killer chocolate pie crust .
Need it gluten-free? Coconut flour pie crust works wonders. Just remember, using coconut flour requires some adjustments like more liquid so make sure to do your homework beforehand!
Nutrition Breakdown: It’s All in the Details
Now, while we love a good pie, let’s not forget about the nutritional aspect . each slice of your pie crust (assuming a 9 inch crust yields 8 slices) typically packs in around 160 calories with about 10g of fat.
Not too shabby, right?
If you're health conscious or on a special diet, consider making a healthy pie crust by swapping out butter for that coconut oil i mentioned earlier.
Healthy pies don’t always have to sacrifice flavor!
Wrapping Up with Encouragement
Getting down with pie crust doesn’t have to be scary. with my recipe for easy pie crust , you’ll have a go-to that’ll please any crowd.
Plus, with all these tips whether you're working with a classic all-butter pie crust or experimenting with a oil pie crust you have what you need to make your pie game strong.
So roll up those sleeves, channel your inner baker, and don’t stress too much! Remember, the best pies come with a side of laughter and love. Happy baking, y'all!
Frequently Asked Questions
What is the best flour to use for this easy pie crust recipe?
You can use all-purpose flour, which works brilliantly for our recipe for easy pie crust. If you're looking for something a bit different, you might try a pastry flour for a more delicate texture or a gluten-free blend if you're avoiding gluten entirely. Just be sure it’s suitable for baking!
Can I make this pie crust ahead of time?
Absolutely! You can prepare the dough in advance and keep it in the fridge for up to 2 days before rolling it out. If you want to store it longer, pop it in the freezer wrapped tightly in plastic wrap, and it’ll do just fine for up to three months. Just remember to thaw it in the fridge overnight before using!
How do I prevent my pie crust from shrinking while baking?
To prevent that pesky shrinking, be sure to chill the dough thoroughly after shaping it and before baking. Additionally, when you place it into the pie plate, don’t stretch it. Gently fit it into the dish instead, and take care when crimping the edges. This will help keep everything in place!
What if I don't have a pastry cutter for this easy pie crust recipe?
No worries! If you don't have a pastry cutter, you can use two forks to cut the butter into the flour or even your fingers. Just remember to work quickly to keep everything nice and chilled, which is vital for the flakiness. It's a bit like giving it a little pampering!
What are some variations I can try with this pie crust?
The world is your oyster! Try adding 1 tsp of dried herbs for a savory touch, or swap out a couple of tablespoons of flour for cocoa powder to make a chocolate crust. You could even play with sweeteners, like replacing sugar with honey for a sweet pie crust. Think of it as your canvas!
How should I store leftover pie crust?
If you have any leftover unbaked dough, wrap it tightly and keep it in the fridge for up to 2 days, or freeze it for up to 3 months. Baked crusts should be kept at room temperature for a day, or wrapped and refrigerated for up to 3 days. Just make sure you’ve got foil or cling film at hand to keep it fresh!
Flaky Love Your Go To Easy Pie Crust Recipe

Ingredients:
Instructions:
Nutrition Facts:
| Calories | 160 |
|---|---|
| Fat | 10 g |
| Fiber | 0 g |
