Cloud Nine Cream the Easiest Homemade Whipped Cream
- Why This Homemade Whipped Cream Beats the Can Every Time
- Elevating Desserts: The Magic of Freshly Whipped Dairy
- Gathering Your Supplies: What You Need for Cloud Nine Cream
- Prepping for Success: Chilling Your Equipment
- Mastering the Technique: Step-by-Step Homemade Whipped Cream
- Achieving the Perfect Texture: Avoiding the Over-Whipping Trap
- Extending Shelf Life and Storing Your Homemade Whipped Cream
- Recipe FAQs
- 📝 Recipe Card
Why This Homemade Whipped Cream Beats the Can Every Time
If you’ve only ever experienced whipped cream from an aerosol can, prepare for a revelation. That metallic tasting, rapidly dissolving foam simply cannot compare to the pure, luxurious texture and flavour of freshly made Homemade Whipped Cream .
Making it yourself is one of the ultimate culinary cheat codes: it’s incredibly satisfying, requires just minutes of effort, and elevates even the simplest bowl of berries or slice of cake into something truly special.
This quick homemade whipped cream recipe takes fewer than five minutes of active whipping time, transforming cold heavy cream into a light, stable cloud. The resulting difference in taste clean, intensely creamy, and perfectly tailored to your sweetness preference makes this Homemade Whipped Cream Recipe the only one you’ll ever need.
Elevating Desserts: The Magic of Freshly Whipped Dairy
The alchemy of turning liquid cream into a fluffy solid relies entirely on the mechanical incorporation of air stabilized by fat globules. Understanding these simple mechanisms is the key to creating a truly foolproof homemade whipped cream every single time.
The Essential 3-Ingredient Difference
You require just three core homemade whipped cream ingredients to achieve perfection: heavy whipping cream, sweetener, and vanilla. We start with 1 cup (240 ml) of heavy cream, three tablespoons (45 g) of powdered sugar, and a teaspoon (5 ml) of pure vanilla extract.
We also recommend adding a tiny pinch of fine sea salt, which surprisingly doesn’t make the cream salty, but rather cuts the richness and brightens the flavour profile.
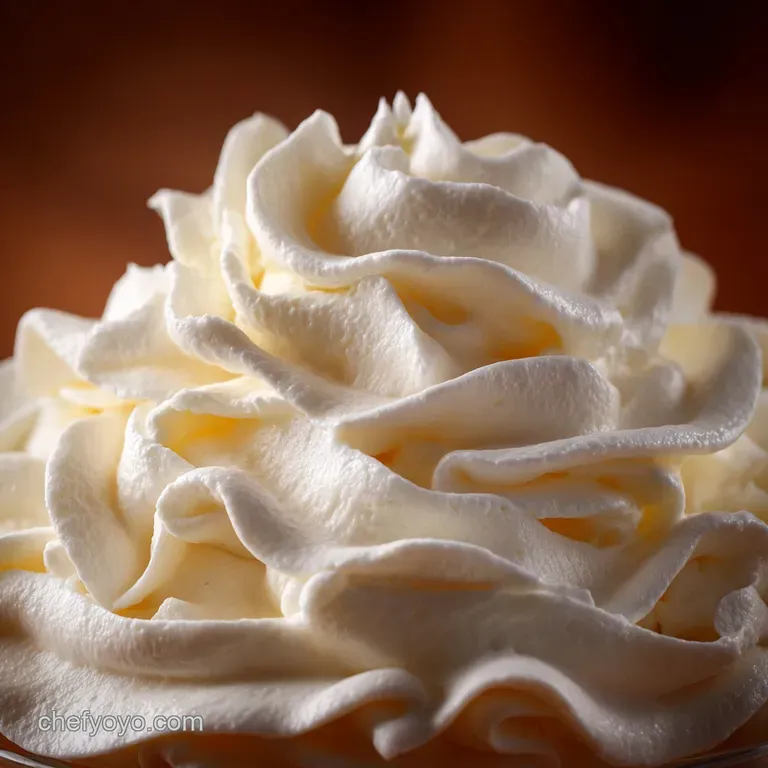
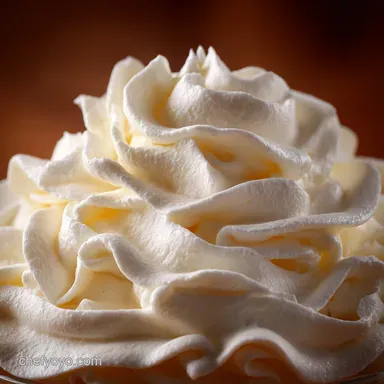
Defining the Stages: From Soft Peaks to Stiff Peaks
Knowing when to stop is the most critical part of the process. The cream progresses through two main stages. Soft peaks are achieved when the cream thickens and the peaks droop slightly when the whisk is lifted.
This texture is ideal for mixing into mousses or dolloping onto warm desserts, such as a sticky toffee pudding, as it’s light and melts gently. If you continue for another minute, you reach stiff peaks , where the cream holds its shape rigidly and doesn’t flop this is the perfect texture for piping onto a beautiful slice of homemade whipped cream for pumpkin pie or frosting a cake, providing maximum stability.
The Case for Powdered Sugar: Stability vs. Granulated Sweeteners
We choose powdered (icing) sugar for this recipe primarily because of its superior ability to stabilize the cream. Unlike granulated sugar, which requires extra time to dissolve (and can lead to a slightly grainy texture if rushed), powdered sugar is finely milled and dissolves instantly.
Crucially, it contains a small amount of cornstarch, which binds moisture and strengthens the network of air and fat. While it is possible to make homemade whipped cream no sugar , the structure will be less reliable, especially if stored for more than an hour.
If you only have granulated sugar, ensure it is fine sugar and anticipate whipping for an extra minute to guarantee full dissolution.
Gathering Your Supplies: What You Need for Cloud Nine Cream
Before beginning the Homemade Whipped Cream Recipe , ensure you have all your tools and ingredients measured and ready. You will need a stand mixer fitted with the whisk attachment, an electric hand mixer, or, if you prefer the satisfaction of muscle, a large balloon whisk for making homemade whipped cream by hand .
We aim for approximately 2 cups (500 ml) of finished whipped cream, yielding eight modest servings.
Related Recipes Worth Trying
- Ultimate Vanilla Cake Recipe Perfect Crumb Using Reverse Creaming — This is the ultimate vanilla cake from scratch Our method ensures a perfect tender crumbsupremely moist and studded with real vanilla bean The best vanilla...
- Authentic Homemade Italian Seasoning Blend Ready in 5 Mins — Forget shopbought This potent Homemade Italian Seasoning is your new secret weapon Its an easy Italian spice mix recipe packed with aromatic herbs perfect...
- Homemade Italian Seasoning The 5Minute Spice Blend that Elevates Everything — Make the easiest Homemade Italian Seasoning mix in just 5 minutes Skip the old jars this vibrant blend brings sunny southern European flavour to pasta and...
Prepping for Success: Chilling Your Equipment
This simple step is non-negotiable and acts as your safeguard against failure. The success of whipping cream hinges entirely on maintaining a low temperature.
Heavy Cream Explained: Fat Content and Temperature Requirements
You must use heavy whipping cream or double cream, which must contain a minimum of 35% milk fat. This high fat percentage is essential because the fat molecules are what lock the air into place as you whip.
The cream itself must be thoroughly chilled, ideally straight from the back of the refrigerator, well below 45°F (7°C). If the cream warms, the fat softens and is unable to form stable air pockets, resulting in a thin, disappointing product.
Recommended Kitchen Tools for Effortless Whipping
For optimal results and volume, place your mixing bowl (stainless steel or glass works best, as they retain cold well) and your whisk attachment into the freezer for at least 15 minutes prior to whipping.
Starting with cold equipment ensures that the cream stays perfectly chilled throughout the entire 3 5 minute whipping process.
Vanilla Extract and Optional Flavor Boosters
We use 1 teaspoon (5 ml) of pure vanilla extract for classic flavour. This is added right at the beginning with the cold cream. Remember, this recipe is highly adaptable. Should you wish to skip the vanilla, you can easily substitute it with a liqueur or spice blend, as detailed later.
Measurement Clarity: Grams, Cups, and Ounces
For precision, our core liquid measurement is 1 cup (8 US fluid ounces or 240 ml) of heavy cream. For sweetness, 3 tablespoons (45 grams) of powdered sugar is the perfect balance, resulting in a cream that is sweet enough to stand alone but won't overpower the dessert it’s accompanying.
Mastering the Technique: step-by-step Homemade Whipped Cream
Once your bowl and whisk are frosted, you are ready to begin. Pour the cold heavy cream, vanilla extract, and optional pinch of salt into the chilled bowl.
Start mixing on a low speed (setting 2 or 3 on a stand mixer). This initial slow rotation is vital for two reasons: it prevents the cream from splashing everywhere, and it gently begins the process of incorporating air. Mix for about 30 seconds until the liquid looks lightly frothy.
Next, stop the mixer and add the powdered sugar. Mix again briefly on low speed to incorporate the fine powder, ensuring you don't send a cloud of sugar puffing into the air.
Finally, increase the speed to medium high (setting 6 or 7). Whip continuously, keeping a close eye on the bowl. You may scrape down the sides once or twice, but avoid doing so too frequently, as constant agitation is key to volume.
After about 2– 3 minutes, you will achieve the soft peak stage.
Achieving the Perfect Texture: Avoiding the Over Whipping Trap
The final minute of whipping requires your undivided attention. Achieving the ideal stiff peak requires precision, as the line between perfectly fluffy cream and grainy, split butter is surprisingly narrow.
Whipping Speed Strategy: Starting Slow, Finishing Strong
The initial slow speed is for incorporation, but the medium high speed is what builds volume. Resist the urge to use maximum speed from the start, as this can destabilize the fat faster and potentially reduce the finished volume. Stick to medium high until you hit the stiff peak stage.
Identifying the Ideal Stiff Peak Stage
Once you are past the soft peak stage, continue whipping for just 30 to 60 seconds more. Stop the machine frequently and lift the whisk. When the peaks stand straight up, rigid and well defined without a slight curl at the top, you have reached the ideal consistency. Stop the mixer immediately!
Any additional whipping beyond this point will break the fat emulsion.
When and How to Introduce the Sweetener
The powdered sugar should be introduced after the initial frothing stage. Adding the homemade whipped cream with icing sugar early ensures that the sweetener dissolves fully before the fat network tightens, locking the flavour into the air pockets.
Troubleshooting: What to Do If Your Cream Won't Thicken
If you have been whipping for several minutes and the cream remains stubbornly liquid, the temperature is almost certainly the culprit. Immediately stop whipping, cover the bowl, and place the entire assembly back into the freezer for 5 to 10 minutes.
This blast of cold air will re-chill the cream and fat globules, allowing them to rebuild the structural integrity necessary for whipping. Resume mixing, and you should see quick results.
Extending Shelf Life and Storing Your Homemade Whipped Cream
One of the great advantages of using the homemade whipped cream with icing sugar technique is its relative stability. While best served immediately, it can be prepared ahead of time if necessary.
Best Practices for Storage and Handling Leftovers
Transfer any leftover cream immediately to an airtight container and store it in the coldest part of the refrigerator. Properly stabilized cream will last for 2 to 3 days, though you will notice it begins to lose a slight amount of its volume and structure after the first 24 hours.
If it begins to look a little deflated, a quick, gentle stir with a spatula can often revive some of the fluffiness.
dairy-free Alternatives: Coconut Cream and Cashew Options
For those seeking non-dairy options, chilled full fat coconut cream is an excellent 1:1 substitute. Scrape the thick, solid cream from the top of a chilled can of coconut milk and whip it using the same technique.
Note that the resulting cream will be slightly denser and carry a distinct, though pleasant, coconut flavour.
Nutritional Breakdown and Suggested Serving Pairings
As a high fat dairy item, each serving (assuming 8 servings per batch) clocks in at an estimated 110 130 kcal. Its rich, velvety texture makes it the perfect pairing for robust flavours.
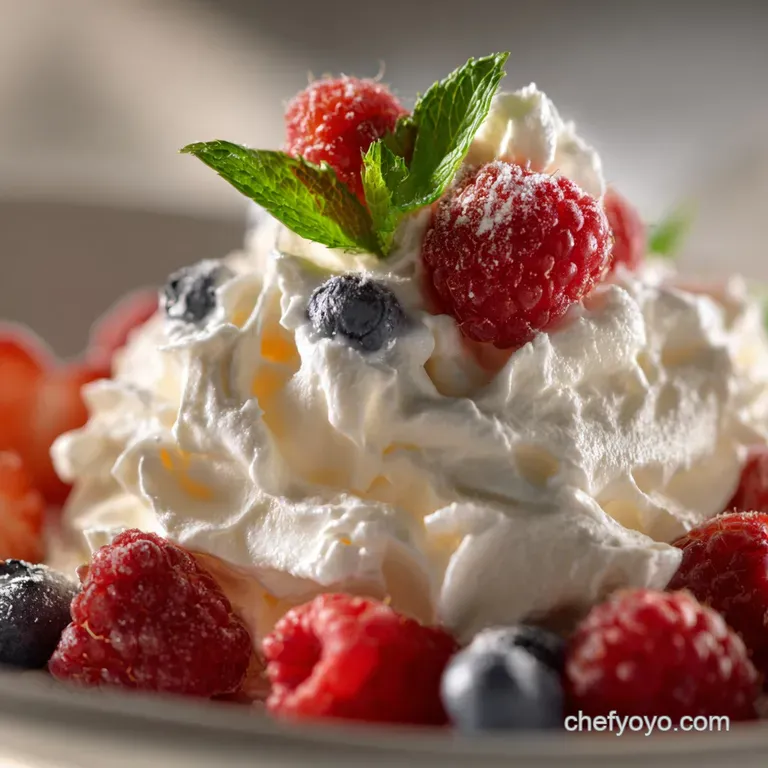
Try pairing this cloud like cream with tart seasonal berries, or serve it on top of a rich cup of hot chocolate or an intense affogato for a perfect afternoon treat.
Turning Cream into Butter: Saving Over Whipped Batches
If, despite your best efforts, you accidentally whip the cream past the stiff peak stage, don't despair! The cream will begin to look curdled and grainy. Simply keep whipping. The mixture will separate into liquid buttermilk and solid butter chunks. Continue mixing until the solids form a cohesive mass.
Drain the buttermilk (which you can save for baking!), rinse the butter solids with cold water to remove residual milk, and congratulations you have just made delicious homemade butter.

Recipe FAQs
Crikey, my cream isn't thickening! Why is my Homemade Whipped Cream refusing to cooperate?
It’s almost always down to temperature, a proper cooking disaster if you forget! If the cream, the bowl, or the whisk are even slightly warm, you’re fighting an uphill battle against science. Pop everything back in the freezer for 10 minutes and try again.
Also, ensure you’re using proper heavy or double cream (at least 35% fat) anything less will be too watery to hold air, bless its heart.
I've made loads, how long will this keep in the fridge before it goes a bit dodgy?
Freshly whipped cream is best enjoyed on the day you make it, as nature intended, but you can usually keep leftovers in an airtight container in the fridge for 2 to 3 days. Do note that it might lose a little volume and you may get some weeping (a bit of liquid settling at the bottom).
If that happens, just give it a very gentle whisk before serving to fluff it back up.
What's the difference between 'soft peaks' and 'stiff peaks' anyway, and when should I stop mixing?
Soft peaks are when the cream flops over slightly when the whisk is lifted this is perfect for gently spooning onto a warm pudding or a hot chocolate. Stiff peaks stand straight up like little mountain peaks, holding their shape rigidly.
Stop immediately once you hit stiff peaks, as going even 30 seconds further turns it grainy and splits it into butter, and nobody wants that!
I want to use this for piping decorations how do I make sure it holds its shape for hours?
If you need a proper sturdy cream that won't collapse, you need a stabiliser we sometimes call this "decorator’s cream." The easiest trick is to use the optional gelatin method mentioned in the variations: 1 teaspoon of plain gelatin dissolved in hot water, then cooled, drizzled in right when the cream hits soft peaks.
This works a treat for piping on sponges or delicate tarts!
I haven't got any icing sugar. Can I use caster sugar in a pinch?
You certainly can, but it’s not the business for stability. Granulated (caster) sugar takes much longer to dissolve, meaning you risk over whipping while trying to get rid of the grainy texture.
If you must use it, opt for superfine caster sugar and whip for an extra minute or two on medium low speed to ensure every last crystal is completely dissolved.
Foolproof Homemade Whipped Cream Recipe
Ingredients:
Instructions:
Nutrition Facts:
| Calories | 482 kcal |
|---|---|
| Protein | 1.4 g |
| Fat | 7.5 g |
| Carbs | 22.4 g |
| Fiber | 0.5 g |
| Sodium | 37 mg |
