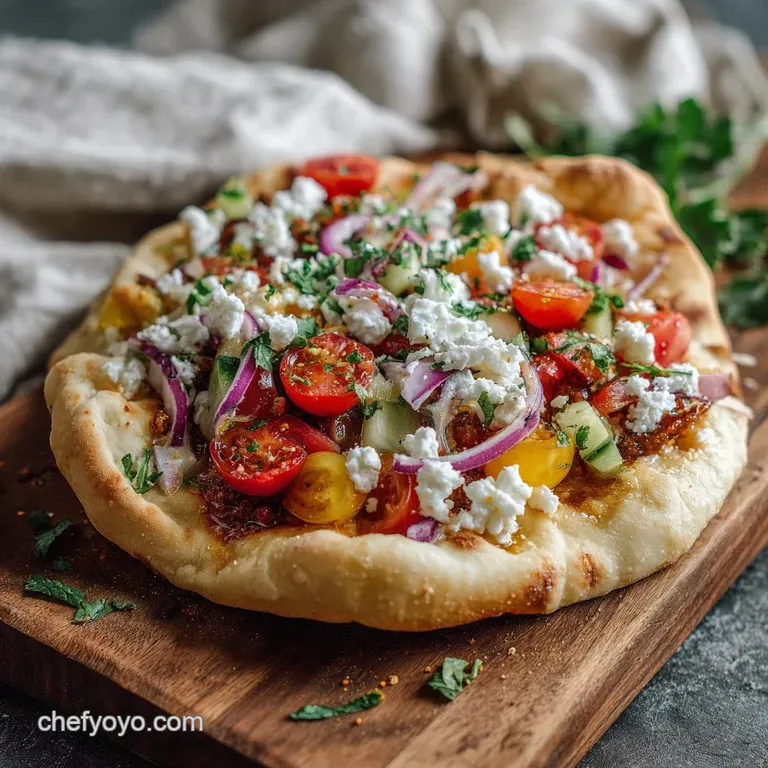
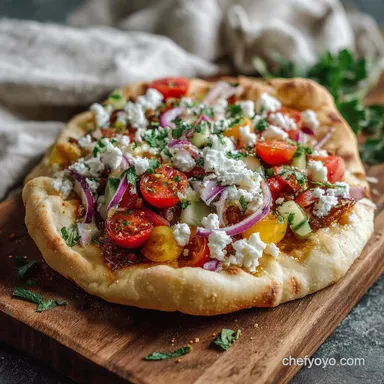
Greek Smashed Pita Recipe

- Time: Active 15 minutes, Passive 10 minutes, Total 25 minutes
- Flavor/Texture Hook: Sizzling charred edges with a velvety herb flecked interior
- Perfect for: Impressive weeknight dinners or casual outdoor gatherings
- Artisanal Secrets for a Greek Smashed Pita Recipe
- Vital Stats and Timing Prep
- Curated Mediterranean Pantry Staples
- Essential Tools for Searing Success
- Mastering the Rustic Assembly Process
- Solving Common Searing Mistakes
- Creative Twists for Every Diet
- Preserving Freshness and Reheating Tips
- Perfect Pairings for Mediterranean Feasts
- High in Sodium (⚠️)
- Recipe FAQs
- 📝 Recipe Card
Artisanal Secrets for a Greek Smashed Pita Recipe
The first time I tried this method, the aroma of dried Greek oregano hitting a scorching cast iron pan nearly brought me to tears. I was standing in my sun drenched kitchen, frustrated with traditional burgers that always seemed too bulky for a light lunch.
I decided to press a seasoned ball of ground turkey directly onto a soft pita, mimicking the "smash" style I’d seen in old school diners, but with a rustic twist.
As the meat hit the heat, the sizzle was immediate and fierce. The pita acted like a lid, trapping the steam while the bottom side of the meat developed a deep, mahogany crust. When I finally flipped it, the bread had toasted in the rendered fat, turning a pale golden brown with a crunch that echoed through the room.
It was a revelation in textures that I've spent months perfecting.
We aren't just making a sandwich here, we are creating a cohesive unit where the bread and meat become one. The meat shouldn't just sit on top; it should be integrated. It’s the kind of meal that makes you want to throw out your standard burger buns forever.
Trust me on this, once you master the "press," you’ll never go back to the thick, chewy patties of the past.
The Physics of the Press
Conductive Synergy: Pressing the meat into the bread forces the fats to migrate into the pita’s pores, preventing the bread from drying out during the sear. This creates a thermal bridge that cooks the meat faster while shielding the delicate herbs from direct flame burn.
Vital Stats and Timing Prep
| Cook Method | Time | Texture | Best For |
|---|---|---|---|
| Cast Iron Skillet | 8 minutes | Maximum char and shatter crisp edges | That authentic diner style crust |
| Stainless Steel Pan | 10 minutes | Even browning and fond development | Making a pan sauce afterward |
| Outdoor Griddle | 7 minutes | Smoky undertones and high volume | Feeding a crowd at a backyard BBQ |
Scaling this dish is surprisingly straightforward because the "one pita per person" rule holds strong. If you are cooking for a larger group, I recommend working in batches rather than crowding the pan.
If you overcrowd, you’ll end up steaming the meat instead of searing it, and you’ll lose that artisanal crunch we’re after.
When prepping for an occasion, you can mix the meat and shave the onions up to 4 hours ahead of time. However, don't smash the meat onto the pita until the very second you are ready to cook. If the meat sits on the bread for too long while raw, the moisture will turn the pita into a soggy mess before it even touches the heat. If you’re hosting a larger crowd, these go beautifully alongside my Zesty Keftedes Greek recipe.
Curated Mediterranean Pantry Staples
Component Deep Dive
| Ingredient | Science Role | Pro Secret |
|---|---|---|
| Ground Turkey (90% lean) | Protein Structure | Use cold meat to keep the fat from melting before it hits the pan |
| Dried Greek Oregano | Aromatic Compound | Rub it between your palms to release the volatile oils before adding |
| Plain Greek Yogurt | Emulsifier | Use full fat for a velvety mouthfeel in the "cheat" tzatziki |
| English Cucumber | Moisture Balance | Keep the skin on for a snappier texture and better color contrast |
Selecting your elements with care is the difference between a mid week meal and a masterpiece. I always opt for 90% lean ground turkey or beef; any leaner and the meat becomes parched, any fattier and the pita becomes greasy.
- 1 lb ground turkey or lean ground beef: Provides the savory base. Why this? Turkey offers a lighter profile that allows the fresh herbs to shine.
- 2 cloves garlic, finely minced: Adds a sharp, pungent kick. Why this? Mincing creates more surface area for flavor release than slicing.
- 1 tbsp dried Greek oregano: The backbone of Mediterranean aroma.
- 1 tsp ground cumin: Adds an earthy, warm depth.
- 1 tsp smoked paprika: Provides a subtle hint of fire without the heat.
- 1/2 tsp sea salt & 1/4 tsp black pepper: Essential for seasoning the protein chain.
- 1 tbsp fresh mint, finely chopped: Adds a cool, refreshing finish to the meat.
- 4 small to medium pita breads: The vessel for our smash.
- 1/2 cup crumbled feta cheese: For a salty, tangy pop.
- 1/2 red onion, thinly shaved: Adds crunch and a sharp bite.
- 1 cup cherry tomatoes, quartered: Provides juicy acidity.
- 1/2 English cucumber, diced: For a cooling, watery crunch.
- 1/2 cup plain Greek yogurt (2%): The base for our sauce.
- 1 tsp lemon juice: To brighten the heavy fats.
- 1 tsp fresh dill & 1 pinch garlic powder: For that classic tzatziki profile.
| Original Ingredient | Substitute | Why It Works |
|---|---|---|
| Ground Turkey | Ground Lamb | Increases richness and adds a gamey, authentic Mediterranean depth |
| Feta Cheese | Halloumi (grated) | Notes of mint and a much higher melting point for a gooey finish |
| Pita Bread | Large Flour Tortilla | Creates a thinner, crispier "quesadilla style" smash burger. Note: Lacks the chew of pita |
Essential Tools for Searing Success
To get that perfect Greek smashed pita recipe finish, you need a heavy bottomed pan. A cast iron skillet is my absolute favorite because it retains heat like a champion. You’ll also need a sturdy metal spatula not the flimsy plastic kind.
You need something you can really lean into to get that meat flattened against the bread.
Chef's Tip: Freeze your pita for exactly 5 minutes before assembling. This slightly firms up the bread, allowing you to press the meat on with more force without tearing the dough.
Another trick I've learned is to use a second, smaller heavy pan or a parchment wrapped brick to press down on the pita while it’s in the skillet. This ensures 100% contact between the meat and the cooking surface, which is the secret to that gorgeous brown crust.
Mastering the Rustic Assembly Process
1. The Flavor Infusion
In a large glass bowl, combine the 1 lb ground turkey with minced garlic, oregano, cumin, paprika, sea salt, pepper, and fresh mint. Use your hands to gently mix until just combined. Note: Overworking the meat will make the burgers tough and rubbery.
2. The Strategic Smash
Divide the meat into 4 equal portions and roll them into balls. Place one ball in the center of each pita bread. Using the palm of your hand or a flat plate, press the meat out toward the edges of the pita until it forms a thin, even layer covering most of the surface.
3. The Sear and Flip
Heat a large skillet over medium high heat with a tiny drizzle of oil. Place the pita, meat side down, into the hot pan. Cook for 3 to 4 minutes until the meat is deeply browned and releases easily from the pan.
4. The Finishing Touches
Flip the pita over so the bread side is now touching the pan. Cook for another 1 to 2 minutes until the bread is golden and crackling. Remove from heat immediately to prevent the bread from becoming too hard to fold.
5. The "Cheat" Tzatziki
While the meat rests for a moment, whisk together the Greek yogurt, lemon juice, dill, and garlic powder in a small ramekin. This provides a velvety contrast to the charred meat.
6. The Garden Garnish
Toss the diced cucumber, quartered cherry tomatoes, and shaved red onion in a bowl. For an extra punch of flavor, a drizzle of Greek Dressing recipe brings that acidic pop that cuts through the rich feta.
7. The Final Build
Spread a generous dollop of the yogurt sauce over the hot meat. Top with the cucumber tomato mixture and a heavy sprinkle of crumbled feta cheese.
8. The Fold and Serve
Fold the pita in half like a taco. The bread should be pliable enough to bend but crispy enough to hold its shape. Serve immediately while the cheese is just beginning to soften from the residual heat.
Solving Common Searing Mistakes
One of the biggest hurdles I faced when developing this recipe was the meat falling off the bread. It’s heart breaking to flip a pita and see half your burger stuck to the pan! This usually happens if the pan isn't hot enough or if you didn't press the meat firmly enough into the bread fibers.
Preventing Meat and Bread Separation
If the meat is separating, it’s often because the meat was too cold or too wet. Pat the surface of the meat dry before seasoning. When you press the meat onto the pita, really use some muscle. You want the raw meat to "grip" the nooks and crannies of the bread.
Ensuring Fully Cooked Burger Centers
Since we are smashing these thin, they cook very fast. However, if your meat is thick, the outside will burn before the inside is done. Aim for a thickness of about 1/4 inch. If you are worried, use an instant read thermometer; turkey is safe at 165°F.
Avoiding Burnt Pita Bread Edges
The bread side only needs a minute or two. If it’s burning, your heat is too high. Once you flip to the bread side, you can even turn the burner off and let the residual heat of the pan do the work.
| Problem | Root Cause | Solution |
|---|---|---|
| Meat is grey/steamed | Pan wasn't hot enough | Wait for the oil to shimmer and slightly smoke before adding meat |
| Pita is rock hard | Cooked too long on the bread side | Reduce second side cook time to 60 seconds max |
| Toppings falling out | Meat wasn't pressed to edges | Ensure the meat layer acts as a "glue" for the veggies by spreading it wide |
Common Mistakes Checklist - ✓ Don't skip the "press" - use a heavy weight for the first 2 minutes. - ✓ Preheat your pan for at least 3 minutes before starting. - ✓ Never use "low-fat" feta; it won't soften correctly against the heat.
- ✓ Avoid watery tomatoes by seeding them before quartering. - ✓ Use a metal spatula to scrape under the meat to keep the crust intact.
Creative Twists for Every Diet
Plant Based Protein Substitution Tips
You can absolutely use a plant based ground "meat" for this. Just be aware that plant based fats often have a lower smoke point, so you might need to drop the heat to medium to prevent the edges from charring too quickly.
gluten-free Flour Tortilla Alternatives
For my gluten-free friends, a sturdy gluten-free wrap or a grain free almond flour tortilla works better than a GF pita, which tends to crumble under the pressure of the smash. The texture will be more like a crispy tostada, which is honestly quite delicious.
Low Carb Cabbage Leaf Wraps
If you want to ditch the bread entirely, you can smash the meat directly onto a large, flat cabbage leaf or even a slice of provolone cheese on the griddle. It won't have the same "soak" factor as the bread, but the flavor remains top tier.
Preserving Freshness and Reheating Tips
Honestly, don't even bother trying to store these fully assembled. The yogurt and tomatoes will turn the crispy pita into a sponge within twenty minutes. However, you can store the components separately with great success.
- - Fridge
- Keep cooked meat pitas (without toppings) in an airtight container for up to 3 days.
- - Freezer
- You can freeze the raw meat and pita "discs" by layering them with parchment paper in a freezer bag for up to 2 months. Cook them directly from frozen, adding 2 minutes to the meat side sear.
- - Zero Waste
- If you have leftover pita scraps, toss them in olive oil and za'atar and bake until they become crispy chips for dipping into any leftover tzatziki.
Reheating Technique To get that "just made" crunch back, avoid the microwave at all costs. It will make the meat rubbery and the bread limp. Instead, pop the meat pita into a toaster oven or back onto a dry skillet over medium heat for 3 minutes meat side down, then 1 minute bread side down.
Perfect Pairings for Mediterranean Feasts
When I serve this for a garden party, I like to lean into the "Mezze" vibe. I place the hot smashed pitas on a large wooden board and surround them with extra bowls of olives, pickled peppers, and perhaps some roasted lemon potatoes.
Complete Mediterranean Mezze Platter Ideas
If you want to go all out, serve these alongside some grilled halloumi and a big bowl of hummus. The contrast between the hot, crispy pita and the cold, creamy hummus is a classic for a reason.
Light Side Dish Pairing Options
For a lighter meal, a simple arugula salad with lemon and shaved parmesan is all you need. The bitterness of the greens cuts right through the salty feta and savory turkey. If you’re looking for a different protein to add to the spread, my The Greek Lemon recipe skewers are a fantastic companion that uses many of the same ingredients.
Searing meat does not "seal in juices." The high heat actually causes moisture to escape through steam. What we are really doing is creating the Maillard reaction a chemical reaction between amino acids and reducing sugars that gives browned food its distinctive flavor.
The "smashed" technique works because it maximizes the surface area in contact with the pan, ensuring every bite is packed with that savory, toasted complexity.
Right then, let's crack on. Grab your skillet, find your heaviest spatula, and get ready for the best lunch you've had all year. Trust the sizzle!

High in Sodium (⚠️)
945 mg 945 mg of sodium per serving (41% 41% of daily value)
The American Heart Association recommends limiting sodium intake to about 2,300mg per day for overall cardiovascular health.
Tips to Reduce Sodium in Your Greek Pita
-
Reduce Feta Cheese-15%
Feta cheese is a significant source of sodium. Try using half the amount or opt for a lower sodium feta variety, if available. This can significantly reduce the overall sodium content.
-
Reduce Added Salt-25%
Eliminate or drastically reduce the added sea salt (1/2 tsp) in the recipe. Taste the dish before adding any salt and adjust accordingly. Consider using a salt substitute.
-
Choose Low-Sodium Pita-10%
Pita bread can contribute to the overall sodium. Check nutrition labels and choose pita breads that are lower in sodium content. You may also consider making your own pita for maximum control.
-
Check Ground Meat Label-10%
Sometimes ground meat may have added sodium, so make sure to check the label. Use fresh ground turkey or lean ground beef without any added seasonings or sodium.
-
Spice It Up!
Experiment with different herbs and spices to enhance the flavor of the dish without relying on salt. Increase the amount of oregano, cumin, smoked paprika, fresh mint, and dill in the recipe.
Recipe FAQs
What is the best type of ground meat for Greek smashed pitas?
90% lean ground turkey or beef is ideal. Leaner meats can become dry, while fattier meats can make the pita greasy. Turkey provides a lighter flavor that lets the herbs stand out.
How do I prevent the meat from falling off the pita?
Press the meat firmly and evenly onto the pita surface. Ensure your pan is hot enough and the meat is well seasoned to create a good grip. The meat should act like a glue for the toppings.
Can I make Greek smashed pitas ahead of time?
Prepare components separately, but assemble just before serving. Cooked meat pitas (without toppings) can be stored for up to 3 days in the fridge. Reheat in a toaster oven or skillet for best results.
How do I reheat leftover Greek smashed pitas?
Avoid the microwave; use a skillet or toaster oven. Place the pita meat side down in a dry skillet over medium heat for 3 minutes, then flip for 1 minute. This restores crispness.
What are good side dishes for Greek smashed pitas?
Serve with a simple arugula salad or a mezze platter. Think olives, pickled peppers, hummus, or grilled halloumi. For a complementary protein, try my Zesty Lemon Chicken Souvlaki with Tzatziki.
How do I get a perfectly crispy pita bread?
Cook the bread side for a short time on medium heat. Don't overcook it; the residual heat of the pan is often enough to achieve a golden, crackling crust in just 1-2 minutes.
Can I use gluten-free alternatives for the pita?
Yes, sturdy gluten-free wraps or almond flour tortillas work well. These will create a crispier, more tostada like texture. A traditional gluten-free pita may crumble too easily.
Greek Smashed Pita Recipe
Ingredients:
Instructions:
Nutrition Facts:
| Calories | 492 calories |
|---|---|
| Protein | 34.8 g |
| Fat | 18.6 g |
| Carbs | 42.1 g |
| Fiber | 3.2 g |
| Sugar | 4.8 g |
| Sodium | 945 mg |
