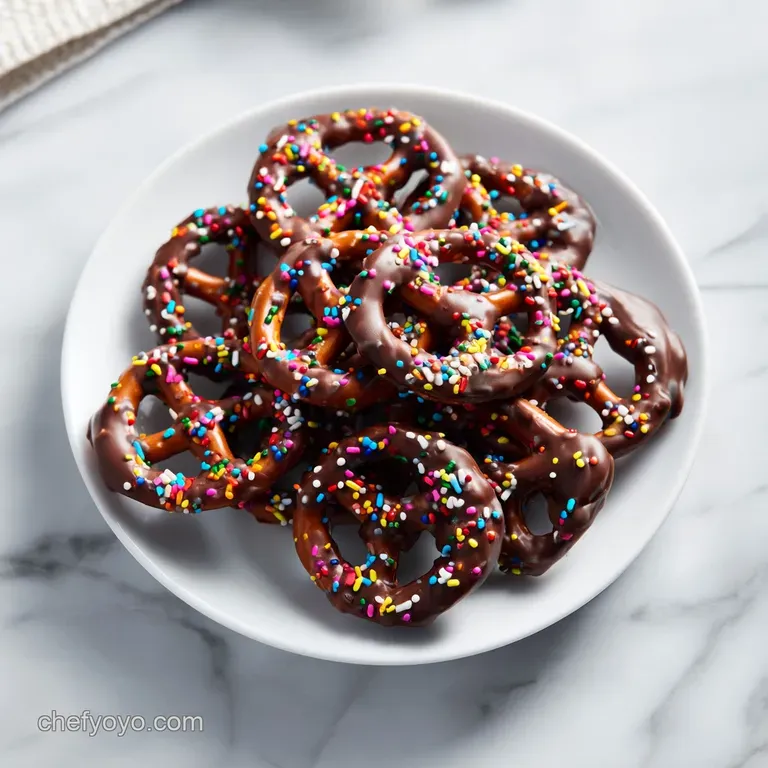
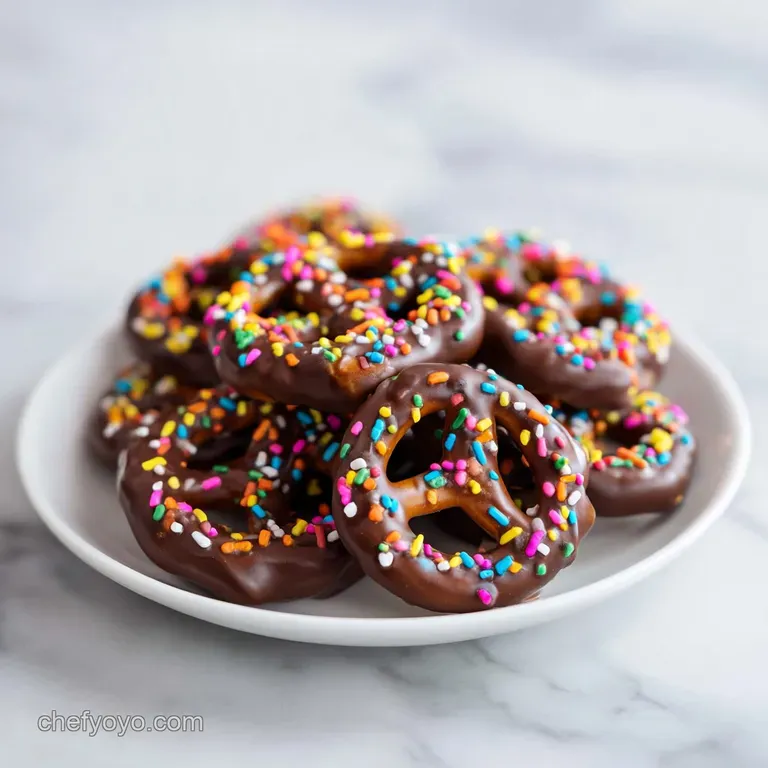
Chocolate Covered Pretzels: Salty and Sweet
- Time: Active 15 minutes, Passive 30 minutes, Total 45 minutes
- Flavor/Texture Hook: Shatter crisp pretzels enveloped in smooth, rich chocolate
- Perfect for: Holiday gifting, movie nights, or beginner friendly edible crafts
- How to Make Chocolate Covered Pretzels
- Why This Simple Method Works
- Ingredient Deep Dive Table
- Ingredients for Salty Sweet Snacks
- Essential Tools for Easy Cleanup
- Steps for a Perfect Finish
- Fixes for Common Dipping Disasters
- Creative Variations for Your Pretzels
- Storage and Make Ahead Tips
- Ideas for Serving Your Treats
- Recipe FAQs
- 📝 Recipe Card
How to Make Chocolate Covered Pretzels
The first time I tried to make these, it was a humid July afternoon and I ended up with a literal puddle of grainy sludge. I remember the kitchen smelling like burnt sugar and my favorite spatula being coated in a mess that just wouldn't set.
But when you get it right, the aroma of rich, melted cacao mingling with the toasted, rustic scent of pretzel dough is absolutely intoxicating. There's something so wholesome about the way the salt crystals peek through a dark chocolate glaze.
We've all been there trying to rush the process and ending up with soggy pretzels or chocolate that looks dull and grey. After a few years of trial and error in my own kitchen, I've found that the secret isn't fancy equipment, but rather a bit of patience and one specific pantry staple.
You'll be amazed at how a single tablespoon of oil transforms a bag of chips into an artisanal treat that looks like it came from a high end boutique.
This recipe is designed for the busy cook who wants that "wow" factor without spending four hours over a double boiler. We’re using the microwave strategically and focusing on high-quality ingredients to ensure every single bite has that characteristic "shatter" we all crave.
Let’s get into why this method is so reliable and how you can avoid the mistakes I made during those early, messy attempts.
Why This Simple Method Works
- Fat Stabilization: Refined coconut oil lowers the melting point of the chocolate slightly, creating a more fluid consistency that coats the intricate nooks of the pretzels without clumping.
- Residual Heat Management: Stopping the microwave while small lumps remain prevents the chocolate from scorching, which can happen in a matter of seconds.
- Hydrophobic Barrier: The fat in the chocolate creates a moisture proof seal around the pretzel, keeping it crispy even if the air is a bit humid.
- Texture Contrast: Using flaky sea salt on top provides a sharp, clean crunch that cuts through the fatty richness of the cocoa butter.
| Method | Time | Texture | Best For |
|---|---|---|---|
| Microwave | 5 minutes | Smooth & Glossy | Quick weeknight batches |
| Stovetop | 10 minutes | Very Consistent | Large holiday quantities |
| Slow Cooker | 60 minutes | Thicker Coat | Party dipping stations |
Whether you use the microwave or a bowl over simmering water, the goal is a velvety pool of chocolate. If you are looking for more technical tips on achieving that rich melted texture guide, it's all about controlling the temperature so the cocoa butter doesn't separate.
Ingredient Deep Dive Table
| Ingredient | Science Role | Pro Secret |
|---|---|---|
| Chocolate Chips | Structural Base | Use chips with at least 60% cacao for better setting |
| Refined Coconut Oil | Emulsifier/Shine | Must be refined to avoid an unwanted coconut aroma |
| Pretzels | Starch Foundation | Choose twists with deep ridges to "trap" more chocolate |
| Flaky Sea Salt | Flavor Enhancer | Apply while chocolate is "tacky" but not wet |
The science here is simple: we want the chocolate to flow easily but set firm. The coconut oil is our secret weapon for that professional sheen.
Ingredients for Salty Sweet Snacks
- 12 oz high-quality chocolate chips: Use Dark, Milk, or White. Why this? Chips contain stabilizers that help them hold their shape once set.
- Substitute: Chopped high-quality baking bars for an even smoother melt.
- 1 tbsp refined coconut oil: This is essential for the gloss. Why this? It thins the chocolate perfectly for dipping without making it greasy.
- Substitute: Vegetable shortening works if you don't have coconut oil.
- 11 oz pretzels: Twists, sticks, or snaps all work. Why this? The salt on the pretzels balances the sweetness of the coating.
- Substitute: gluten-free pretzels for those with dietary restrictions.
- 2 oz contrasting chocolate: For the drizzled finish. Why this? Provides a beautiful artisanal look and extra flavor depth.
- Substitute: Butterscotch chips or peanut butter melts.
- 1 tsp flaky sea salt: For that final rustic touch. Why this? It provides a clean saltiness compared to standard table salt.
- Substitute: Smoked salt for a more sophisticated, savory profile.
Essential Tools for Easy Cleanup
You don't need a professional pastry kitchen to make amazing Chocolate Covered Pretzels. In fact, keeping the tool kit minimal actually makes the process faster and reduces the chance of water getting into your chocolate the ultimate kitchen disaster.
I highly recommend using a microwave safe glass bowl rather than plastic. Glass holds heat better, which keeps your chocolate in a liquid state for longer while you're dipping. You'll also want a dipping fork or even a regular salad fork to lift the pretzels.
This allows the excess chocolate to drain back into the bowl so you don't end up with huge "puddles" on your parchment paper.
Chef's Tip: Freeze your pretzels for 10 minutes before dipping. The cold surface helps the chocolate "grab" the pretzel and start setting immediately, preventing those annoying bare spots.
Steps for a Perfect Finish
- Line a large baking sheet with parchment paper or a silicone baking mat.
- Check that all bowls and utensils are completely dry. Note: Even a single drop of water will cause the chocolate to seize and turn grainy.
- Combine 12 oz of chocolate chips and 1 tbsp of refined coconut oil in a microwave safe glass bowl.
- Heat the mixture in 30 second intervals at 50% power.
- Stir vigorously between each interval. Stop heating when small lumps remain and let the residual heat finish the job.
- Submerge a pretzel into the melted chocolate using a dipping fork.
- Lift the pretzel and gently tap the fork against the bowl's edge until the excess chocolate stops dripping.
- Place the coated pretzel onto the prepared baking sheet.
- Melt the 2 oz of contrasting chocolate and drizzle it until a thin, elegant pattern forms.
- Sprinkle with sea salt and let sit 30 minutes until the surface is firm and matte glossy.
Fixes for Common Dipping Disasters
One of the most frustrating things is "seizing." This happens when moisture gets into the chocolate, turning it from a silky river into a clump of dry fudge. If this happens, don't throw it out!
You can often save it by stirring in a teaspoon of boiling water which sounds counterintuitive but it can sometimes bring the emulsion back. However, for dipping, it’s best to prevent it entirely.
Another issue is "blooming," where white streaks appear on the chocolate after it dries. This usually means the chocolate got too hot or cooled too slowly. It's still safe to eat, but it won't look as artisanal.
Why Your Chocolate Is Seizing
If your chocolate suddenly turns into a thick, gritty paste, water is the culprit. This can be from a damp spoon or even steam from a nearby pot. Always wipe your bowls with a dry paper towel before starting.
Avoiding the Bottom Puddle
If your pretzels have a large "foot" or puddle of chocolate at the bottom, you aren't shaking off enough excess. Tap that fork patiently! It takes a few extra seconds, but the result is a much cleaner, more professional look.
| Problem | Root Cause | Solution |
|---|---|---|
| Grainy Texture | Overheating | Heat at 50% power only and stir more |
| Soft Coating | Not enough oil | Ensure you used the full 1 tbsp of coconut oil |
| Dull Finish | Humid environment | Let them set in a cool, air conditioned room |
Common Mistakes Checklist
- ✓ Never use a lid when melting chocolate (condensation will drip inside)
- ✓ Avoid using wooden spoons as they can retain hidden moisture
- ✓ Don't use a cold metal tray; use parchment paper for easy release
- ✓ Ensure your drizzle chocolate is the same temperature as the base
- ✓ Don't move the pretzels until the chocolate is completely set
Creative Variations for Your Pretzels
For a fun twist, you can experiment with different toppings. My personal favorite is a homemade peanut butter chocolate drizzle, which gives it a flavor profile similar to a gourmet candy bar. You just melt peanut butter chips with a tiny bit of oil and zig zag it over the dark chocolate.
If you are scaling this recipe up for a large party (2x or 4x), remember that you should only increase your salt and spices to 1.5x. Chocolate is a powerful flavor carrier, and doubling the salt can quickly become overwhelming.
Work in small batches of about 10 oz of chocolate at a time to ensure it stays warm and fluid throughout the process.
| Servings | Chocolate Amount | Pretzel Amount | Cooling Space |
|---|---|---|---|
| 45 (Standard) | 12 oz | 11 oz | 1 Large Sheet |
| 90 (Party) | 24 oz | 22 oz | 2 Large Sheets |
| 180 (Event) | 48 oz | 44 oz | 4 Large Sheets |
Chef's Tip: To get that perfect "thin" drizzle, put your melted contrasting chocolate into a small Ziploc bag and snip off a tiny, tiny corner. It gives you much more control than a spoon.
Storage and make-ahead Tips
Chocolate Covered Pretzels are the ultimate make-ahead snack because they actually thrive when they've had time to set properly. You can store these in an airtight container at room temperature for up to 2 weeks. Keep them in a cool, dark pantry; direct sunlight is the enemy of a glossy finish.
If you live in a very hot climate, you can store them in the fridge, but be warned: when you take them out, they might "sweat" as they come to room temperature. To prevent this, place a piece of paper towel in the container to absorb any condensation.
For zero waste, don't toss the leftover chocolate at the bottom of the bowl! Scrape it onto a piece of parchment paper, let it harden, and chop it up. It makes for excellent "pretzel bark" chunks that you can fold into cookie dough later in the week.
Ideas for Serving Your Treats
When it comes to serving, I love leaning into a rustic, artisanal aesthetic. Placing these in a simple glass jar tied with a bit of twine makes for a wholesome gift. If you're serving them at a party, try stacking them in a "log cabin" style on a wooden board.
It looks much more intentional than just piling them in a bowl.
Myths About Dipping Chocolate
A common misconception is that you need a double boiler to melt chocolate properly. While it's a great tool, a microwave is actually safer for many home cooks because it eliminates the risk of steam (water) entering the bowl.
Another myth is that you must use "melting wafers." high-quality chocolate chips work perfectly fine as long as you add that tiny bit of coconut oil to help with the fluidity.
The Best Salt Ratio
People often think more salt is better, but with pretzels, you already have the large grains of salt on the dough. The flaky sea salt on top should be a light "dusting," not a heavy coating. It's meant to spark the taste buds, not overwhelm the sweetness of the chocolate. Trust me, a little goes a long way!

Recipe FAQs
What is the easiest way to do chocolate covered pretzels?
Submerge each pretzel using a dipping fork, then tap it against the bowl's edge to remove excess chocolate. Placing them immediately onto a parchment lined sheet keeps the shape clean and ensures an even coating.
What kind of chocolate is best for chocolate covered pretzels?
high-quality chocolate chips are ideal because they contain stabilizers that assist in a smooth melt. Using refined coconut oil in the mix helps achieve the perfect dipping consistency without affecting the flavor.
How many days before a party can you make chocolate covered pretzels?
You can prepare them up to two weeks in advance. Storing them in an airtight container in a cool, dark pantry keeps the chocolate glossy and the pretzels crisp.
Are chocolate covered pretzels healthy?
No, they are a indulgent treat rather than a health food. Each serving contains approximately 77 calories, so they are best enjoyed as an occasional snack.
How to melt chocolate without burning it?
Heat the chocolate and coconut oil in 30-second intervals at 50% power. Stir vigorously between each burst and stop when only a few small lumps remain, letting the residual heat finish the process.
Is it true I must wash my bowls with water right before melting chocolate?
False, this is a common misconception that will ruin your batch. Even a single drop of water causes chocolate to seize and turn grainy, so ensure your bowls and utensils are completely dry before you begin.
How to ensure the chocolate sets with a professional shine?
Allow the pretzels to sit undisturbed at room temperature for 30 minutes. If you enjoyed mastering this tempering free process, you can apply similar patience based cooling techniques to our homemade buckeye candy to ensure a clean, smooth finish.
Homemade Chocolate Covered Pretzels

Ingredients:
Instructions:
Nutrition Facts:
| Calories | 77 kcal |
|---|---|
| Protein | 1.1 g |
| Fat | 3.4 g |
| Carbs | 10.4 g |
| Fiber | 0.7 g |
| Sugar | 4.1 g |
| Sodium | 91 mg |
