Chocolate Turtles: the Connoisseurs Recipe for Decadent Pecan Caramel Clusters
- The Connoisseur's Turtle: Decadent Homemade Chocolate, Pecan & Caramel Clusters
- Decoding the Classic: The History and Appeal of Homemade Connoisseur Turtles
- Mastering the Perfect Texture: The Science of Gooey Caramel and Snappy Chocolate
- Essential Components: Gathering Ingredients for Connoisseur-Grade Pecan Clusters
- Sequential Mastery: Crafting Your Decadent Chocolate Turtles from Start to Finish
- Troubleshooting Turtles: Expert Tips for Preventing Common Candy Failures
- Extending the Decadence: Proper Storage and Preservation of Homemade Turtles
- Perfect Pairings: Complementary Beverages for Chocolate Turtle Enjoyment
- Recipe FAQs
- 📝 Recipe Card
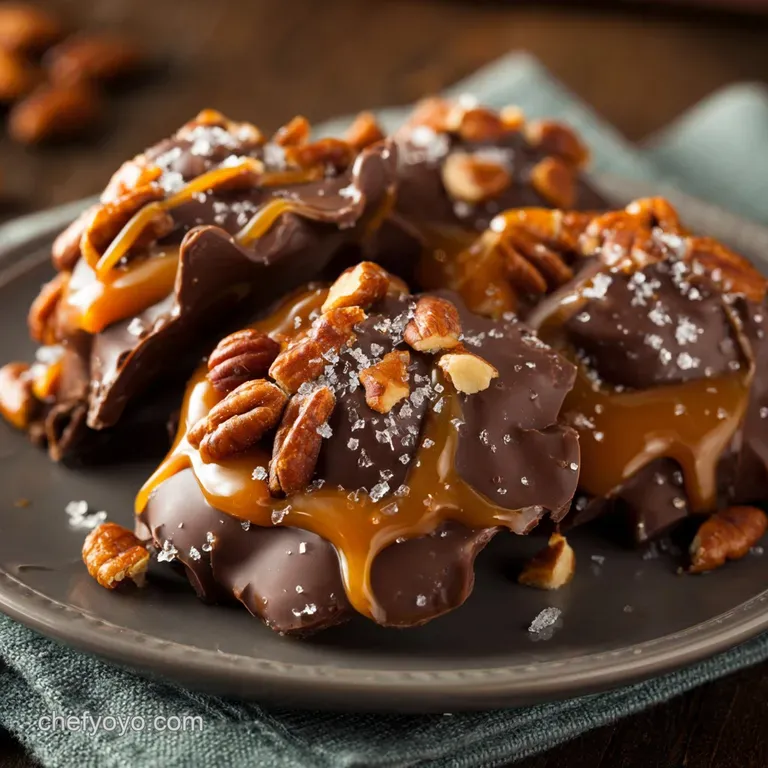
The Connoisseur's Turtle: Decadent Homemade Chocolate, Pecan & Caramel Clusters
When that smell hits you, you know you’ve done something right. The air fills with deep, toasty pecan notes and the sweet, almost burnt aroma of caramel bubbling happily on the stove.
This classic confection isn't just candy; it’s a symphony of textures the snappy chocolate shell giving way to chewy, buttery caramel and that satisfying pecan crunch. It's pure, unadulterated decadence.
I swear, store-bought Chocolate Turtles just don't cut it anymore; they are always too waxy and the caramel is suspiciously hard. Making your own at home feels really fancy, but honestly, it’s one of the most rewarding recipes you can tackle on a cold afternoon.
You save a load of money compared to the boutique confectioners, and the taste is incomparably better.
Ready to ditch the overly sweet, disappointing store versions and dive headfirst into the world of truly Homemade Chocolate Pecan Turtles ? We are going to nail that perfect chewy but-not-rock hard caramel and achieve that glorious, glossy chocolate finish. Trust me, these are next level.
Decoding the Classic: The History and Appeal of Homemade Connoisseur Turtles
From Chicago Delicacy to Global Treat
The Chocolate Turtle Recipe has its roots way back in Chicago in the early 1900s, named for the resemblance of the caramel and nut clusters to a shelled turtle. What began as a simple mixture of nuts, sweet goo, and chocolate quickly became an American candy classic.
I always loved how something so simple just three core components can create such an intensely satisfying bite.
Why Homemade Caramel Elevates the Cluster Experience
This is non-negotiable, folks: using homemade caramel is the key to creating a connoisseur grade cluster. store-bought sauces are often too runny or contain stabilizers that make them unnaturally stretchy.
When you make your own, you control the butter content and the temperature, resulting in a caramel that is deeply flavorful, buttery, and perfectly gooey without pulling out your fillings.
Anticipated Prep and Cook Time Breakdown
You definitely need to block out some focused time for this project, especially for the setting phase.
| Stage | Time |
|---|---|
| Active Prep: | 20 minutes (Nut preparation & measuring) |
| Caramel Cook: | 15 minutes (Focused cooking) |
| Cooling/Setting: | 60– 90 minutes (Minimum) |
| Total Time: | Approx. 1 hour 45 minutes |
Mastering the Perfect Texture: The Science of Gooey Caramel and Snappy Chocolate
The Maillard Reaction: Achieving Deep Flavor in Toasted Pecans
If you skip toasting the pecans, you are truly missing out on 50% of the flavour profile of a Candy Turtles Recipe . Toasting them in the oven triggers the Maillard reaction, which essentially deepens the natural, earthy, nutty flavor.
They become incredibly fragrant and shatter beautifully against the soft caramel. This small step changes everything.
Temperature Control: Ensuring Buttery, Non-Crystallized Caramel
Caramel is notoriously bossy, requiring strict temperature control to prevent graininess. We are aiming for the Soft Ball Stage (116°C or 240°F) because this guarantees a caramel that is chewy, but still soft enough to yield under pressure. My biggest mistake when I started?
Trying to guess the temperature without a thermometer; that batch ended up being grainy, hard, and totally useless.
The Role of Tempering: Why Your Chocolate Turtles Must Have that 'Snap'
To make those professional looking, glossy Chocolate Covered Pecan Clusters that don't melt the second you touch them, you need tempered chocolate. Tempering stabilizes the cocoa butter crystals, giving the coating that signature snap and preventing that grey, dull streaking known as "bloom." Don't fret if tempering feels intimidating; we are using a simplified melt and stir method, which is much more achievable for the home baker.
Essential Components: Gathering Ingredients for Connoisseur Grade Pecan Clusters
Selecting the Right Chocolate: Dark vs. Milk Cocoa Solids
I recommend a 2:1 ratio of dark chocolate (around 60 70% cocoa) to milk chocolate. This blend balances the intense richness of the Diy Chocolate Recipe with a creamy sweetness.
Using only dark chocolate can be a bit bitter against the sweet caramel, but using only milk chocolate is often too cloying. Finding that middle ground is key.
Pecan Preparation: Toasted vs. Raw Nut Bases
As mentioned, we are only using toasted pecan halves here. Raw nuts just taste bland and doughy next to the intense caramel and chocolate. Toasting takes about seven minutes and is truly mandatory for achieving that deep, earthy complexity needed for the best Turtles Recipe Homemade .
The Caramel Core: Dairy Fat Ratios and Salt Balance
The high fat content of the heavy cream and butter is essential for a velvety, rich caramel that won't turn into hard candy. The salt, meanwhile, is absolutely vital. It cuts through the sweetness and heightens the depth of the cooked sugar flavor. Never skimp on the salt!
Smart Swaps: Replacing Cream and Sugar Alternatives
Here are a few quick solutions if your cupboard is looking a bit sparse.
| Ingredient | Viable Substitute | Notes |
|---|---|---|
| Heavy Cream | Full fat evaporated milk | Will yield a slightly less rich caramel, but still works well. |
| Granulated Sugar | Light Brown Sugar | Adds a subtle molasses flavour; reduce cooking time slightly as it browns faster. |
| Pecan Halves | Whole Walnuts or Cashews | Ensure they are properly toasted before assembly. |
| Coating Chocolate | Chocolate Melting Wafers | Easier to work with (no tempering needed), but the flavor isn't as pure. |
Sequential Mastery: Crafting Your Decadent Chocolate Turtles from Start to Finish
Phase I: Toasting and Forming the Pecan Clusters
Preheat that oven to 175°C (350°F). Toss those pecans with a tiny bit of butter and spread them out; toast for just 6 to 8 minutes until they smell deliciously nutty. Once cooled slightly, arrange 3 or 4 halves into those cute little clusters on your parchment lined sheets.
They should look like little 'v' shapes or tiny piles, ready to receive the gooey filling.
Phase II: Achieving the Deep Amber Caramel Consistency
Combine your sugar and water in a heavy pot. Heat and stir until the sugar dissolves completely, then stop stirring immediately! Watch the color change from clear to straw yellow, then finally a beautiful deep amber this takes nerve, but that color equals flavor.
Pull it off the heat the second your candy thermometer hits 116°C (240°F), then slowly whisk in the warm cream and butter.
Crucial Chef's Note: When pouring the hot caramel onto the nuts, wait about three to five minutes after mixing in the butter. This slight cooling time lets the caramel thicken just enough so it doesn't immediately run all over your baking sheet.
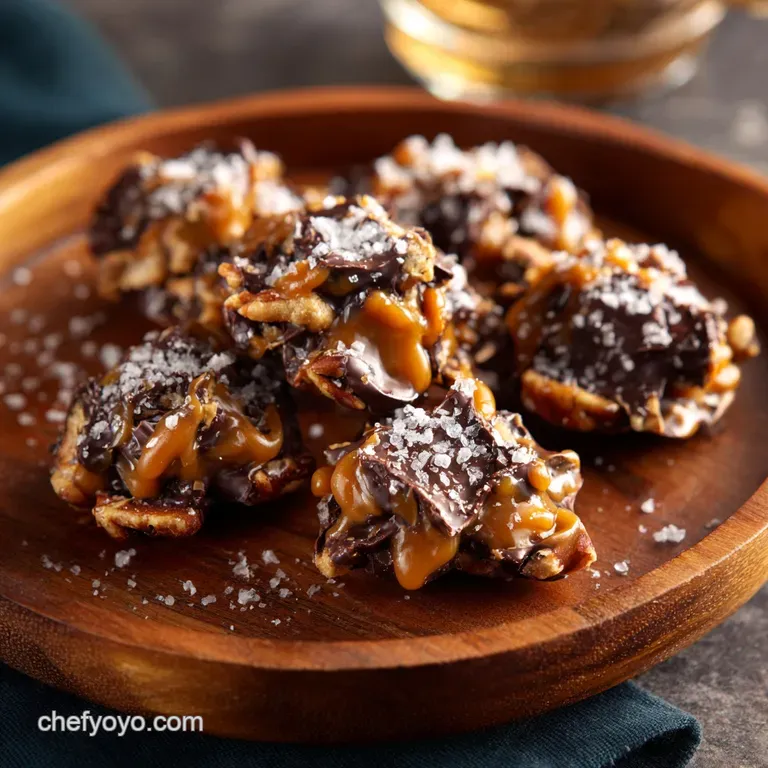
Phase III: The Double Dip Technique for Complete Chocolate Enrobing
Allow those caramel coated pecan clusters to set for at least 30 minutes until the caramel is firm to the touch. Melt your high-quality chocolate using a double boiler until smooth and glossy. I love adding a teaspoon of coconut oil here because it gives the finished chocolate a stunning shine.
Now, you can either gently drizzle or, if you're brave, dip the underside of each cluster into the chocolate, then spoon more chocolate over the top to completely cover the caramel core. Sprinkle with flaky sea salt immediately!
Troubleshooting Turtles: Expert Tips for Preventing Common Candy Failures
Salvaging Grainy Caramel: Heat, Water, and Patience
If your caramel gets suddenly crystallized or grainy when you add the cream, do not panic! Put it back on very low heat and add a tablespoon or two of water. Stir gently until the sugar crystals hopefully dissolve back into the mixture.
This is not always a guaranteed fix, but it often works to save the batch, restoring that necessary smooth texture.
Avoiding Chocolate Bloom (Grey Streaks) After Cooling
Chocolate bloom happens when the cocoa butter separates, usually because the chocolate cools too quickly or was exposed to moisture. The easiest way to avoid this dull grey look is to ensure the chocolate is melted slowly and then allowed to set naturally at cool room temperature (18 20°C).
Don't blast them in the fridge right after dipping, unless you are truly impatient!
Speed vs. Quality: Why Rushing the Tempering Process is Fatal
The most common failure point is impatience. When you're making chocolate turtles ingredients need time to set and stabilize. If you try to coat hot caramel with melted chocolate, the chocolate will instantly lose its temper and turn out soft and dull.
Give the caramel 40 minutes, minimum, to become solid enough to support the chocolate shell.
Extending the Decadence: Proper Storage and Preservation of Homemade Turtles
Countertop, Fridge, or Freezer: Optimal Short Term Freshness
Because of the high butter content in the caramel, these turtles actually store beautifully. Keep them in an airtight container at cool room temperature for up to two weeks, or in the fridge for up to a month.
If stored in the fridge, make sure they come up to room temperature for about 15 minutes before serving for the best caramel chew.
The Best Way to Thaw Chocolate Turtles Without Losing Texture
But does it freeze well? You bet. Place the fully set turtles in layers separated by parchment paper inside a robust freezer safe container. They keep well for up to six months! To thaw, transfer the container directly to the fridge overnight, then let them sit at room temperature for an hour before opening the lid.
This gradual thawing prevents condensation (moisture equals bad chocolate) from forming on the surface.
Perfect Pairings: Complementary Beverages for Chocolate Turtle Enjoyment
Coffee and Dessert Wine Recommendations
These little gems are rich, so you need a beverage that either cuts the sweetness or stands up to its intensity. A strong, dark roast coffee or a simple espresso works wonders. For a truly luxurious pairing, I suggest a sip of dark, aged Port wine or even a sweet sherry to match the complexity of the deep caramel.
If you’re hosting a holiday party and need more extreme chocolate decadence, these pair brilliantly with my Hot Chocolate Dip: Decadent, Velvety, and Ready in Just 25 Minutes . If you have leftover chocolate from coating the turtles, you might as well go all out and try my ultimate Nutella Chocolate Cake Recipe: Easy, Decadent Fudge Layers next!

Recipe FAQs
Why did my homemade caramel turn out hard and brittle instead of soft and gooey?
Hard caramel usually indicates that it was cooked to too high a temperature, likely past the firm ball stage (245°F / 118°C). For the proper gooey texture required for turtles, remove the caramel from the heat immediately when it reaches the soft ball stage (235 240°F / 112 115°C).
Ensure you use a reliable candy thermometer and measure the temperature accurately.
Can I use a different type of nut if I don't like pecans?
Absolutely. Walnuts and cashews are excellent alternatives that pair beautifully with caramel and chocolate. Regardless of your choice, make sure they are lightly toasted before assembly to enhance their flavour profile and provide the necessary crunch. Ensure the nut clusters are stable before pouring the caramel.
My finished chocolate turtles look dull and have white streaks. What went wrong?
This is a classic sign of improper chocolate tempering, often called "bloom." Tempering ensures the cocoa butter crystals are stabilized, resulting in a shiny finish and a satisfying snap.
While the turtles are safe to eat, to achieve that professional gloss, you must maintain the correct working temperature (typically 88 91°F / 31 33°C for semi sweet chocolate) during the dipping process.
What is the best way to store these decadent turtles, and how long will they last?
Store your finished turtles in an airtight container at a cool room temperature (ideally below 70°F/21°C) for up to two weeks. If the caramel is made correctly, they can maintain their texture well. To prevent sticking, always layer them between sheets of parchment paper.
Can I make these Chocolate Turtles dairy-free or vegan?
Yes, you can substitute the heavy cream and butter in the caramel with full fat canned coconut milk and high-quality vegan butter sticks. You must also use certified dairy-free or vegan chocolate for the coating.
Note that the caramel texture might require minor cooking time adjustments to account for the difference in fat content.
Why is my chocolate slipping off the caramel or cracking when it sets?
This separation often occurs if the caramel clusters were still warm or slightly greasy when dipped into the chocolate. Ensure the caramel pecan clusters are completely cool and set before dipping.
Additionally, if the chocolate is too thick or the surrounding temperature is too cold, the shell may contract too quickly, causing it to crack.
Does the quality of the chocolate truly matter for the final result?
Absolutely. Because the chocolate makes up a significant portion of the final turtle, using high-quality dark or semi sweet chocolate (around 60% cacao) provides a better flavour balance against the richness of the caramel.
Avoid using standard baking chocolate chips, as they contain stabilizers that interfere with smooth melting and proper tempering.
Homemade Pecan Chocolate Turtles Recipe

Ingredients:
Instructions:
Nutrition Facts:
| Calories | 195 kcal |
|---|---|
| Fat | 14 g |
| Fiber | 2 g |
