Luscious Cherry Jam: Sweeten Your Summer with This Homemade Delight
- look into Into the World of Cherry Jam
- A Taste of Tradition
- Why You Need This Jam in Your Life
- The Lowdown on Making Jam
- Essential Ingredients Guide: Jammin’ with Cherries!
- The Art of Professional Cooking: Unlocking the Secrets of Cherry Jam
- Pro Tips & Secrets for Luscious Cherry Jam
- Perfect Presentation for Your Cherry Jam
- Storage & Make-Ahead Tips
- Creative Variations
- Complete Nutrition Guide
- Frequently Asked Questions
- 📝 Recipe Card
look into Into the World of Cherry Jam
Ever had that feeling when your grandma pulls out a jar of her homemade cherry jam from the pantry? oh my gosh, the smell alone takes you back to those sunny summer days.
You remember the sound of laughter, family gatherings, and the sweet taste of cherries picked fresh from the tree? well, you can bring back that nostalgia with this cherry jam recipe that’s just as delicious!
Now, if you’ve been wondering how to make jam at home, let me tell you, it’s not just for the pros.
This jam is easy peasy! trust me, i’m no master chef. just a home cook with a love for homemade jam who decided to give it a go.
You’re gonna feel like a rockstar when you make this!
A Taste of Tradition
Let’s talk a bit about where this cherry jam comes from. historically, people have been preserving fruits for centuries. it’s about making the most of seasonal fruit, which is the heart of any good fruit preserves .
The art of canning cherries dates back to when folks wanted to capture summer flavors for the dreary winter months.
Isn’t that just beautiful?
Nowadays, cherry jam pops up everywhere from breakfast toast to topping on cheesecake. this jam is not just a nostalgic nod; it’s an absolute must have for modern summer desserts .
With a quick prep time of about 15 minutes and a cook time of around 20 minutes, it fits seamlessly into a busy lifestyle.
Plus, it yields about four cups , perfect for sharing or gifting!
Why You Need This Jam in Your Life
Health Benefits
As if you needed another reason to dive into this cherry goodness! cherries pack a punch when it comes to health.
They’re loaded with antioxidants and have notable cherry jam health benefits . you get all that juicy flavor and a boost to your well being too!
Versatility Like No Other
This jam isn’t just about classic toast. picture this add it to your morning yogurt, mix it into smoothies, or dollop it on a slice of cheesecake.
It transforms into amazing cherry dessert ideas in a snap! you’ll impress your friends and leave ‘em wondering how you pulled it off.
Perfect for Celebrations
Planning a potluck or holiday get-together? this jam is perfect for any occasion. it’s an easy way to elevate your cheese boards or homemade pastries.
Think: cherry stuffing for pastries or as a unique gift in those cute jars everyone loves. homemade gifts are hitting different this year!
The Lowdown on Making Jam
Alright, so let's do a quick recap. making cherry jam is an easy and rewarding cooking project. the ingredients are simple just cherries, sugar, lemon juice, and pectin.
You’ll need about an hour of your time. by the end, you’ll have a jar full of sweet spreads that is perfect for breakfast or dessert.
Plus, if you’re into small batch jam making , you can always scale the recipe down for a lesser yield, too!
So, are you ready to gather your ingredients and kick off your cherry jam adventure? Grab those fresh, ripe cherries, and let’s make something tasty!
With all that sweet talk about cherries and jam, it’s time to dive into the ingredients you’ll need for your soon-to-be favorite kitchen project. Let's get started!
Essential Ingredients Guide: Jammin’ with Cherries!
Let’s chat about the must have ingredients for making a delicious homemade cherry jam . we all know that when summer hits, cherries are one of the best fruits around! and honestly, there’s nothing quite like the taste of homemade jam bursting with fresh flavors.
So, let's break it down and make this jam-making adventure as easy as pie well, cherry pie, to be exact!
Premium Core Components
First off, let’s get our core ingredients on the table. You’ll need:
- 4 cups (600g) ripe cherries, pitted and halved
- 2 cups (400g) granulated sugar
- 1/4 cup (60ml) fresh lemon juice (this adds a zing!)
- 1 teaspoon vanilla extract (optional, but why not?)
- 1 package (1.75 oz or 49g) fruit pectin , because we want our jam to gel!
Storage and Freshness Tips
Now, a little something about storage . fresh cherries can last in your fridge for about 5-7 days . but if you've got some canned cherry jam in those best jars for canning , you can enjoy that sweet spread for up to a year ! just make sure the lids seal properly; otherwise, you'll be in a sticky situation.
When selecting cherries, look for plump, vibrant red ones! the darker, the better. they'll give you that luscious flavor we crave in our fruit preserves .
And a quick tip if you’re ever in doubt, just give them a sniff . ripe cherries smell sweet, and who doesn’t want that?
Signature Seasoning Blend
Alright, now head into the seasoning zone! While cherries are the star of our jam, a little extra flavor enhancer can take your jam from good to wow .
- Think about herb pairings . Adding a bit of mint or thyme can give your jam an unexpected twist.
- If you wanna make a spiced cherry jam , a dash of cinnamon or nutmeg works wonders.
Smart Substitutions
What if you’re out of something? No worries! Here are a few smart substitutions:
- If you’re missing fresh cherries, feel free to use frozen cherries . Just thaw and drain extra liquid. Easy peasy!
- For those avoiding sugar, consider using natural sweeteners like honey or agave. Check for low-sugar jam recipes if you need a nudge toward healthier options.
Kitchen Equipment Essentials
Now, let’s move on to your kitchen tools. You gotta have some must have equipment before diving into the jam-making process:
- Large heavy bottomed saucepan : This one’s crucial for even heat distribution.
- Wooden spoon : For stirring, obviously! Bonus, they’re pretty classic.
- Canning jars : Can't make homemade jam without them! Go for sterile ones to keep things fresh.
- A ladle and tongs help with the hot mixture; safety first!
If you don’t have fancy canning tools, that’s totally fine! You can use regular kitchen utensils —it doesn’t have to be fancy.
Why We Love Cherry Jam
So, why go through all this effort? well, cherry jam isn’t just a spread; it’s a ticket back to summer anytime you're craving it.
Imagine those cold winter mornings slathering it on warm toast, or using it in a quick fruit jam filling for pastry.
It’s that good .
Plus, did you know cherry jam is packed with antioxidants? Seriously, it’s like eating dessert and doing good for your body! So, who wouldn’t want to whip up a batch?
Now that you're all prepped with the essentials, it's time to dive into the actual cherry jam recipe. Trust me, coming up next is going to be simple, fun, and totally rewarding! Let’s get that cherry jam cooking!
The Art of Professional Cooking: Unlocking the Secrets of Cherry Jam
If you've ever thought about diving into the world of professional cooking, you've probably come across the phrase "mise en place.
" it’s a fancy french term meaning "everything in its place." and guess what? it's the first step you’ll want to focus on when making the perfect cherry jam recipe .
But before we jump into that sweet goodness, let’s break down the essentials.
Essential Preparation Steps
Mise en place : gather everything you need before you even think about turning on the heat. for our cherry jam, that includes 4 cups of ripe cherries, some sugar, lemon juice, and pectin.
This prep helps you avoid any last minute panic like realizing you’re out of sugar. oh my gosh, right?
Time management : cooking's all about timing. while you simmer your cherries, you can wash those jars and get them ready.
Trust me; multitasking will save you from scrambling around when you should be enjoying the process.
Organization strategies : Keep your workspace clear. If you have a small kitchen like me, it can feel cramped. Use small bowls to hold ingredients so you don’t have sugar spilling everywhere learned that the hard way!
Safety considerations : always be cautious with boiling sugar, folks. it can get super hot. wear an apron (you don’t want sticky sugar on your favorite shirt) and keep a pair of tongs handy for those fiery hot jars.
step-by-step Process
Ready to get your cook on? Here’s how to make that luscious cherry jam in just a few simple steps .
Prepare the Cherries : Wash ’em, pit ’em, and if you want a smoother jam, give them a little chop.
Combine Ingredients : Toss those cherries in a large heavy bottomed saucepan and mix in 1/4 cup of fresh lemon juice .
Add Sugar and Pectin : Sprinkle in the pectin and 2 cups of granulated sugar . Stir it all together.
Cook the mixture : bring it to a boil over medium high heat, stirring constantly. you want this baby to boil for 1- 2 minutes until it thickens.
If it clings to a spoon, you’re golden.
Fill the Jars : Let it chill for 5 minutes off the heat, then ladle that gooey goodness into sterilized jars, leaving 1/4 inch of headspace .
Seal and Cool : Don’t forget to wipe down the rim of the jars before putting on the lids. Now, let ’em cool if you can resist the urge to dig in!
Expert Techniques
Let’s get real: cooking is an art. And with a bit of practice, you can make something truly special! Here's how to up your jam game:
Professional methods : You don’t need a degree, just some patience. Use a potato masher if you want your cherries broken down, or keep them whole for that rustic charm.
Critical steps explained : testing doneness with a spoon is key. use the “wrinkle test” by putting a dollop of jam on a cold plate.
If it gels and holds its shape, it's ready!
Quality checkpoints : Always check your jars for cracks and make sure they’re sterilized. Spoiled jam? No thank you.
Troubleshooting tips : If your jam doesn’t set, don’t fret! You can reheat it with a bit more pectin and sugar just follow the packaging instructions for guidance.
Success Strategies
Now that you’ve got the hang of things, here are some success strategies to keep in mind.
Common mistakes to avoid : Forgetting to prep your jars or not measuring accurately. Those can lead to less than-perfect results.
Quality assurance tips : Taste as you go! If you want a little tang, use a squeeze more juice it's your jam after all.
Perfect results guide : Always choose fresh, ripe cherries canning cherries are great, but you want the best flavor for your jam.
make-ahead options : You can always whip up a double batch and save some jars for gifts. Who doesn’t love a homemade gift?
Making cherry jam isn’t just about putting stuff in a jar; it's about preserving summer flavors to enjoy all year long.
Whether you spread it on toast or use it as a filling for your favorite pastries, you'll savor that delicious jam with each taste.
Now that you're equipped with these skills, let’s transition into the delicious world of Additional Information about other cherry recipes and preserving fruits because trust me, you’ll want to keep cooking!
Pro Tips & Secrets for Luscious Cherry Jam
Let me tell you, making this cherry jam recipe is one of those delightful projects where you get to channel your inner chef.
Oh my gosh, the smell of cooking cherries fills your kitchen with pure nostalgia for summer!
Chef's Personal Insights
So, one thing i’ve learned from cooking with cherries is to always choose ripe ones. that deep red hue is your best friend! a ripe cherry means a sweeter jam.
Trust me, when you bite into it, you’ll feel like you’re at a sunny orchard, just picking the best fruit.
I often go cherry picking in my local orchard when it’s in season it’s a total blast! plus, nothing beats that fresh fruit flavor when making easy jam recipes .
Time Saving Techniques
Got a busy schedule? no worries! you can save time by prepping your jars the night before. while the jam is cooking, just sterilize those jars and set them aside.
They’ll be ready to go when your jam is bubbling away like a happy cauldron.
Flavor Enhancement Tips
For a little twist, try adding lemon zest into the mix too. it adds this bright flavor that balances out the sweetness beautifully! or, when you pour in your pectin, toss in a splash of vanilla extract.
Just think about it a cherry vanilla jam? heaven!
Presentation Advice
When it comes to the final presentation, i swear, it’s all about those jars! use the best jars for canning you can find clean, shiny, and ready to impress.
Source some cute labels too, because come on, homemade gifts are where it’s at! not to mention, gifting homemade jam can totally win you friends for life.
Just imagine the look on their faces!
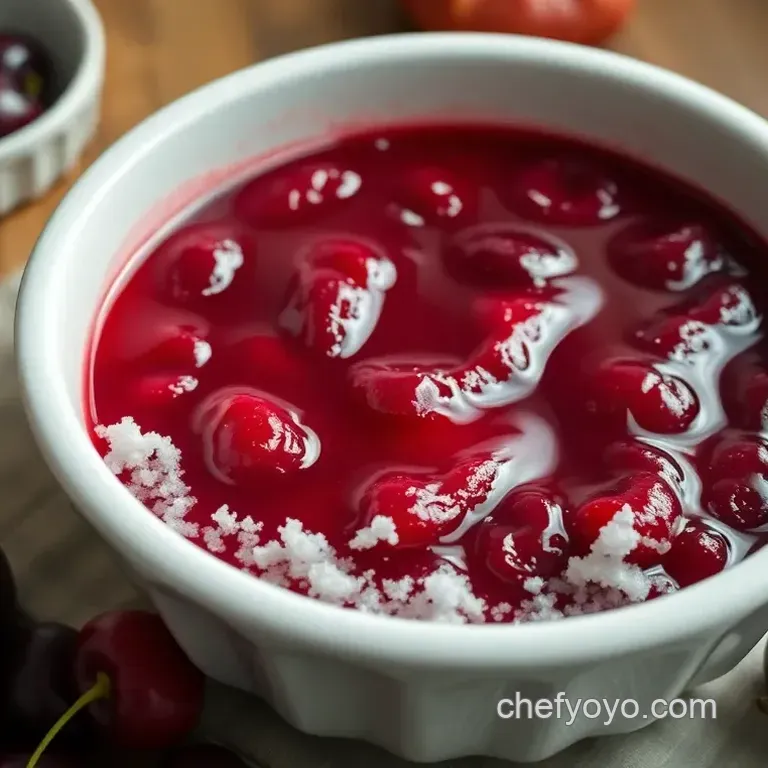
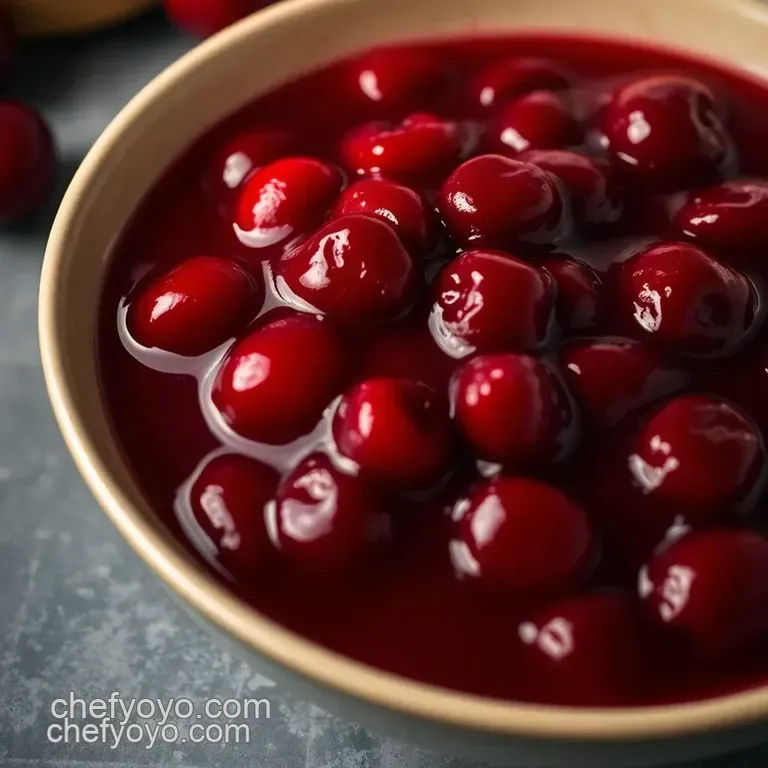
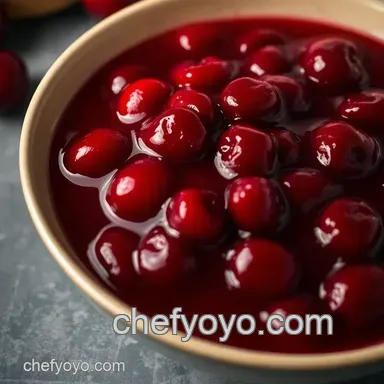
Perfect Presentation for Your Cherry Jam
Let’s talk about how to make your jam look as good as it tastes. After all, we eat with our eyes first, right?
Plating Techniques
When you fill those jars, don’t just stop at the rim. Leave a little space and wipe the edges with a clean cloth. It gives it that polished look!
Garnish Ideas
Top off your jars with a piece of twine and a small sprig of mint or even a cherry on top just a little something to say, “Hey, look at my fabulous homemade goodness!”
Color Combinations
The bright red color of your cherry jam pops against a rustic white plate or wooden board. pair up those jars with some seasonal fruits like strawberries or blueberries.
It’s not only tasty but a feast for the eyes too!
Visual Appeal Tips
Don’t be afraid to get creative! layering different fruit jam variations or even using different fruit preserves makes for a stunning display.
You can turn your simple cherry jam into a pinnacle of a summer dessert!
Storage & make-ahead Tips
Now, if you like to plan ahead, you are going to love this part!
Storage Guidelines
Homemade jam can stay fresh in the fridge for about three weeks . Just make sure your jars are airtight! For long term storage, it’s best to can those bad boys.
Preservation Methods
No one likes a spoilage surprise. if you’re canning cherries, follow standard canning methods: hot water bath and all that jazz! before you know it, you’ll have a pantry full of your own fruit treasures.
Reheating Instructions
When you’re ready to get back into the jam game, just pop open the jar and warm it gently over low heat on the stovetop.
Stir it a little trust me, the aroma will pull everyone into the kitchen!
Freshness Duration
Canned jams can last up to a year when done correctly. But we both know that since you’re making this cherry jam recipe, it might not last that long especially if your family finds out about it!
Creative Variations
Feeling adventurous? Let’s whip up some creative spins on your classic cherry jam.
Flavor Adaptations
What if i told you you can mix peaches into your cherry jam? that sweet tart combo is just divine. and if you want something different, try spiced cherry jam with a hint of nutmeg or cinnamon.
Dietary Modifications
For my friends watching their sugar intake, you can make a low-sugar jam recipe ! Just swap out some sugar for natural sweeteners like honey. Remember to check the pectin guidelines!
Seasonal Twists
Channel those seasonal flavors with cherries and rhubarb or even mixing in some apples. The options are endless!
Regional Variations
Lastly, if you want to get really fancy, try using dark chocolate shavings in your jam for a rich, unique flavor that’s a bit over the top but in the best way!
Complete Nutrition Guide
Even though we’re indulging, let’s keep it real with nutrition.
Detailed Breakdown
Each tablespoon of this jam clocks in around 50 calories . Not too shabby, right? Packed with fruit and a lot less harmful than sugary snacks.
Health Benefits
Cherry jam offers antioxidants and vitamins all good stuff for your body! Pair it with whole grain toast, and you’re good to go!
Dietary Considerations
If you’re gluten-free or vegan, just ensure your pectin is in line with your dietary needs. Lots of options out there!
Portion Guidance
A little goes a long way, so think about this jam as a little spoonful of happiness rather than smothering everything in sight.
So there you have it a complete guide to making a cherry jam recipe that’s both simple and bursting with flavor.
Don’t be afraid to dive deep into cooking with cherries . you are, after all, preserving summer in a jar! i encourage you to get in your kitchen, embrace the mess, and make something delicious.
Your next homemade gift idea is just waiting to happen! i can’t wait for you to indulge in the vibrant, sweet spread goodness that is cherry jam and remember, share your culinary adventures with me! happy cooking!
Frequently Asked Questions
What ingredients do I need for the cherry jam recipe?
For the cherry jam recipe, you'll need 4 cups of ripe cherries (pitted and halved), 2 cups of granulated sugar, 1/4 cup of fresh lemon juice, 1 teaspoon of vanilla extract (optional), and 1 package of fruit pectin. Make sure to use ripe cherries to achieve the perfect sweetness!
How do I know when my cherry jam is done cooking?
Your cherry jam is done cooking when it thickens to a gel-like consistency. You can test this by placing a spoonful on a plate and allowing it to sit for a minute; if it wrinkles when you push it with your finger, it’s ready! Boil it for 1-2 minutes while stirring constantly to achieve the right texture.
Can I use frozen cherries for this cherry jam recipe?
Yes, you can use frozen cherries in your cherry jam recipe! Just be sure to thaw them and drain any excess liquid before using. This can save time and still yield delicious results!
How long can I store cherry jam, and what's the best way to do it?
You can store homemade cherry jam in the refrigerator for up to 3 weeks. If you choose to can the jam properly, it can last up to a year. Make sure to sterilize your jars before canning to prevent spoilage.
What are some variations I can try with this cherry jam recipe?
There are many fun variations you can try! For a cherry vanilla jam, add more vanilla extract. If you want to spice things up, consider adding a pinch of cinnamon or nutmeg. You can also mix cherries with rhubarb for a tangy twist. Feel free to experiment!
Is this cherry jam recipe suitable for canning?
Absolutely! This cherry jam recipe is suitable for canning. Just follow standard canning procedures: sterilize your jars, fill them while the jam is hot, and ensure proper sealing before storage. Properly canned jam can last up to a year, so you can enjoy it long after cherry season!
Luscious Cherry Jam Sweeten Your Summer With Thi
Ingredients:
Instructions:
Nutrition Facts:
| Calories | 50 |
|---|---|
| Protein | <1g |
| Fat | 0g |
| Carbs | 13g |
| Fiber | <1g |
| Sugar | 12g |
| Sodium | 0mg |
