Mexican Chicken Recipe with Peppers and Spices
- Time: Active 15 minutes, Passive 12 minutes, Total 27 minutes
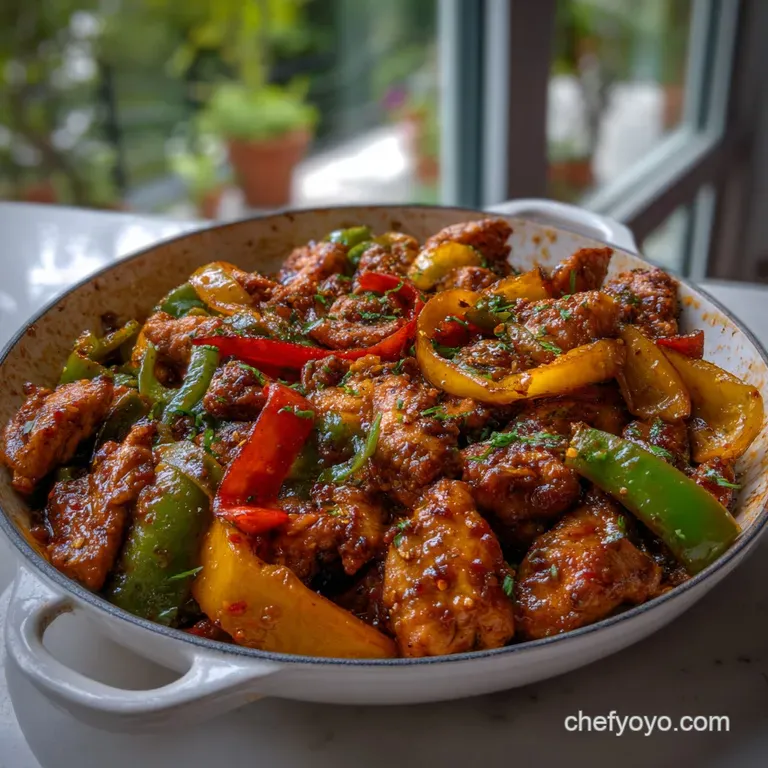
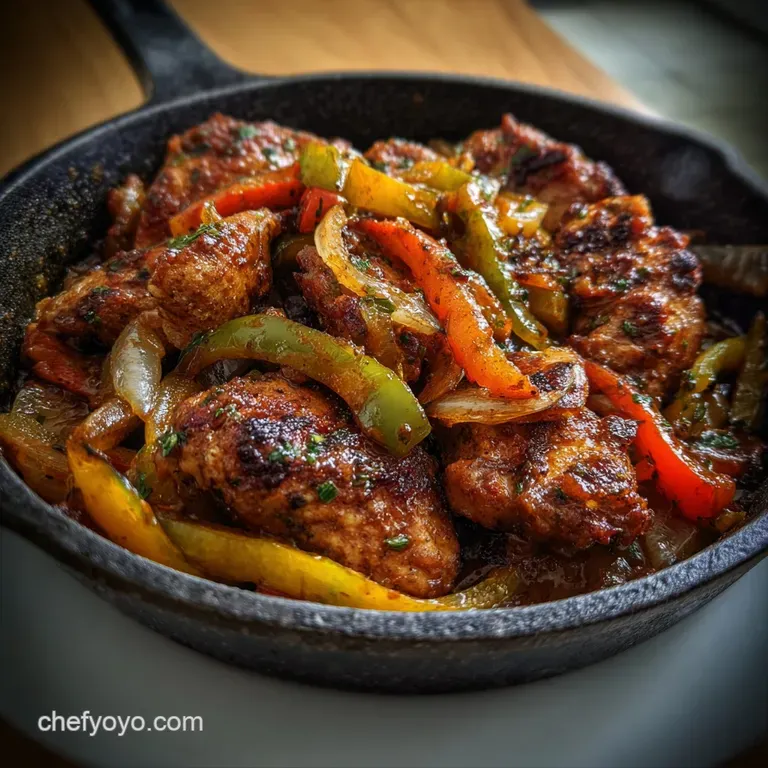
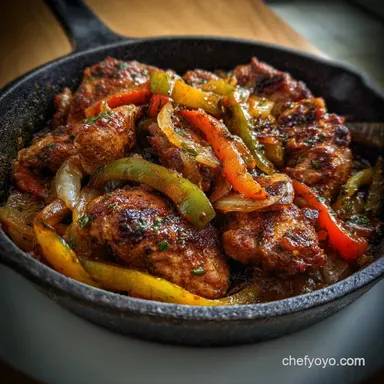
- Flavor/Texture Hook: Sizzling strips of spiced chicken paired with snap crisp peppers and a zesty lime finish.
- Perfect for: A fast weeknight dinner that brings the energy of a Mexican street market to your kitchen.
- The Science of Bold Searing
- Quick Stats for Busy Cooks
- Choosing Your Vibrant Ingredients
- Tools for a Perfect Sizzle
- Step-By-Step Street Food Magic
- Fix Common Cooking Hiccups
- Dietary Tweaks for Every Table
- Keep Your Leftovers Fresh
- Best Sides for This Meal
- Myths About Mexican Spices
- Recipe FAQs
- 📝 Recipe Card
Imagine the sound of cold meat hitting a scorching hot pan. That immediate hiss and the instant cloud of smoky paprika and toasted cumin filling your kitchen is what this dish is all about.
This flavorful Mexican chicken recipe with peppers and spices is a guaranteed crowd pleaser that I turn to whenever I need a meal that looks as bold as it tastes.
I’ve spent years trying to replicate that specific street food char without a professional flat top grill. The secret isn't a fancy gadget, it's about respecting the heat and the timing of your spices. We aren't just cooking food here; we're building layers of texture that make every bite feel alive.
You can expect a meal that hits every sensory note. The chicken is juicy and stained dark red with spices, while the peppers provide a sweet, colorful crunch that cuts through the heat. It’s simple, fast, and honestly, way better than what you’d get at most local takeout spots.
Let's get into how we make this happen.
The Science of Bold Searing
Maillard Reaction: High heat causes amino acids and sugars in the chicken to react, creating the browned, savory crust and deep aromatic complexity.
Starch Gelatinization: While we don't use flour here, the spices themselves contain carbohydrates that hydrate and thicken slightly in the oil, forming a "velvety" coating on the meat.
Volatile Oil Release: Heating the ground cumin and Mexican oregano in oil (blooming) dissolves their flavor compounds, making them taste significantly more intense than if they were just stirred into liquid.
Cellular Hydration: Salt draws moisture to the surface of the chicken initially, but given enough time or heat, it reabsorbs, seasoning the meat deeply and helping it retain its juices during the fast cook.
Quick Stats for Busy Cooks
When you're trying to get dinner on the table, precision matters. This isn't a slow braised stew; it's a high speed dance in a hot skillet. If you want a slower, more tender result, you might consider a Country Gravy Recipe for a different night, but today, we are all about that fast sizzle.
| Feature | Detail |
|---|---|
| Protein Focus | 1.5 lbs Chicken Breast strips |
| Heat Level | Medium High (High smoke point oil is a must) |
| Texture Balance | 70% sear on meat, 30% crunch on vegetables |
| Flavor Profile | Earthy, smoky, and bright citrus |
Mastering the Spice Bloom
Spices are essentially dried plants with dormant oils. When they hit the hot avocado oil in your pan, those oils "wake up." This is why your kitchen will suddenly smell like a restaurant the second the chicken hits the pan. If you just tossed the spices into a cold pot, you'd lose about 40% of that flavor potential.
Avoiding the Sogginess Trap
The biggest enemy of this recipe is steam. If you crowd the pan with too many peppers at once, they release water and begin to boil rather than sear. We want a "shatter" to that pepper skin, not a soft mush.
This is why we slice the onions into half moons and the peppers into thin ribbons surface area is your friend.
Choosing Your Vibrant Ingredients
Selecting the right components makes the difference between a dull stir fry and a vibrant Mexican chicken recipe. I always look for bell peppers that feel heavy for their size; that weight indicates high water content, which translates to a better snap when bitten.
- 1.5 lbs chicken breast: Sliced into 1/2 inch strips. Why this? Breasts cook fast and absorb the dry rub spice blend beautifully. (Substitute: Chicken thighs for more fat and flavor, though they take 3 minutes longer).
- 3 large bell peppers: One red, one yellow, one green. Why this? The color variety provides different sweetness levels and a stunning visual. (Substitute: Poblano peppers for a darker, earthier heat).
- 1 large white onion: Sliced into half moons. Why this? White onions have a sharper, cleaner bite that is traditional in Mexican cooking. (Substitute: Red onion for a milder, sweeter finish).
- 2 tbsp avocado oil: For the over high heat sauté. Why this? Avocado oil has a high smoke point, meaning it won't burn or turn bitter. (Substitute: Grapeseed oil).
- 1 tbsp smoked paprika: The backbone of the color. Why this? Adds a deep red hue and a campfire scent without needing a grill. (Substitute: Sweet paprika plus a drop of liquid smoke).
- 1 tsp ground cumin seeds: Earthy and warm. Why this? Cumin provides the "soul" of the Mexican flavor profile. (Substitute: Toasted and crushed coriander seeds).
- 1 tsp garlic powder: For even distribution. Why this? Fresh garlic can burn too quickly at the heats we are using. (Substitute: 3 cloves fresh garlic, added only in the last 60 seconds).
- 1/2 tsp onion powder: Concentrated savory notes. Why this? It boosts the "umami" without adding extra moisture from more raw onions. (Substitute: Shallot salt).
- 1/2 tsp dried Mexican oregano: Citrusy and floral. Why this? It is a different species than Mediterranean oregano and tastes less minty. (Substitute: Dried marjoram).
- 1/4 tsp cayenne pepper: Just a hint of heat. Why this? Provides a back of-the throat warmth that balances the sweet peppers. (Substitute: Red pepper flakes).
- 1 tsp sea salt: To draw out juices. Why this? Coarser salt grains provide better coverage on the meat strips. (Substitute: Kosher salt).
- 1/2 tsp cracked black pepper: For a sharp bite. Why this? Freshly cracked pepper has more volatile oils than the pre ground dust. (Substitute: White pepper).
- 1 fresh lime: Juiced at the very end. Why this? Acid cuts through the oil and "pops" the other spice flavors. (Substitute: Lemon juice).
- 1/4 cup fresh cilantro: For a herbal finish. Why this? Adds a burst of green and a fresh, soapy sweet aroma. (Substitute: Flat leaf parsley).
Ingredient Component Analysis
| Ingredient | Science Role | Pro Secret |
|---|---|---|
| Avocado Oil | Heat Transfer | Use it to coat the chicken before the spices for a "glue" effect. |
| Smoked Paprika | Color/Maillard Support | It actually aids in the browning process because of its natural sugars. |
| Lime Juice | Protein Tenderizer | Adding it at the end prevents the chicken from becoming "chalky" or tough. |
Tools for a Perfect Sizzle
You don't need a professional kitchen, but a thin, flimsy pan will ruin this dish. You need something that can hold heat like it’s holding a grudge.
- Lodge Cast Iron Skillet: This is my go to. It retains heat so well that when you add the cold peppers, the temperature doesn't plummet.
- KitchenAid Chef's Knife: A sharp blade is non negotiable for those thin bell pepper ribbons.
- Large Stainless Steel Mixing Bowl: You'll need this to toss the chicken in the spice rub before it hits the pan.
- Silicone Spatula or Tongs: Tongs are better for flipping individual chicken strips to ensure even browning.
Chef's Tip: Put your cast iron skillet in the oven at 400°F for 10 minutes before you even turn on the stove. This ensures the entire surface is evenly saturated with heat, preventing "cold spots" that lead to unevenly cooked meat.
step-by-step Street Food Magic
Ready? This goes fast. Make sure your peppers are chopped and your lime is halved before the chicken touches the pan. This is a recipe with peppers and spices that demands your full attention for about twelve minutes.
Step 1: Prep for Impact
In a large bowl, combine the sliced chicken strips with the avocado oil, smoked paprika, cumin, garlic powder, onion powder, Mexican oregano, cayenne, salt, and black pepper. Use your hands or tongs to coat every single piece. Note: Coating in oil first prevents the spices from clumping.
Step 2: The Perfect Sear
Heat your skillet over medium high heat until a drop of water dances and evaporates instantly. Add the chicken in a single layer. Don't touch it for 3 minutes. Cook until the bottom is dark mahogany and has a visible crust.
Step 3: The Flip
Turn the chicken strips over. They should release easily from the pan if they have formed a proper sear. Cook for another 2 minutes until the chicken is nearly cooked through.
Step 4: Adding the Onions
Push the chicken to the outer edges of the pan and drop the onion half moons into the center. Sauté for 2 minutes until the onions are translucent and picking up the brown bits (fond) from the pan.
Step 5: Incorporating the Peppers
Add all three colors of bell pepper ribbons into the pan. Toss everything together vigorously. Cook for 3 to 4 minutes until the peppers are blistered but still have a slight snap.
Step 6: The Citrus Punch
Turn off the heat entirely. Squeeze the fresh lime juice over the entire mixture. Listen for the sizzle as the juice deglazes the pan and coats the chicken.
Step 7: The Herb Finish
Toss in the chopped cilantro and give it one final mix. The residual heat will wilt the cilantro just enough to release its aroma without turning it black.
Step 8: Resting the Meat
Let the pan sit for 2 minutes before serving. This allows the juices to redistribute so they don't leak out the moment you bite into a piece of chicken.
Fix Common Cooking Hiccups
Even the best of us make mistakes. I remember once trying to make this in a crowded non stick pan; the chicken basically boiled in its own juices, and it was a gray, sad mess. Here is how you avoid that.
Why Is the Chicken Rubbery?
This usually happens because the chicken was cooked for too long at too low a temperature. When the heat isn't high enough to sear the outside quickly, the internal proteins tighten up and squeeze out all the moisture, leaving you with "bouncy" meat.
Fixing a Watery Pan
If you see liquid pooling in the bottom of the skillet, your heat is too low or you added the peppers too early. Immediately crank the heat to high and don't stir for 60 seconds to allow the liquid to evaporate.
| Problem | Cause | Fix | Pro Tip |
|---|---|---|---|
| Burnt Spices | Heat too high/No oil | Add a splash of water/broth | Bloom spices in oil on the meat first. |
| Soggy Peppers | Crowding the pan | Sauté in two batches | Keep peppers in a "ribbon" cut for faster searing. |
| Lack of Flavor | Old spices | Add more lime and salt | Rub Mexican oregano between palms to release oils. |
Managing Bitter Burnt Spices
If the paprika burns, it turns bitter. If your pan looks like it's smoking too much, add a tiny splash of water. The steam will lift the spices off the hot surface and stop the burning process instantly. This is a trick I use when my cast iron gets a bit too enthusiastic.
Dietary Tweaks for Every Table
This chicken recipe with peppers and spices is naturally quite healthy, but we can make it fit almost any lifestyle with a few small changes.
Going Low Carb and Keto
This dish is already extremely keto friendly. To keep it that way, serve it over cauliflower rice or in lettuce wraps instead of with flour tortillas. The fat content from the avocado oil is great for macros.
Creating a Paleo Version
For a strict Paleo or Whole30 approach, ensure your smoked paprika doesn't have added sugar or anti caking agents. Serve this alongside a big pile of sautéed greens or some roasted sweet potatoes.
Ingredient Swap Guide
| Original Ingredient | Substitute | Why It Works |
|---|---|---|
| Chicken Breast | Portobello Mushrooms | Thick slices provide a "meaty" texture for vegans. Note: Will cook much faster. |
| White Onion | Leeks (white parts) | Provides a much milder, more buttery onion flavor. |
| Avocado Oil | Ghee | Ghee has a high smoke point and adds a rich, nutty depth. |
Keep Your Leftovers Fresh
This dish actually tastes better the next day as the spices continue to penetrate the meat. If you've ever had a burger patty recipe leftover, you know how those flavors can meld.
- Fridge: Store in an airtight glass container for up to 4 days.
- Freezer: You can freeze this for up to 2 months. However, be warned: the peppers will lose their "snap" and become soft upon thawing.
- Reheating: Don't use the microwave if you can help it; it makes the chicken rubbery. Instead, toss everything back into a hot skillet with a teaspoon of water for 3 minutes.
- Zero Waste Tip: Don't throw away the cilantro stems! Chop them very finely and add them into the pan at the same time as the onions. They have more flavor than the leaves. Also, save the lime rinds to zest over the top for an extra aromatic punch.
Best Sides for This Meal
This is a big, bold protein, so you want sides that can either stand up to the spice or provide a cooling contrast. It's much like the balance you'd look for after a heavy Giblet Gravy Recipe during a holiday meal you need contrast.
- Cilantro Lime Rice: The classic pairing. The fluffiness of the rice soaks up the extra juices from the chicken and peppers.
- Charred Corn Salad: Mix corn with lime, cotija cheese, and a bit of chili powder for a sweet and salty side.
- Refried Black Beans: Provides a creamy texture that balances the crunch of the bell peppers.
- Orange Crush Pairing: To drink, I highly recommend a Maryland Orange Crush Recipe. The bright citrus and carbonation cut through the smoky spices perfectly.
- Sweet Finish: If you have a sweet tooth after dinner, a warm Cinnamon Rolls recipe is a decadent way to end the evening, though it's far from traditional!
Comparison: Fast vs Classic Method
| Feature | Fast (This Recipe) | Classic (Slow Braise) |
|---|---|---|
| Cooking Time | 12 minutes | 45 minutes |
| Chicken Texture | Seared and bouncy | Fall apart tender |
| Pepper State | Bright and crisp | Soft and integrated |
Decision Shortcut
- If you want a smoky depth, add an extra teaspoon of smoked paprika and a pinch of chipotle powder.
- If you want it extra juicy, use chicken thighs instead of breasts and add 2 minutes to the sear time.
- If you want it kid friendly, swap the green peppers for more orange ones and omit the cayenne pepper entirely.
Myths About Mexican Spices
Myth: Searing meat "seals in" the juices. Actually, searing creates flavor through the Maillard reaction, but it doesn't create a waterproof barrier. Moisture loss still happens, which is why we don't overcook the chicken.
Myth: Mexican oregano is just "regular" oregano. They are entirely different plants. Mediterranean oregano is related to mint, while Mexican oregano is related to lemon verbena. The latter has citrus notes that are vital for this recipe with peppers and spices.
Myth: You should always use fresh garlic. In over high heat sautéing, garlic powder is often superior because it won't burn and become bitter as quickly as fresh minced cloves. It coats the meat more evenly for a consistent flavor profile.
This vibrant Mexican chicken recipe with peppers and spices is more than just a quick meal; it's a technique for bringing maximum flavor out of simple pantry staples. Once you master the over high heat sear and the spice bloom, you'll never go back to boring chicken again.
Trust me on the lime juice at the end it's the magic trick that brings the whole dish to life. Let's crack on and get cooking!

Recipe FAQs
Can I use pre-sliced or frozen chicken to save time?
No, slicing it yourself is recommended. Pre-sliced chicken is often uneven, leading to some pieces overcooking while others remain raw. If you enjoy learning technique optimization, the principle of creating uniform surface area for even searing here is similar to how fat ratios affect texture in our Béarnaise Sauce Recipe: Master The Classic Steakhouse Emulsion.
What is the highest heat setting recommended for searing the chicken?
Use medium high heat, ensuring the pan is fully preheated. The goal is to achieve the Maillard reaction quickly, but if the heat is too high without enough oil, the spices will burn before the chicken cooks, leading to bitterness.
My peppers are soggy, not crisp; what went wrong?
You crowded the pan, causing steaming instead of searing. To fix this, remove the chicken, turn the heat up high, let the excess moisture evaporate, and then add the vegetables back in small batches. This forces high surface temperature contact, which is key to texture control.
Can I substitute the Mexican oregano with Italian oregano?
Yes, but the flavor profile will change significantly. Italian oregano is sharper and mintier, whereas Mexican oregano has a more citrusy, earthy profile crucial to authentic taste. If you enjoy bright, contrasting flavors, see how we achieve that punch in our Greek Dressing: Authentic Homemade Vinaigrette Recipe.
Why add the lime juice only after turning off the heat?
Adding acid too early while cooking toughens protein fibers. Squeezing the lime post cook allows the bright, volatile citrus oils to coat the finished ingredients without stewing the chicken or making it chewy.
Is it better to use fresh or ground spices for the rub?
Freshly ground spices are superior for this high heat recipe. They release more aromatic oils when bloomed in the initial hot oil, creating a deeper, more complex crust on the chicken.
Can I make a dark, smoky version of this without using chipotle?
Yes, rely heavily on high-quality smoked paprika and cumin. You can also lightly toast your spices in a dry pan for 30 seconds before mixing them with the oil and chicken; this technique deepens the earthy notes, similar to how we develop depth in the umami base for our Korean BBQ Sauce: Easy Recipe for Ultimate Bulgogi Marinade.
Mexican Chicken Peppers Spices
Ingredients:
Instructions:
Nutrition Facts:
| Calories | 402 kcal |
|---|---|
| Protein | 53.4 g |
| Fat | 13.2 g |
| Carbs | 12.8 g |
| Fiber | 3.8 g |
| Sugar | 6.1 g |
| Sodium | 585 mg |
