Cookies N Cream Mini Cheesecakes: Our Ultimate Creamy Dream

Why Mini Cheesecakes Are the Perfect Dessert Solution
Let's be honest. Making a full and sized cheesecake is high and stakes drama. You spend four hours stressing over the water bath setup, only to have the entire surface crack into a geographical map of stress when you pull it out of the fridge. I've been there. I've cried over a cracked key lime cheesecake.
Never again, friend. The minute I tried making individual mini cheesecakes in a muffin tin, my life changed. They are easier to handle, they bake faster, and honestly, they feel so much fancier. It’s brilliant.
These Cookies n Cream Mini Cheesecakes are exactly the sweet spot between satisfying a serious craving and keeping the faff level low.
Portion Control Made Easy: Serving Individual Delights
This is the sneaky genius of the mini dessert. You get that perfect, thick, creamy layer, that satisfying crunch of the Oreo crust, and zero slicing anxiety. Think about entertaining.
No one has to watch you try to cut a perfect wedge of cheesecake only for it to cling stubbornly to the knife (and then accidentally smash the crumb base while trying to scrape it off). Because these are individual cheesecakes, they are ready to serve.
Just pop them out of the paper liner if you chill them long enough, they come right out, promise and you’re done. Instant dessert hero status.
Mastering the Smooth Swirl: Achieving the Iconic Look
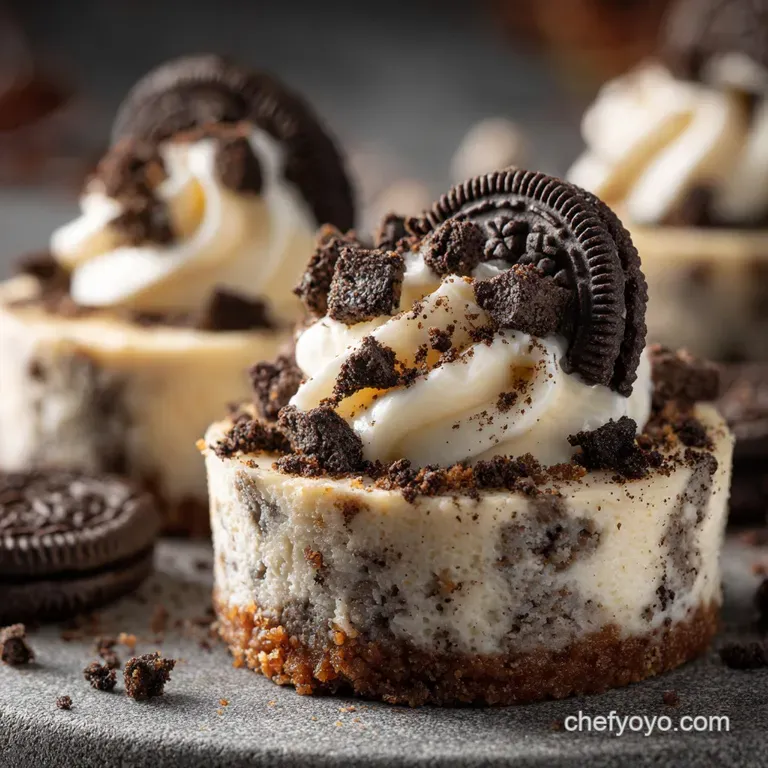
So much of the appeal of a Cookies n Cream dessert is that visual mix of deep, dark chocolate against the bright white filling. We don't want the chocolate sandwich biscuits completely pulverized into dust in the filling; we want chunks! We are looking for texture, baby.
I use two methods for the biscuits: the first batch is absolutely annihilated for the crust (they need to pack tight), and the second batch is broken into rough, pea and sized pieces just before folding them into the batter.
This keeps the classic look intact and gives you that perfect little crunch when you bite into the cream cheese filling.
The Secret to 'No and Fuss' Baking Success
"No and fuss" in baking usually means "no technique required," but here, "no and fuss" means minimizing the risk of failure that comes with a large cake. The major crack and prevention steps are absolutely non and negotiable, but they’re not hard.
We’re talking about controlled mixing (no speed demons allowed) and the essential water bath. These mini versions bake in 25 minutes flat, which saves you hours of oven time compared to their big sibling.
Trust me, spending five extra minutes prepping the water bath is far easier than staring anxiously through the oven door for an hour and a half.
Gathering Your Components for Cookies n Cream Mini Cheesecakes
The ingredient list is wonderfully short, but quality truly matters when you only have four main components (cream cheese, sugar, eggs, and cookies). Seriously, stop trying to use that low and fat cream cheese. It’s dry and it just won’t give you the velvety result we need here. You want decadence, right?
Go full and fat or go home.
Building the Perfect Crumb Base: Ingredient Ratio Guide
A bad crust is soggy, crumbly, or, worst of all, burnt. I once tried to use half butter because I was feeling virtuous. Mistake. The crust just disintegrated when I took the paper off. You need enough melted butter to act as the glue. The ratio is simple, but crucial for stability.
| Base Problem | Common Fix |
|---|---|
| Crumbly or Loose Base | Needs more butter (1 2 tsp more) |
| Oily or Soggy Base | Reduce butter slightly or try a 5 minute pre and bake |
The key here is that the mixture should resemble wet sand when you mix it together. Not sloppy, but definitely wet enough that if you pinch a little between your fingers, it holds its shape perfectly.
Selecting Quality Dairy: Ensuring a Velvety Filling Texture
I’ve already hammered home the full and fat point, but let's talk temperature. If you take the cream cheese straight from the fridge and try to beat it, you will end up with little, stubborn, chilly lumps that absolutely refuse to blend in. The result? A grainy texture.
I usually take everything out the cream cheese, the eggs, the sour cream at least an hour before I plan to start mixing. If you forget (I forget often), zap the cream cheese blocks for 15 seconds in the microwave. It’s a cheat, but it works in a pinch.
The filling has to be smooth before it hits the oven.
Essential Equipment: Muffin Tins and Water Baths
You need a standard 12 cup muffin tin, naturally. Make sure you use paper liners, or even better, those slightly sturdier foil liners. They make removing the cooled cakes so much easier. As for the water bath don't panic. You aren't submerging your cheesecakes.
You need a big roasting pan (the one you use for the Thanksgiving turkey works great) that is large enough to snugly fit the muffin tin inside. This creates a moist, gentle cooking environment.
Related Recipes Worth Trying
- Ranch Chicken Spaghetti: The Ultimate Creamy, Cheesy Family Casserole — Ranch Chicken Spaghetti is the ultimate creamy comfort food. This chicken ranch spaghetti casserole uses a silky roux, not canned soup, making it a Quick...
- Pumpkin Roll Recipe Easy: Crack Free Roulade with Tangy Cream Cheese — This Traditional Pumpkin Roll is the autumn classic you need. Learn the crack free technique for a perfect Spiced Pumpkin Roll, complete with a silky...
- Sweet Potato and Black Bean Quinoa Bowls The Creamy Avocado Lime Dressing Recipe — Sweet Potato and Black Bean Quinoa Bowls are hearty, healthy, and perfect for meal prep! Get this easy sweet potato black bean quinoa bowl recipe featuring...
Prepping the Components: Crust and Creamy Filling
Right then, let's crack on. First, get those biscuits into submission. I use a food processor for a fast, fine crumb, but placing them in a Ziploc bag and taking out some aggression with a rolling pin works just as well.
Mix that fine crumb with the melted butter, press it into the liners, and pop them in the oven for a quick five and minute set. While those are cooling slightly, start on the star of the show.
Beat the room and temperature cream cheese until it looks like thick, luxurious velvet scraping the bowl down every 30 seconds is non and negotiable here. Add the sugar, sour cream, and vanilla. Finally, the eggs go in, one at a time, just until the yellow disappears. The minute the batter is uniform, you stop.
Put the whisk down. Seriously.
Baking and Cooling Your Cookies n Cream Mini Cheesecakes
This stage is all about patience and thermal control. If you rush it, the structure collapses.
Pressing the Crust: Achieving a Compact, Stable Base
Once you've divided the buttery crumbs into the liners, you must press them down hard. I use the bottom of a shot glass or a small metal measuring cup something flat and smooth. You want a compact, stable foundation.
If you press too lightly, the crust will crumble when you try to lift the finished cheesecake out of the liner.
Whipping the Batter: Techniques for a Lump and Free Cheesecake
I know the temptation is to crank up the stand mixer speed to get it done fast, but resist! Low speed prevents air incorporation. Air is the enemy of a smooth, crack and free cheesecake.
If your cream cheese was warm enough, you shouldn't need more than 3 or 4 minutes total mixing time (excluding the eggs). Once the batter is silky, gently fold in those rough and chopped cookie chunks with a spatula. We don't want the mixer shattering those beautiful pieces.
The Water Bath Method: Preventing Cracks in Mini Desserts
This step is the difference between perfection and disappointment.
CRUCIAL WARNING: Make sure you pour boiling water into the roasting pan after the muffin tin is already sitting inside the pan, and do this only after the whole setup is on the oven rack.
Trying to move a roasting pan full of sloshing boiling water is a recipe for disaster (and severe burns).
The water bath creates steam, ensuring that the environment in your oven is moist and that your cheesecakes cook gently from the sides and bottom, preventing the edges from setting too fast and pulling apart.
Low and Slow: Optimal Baking Times and Temperature Checks
We are baking at 325°F (160°C). After about 25– 30 minutes, they should look set around the edges, maybe slightly puffed, but the centre the very middle should have a slight wiggle.
It’s not liquid, but if you give the pan a gentle nudge, it should wobble like perfectly set jelly. If you don't see that wobble, keep baking for 3 more minutes and check again. The centre will finish setting up during the crucial cooling phase.
Post and Bake Transition: From Oven Heat to Chill
Don't yank them out. Please. The most common mistake is going from 325°F straight to room temperature air. The rapid temperature drop shrinks the cheesecake instantly, causing a massive, ugly crack. Instead, turn the oven off. Prop the door open slightly with a wooden spoon (or a folded tea towel).
Let them sit there for 30 minutes, then take them out of the water bath and place them on a rack to finish cooling to room temperature. Only then do they go into the fridge for their mandatory minimum 4 hour nap.
Troubleshooting and Storage Solutions
Listen, mistakes happen. I still mess up sometimes, usually because I’m impatient. These tips should save you some headache.
Preventing a Sinking Center: Why Your Cheesecakes Collapse
If your cheesecakes look tall and puffy when they come out of the oven but then sink drastically in the middle, you introduced too much air during the mixing phase. Remember: air expands when heated, giving you a beautiful rise, but when it cools, that air escapes and the structure deflates dramatically.
Low and slow mixing, guys. Also, checking your baking powder if you accidentally added any, skip it next time!
Shelf Life and Freezing: Storing Leftover Mini Treats
These are amazing chilled. They keep beautifully in an airtight container in the refrigerator for up to 5 days. For longer storage, mini cheesecakes freeze brilliantly. Cool them completely, then freeze them without the whipped cream topping on a baking sheet.
Once solid, wrap each one individually in cling film, then foil, and stash them in the freezer for up to a month. Thaw overnight in the fridge.
Creative Variations on the Classic Cookies n Cream
Boredom is the enemy of a home cook, so once you nail the base recipe, start playing around.
Chocolate Overload: Dark Chocolate Swirl Options
Want to dial up the richness? Melt about 2 oz of good dark chocolate (around 70% cocoa) with a teaspoon of oil (it helps it stay liquid). After you've poured the white batter into the cups, drizzle the melted chocolate over the top and use a toothpick or skewer to create a quick, lazy swirl pattern just before baking.
Don't go deep; you just want a surface marble effect.
Seasonal Swaps: Mint and Pumpkin Spice Interpretations
This basic recipe is a perfect template. In the fall, swap out the chocolate sandwich biscuits for gingersnaps or Graham crackers, reduce the vanilla, and add 1 tsp of pumpkin pie spice and ¼ cup of canned pumpkin puree.
For a fun holiday twist, try using those mint chocolate sandwich biscuits (you know the ones) and adding a tiny dash of peppermint extract to the filling.
Nutritional Breakdown: Estimating Serving Sizes
Look, these are full and fat, creamy desserts designed for pleasure, not for dieting. Each mini cheesecake is quite rich and satisfying, so if you're serving them after a heavy meal, one per person is definitely enough. If you’re just having a coffee date, maybe stick to two. They are small, but mighty!

Recipe FAQs
I followed the recipe precisely, but my mini cheesecakes have tiny little cracks what gives?
This common headache is usually down to over mixing the batter (introducing too much air) or cooling the cakes too quickly, which causes them to seize up. Remember the golden rule: low and slow is key always use the lowest speed when mixing the eggs and let them cool gradually inside the switched off oven.
How far ahead can I make these brilliant Cookies n Cream Mini Cheesecakes for a party?
These are the perfect make-ahead treat! You can bake them up to 3 days in advance and keep them covered in the fridge, but only add the whipped cream and biscuit crumble garnish right before serving, otherwise, the cream might weep.
Is using the water bath really necessary, or can I skip the faff?
While you technically can skip it, the water bath (Bain Marie) is the secret weapon for preventing a dry, curdled texture. It ensures incredibly gentle, even heat and a silky smooth finish, making the small bit of extra effort well worth it for a luxurious texture.
I don't have sour cream in the fridge; can I use Greek yogurt instead?
Absolutely! Full fat Greek yogurt or crème fraîche are excellent, direct swaps for sour cream as they both provide the necessary richness and tang that helps balance the sweetness of the biscuits.
I want to jazz these up a bit can I swap the chocolate sandwich biscuits for something else?
Go for it! Feel free to substitute the chocolate biscuits with digestives (a classic British twist), shortbread, or even Biscoff/speculoos biscuits for a spicy, caramel kick; just ensure the weight ratio for the crust remains the same.
How long are the leftovers good for once they are fully baked and chilled?
Properly stored in an airtight container in the refrigerator, these mini cheesecakes will keep beautifully for about 4 5 days, making them a great option to enjoy for elevenses or a posh pudding all week long.
No Fuss Cookies N Cream Mini Cheesecakes

Ingredients:
Instructions:
Nutrition Facts:
| Calories | 199 kcal |
|---|---|
| Protein | 5.0 g |
| Fat | 11.0 g |
| Carbs | 20.0 g |
