No Knead Gluten Free Bread: Effortless Artisan Loaf with a Crusty Finish
- The Effortless Loaf: Mastering No-Knead Gluten-Free Artisan Bread
- Essential Components for Your Artisan Gluten-Free Loaf
- Achieving the Perfect Crumb: The Science Behind No-Knead Gluten-Free Baking
- Baking Your Artisan Loaf: Step-by-Step Guide
- Troubleshooting and Expert Secrets for Baking Better GF Bread
- Recipe FAQs
- 📝 Recipe Card
The Effortless Loaf: Mastering No-Knead gluten-free Artisan Bread
The Myth of the Dense gluten-free Loaf
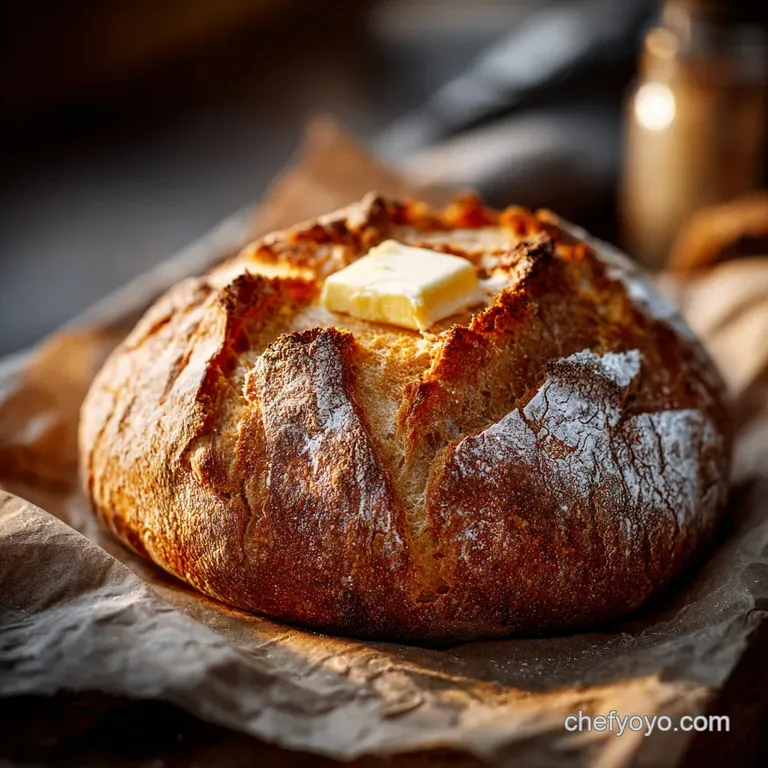
The smell of baking bread is pure magic, right? That deep, yeasty, warm aroma that fills your whole kitchen is honestly the best part of the weekend. And when you pull this beauty from the Dutch oven, the sound of that cracking, mahogany crust? That sound is the sound of victory, my friend.
For years, making a proper, crusty loaf without gluten felt like some sort of culinary mythical quest. We were all just churning out expensive, slightly suspicious house bricks that tasted vaguely of sadness and rice flour.
I promise you, this recipe changes everything about your perception of homemade No Knead gluten-free Bread .
We’re ditching the stand mixer, ignoring the messy countertop kneading, and embracing patience. This is the simple, slow fermentation method you already love from classic artisan loaves, engineered specifically for gluten-free flours. Get ready to bake a loaf so good, you’ll forget wheat ever existed.
Why the No-Knead Technique is a Game Changer for GF Baking
We rely on the time instead of muscle, which is brilliant. In traditional baking, kneading builds that robust gluten structure that gives bread its chewiness. Since we’re working without gluten, we need something else to create structure and air pockets.
In this recipe, we achieve that structure through extremely high hydration and the power of psyllium husk. You mix it up, let the yeast do the heavy lifting overnight, and the psyllium creates a flexible, gel-like network that traps the CO2 gas.
This lazy method maximizes flavor development and prevents the dense, gummy texture GF bread is famous for. It’s genius.
Preparing Your Mindset: The Patience Factor (Understanding Fermentation Time)
The active time is ten minutes, tops. The passive time? That’s where you need to chill out and trust the process. Fermentation is crucial for flavor development, giving the dough that subtle, complex tanginess.
If you rush the bulk fermentation, you end up with a flat, under flavored loaf. Do not cut the corners here. Think of the long rest as your oven’s prep time it’s doing necessary work, even if you can’t see it working very quickly. If you want a fun variation on this simple base, you could try adapting the flavors we used in my Basil and Garlic No Knead Bread: The Rustic Dutch Oven Artisan Loaf .
Essential Components for Your Artisan gluten-free Loaf
This recipe relies on a careful balance of starches, binders, and flours. Do not eyeball this. Trust me; I once ruined three separate attempts before I accepted the wisdom of the scale.
| Component | Function | Viable Substitute |
|---|---|---|
| Psyllium Husk Powder | Primary binder; creates structure and stretch. | Whole Psyllium Husks (Use 1 Tbsp extra if using whole) |
| Brown Rice Flour | Provides structure and nutty flavor. | Sorghum Flour or Millet Flour |
| Tapioca Starch | Adds chewiness and crispness to the crust. | Potato Starch or Corn Starch |
| Warm Water | Hydrates the psyllium; activates the yeast. | Flat gluten-free Beer (for richness) |
| Apple Cider Vinegar | Aids yeast activity and promotes a tender crumb. | Lemon Juice or White Wine Vinegar |
Achieving the Perfect Crumb: The Science Behind No-Knead gluten-free Baking

Precision Matters: Why You Must Use a Kitchen Scale (Weight vs. Volume)
Stop right there. Are you about to use your measuring cups for the flours and starches? Please don't. gluten-free flour mixes and starches compress dramatically, meaning your "cup" of brown rice flour could weigh 120 grams or 160 grams depending on how dense it is.
The difference between a fluffy, holey crumb and a wet, dense gum-ball loaf is often just 20 grams of liquid or flour. Using a digital kitchen scale eliminates this variable completely. It’s the single most important tool for consistently amazing GF bread.
The Crucial Role of Hydrocolloids (Psyllium Husk) in GF Structure
This is the secret weapon. Hydrocolloids, like psyllium husk and xanthan gum, are substances that love water and form thick gels. Psyllium husk, specifically, creates a powerful, flexible gel that mimics the stretchy network of gluten when highly hydrated.
It essentially wraps around the air bubbles created by the yeast, preventing them from collapsing. This high hydration structure is why we can get away with zero kneading. We need the specific combination of psyllium and water to make this work.
Recommended gluten-free Flour Blends and Ratios
I specified Brown Rice Flour because it’s widely available and neutral in flavor, but the magic happens in the ratio . We are using a 2:1 ratio of structural flour (Rice) to stretchy starch (Tapioca).
You want to avoid flour blends that contain a lot of bean flours, as they can result in a heavy, noticeable flavor. If you use a pre-mixed GF blend (like Bob's Red Mill 1:1), you might need to adjust the water slightly, as pre-mixed blends usually already contain xanthan gum and various starches.
Start with the liquid amount listed and add more water, 1 tablespoon at a time, until the dough is truly sticky and wet, almost like a thick batter.
Ingredient Swaps: Making This Recipe dairy-free or Vegan
Good news! This No Knead gluten-free Bread is already naturally vegan and dairy-free. We use water as the primary liquid, and the structure comes entirely from the psyllium husk and fermentation.
If you substitute the water for unsweetened almond milk, the result will be a slightly softer crust, but the overall structure holds beautifully. Just ensure any liquid you use is warmed to the right temperature to keep your yeast happy.
Baking Your Artisan Loaf: step-by-step Guide
Stage 1: The Initial Mix (Combining Wet and Dry)
Whisk all your dry ingredients together thoroughly in a large bowl. Seriously, give it a good minute. You want the yeast, salt, xanthan gum, and psyllium powder evenly dispersed so you don't end up with pockets of raw powder. Add the warm water and vinegar all at once.
Mix vigorously with a sturdy spatula for about 60 seconds until the ingredients are fully combined into a very wet, shaggy mass. It should look like oatmeal that’s too thick to pour but too wet to form a ball.
Stage 2: The Long Rest (Optimizing Proofing and Fermentation)
Cover your bowl loosely with plastic wrap or a kitchen towel; air circulation is good, but it shouldn't dry out. Let the dough rest undisturbed at cool room temperature (65 70°F) for 12 to 18 hours.
This bulk fermentation is where the flavor develops and the psyllium fully hydrates, maximizing structure. When ready, the dough should have visibly increased in size and be covered in little bubbles it will smell pleasantly yeasty and slightly acidic.
Stage 3: Shaping and Final Rise (Minimizing Handling)
This dough is sticky! Dust your parchment paper heavily with rice flour; this prevents sticking and helps create a beautiful rustic crust. Gently scrape the dough onto the prepared paper do not deflate it by punching it down.
Using well floured hands, quickly coax the dough into a rough round shape by gently tucking the edges underneath. You are not kneading, just forming tension on the surface. Allow this shaped loaf to rest for only 30- 45 minutes while your Dutch oven preheats.
Stage 4: over High heat Baking in the Dutch Oven
Preheating the Dutch oven is the secret to that gorgeous artisan crust. Set your oven and the Dutch oven (with the lid on) to 450°F (230°C). Once smoking hot, carefully transfer the loaf (still on the parchment) into the pot.
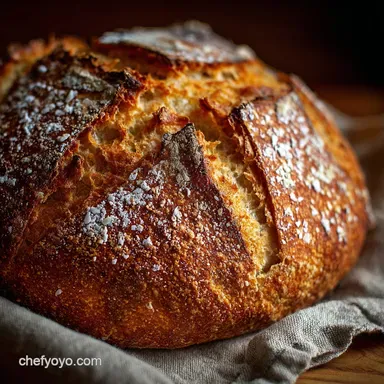
The trapped steam in the covered pot creates the perfect environment for maximum oven spring and a soft interior. After the initial covered bake, reduce the heat slightly and finish uncovered until it’s deep golden brown this builds that incredible crust.
Troubleshooting and Expert Secrets for Baking Better GF Bread
Troubleshooting Your No Knead gluten-free Bread Loaf
If your loaf spread out flat instead of rising up, it's usually one of two things: either your yeast was dead, or your dough was too warm during the bulk fermentation, causing it to over proof and lose its structure before baking. Always check your yeast expiration date and ensure your water isn't scalding hot.
Solving the Gummy Center Problem
The gummy center is the most common GF baking failure, and it almost always happens because the baker sliced the loaf too early. Seriously, wait two full hours. While cooling on the rack, the residual heat continues to drive off moisture and set the starches.
Slicing immediately releases that steam, causing the internal structure to collapse into a wet, gummy mess.
Achieving a Deeper Flavor: Adjusting the Bulk Fermentation Time
If you prefer a milder, sweeter flavor, aim for the shorter end of the proofing spectrum (12– 14 hours in a standard kitchen). If you crave a tangy, slightly sour flavor, push the fermentation to 16– 18 hours. The longer the yeast works, the more complex the acids and flavors become. This depth of flavor is exactly why I love making savory loaves like Cheesy Pull Apart Christmas Bread: Ultimate Garlic Showstopper .
The Dutch Oven Difference: Creating a High Crust Environment
Using a heavy Dutch oven traps the moisture released by the dough during the initial bake, effectively creating a powerful, self steaming environment. This steam keeps the surface of the dough moist, allowing it to expand dramatically before the crust sets. No Dutch oven?
You can use a pizza stone and place a shallow pan filled with hot water on the bottom rack, though the crust won't be quite as dramatic.
Extending Freshness: How to Properly Store Your Crusty Loaf
Fresh GF bread tends to stale quicker than its wheat counterpart. At room temperature, wrapped loosely in a clean linen bag or towel, it will last 2 3 days. If you plan to keep it longer, slicing it first and freezing the slices is the best approach.
To freeze: Wrap cooled, sliced bread tightly in plastic wrap, then place in a freezer bag or airtight container. It keeps beautifully for up to 3 months. Reheat slices directly in the toaster or in a 350°F oven for a few minutes until warmed through and crisp.
Savory and Sweet Serving Suggestions for the Perfect Slice
This rustic, crusty bread is incredibly versatile. I love it thick sliced and toasted, topped with mashed avocado and flaky sea salt. Alternatively, pair it with a tangy cream cheese spread, maybe adapting the filling from my Pumpkin Roll Recipe Easy: Crack Free Roulade with Tangy Cream Cheese if you want a sweet treat. It also makes the world's most structurally sound grilled cheese sandwich. Honestly, anything that needs a crispy base will work here.

Recipe FAQs
Why is my finished loaf dense or gummy?
This common issue is often caused by not cooking the loaf long enough or by cutting into it too soon. gluten-free bread needs significant time to release moisture and set its structure; always ensure the internal temperature reaches 205 210°F (96 99°C).
Furthermore, wait until the loaf is completely cool (2 3 hours) before slicing, otherwise the steam trapped inside will turn the crumb unpleasantly gummy.
My dough didn't rise much during the long proofing time. What went wrong?
Lack of rise usually indicates inactive yeast or a temperature issue during fermentation. Ensure your water temperature is around 105 115°F (40 46°C) when activating the yeast, and avoid placing the dough in an area that is too cold, as this dramatically slows down yeast activity.
Always check the expiration date on your dry yeast before starting the recipe.
How should I store this artisan bread, and can I freeze leftovers?
Store the cooled loaf unsliced at room temperature in a breathable paper bag or a clean tea towel for up to three days to maintain the crunchy crust. Yes, this bread freezes excellently; slice the cooled loaf completely, wrap the slices tightly in plastic wrap, and then place them in a freezer bag for up to three months.
Is using a Dutch Oven absolutely essential for achieving the best crust?
While not strictly mandatory, the heavy Dutch oven is highly recommended because it traps steam released by the dough during the initial baking phase. This trapped steam prevents the crust from setting prematurely, allowing the loaf to expand fully and producing the signature crunchy, deep golden exterior typical of artisan bread.
If you do not have one, you can simulate steam by placing a shallow pan of water on the oven's lowest rack.
Can I substitute the specified gluten-free flour blend with a non-commercial alternative?
While you can experiment, results may vary significantly because different blends have varying protein and binder (xanthan/guar gum) contents. For the best, most consistent results with this no-knead technique, use a commercially available all-purpose GF blend that already includes xanthan gum.
If you use a homemade blend, ensure you accurately measure and incorporate the necessary binding agent.
Why does this recipe require such a long bulk fermentation (proofing) period?
The long, slow fermentation is the foundational technique of this "no-knead" bread and is especially critical in gluten-free baking to replace the structure normally built by kneading gluten.
This extended time allows the flours to fully hydrate and the yeast to develop complex, slightly sour flavors, eliminating the need for manual work and creating a more open crumb.
My crust is soft instead of crunchy. How can I ensure maximum crispness?
A soft crust often means insufficient heat or steam release at the end of the baking cycle. Ensure your oven is fully preheated for at least 30 minutes before baking and remove the lid of the Dutch oven for the last 15 to 20 minutes of baking.
This direct heat exposure dries the exterior, setting that desirable crispy crust.
No Knead gluten-free Artisan Loaf
Ingredients:
Instructions:
Nutrition Facts:
| Calories | 247 kcal |
|---|---|
| Protein | 3.7 g |
| Fat | 4.1 g |
| Carbs | 50.3 g |
