Christmas Cookies: the No-Spread Classic Cut-Out Recipe (Zesty Vanilla)
- The Ultimate Guide to Perfect Christmas Cut-Out Cookies
- The Science of Sturdy Cookies: Why This Dough Won't Spread
- Essential Ingredients for Flawless Zesty Vanilla Christmas Cookies
- How to Make Professional-Quality Cut-Out Christmas Cookies (The Method)
- Troubleshooting Your Christmas Cookie Bake: Chef’s Essential Tips
- Finishing Touches: Decorating, Storage, and Festive Serving Ideas
- Recipe FAQs
- 📝 Recipe Card
The Ultimate Guide to Perfect Christmas Cut-Out Cookies
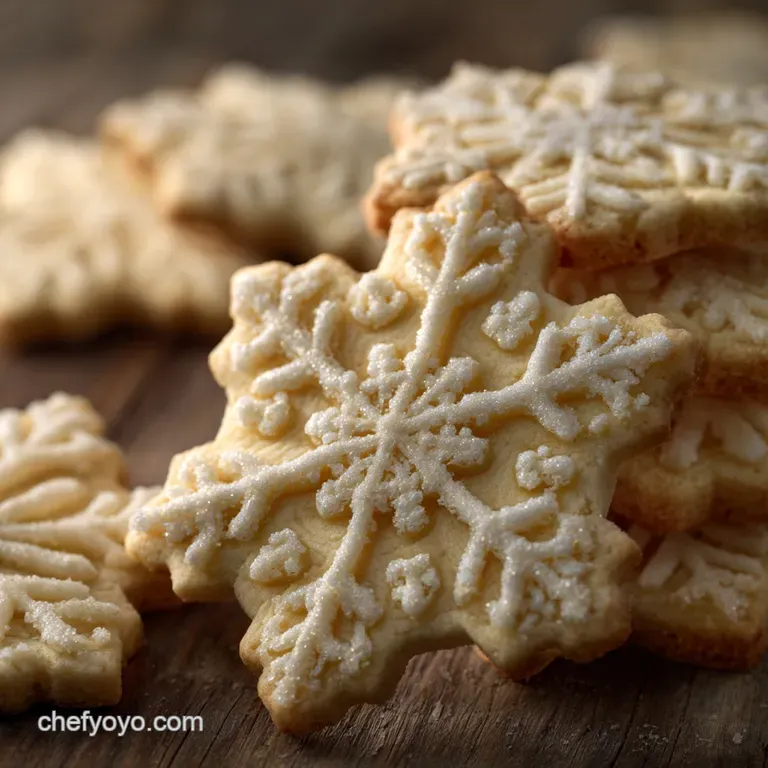
The smell of these Classic Cut-Out Christmas Cookies baking is instant holiday magic. Imagine that sharp, bright aroma of vanilla and orange zest, wafting through the house, promising sturdy, perfectly crisp edges and a soft, buttery center.
These aren't just cookies; they are edible canvases for all your festive joy.
Listen, I spent years fighting with cut-out dough that melted into shapeless blobs a true Christmas tragedy. This recipe is a lifesaver because it’s engineered to hold the shape of your most detailed snowflake cutter. It’s also incredibly easy to make, and chilling is the hardest part, making it ideal for baking with kids or when you’re prepping a huge party spread, maybe alongside these easy Christmas Party Appetizers: Easy Cranberry Brie Puff Pastry Whirls .
So, ditch the stress of fragile dough and floppy edges this season. We are making the Best Christmas Cookies —sturdy, zesty, and ready for a serious layer of royal icing. Let’s crack on with the secrets to perfect holiday baking success.
The Science of Sturdy Cookies: Why This Dough Won't Spread
A good cut-out cookie is all about structure. We aren't aiming for the deep, gooey center of a giant chocolate chip recipe, like my Levain Bakery Chocolate Chip Crush Cookies: Ultimate Giant Gooey Copycat . We need crisp, reliable edges. The logic behind this specific recipe is simple: balance the fat and flour, and keep everything ridiculously cold.
Recipe Overview: Yield, Prep Time, and Difficulty
This recipe typically yields 36 40 medium Holiday Cookies. It’s a medium difficulty because, while the mixing is easy, success relies heavily on patience (the chilling step) and precise rolling.
| Stage | Time Required | Notes |
|---|---|---|
| Prep Time (Active) | 20 minutes | Fast to mix up! |
| Chilling Time | 1 to 2 hours (minimum) | Non-negotiable. |
| Cook Time (Per Batch) | 10 – 12 minutes | Watch for pale edges. |
Setting the Scene for Festive Baking Success
I know you're excited to start rolling out Santa shapes, but precision matters here. Before you even touch the mixer, make sure your butter and egg are softened to room temperature; this is crucial for smooth mixing.
Also, using a scale to weigh the flour is the single most important action you can take to prevent dry, dense cookies or, worse, spread.
Why Your Dough Must Be Chilled (The Secret to No-Spread)
This is the number one secret to flawless cut-outs: cold fat . When you cream butter, you incorporate tiny air bubbles. Chilling the dough solidifies the butter, locking those air bubbles and flour structure into place.
When the cold dough hits the hot oven, the exterior firms up before the butter melts completely, meaning your snowman retains his perfect shape. Skip the chilling, and you get cookie puddles.
Balancing Fats and Flour for Structural Integrity
We use a higher flour-to-fat ratio than a standard drop cookie recipe, and critically, we use baking powder instead of baking soda. Baking powder gives a gentle lift without causing extreme spread.
Too much butter equals a greasy, spreading mess, so make sure you level those measurements perfectly.
The Role of Creaming Butter and Sugar (Air Incorporation)
Creaming isn't just mixing; it's aerating. We need to beat the butter and sugar together until the mixture is visibly lighter in color and fluffier. This process incorporates air, which is the first step in creating a tender texture.
Stop beating when it’s fluffy, but don’t keep going once the egg and flour are added.
The Acid Component: Boosting Vanilla and Zest Flavour
We use fresh orange zest for a bright, vibrant, and thoroughly festive lift. Citrus zest contains oils that cut through the richness of the butter and deepen the perceived flavour of the vanilla.
It just makes the whole thing taste more 'Christmassy.' If you're wondering what Christmas Cookies Ideas to try, the vanilla orange combo is a certified classic.
Essential Ingredients for Flawless Zesty Vanilla Christmas Cookies
Here’s exactly what you need for this Christmas Cookies Recipe . Remember, quality ingredients make a huge difference in simple biscuits like these.
Mastering the Flour Measurement (Weight vs. Volume)
If you don't own a scale, please, please buy one. But if you must use volume, remember to spoon the flour lightly into your measuring cup and level it off. Don't scoop it directly from the bag! Over measuring flour is the quickest way to end up with tough, dry holiday biscuits.
I use 450g (3 ½ cups) of all-purpose flour.
Ingredient Deep Dive: Which Vanilla Extract is Best?
Use pure vanilla extract here, not imitation. This cookie is simple, and vanilla is the star alongside the zest. If you have vanilla bean paste, even better the tiny black specks look beautiful in the finished dough.
Smart Substitutions for Dairy and Citrus Zest
Chef’s Note: Never swap granulated sugar for brown sugar in cut-out recipes. The molasses in brown sugar attracts moisture and guarantees your cookie will spread!
| Ingredient | Measurement | Viable Substitute |
|---|---|---|
| Unsalted Butter | 225g (1 cup) | high-quality, dairy-free baking sticks (not soft margarine). |
| Large Egg | 1 | Flax Egg (1 Tbs flaxseed + 3 Tbs water) for binding, though texture may change slightly. |
| Orange Zest | 1 Tbs | Lemon zest (for sharpness) or 1/4 tsp Almond Extract (for a different flavour profile). |
| Baking Powder | 1 tsp | None. This is essential for lift. |
Preparing Your Equipment Checklist
You need heavy duty baking sheets that won't warp and a good rolling pin. If you have one with thickness guides, use it! Consistent thickness is essential for even baking and prevents some cookies from burning while others remain raw.
Don’t forget the parchment paper, either it’s the true hero of easy cookie removal.
How to Make Professional Quality Cut-Out Christmas Cookies (The Method)
Phase 1: Creating the Perfect Creamed Base
- Whisk the Dry Ingredients: In a medium bowl, whisk together the measured flour, baking powder, and salt. Set it aside.
- Cream Butter and Sugar: Using an electric mixer, beat the softened butter and sugar together on medium high speed. Do this for a full 3– 4 minutes until the mixture looks pale yellow and significantly fluffy. This is where you trap the air.
- Add the Wet Flavour: Beat in the room temperature egg, pure vanilla extract, and the lovely orange zest. Mix only until everything is incorporated, scraping the bowl once or twice.
Phase 2: Mixing, Shaping, and Chilling the Dough
- Incorporate the Flour: Reduce the mixer speed to low. Gradually add the flour mixture, mixing only until the dough just comes together. Stop immediately when you see the last streak of flour disappear. Do not overmix!
- Divide and Flatten: Turn the dough out onto a work surface. It should feel slightly stiff. Divide it into two equal disks and flatten them slightly this makes rolling later much easier.
- Wrap and Chill (Crucial Step): Wrap each disk tightly in plastic wrap. Refrigerate for a minimum of 1 hour, but 2 hours is better, especially if your kitchen is warm. You can even make this dough up to two days ahead!
Phase 3: Rolling Techniques for Consistent Thickness
- Prep and Warm Up: Preheat your oven to 180°C (350°F) and line trays with parchment paper. Take one disk of chilled dough out and let it sit for about 5 minutes to slightly soften.
- Roll Between Paper: Place the dough between two sheets of parchment paper. Roll the dough consistently to a 6mm (¼ inch) thickness. Consistency is key for perfectly baked batches.
- Cut Shapes and Arrange: Use your favorite festive cutters. Dip the cutters lightly in flour if they start to stick. Place the cut shapes about one inch apart on the prepared baking sheets. Reroll scraps quickly, but if the dough becomes sticky or soft, chill it again for 15 minutes before attempting the next roll.
Phase 4: Baking Times and Visual Cues for Doneness
- The Freezer Trick (Mandatory for Sharp Edges): Place the baking sheets loaded with cut cookies into the freezer for 10 minutes before baking. This cold shock locks the edges in place and prevents any last minute spreading.
- Bake: Bake for 10– 12 minutes, depending on the size of your cookies. Rotate the tray halfway through for even color.
- Look for Pale Perfection: The cookies are done when the edges are just set and barely hint at a golden color. The center should still look quite pale. Over baking steals the buttery tenderness.
- Cooling: Let them rest on the baking sheet for 5 minutes, then transfer gently to a wire rack to cool completely before decorating. If they are even slightly warm, royal icing will melt or bleed.
Troubleshooting Your Christmas Cookie Bake: Chef’s Essential Tips
Preventing Sticky Dough (The Flour Dusting Trick)
If your dough is too warm or sticky during rolling, do not just dust the counter with mountains of flour. Extra flour equals a dry cookie. Instead, roll the dough between parchment paper (as detailed above). If the cutters stick, give the cutter itself a light dusting of flour, not the entire dough surface.
Common Mistake: Overworking the Dough
Once the flour hits the wet ingredients, stop mixing as soon as everything is combined. If you continue to beat the dough, you develop the gluten, resulting in tough, brittle cookies. This is usually the fix when people complain their cookies are too hard after cooling.
Achieving Razor Sharp Edges on Your Shapes
Beyond the critical chilling step, use sharp metal cutters, not dull plastic ones. Press down firmly and pull the excess dough away gently before removing the cutter. For the absolute best edges, the 10 minute pre-bake freeze is the ultimate game changer.
Adapting the Recipe for Different Cookie Sizes
This recipe works best for 6mm thickness. If you are using very tiny cutters (mini stars), reduce the baking time to 8– 9 minutes. If you use massive cutters (think hand sized gingerbread men), they might need 12– 14 minutes.
Just watch for the golden edge cue!
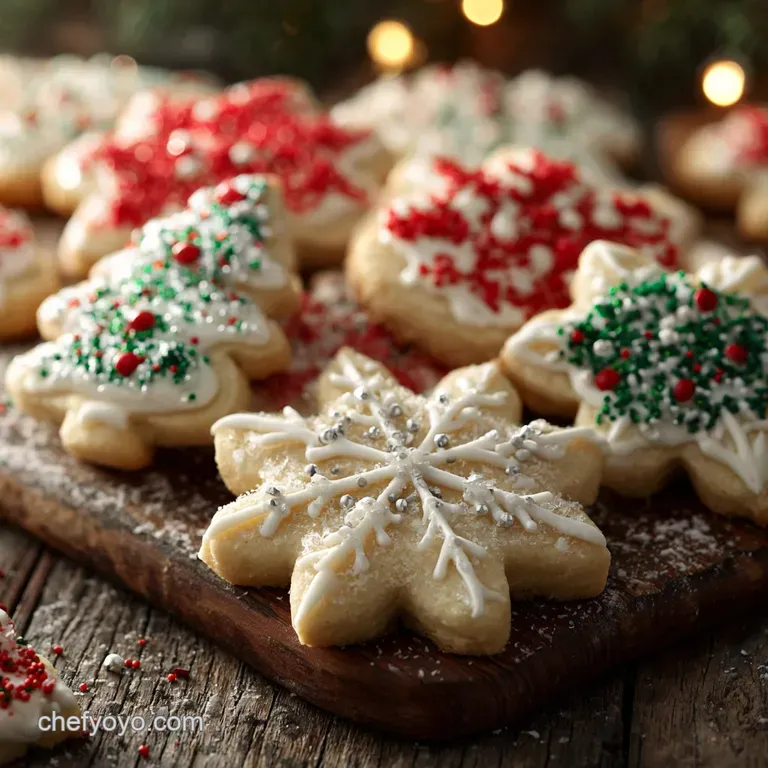
Finishing Touches: Decorating, Storage, and Festive Serving Ideas
The simple royal icing recipe listed in the outline provides a fantastic, sturdy coating for your Christmas Cookies to Make with Kids . Once dry, the icing is hard enough to handle, stack, and mail to relatives without damage.
How to Store Baked and Unbaked Cookie Dough
Unbaked Dough: You can store the wrapped disks of dough in the refrigerator for up to 4 days, or freeze them tightly wrapped for up to 3 months. Thaw overnight in the fridge before rolling.
Baked Cookies (Un-iced): Store in an airtight container at room temperature for up to 5 days. Add a slice of fresh bread to the container it absorbs the moisture and keeps the cookies softer! (Just replace the bread every day or two.)
The Best Way to Freeze and Thaw Finished Christmas Cookies
Yes, they freeze beautifully! This is excellent for holiday prep.
- Freeze: Once the royal icing is completely dry and hard (4– 8 hours minimum), layer the decorated cookies between sheets of parchment paper in an airtight plastic container.
- Thaw: Thaw them still sealed in the container at room temperature. This prevents condensation from forming directly on the icing, which can cause colors to bleed or the icing to soften.
Serving Suggestions
These sturdy cookies are perfect alongside a rich espresso or maybe after a large festive dinner. If you’re also preparing some savory elements, these cookies offer a sweet counterpoint to richer dishes, maybe even next to your Christmas Side Dishes: Maple Glazed Carrots Parsnips (Crowd Pleasing) . Stack them high, add a few colourful ribbons, and watch them disappear!

Recipe FAQs
Why are my cut-out cookies spreading, even though this is a "no-spread" recipe?
Spreading is usually caused by warm butter or insufficient chilling. Ensure your butter is cool (not melted) when mixing, and always chill the cut-out dough shapes for at least 15 minutes before baking.
Additionally, verify that you measured the flour correctly, as too little flour can cause the fat to melt too quickly.
My finished cookies came out too hard or crumbly. What went wrong?
The primary culprits are over baking or inadvertently adding too much flour during mixing or rolling. Bake only until the edges are lightly golden, and remove them immediately from the hot pan to cool.
If the dough was difficult to handle prior to baking, you likely added excess flour, which absorbs too much moisture and creates a dry result.
What is the best way to roll out the dough to ensure consistent thickness?
To guarantee even baking and professional results, use two rolling guides (like 1/4 inch dowels or rulers) placed on either side of the dough. Always roll the dough between two sheets of parchment paper; this prevents sticking and eliminates the need for excess dusting flour, which can dry out the final cookies.
How long can I store the baked Christmas cookies, and what is the best method?
Properly stored, un-iced cookies will maintain their optimal freshness for about 5 to 7 days at room temperature. Use an airtight container, placing parchment paper between layers to prevent sticking or breakage.
If the cookies are heavily frosted, they may be better stored in the refrigerator, extending the shelf life slightly.
Can I freeze this dough, or the already baked cookies, to save time during the holidays?
Yes, this sturdy cut-out dough freezes exceptionally well. Wrap the unbaked dough disks tightly in plastic wrap, then foil, and freeze for up to 3 months. Baked, un-iced cookies can also be frozen in an airtight container for 6-8 weeks; ensure they are fully thawed at room temperature before any decorating.
I don't like lemon zest. What are some good flavor variations for this recipe?
The base sugar cookie recipe is highly versatile for substitutions. You can easily replace the vanilla extract and zest with a warm combination of almond extract (1 tsp) and a dash of nutmeg or cardamom. For a more festive flavor, try adding 1/2 teaspoon of espresso powder or a few drops of food grade peppermint oil.
Can I make this recipe gluten-free or dairy-free (vegan)?
For a gluten-free version, substitute the standard flour with an equal measure of a high-quality 1:1 gluten-free baking blend that contains xanthan gum. Converting to dairy-free requires swapping the butter for a solid plant based shortening or stick butter replacement, ensuring the flavor profile is neutral to maintain the integrity of the cookie.
No Spread Cut Out Christmas Cookies

Ingredients:
Instructions:
Nutrition Facts:
| Calories | 96 kcal |
|---|---|
| Protein | 1.0 g |
| Fat | 5.0 g |
| Carbs | 12.0 g |
