Old Fashioned Apple Crisp: Warm and Golden
- Time: Active 15 minutes, Passive 45 minutes, Total 60 minutes
- Flavor/Texture Hook: Buttery crunchy topping meeting velvety, tart sweet apples
- Perfect for: Sunday family dinners or using up a seasonal apple haul
- Why Cold Butter and Oats Create the Best Texture
- Essential Component Analysis for Your Handcrafted Bake
- Selecting Wholesome Elements for a Better Fruit Filling
- Simple Kitchen Tools for a Flawless Fruit Bake
- Step by Step Guide to a Shattering Oat Crust
- Navigating Common Baking Hurdles for a Flawless Finish
- Creative Ways to Customize Your Warm Spiced Fruit Bake
- Preservation Secrets and Zero Waste Tips
- Wholesome Sides That Make This Warm Fruit Dessert Sing
- Clearing Up Kitchen Myths
- Recipe FAQs
- 📝 Recipe Card
The moment that first apple skin curls away from the peeler, the air in my kitchen transforms. There is a specific, crisp scent that only comes from a fresh Honeycrisp or a tart Granny Smith hitting the air, a precursor to the warmth that’s about to follow.
I remember a chilly October afternoon a few years back when I tried to rush this process by using soft, mealy apples I had sitting in the fruit bowl too long. The result was a sad, mushy soup that lacked any of the structural integrity a proper rustic dessert requires.
It was a lesson learned the hard way: the apple is the hero, and it demands respect.
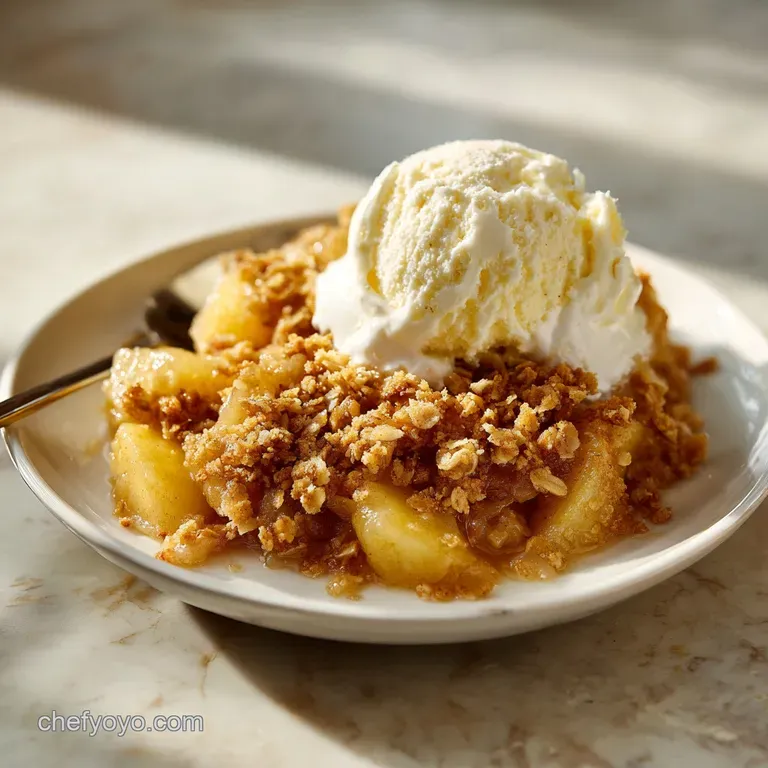
This particular apple crisp recipe focuses on that interplay between the fruit’s natural tartness and the deep, caramelized crunch of the oat topping. When you pull this dish out of the oven at exactly 45 minutes, the juices should be bubbling like molten amber around the edges, and the top should have reached a deep, mahogany gold.
It’s not just about the sweetness; it’s about that specific sound when your spoon first breaks through the crust, a delicate shatter that reveals the softened, steaming fruit beneath.
We aren't looking for a refined, perfectly smooth tart here. We want something that feels artisanal and lived in. By using cold, cubed butter and working it by hand, we create little "pebbles" of dough that don't just melt into a flat sheet.
Instead, they stand up, creating peaks and valleys of texture that catch the heat of the oven differently. It’s a humble dish, but when done with attention to the cell structure of the fruit and the temperature of the fat, it becomes something truly spectacular.
Why Cold Butter and Oats Create the Best Texture
Understanding the physics of your bake helps you avoid the dreaded "soggy crumble." When we work with this apple crisp recipe, we are essentially managing moisture and fat distribution to ensure the topping stays distinct from the fruit layer.
- Fat Suspension: Cold butter stays in distinct chunks, creating steam pockets during baking that result in a flaky, pebbled texture rather than a greasy, flat paste.
- Starch Gelatinization: The small amount of cornstarch in the filling binds with the escaping apple juices, turning them into a velvety syrup instead of a watery mess.
- Thermal Insulation: The dense layer of rolled oats acts as a heat shield, allowing the apples to steam in their own juices while the top toasts to a mahogany finish.
- Acid Balance: Lemon juice isn't just for flavor; it prevents the apples from oxidizing and helps break down just enough pectin to make them tender without turning to puree.
If you are a fan of traditional fruit desserts, you might notice this method shares some DNA with other classics. For instance, while this recipe uses a crumbly top, my Classic Apple Pie Recipe uses a similar fruit base but relies on a flaky bottom crust to hold everything together. The science of the fruit filling remains largely the same, focusing on that perfect balance of sugar and acid.
| Method | Total Time | Texture Profile | Best For |
|---|---|---|---|
| Quick Stovetop | 25 minutes | Soft fruit, chewy topping | Weeknight cravings |
| Classic Oven (This Recipe) | 60 minutes | Velvety fruit, shattering crust | Family gatherings |
| Slow Cooker | 4 hours | Jam like fruit, soft topping | Hands off meal prep |
Choosing the right method depends on how much you value that specific "shatter" of the topping. The oven method, which we are focusing on today, is the only way to get that artisanal, toasted oat flavor that characterizes a truly wholesome dessert.
Stovetop versions often lack the depth of caramelization that 45 minutes of dry heat provides.
Essential Component Analysis for Your Handcrafted Bake
Selecting the right elements is the difference between a mediocre dessert and one people ask for every year. Each ingredient in this apple crisp recipe serves a functional purpose that goes beyond mere flavor.
| Ingredient | Science Role | Pro Secret |
|---|---|---|
| Honeycrisp Apples | Structural Base | Mix with Granny Smith for a complex tart sweet profile that doesn't collapse. |
| Old Fashioned Oats | Texture & Fiber | Never use instant oats; they disappear into the flour and lose the "crunch" factor. |
| Cold Unsalted Butter | Steam & Crispness | Grate the butter while frozen for the most even "pebble" distribution you've ever seen. |
| Light Brown Sugar | Caramelization | The molasses content keeps the topping moist on the inside while the edges crisp up. |
Every component has a job to do. The baking powder, for example, is a small but mighty addition. It provides just a tiny bit of lift to the flour in the topping, ensuring it isn't a leaden weight on top of your fruit. This creates a more aerated, "short" texture that breaks apart easily under a fork.
Selecting Wholesome Elements for a Better Fruit Filling
When you head to the market, look for apples that feel heavy for their size. This indicates a high water content and dense cell structure, which translates to a juicier bake.
- 1/4 cup granulated sugar
- 50g. Why this? Draws out juices to create the internal syrup without oversweetening.
- 1 tsp ground cinnamon
- For that classic, warm autumnal aroma.
- 1 tbsp lemon juice
- 15ml. Why this? Regulates pH to keep the fruit bright and balances the sugars.
- 1 tsp cornstarch
- The essential thickener for a velvety sauce.
- 1 cup old fashioned rolled oats
- 90g. Why this? Provides the signature rustic chew and artisanal look.
- 1 cup all purpose flour
- 125g. Why this? The binder that holds the butter and sugar in a "crumble" state.
- 1 cup light brown sugar
- Packed, 200g. Why this? Adds deep caramel notes and essential moisture.
- 1/2 tsp baking powder
- Creates a lighter, less dense crust.
- 1 tsp ground cinnamon
- Extra warmth for the topping layer.
- 1/2 cup unsalted butter
- Cold and cubed, 113g. Why this? The source of both flavor and the "shatter" texture.
- 1/4 tsp salt
- To sharpen all the sweet flavors.
| Original Ingredient | Substitute | Why It Works |
|---|---|---|
| Honeycrisp Apples | Braeburn or Jonagold | Similar firm texture. Note: Jonagolds are slightly sweeter and may need less sugar. |
| Light Brown Sugar | Coconut Sugar | Offers a similar earthy, caramel flavor with a slightly lower glycemic index. |
| All Purpose Flour | Almond Flour | Adds a nutty flavor. Note: Results in a softer, less "shattering" crust. |
Using these substitutes won't ruin the dish, but they will subtly shift the final profile. If you choose almond flour, for instance, you'll lose that specific wheat based crunch, but you'll gain a rich, buttery nuttiness that pairs beautifully with the cinnamon.
Simple Kitchen Tools for a Flawless Fruit Bake
You don't need a high tech kitchen to master this apple crisp recipe, but a few specific tools make the process much more rhythmic and enjoyable.
- 9x9 inch square baking dish: Glass or ceramic is preferred for even heat distribution. Metal pans can sometimes brown the bottom too quickly before the apples are soft.
- Vegetable Peeler: A sharp Y peeler makes quick work of those six large apples.
- Large Mixing Bowl: You'll need plenty of room to toss the topping without flour flying everywhere.
- Pastry Cutter or Your Hands: Honestly, I prefer using my fingertips. It allows you to feel the temperature of the butter and ensure every bit of flour is hydrated.
- Sharp Chef's Knife: For those uniform 1/4 inch slices. Consistency in slicing equals consistency in cooking.
Chef's Tip: If you find your butter is melting too quickly while you work it into the flour, pop the bowl in the freezer for 5 minutes. Keeping the fat cold until it hits the oven is the single most important rule for a crispy topping.
Using a glass dish also allows you to peek at the sides of the bake. You want to see those juices bubbling vigorously; that’s the sign that the cornstarch has reached its thickening temperature and your sauce will be silky rather than cloudy.
step-by-step Guide to a Shattering Oat Crust

Follow these steps closely to ensure your apples are tender and your topping is perfectly bronzed. We are aiming for a total time of one hour from start to finish.
- Preheat the environment. Set your oven to 375°F (190°C). Note: A fully preheated oven is vital so the butter begins steaming immediately upon entry.
- Prepare the orchard fruit. Peel, core, and slice your 6 apples into uniform 1/4 inch wedges. Ensure they are thin enough to soften but thick enough to hold their shape.
- Macerate the filling. In your 9x9 inch dish, toss the apples with 1/4 cup granulated sugar, 15ml lemon juice, 1 tsp cinnamon, and 1 tsp cornstarch. Mix until the fruit looks glossy and every slice is coated.
- Whisk the dry topping. In a separate large bowl, combine the oats, flour, brown sugar, baking powder, salt, and the remaining 1 tsp cinnamon.
- Integrate the fat. Add the 1/2 cup cold, cubed butter. Use your fingertips to 'pinch' the butter into the dry mix. Stop when it looks like wet sand with some pea sized pebbles remaining.
- Layer the components. Evenly distribute the crumble over the apples. Don't press it down; keep it loose to allow air to circulate.
- Bake to mahogany perfection. Place in the oven for 45 minutes. Wait until the topping is a deep brown and the juices are thick and bubbling.
- The essential rest. Let the dish sit for at least 10 minutes before serving. This allows the starches to fully set the sauce.
The visual cues here are more important than the timer. If your oven runs hot, check at 35 minutes. You are looking for those bubbles at the edge to move slowly, like lava. That tells you the cornstarch has done its job.
Navigating Common Baking Hurdles for a Flawless Finish
Even a simple apple crisp recipe can go sideways if the moisture levels aren't managed correctly. The most common complaint is a "soggy" bottom or a "greasy" top.
Why Your Topping Is Melting
If your crumble looks like a flat sheet of melted butter rather than distinct pebbles, your fat was likely too warm before it hit the oven. This happens if you handle the dough too much with warm hands or if your kitchen is particularly steamy.
To fix this next time, chill the assembled dish for 15 minutes in the fridge before baking.
Why Your Apples Are Still Crunchy
If the topping is done but the apples are still resistant to a fork, your slices were likely too thick. Slicing them into 1/4 inch wedges is the sweet spot. If you find yourself in this position mid bake, cover the dish with foil to prevent further browning of the top and continue baking for another 10-15 minutes.
| Problem | Root Cause | Solution |
|---|---|---|
| Soggy Crust | Apples released too much water | Add an extra 1/2 tsp of cornstarch to the filling next time. |
| Burnt Topping | Oven rack was too high | Bake on the middle rack and tent with foil if browning too fast. |
| Bland Filling | Lack of acidity | Don't skip the lemon juice; it brightens the entire flavor profile. |
Common Mistakes Checklist:
- ✓ Ensure the butter is straight from the fridge (never room temp).
- ✓ Use Old Fashioned oats, not the "Quick" variety.
- ✓ Slice apples to a consistent 1/4 inch thickness.
- ✓ Let the crisp rest for 10 minutes to thicken the juices.
- ✓ Don't over mix the topping; you want those rustic clumps.
Creative Ways to Customize Your Warm Spiced Fruit Bake
While the classic version is hard to beat, this recipe is incredibly forgiving when it comes to variations. You can easily pivot based on what you have in your pantry or the season.
The Nutty Orchard Twist
For an extra layer of crunch, add 1/2 cup of chopped pecans or walnuts to the oat mixture. The fats in the nuts will toast alongside the oats, providing a savory depth that balances the sweetness of the brown sugar. This is particularly good if you're using a sweeter apple variety like Fuji or Gala.
The Ginger Spice Swap
If you want something with a bit more "zing," swap half of the cinnamon in the filling for ground ginger and add a tablespoon of finely chopped crystallized ginger. This creates a sophisticated, warming heat that feels very artisanal.
It's a great choice for adult dinner parties where you want a less traditional flavor profile.
The gluten-free Modification
This apple crisp recipe is easily adapted for dietary needs. Use a certified gluten-free oat and swap the all purpose flour for a 1:1 gluten-free baking blend. Because gluten-free flours can sometimes be a bit drier, you might need to add one extra tablespoon of butter to help the crumble hold its shape.
Scaling for Any Crowd
- To Scale Down (1/2 recipe): Use a 6 inch round cake pan or individual ramekins. Reduce baking time to 30-35 minutes.
- To Scale Up (2x recipe): Use a 9x13 inch pan. Increase the cinnamon and spices by only 1.5x to avoid overpowering the fruit. The bake time will remain roughly the same, but check at 45 minutes to ensure the center is bubbling.
Preservation Secrets and Zero Waste Tips
Storing leftovers properly ensures that the second day is just as good as the first, though the topping will naturally soften over time as it absorbs moisture from the fruit.
- Fridge
- Store in an airtight container for up to 4 days.
- Freezer
- You can freeze the baked crisp for up to 3 months. Wrap it tightly in foil and then plastic wrap. To reheat, bake from frozen at 350°F (180°C) until warmed through.
- Reheating
- Avoid the microwave if possible, as it makes the oats rubbery. Instead, use a toaster oven or the main oven at 350°F for 10 minutes to re crisp the top.
Zero Waste Kitchen Tips Don't throw away those apple peels! If you have a dehydrator or a very low oven, toss the peels with a little cinnamon sugar and bake them until crispy for "apple chips." Alternatively, you can simmer the cores and peels with a bit of water and honey to create a simple apple syrup for cocktails or morning oatmeal.
It’s a wholesome way to use every part of the fruit.
Wholesome Sides That Make This Warm Fruit Dessert Sing
Serving this apple crisp recipe is all about the temperature contrast. A steaming scoop of fruit and oats practically begs for something cold and creamy to melt into its nooks and crannies.
A high-quality vanilla bean ice cream is the standard, but if you want to lean into the rustic vibe, try a dollop of crème fraîche or even a sharp piece of aged cheddar cheese on the side. The saltiness of the cheese cuts through the sugar in a way that is incredibly satisfying.
For another nostalgic experience, you might enjoy looking into Grandma's Golden Crust Apple Pie. It captures that same artisanal essence but in a more formal pie structure. Whether you choose the pie or this crisp, the key is the quality of the harvest.
Clearing Up Kitchen Myths
Many people believe that "any apple will do" for a bake, but that is perhaps the biggest myth in the dessert world. If you use a Red Delicious, the cell walls will collapse almost immediately, leaving you with a grainy, watery mess.
Stick to the Honeycrisp or Granny Smith as suggested; their high acid and pectin levels are what allow them to soften without losing their identity.
Another common misconception is that you must "seal" the apples by pre cooking them. In this apple crisp recipe, the 45 minute bake time is more than enough to tenderize the fruit. Pre cooking often leads to over processed fruit that lacks the "bite" necessary for a rustic dessert.
Let the oven do the work; the slow steam under the oat blanket is the most artisanal way to achieve that velvety texture we all crave.

Recipe FAQs
What is the secret to a good apple crisp?
Keep your butter cold and cubed. When you "pinch" the cold butter into the flour and oats, it creates small pockets of fat that steam in the oven, leading to a perfectly shattering crust rather than a greasy one. If you enjoy mastering this fat-to-flour technique, you will find it equally essential for achieving a flaky, professional finish in other baked goods.
What is the difference between apple crumble and apple crisp?
The presence of rolled oats. While both feature a fruit base with a streusel topping, a crisp specifically includes oats in the topping to provide an extra crunchy, toasted texture, whereas a crumble topping is typically limited to flour, butter, and sugar.
What are common apple crisp mistakes?
Cutting apples into uneven slices. If your apple wedges vary significantly in size, some will turn to mush while others remain undercooked and crunchy. Always aim for consistent 1/4 inch slices for even heat distribution.
Should you peel your apples for apple crisp?
Yes, peel them. Leaving the skins on creates a tough, papery texture that distracts from the soft, syrupy consistency of the fruit filling you want in a quality crisp.
How to ensure the apple filling isn't too runny?
Toss the apples thoroughly with 1 teaspoon of cornstarch. This is critical for thickening the juices released during the 45-minute bake time, resulting in a cohesive, glossy filling rather than a watery one.
How to tell when your apple crisp is fully baked?
Look for a mahogany colored topping and bubbling juices. The crisp is ready when the surface is deeply bronzed and you can clearly see the juices from the apple mixture thickening and bubbling up around the edges of the pan.
How to store leftovers?
Cover and refrigerate once completely cooled. You can keep it for up to three days, but note that the topping will lose its crispness over time; reheat in a 375°F oven for a few minutes to revive the texture.
Old Fashioned Apple Crisp
Ingredients:
Instructions:
Nutrition Facts:
| Calories | 381 calories |
|---|---|
| Protein | 3.4 g |
| Fat | 12.6 g |
| Carbs | 65.6 g |
| Fiber | 3.4 g |
| Sugar | 42.5 g |
| Sodium | 102 mg |
