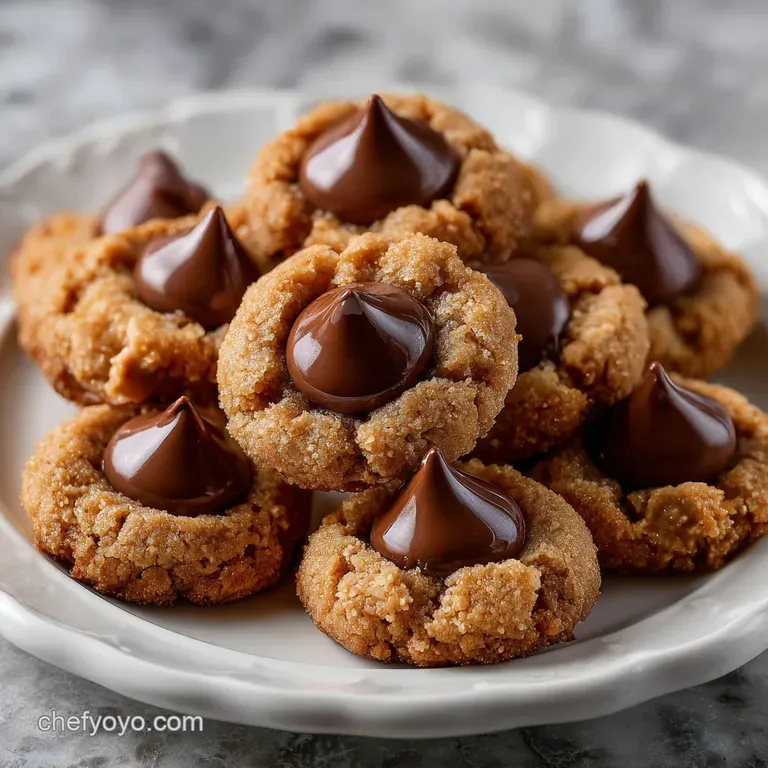
Hershey Kiss Cookies: the Ultimate Peanut Butter Blossom
- The Classic Hug: Decoding the Peanut Butter Blossom
- Why This Formula Creates the Perfect Peanut Butter Kiss Cookie Texture
- Gathering Your Baking Essentials: Ingredients and Swaps
- Baking the Classic Hug: A Step-by-Step Guide
- Mastering the Blossom: Expert Tips and Troubleshooting
- Keeping Them Fresh: Storage and Freezing Peanut Butter Blossoms
- Perfect Pairings for Your Chocolate Peanut Butter Cookies
- Recipe FAQs
- 📝 Recipe Card
The Classic Hug: Decoding the Peanut Butter Blossom
There’s nothing quite like the smell of warm peanut butter and melting chocolate filling your kitchen. Seriously, it’s instant nostalgia, the kind that makes you want to cozy up under a blanket.
If you are hunting for the ultimate holiday biscuit or just need a simple weeknight treat, these are your new best friend. We’re not just making standard cookies today; we’re perfecting the art of the Hershey Kiss Cookies , the iconic peanut butter blossom that everyone expects to see on the dessert tray.
These cookies are a lifesaver, genuinely. They require zero fancy ingredients just pantry staples you likely have right now and they come together faster than it takes to decide what to watch on Netflix.
They are inexpensive, incredibly easy to scale for massive parties, and far more forgiving than those fussy cut-out biscuits. If you’ve ever felt intimidated by baking, this particular Hershey Kiss Cookies recipe is your gateway to glory.
So, let's ditch the complicated techniques and focus on the real world tricks that guarantee the perfect, soft, slightly salty, chewy centre every time. I've made all the mistakes (hello, flat, greasy disasters!), and now I’m handing you the foolproof formula for the best Hershey Kiss Cookies you will ever bake.
Let's crack on and make some magic.
Why This Formula Creates the Perfect Peanut Butter Kiss Cookie Texture
The secret to a truly excellent Peanut Butter Blossom isn’t the chocolate it’s the balance of fats and sugars in the dough. We are aiming for a cookie that is chewy in the centre, has just enough lift to create those characteristic cracks, and stays soft for days.
This specific formula achieves that by leaning heavily on brown sugar and using a crucial fat combination. Making perfect Hershey Kiss Cookies requires respecting these ratios.
A Brief History of the Iconic Peanut Butter Biscuit
The original recipe for what we now know as the Peanut Butter Blossom first appeared in the early 1950s. It was the invention of Freda Smith, who submitted it to a baking contest, and the rest is history! It quickly became a staple, especially around Christmas.
Honestly, a holiday spread isn't complete without a batch of these Hershey Kiss Cookies Christmas style. The simple design a rich biscuit base topped with a shiny chocolate gem is timeless and universally beloved.
What Makes This Version Uniquely Chewy and Rich
Most cookie recipes call for 100% butter, but this is one of the rare instances where a slightly lower melting point fat helps us achieve a distinct texture. We use equal parts brown and white sugar; the brown sugar contains molasses, which adds moisture and acidity, keeping the Hershey Kiss Cookies softer for longer.
We also stop mixing the moment the flour disappears. Overmixing develops gluten, and gluten means tough, dry cookies. We want tender, melt-in-your mouth perfection in these Peanut Butter Hershey Kiss Cookies.
Essential Equipment Checklist for Easy Baking
You don't need a professional kitchen, but a few tools make these Hershey Kiss Cookies significantly easier.
- A Stand Mixer: Essential for properly creaming the butter and sugar until fluffy. Don't skip this aeration step; it incorporates air, which helps the cookies rise nicely.
- Cookie Scoop: Seriously, uniformity is the key to even baking. Use a small (1.5 Tbsp) scoop. It ensures all your Kiss Cookies bake at the same rate and look professional.
- Parchment Paper: Stops sticking and helps insulate the bottom of the cookie, preventing scorched bottoms while ensuring a lovely golden brown edge.
The Role of Shortening vs. All-Butter Recipes
Traditional Peanut Butter Blossoms sometimes call for shortening (like Crisco). Shortening has no water content, so it guarantees a softer, puffier cookie that holds its shape incredibly well. However, butter delivers flavour it's complex and nutty.
My preference is for all butter here, but if you want the absolute puffiest, no-spread result, substitute half the butter with high-quality shortening. Just know that the butter provides the best foundation for great tasting Hershey Kiss Cookies .
Achieving the Ideal Crinkle: Sugar Coating Secrets
That beautiful, cracked surface is part of the charm of the best Hershey Kiss Cookies . It happens naturally as the dough expands and the granulated sugar coating resists the movement. You must roll the dough balls completely and generously in sugar before baking.
This coating also helps retain moisture inside the cookie while it bakes.
Temperature Matters: Why Chilling the Dough Is Recommended
I know, I know chilling is annoying. You want cookies now . But if you skip the 30 minute chill, the butter is too soft, and the dough will melt rapidly when it hits the hot oven.
This causes "spread," resulting in thin, flat, crispy discs instead of thick, chewy Hershey Kiss Cookies . The chill firms up the fat, ensuring the dough holds its shape until the structure (flour and egg) has time to set. Trust me on this: patience is rewarded with superior texture.
Gathering Your Baking Essentials: Ingredients and Swaps
We are keeping this simple. These ingredients are staples, but quality matters, especially with the peanut butter.
| Ingredient | Role | Substitution Tip |
|---|---|---|
| Creamy Peanut Butter | Structure, flavour | Use almond butter or Sunbutter (homogenized/non-separating only). |
| Brown Sugar | Moisture, chewiness | Can use 100% white sugar, but you lose the depth and softness. |
| All-Purpose Flour | Structure, lift | Use a quality 1:1 gluten-free flour blend with xanthan gum for gluten-free Hershey Kiss Cookies . |
| Butter | Flavour, richness | Half butter, half shortening for max softness and puff. |
| Baking Soda | Leavening, browning | Do NOT sub with baking powder; the acidity balance won't be right. |
Choosing the Right Peanut Butter (Creamy vs. Natural)
This is perhaps the most critical ingredient decision for perfectly formed Peanut Butter Kiss Cookies . You must use commercial, homogenized peanut butter (think Jif or Skippy). Natural peanut butter, the kind that separates with oil on top, is too greasy and inconsistent.
That excess oil will cause the cookies to spread drastically, rendering them thin and flat. Avoid the natural stuff for this specific recipe.
The Star Topping: Selecting Your Hershey's Kisses
Obviously, the classic milk chocolate Hershey's Kiss is the star, but don't limit yourself! Try unwrapping a mix of flavours like the seasonal caramel filled Kisses or the Dark Chocolate Kisses. Just ensure they are all unwrapped and ready to go before the baking timer sounds.
Unwrapping 36 Kisses when you should be pressing them into hot dough is a stressor you don't need! Making Hershey Kiss Cookies is supposed to be fun, not frantic.
Necessary Substitutions for Common Allergies (gluten-free Flour Notes)
As mentioned, this dough handles a quality gluten-free blend beautifully. If you need a completely allergen free version, the swap for Sunbutter is reliable, and you can top the cookies with a standard vegan chocolate chip if the Kisses are a concern.
The structure of the dough remains surprisingly resilient, making these a very customizable version of the classic kiss cookies recipe .
Measuring Precisely: Why Spooning Flour Is Crucial
Don't scoop your flour directly out of the bag with your measuring cup! That packs it down, and you could easily end up using 20 30% too much flour. Too much flour leads to dry, dense, and crumbly Hershey Kiss Cookies .
Instead, gently spoon the flour into the measuring cup until it overflows, then level it off with the back of a knife. This small step ensures the perfect chewy texture.
Baking the Classic Hug: A step-by-step Guide

Preheat the oven to 350°F (175°C). Line those sheets with parchment. Have your 36 Kisses unwrapped. Ready? Let’s do this!
Creaming Butter and Sugar for Max Volume
Put the softened butter, granulated sugar, and brown sugar into your mixer. Crank it up to medium speed and let it go for 2– 3 minutes. Don't stop until the mixture looks noticeably lighter in colour and texture, like thick frosting.
This creaming step incorporates air, crucial for light, chewy Hershey Kiss Cookies . Scrape the bowl well, then beat in the peanut butter, egg, and vanilla until just mixed.
Forming Uniform Cookie Dough Balls
Mix the dry ingredients (flour, salt, baking soda) in a separate bowl first, then add them to the wet mixture on low speed. Mix until just combined. Stop the mixer the second you don't see dry flour anymore. Chill the dough for at least 30 minutes.
Once chilled, scoop the dough using your small scoop. Roll each portion gently between your palms to smooth out the surface. This ensures perfect, round Peanut Butter Hershey Kiss Cookies .
Pre-Bake Preparation: The Sugar Rolling Technique
Pour your rolling sugar into a shallow dish. Roll each dough ball generously, making sure the entire surface is coated. This sugar shell is what gives the cookies their crisp edge and those lovely, dramatic cracks while baking. Place them 2 inches apart on the prepared sheets.
If you’re short on time, this easy peanut butter cookies technique works perfectly without extensive chilling.
The Critical Timing: Adding the Chocolate Kiss Post Bake
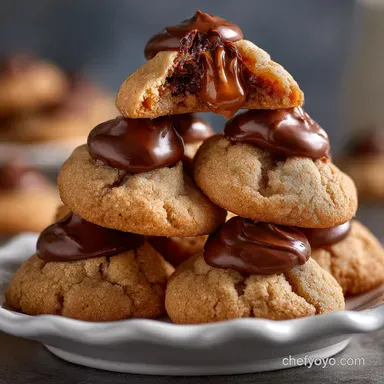
Bake for 8– 10 minutes. The cookies will look slightly puffy and the edges will be set, but the centres should still look a tiny bit underdone. This is crucial! Pull them out. Now, move fast. Immediately press one Kiss gently into the centre of each cookie.
The cookie will fracture slightly that’s exactly what you want! Let the chocolate sit and soften for about a minute on the hot cookie before transferring the whole shebang to a cooling rack. This prevents the melted chocolate from collapsing entirely.
This step defines the classic Hershey Kiss Cookies experience.
Chef’s Note: Do NOT bake the Kisses! They will seize up, dry out, and look dull. You want the creamy, slightly soft texture of a Kiss that has just barely melted into the hot cookie.
Mastering the Blossom: Expert Tips and Troubleshooting
Why Your Kisses Are Melting (And How to Stop It)
If your Kisses are collapsing into a puddle of sad chocolate syrup, you did one of two things: A) You put them on too early, or B) You transferred the cookies too soon. Only press the Kiss into the cookie after it comes out of the oven.
Then, let the cookie cool on the baking sheet for a full 5 minutes before moving it. This setting time is essential to stabilize the melted chocolate.
Preventing Spread: Dealing with Flat Cookies
Flat cookies are usually caused by three things: warm dough, using natural peanut butter, or too much fat. Make sure your butter isn't melted, respect the 30 minute chill time, and measure your peanut butter accurately.
If you live in a very warm or humid climate, chilling for an hour, or even 10 minutes in the freezer, can make all the difference for your chewy peanut butter cookie recipe .
Achieving Perfectly Cracked Surfaces
The secret is the combination of the sugar coating and the slightly under baked centre. When the dough expands rapidly in the oven, the sugar coating creates friction, causing the top to split and crack.
If your cookies are smooth, you might need to roll them more aggressively in the sugar, or your dough might be too dry (meaning you scooped too much flour!). These steps ensure beautiful, picture perfect Hershey Kiss Cookies .
Keeping Them Fresh: Storage and Freezing Peanut Butter Blossoms
These are fantastic make-ahead treats!
Room Temperature Storage Guidelines
Once completely cool (and the chocolate has fully set give it 2- 3 hours), store your Hershey Kiss Cookies in an airtight container at room temperature. They stay beautifully soft for 5 7 days.
Pro Tip: Throw a half slice of sandwich bread into the container; the cookies will absorb the moisture from the bread and stay softer even longer.
Detailed Instructions for Freezing Baked Cookies
Yes, you can freeze these! Bake and cool the kiss cookies recipe completely. Place them in a single layer on a sheet pan to flash freeze for one hour. Once solid, transfer them to a heavy duty freezer bag or airtight container, separated by sheets of parchment paper.
They will keep well for up to three months. Thaw them overnight at room temperature. They taste nearly as good as fresh!
Freezing Unbaked Dough for Batch Baking
This is my favourite trick for holiday prep. Make the dough, chill it, scoop it, and roll the balls in the sugar coating. Place the coated balls onto a sheet pan and freeze solid. Once frozen, transfer the dough balls to a labelled freezer bag.
When you want fresh Hershey Kiss Cookies , place the frozen dough balls on a prepared sheet pan (no need to thaw!) and add 2– 3 minutes to the total baking time. Fresh cookies anytime!
Perfect Pairings for Your Chocolate Peanut Butter Cookies
These rich cookies pair wonderfully with contrast! If you're planning a holiday dessert platter, I highly recommend balancing the rich peanut butter with something sharp and citrusy, like a cranberry shortbread, or pairing them with another iconic treat like my recipe for Crinkle Cookies: The Classic Fudgy Chocolate Christmas Cracker . If you want more chewy goodness, check out my tips for Chocolate Chip Cookies: Best Chewy Recipe for Crispy Edges too! The versatility and ease make this Hershey Kiss Cookies recipe a total winner in every season. This classic chocolate and peanut butter pairing is the definition of comfort. Go forth and hug your cookies!

Recipe FAQs
When exactly should I place the Hershey Kiss on the cookie?
The kisses must be placed immediately after the cookies come out of the oven, while they are still piping hot. Gently press the kiss directly into the center of the cookie; the residual heat will soften the chocolate just enough to adhere without melting it entirely.
If you wait too long, the kiss won't stick properly once the cookie cools and sets.
Why are my peanut butter kiss cookies dry or crumbling apart?
This usually indicates too much flour or insufficient mixing of the wet ingredients. Ensure you measure the flour using the spoon and-level method, and avoid overbaking, as these cookies firm up significantly upon cooling.
If the dough feels overly dry before baking, try adding 1 tablespoon of milk to hydrate it slightly.
Can I substitute crunchy peanut butter for the smooth variety?
Yes, you absolutely can, but be aware that the texture will be slightly rougher and less uniform due to the peanut chunks. Make sure the total volume of peanut butter remains the same as specified in the recipe.
If the dough seems overly stiff because of the added chunks, you may need to add a splash of milk for better binding.
I don't have Hershey Kisses. What are some good alternatives?
Excellent alternatives include small solid chocolate squares, miniature peanut butter cups, or even a simple chocolate ganache dollop applied once the cookie is fully cool. If you prefer a non-chocolate twist, try pressing a candied cherry or a pecan half into the warm cookie instead.
Why did my cookies flatten out too much during baking?
Excessive spreading is usually caused by the butter being too soft or melted when incorporated, or by not chilling the dough sufficiently. Ensure your butter is properly softened (not liquid) and that your oven temperature is accurate.
If you skipped the step of rolling the dough in granulated sugar, that lack of coating can also allow the cookies to spread more easily.
How long do these cookies stay fresh, and how should I store them?
Store baked and cooled cookies in an airtight container at room temperature for up to 5 days. For optimal freshness, separate the layers with parchment paper to prevent the chocolate kisses from sticking to the cookie bottoms. Avoid refrigerating, as this often dries out the peanut butter cookie dough.
Can I freeze the cookie dough or the finished baked cookies?
Both the dough and the baked cookies freeze well. Freeze the scooped cookie dough balls (without the sugar coating) for up to 3 months; bake directly from frozen, adding a couple of minutes to the baking time.
Baked cookies freeze perfectly for about 6 weeks, provided they are stored in a sturdy, airtight container to protect the fragile chocolate kisses.
Peanut Butter Kiss Cookies Recipe
Ingredients:
Instructions:
Nutrition Facts:
| Calories | 994 kcal |
|---|---|
| Protein | 40.3 g |
| Fat | 64.8 g |
| Carbs | 46.7 g |
