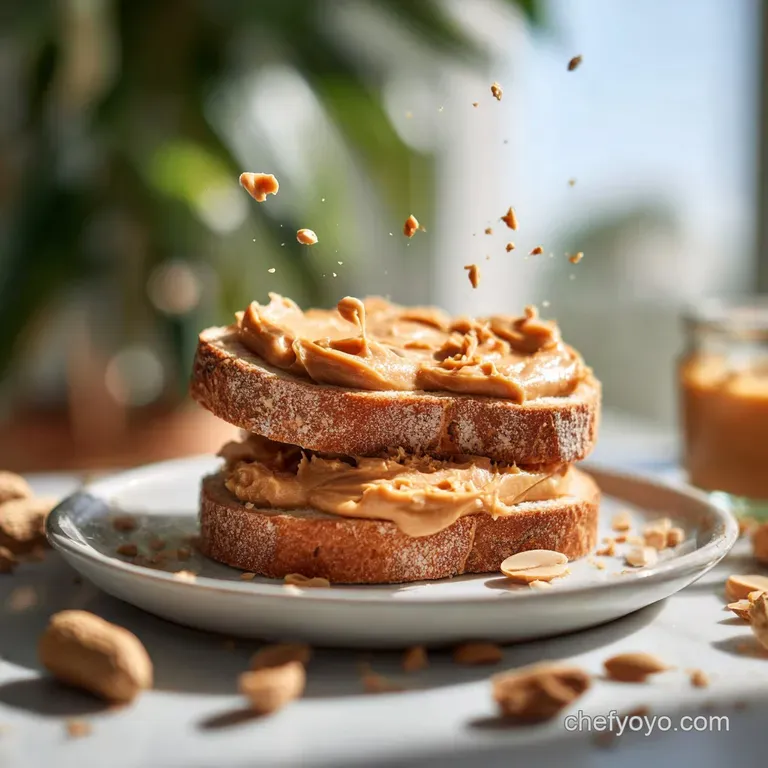
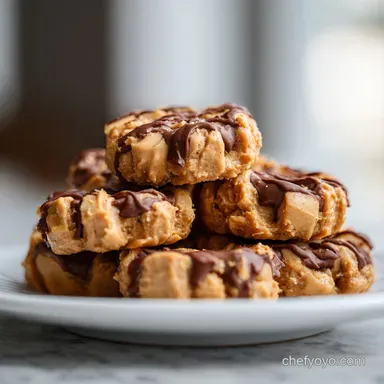
Peanut Protein Balls
- Time: Active 10 minutes, Passive 30 minutes, Total 40 minutes
- Flavor/Texture Hook: Fudgy, nutty, and velvety
- Perfect for: Post workout recovery or busy morning meal prep
- The Secret to Fudgy Results
- Essential Preparation and Timing Specs
- Analyzing Each Critical Component
- Professional Equipment for Clean Rolling
- Instructions for a Contemporary Snack
- Mastering Texture and Consistency
- Adaptations for Unique Dietary Profiles
- Optimal Storage and Waste Solutions
- Perfect Pairings and Presentation Styles
- Recipe FAQs
- 📝 Recipe Card
You know that mid afternoon slump where your brain feels like it is running through wet cement? I used to reach for those "healthy" store-bought bars that tasted like flavored cardboard and cost a fortune.
One Tuesday, after a particularly grueling workout, I stood in my kitchen surrounded by half empty jars of peanut butter and a bag of oats, determined to create something better. The result was a kitchen that smelled like a toasted nut heaven and a snack that actually kept me full until dinner.
The beauty of making these yourself is the control over the texture. Most people settle for dry, crumbly pucks that require a gallon of water to swallow. But we are going for a contemporary fusion of a truffle and a granola bar.
We want that silky mouthfeel from the peanut butter paired with the slight chew of the oats and the occasional snap of a dark chocolate chip.
Honestly, once you smell the aroma of warm honey hit the natural peanut butter, you will never go back to the boxed stuff. We are making something that feels like a treat but works like fuel. It is simple, requires zero heat, and is practically foolproof if you follow my texture cues.
Let's get into the mechanics of why these bites are so much better than the rest.
The Secret to Fudgy Results
The Science of Why it Works Lipid emulsification occurs when the natural fats in the peanut butter bind with the viscous sugars in the honey to create a stable, fudgy matrix.
This suspension traps the dry protein powder, preventing a chalky texture while the oats undergo starch hydration to provide structure.
- Emulsification: Mixing the "drippy" oils with the honey creates a thick syrup that coats every oat flake.
- Starch Hydration: The quick cooking oats absorb the liquid over 30 minutes, turning from dry flakes into soft, chewy binders.
- Protein Density: Vanilla protein powder acts as a structural flour, giving the balls a "bite" that mimics a soft baked cookie.
- Fiber Network: Ground flaxseed creates a mucilaginous bond when it touches the honey, acting as an invisible glue.
Essential Preparation and Timing Specs
When we talk about contemporary snacks, timing is everything. While the prep only takes 10 minutes, the "set" time is what separates a sticky mess from a professional grade bite.
I have tried rushing this by eating the dough straight from the bowl, and while it's delicious, it doesn't have that clean, velvety finish we want.
| Method | Texture Outcome | Preparation Time |
|---|---|---|
| Microwave (Warm PB) | Silky and easy to roll | 10 minutes |
| Stovetop (Melting) | Glossy but can be oily | 12 minutes |
| Cold Mix | Chunky and hard to bind | 15 minutes |
The stovetop method is great if your peanut butter is at the bottom of the jar and a bit dry, but I usually find a quick 15 second zap in the microwave is the sweet spot. You want the peanut butter to be the consistency of heavy cream, not water.
This ensures it coats the oats without making the dark chocolate chips melt instantly.
Analyzing Each Critical Component
Choosing your ingredients is like selecting the cast for a play. If your peanut butter is too stiff, the balls will be dry. If your honey is too thin, they will be a puddle. For the best results, use "drippy" natural peanut butter where the only ingredients are peanuts and maybe a bit of salt.
| Component | Science Role | Pro Secret |
|---|---|---|
| Peanut Butter | Primary Lipid Binder | Use the "drippy" top of-the jar portion for better flow. |
| Quick Oats | Structural Fiber | Pulse half of them in a blender for a smoother, fudge like bite. |
| Honey | Viscous Humectant | Use local wildflower honey for a complex, floral aroma. |
| Protein Powder | Texture Modifier | Whey blends provide a creamier finish than pure plant proteins. |
Beyond the basics, we are adding shredded coconut and dark chocolate chips. The coconut adds a tropical, nutty aroma that balances the heavy roast of the peanuts. The chocolate chips provide a necessary "shatter" when you bite into them, offering a textural contrast to the soft dough. If you are looking for a more intense energy boost, consider my Peanut Butter Protein Balls recipe.
- 1 cup natural drippy peanut butterWhy this? Provides the essential healthy fats and roasted flavor base.
- 1 ½ cups quick cooking rolled oatsWhy this? Smaller flakes hydrate faster than old-fashioned oats.
- ¼ cup honeyWhy this? The "glue" that provides sweetness and shelf stability.
- ½ cup vanilla protein powderWhy this? Adds the muscle repairing element and balances the moisture.
- 2 tbsp ground flaxseedWhy this? Omega-3s and extra binding power.
- ¼ cup unsweetened shredded coconutWhy this? Adds a subtle crunch and nutty scent.
- 1/3 cup mini dark chocolate chipsWhy this? For that classic flavor pairing and antioxidant boost.
- ½ tsp sea saltWhy this? Sharpens the sweetness and heightens the peanut aroma.
Professional Equipment for Clean Rolling
You don't need a pantry full of gadgets for this, but a few specific tools make the process much less of a "sticky hand" nightmare. I always use a medium sized cookie scoop. It ensures every ball is exactly the same size, which looks stunning if you are serving these on a contemporary snack board.
A large silicone spatula is also a must. You need something flexible to scrape the bottom of the bowl to ensure no dry protein powder is left hiding. If you have a stand mixer such as KitchenAid, you can use the paddle attachment on the lowest setting, but honestly, doing it by hand gives you a better "feel" for the dough.
Phase 1 Emulsion Base
The first step is all about the smell. Put your peanut butter and honey in a large glass bowl. If they are cold from the fridge, the mixture will be stubborn. Warm them slightly until you can stir them into a shimmering, golden liquid. The aroma at this stage should be sweet and intensely nutty.
Phase 2 Building Structure
Once the liquids are combined, fold in the ground flaxseed and protein powder. This is where the magic happens. The mixture will turn from a liquid into a thick, paste like dough. It might look a bit "sandy" at first, but keep stirring. The salt goes in now too, so it can dissolve evenly into the fats.
Phase 3 Shaping Setting
Add the oats and coconut. This will take some elbow grease. You want every single oat flake to be coated in that peanut butter "gold." Finally, fold in the chocolate chips. If the dough is still warm, wait 2 minutes before adding the chocolate so they don't melt and turn the whole thing brown.
Use your scoop to form 20 even balls.
Instructions for a Contemporary Snack

- Warm the 1 cup peanut butter and 1/4 cup honey for 15 seconds. Note: This creates a liquid state for easier mixing.
- Whisk the peanut butter and honey until they form a smooth emulsion.
- Add the 1/2 tsp sea salt and 2 tbsp ground flaxseed. Mix until combined and fragrant.
- Stir in the 1/2 cup protein powder. Note: It will become very thick and slightly tacky.
- Fold in the 1 1/2 cups quick oats and 1/4 cup coconut. Mix until no dry oat patches remain.
- Check the temperature. Note: If it feels hot, wait 2 minutes before the next step.
- Incorporate the 1/3 cup mini chocolate chips gently.
- Scoop the dough into 1 inch mounds. Check for a weight of about 25g each.
- Roll between your palms until smooth and spherical.
- Chill on a parchment lined tray for 30 minutes until firm and matte.
For those days when you're craving something even more indulgent, I often swap this for my Peanut Butter Balls recipe. It uses a similar rolling technique but focuses more on that dessert like finish.
Mastering Texture and Consistency
The biggest mistake I ever made was using "dry" peanut butter from the bottom of a jar. I ended up with a bowl of crumbs that wouldn't hold a shape even if I squeezed them with all my might. If your dough is crumbly, don't panic. Just add another tablespoon of peanut butter or a teaspoon of water.
On the flip side, if your hands are covered in goo and you can't form a ball, your mix is too wet. This usually happens if the honey was particularly thin or the peanut butter was very oily. In that case, add a tablespoon more of oats or protein powder.
| Problem | Root Cause | Solution |
|---|---|---|
| Balls are Crumbly | Not enough binder/fats | Add 1 tbsp of warm peanut butter. |
| Too Sticky to Roll | Excess liquid or heat | Chill the dough for 15 mins before rolling. |
| Chalky Aftertaste | Low quality protein powder | Use a whey/casein blend or add more honey. |
Avoid a Chalky Mouthfeel
The "chalky" sensation is usually the result of protein powder that hasn't been fully hydrated. To fix this, ensure you mix the protein powder into the liquid peanut butter before adding the oats. This allows the fats to encapsulate the protein particles, making them feel silky on the tongue rather than dry.
Instant Cohesion No Crumbly Balls
If the balls are still falling apart after chilling, you might have used old-fashioned rolled oats instead of quick oats. Quick oats are pre steamed and rolled thinner, meaning they have more surface area to grab onto the "glue." If you only have old-fashioned oats, give them a 5 second pulse in the food processor first.
Fixing Dry Crumbly Dough
Chef's Note: If your dough looks like sand, add a splash of almond milk. Just a teaspoon at a time! This provides the moisture needed for the flaxseed to "activate" and bind the mixture together without adding excess fat.
Adaptations for Unique Dietary Profiles
We live in a world of diverse needs, and these Peanut Protein Balls are incredibly flexible. I have a friend who is allergic to all nuts, and I make these for her using sunflower seed butter (SunButter). The aroma is slightly different, more earthy and toasted, but the texture remains perfectly fudgy.
| Original Ingredient | Substitute | Why It Works |
|---|---|---|
| Peanut Butter | Almond or Sunflower Butter | Similar fat content. Note: SunButter adds a savory, earthy note. |
| Honey | Pure Maple Syrup | Vegan friendly binder. Note: Thinner than honey; add more oats. |
| Quick Oats | Quinoa Flakes | gluten-free and high protein. Note: Very soft texture. |
Protein Powder Alternatives
If you want to make these without any processed powders, you can. Simply replace the 1/2 cup of protein powder with an extra 1/2 cup of almond flour or finely ground oats. You will lose some of the "muscle building" stats, but the flavor is remarkably clean and nutty.
Nut Free Alternative Options
Using sunflower seed butter is the best bet here. Just be aware that sunflower butter can sometimes react with baking soda (not used here, but good to know!) and turn green. In this no bake recipe, it stays a beautiful toasted brown color.
Decision Shortcut
- If you want a crunchier bite, swap the mini chips for cacao nibs.
- If you want a sweeter treat, use white chocolate chips and dried cranberries.
- If you want it extra creamy, add 1 tablespoon of melted coconut oil to the mix.
Optimal Storage and Waste Solutions
These little gems are shelf stable for a day or two, but for that "snap" in the chocolate and the best fudgy texture, the fridge is your best friend. I like to keep mine in a glass airtight container.
If you stack them, put a piece of parchment paper between the layers to prevent them from fusing into one giant protein brick.
- Fridge: Store for up to 2 weeks. The flavor actually deepens after the first 24 hours.
- Freezer: These freeze beautifully for up to 3 months. Eat them straight from the freezer for a "truffle" experience!
- Zero Waste Tip: Don't throw away the "dust" at the bottom of the oat bag. Use those fine oat particles instead of the quick oats for an even smoother consistency. If you have leftover crumbs from rolling, toss them over your morning yogurt or smoothie bowl.
Perfect Pairings and Presentation Styles
Presentation is where you can really show off your creative side. Instead of just piling them in a bowl, try lining them up on a slate board. Drizzle a tiny bit of melted dark chocolate over the top and sprinkle a few extra flakes of sea salt.
It looks contemporary and professional, like something you'd find in a high end bistro.
High Protein Breakfast Bowl
If you don't feel like rolling balls, you can crumble two or three of these over a bowl of Greek yogurt. Add some fresh sliced strawberries or bananas. The creaminess of the yogurt pairs perfectly with the dense, nutty texture of the protein bites.
Post Workout Recovery Strategy
I usually pack three of these in a small reusable silicone bag. Pair them with a crisp green apple. The acidity of the apple cuts through the richness of the peanut butter, making for a perfectly balanced snack that hits every flavor profile.
Trust me on this, once you master the "feel" of the dough, you will be making these every week. They are a lifesaver for busy schedules and a genuine joy to eat. Right then, let's get rolling!

Recipe FAQs
Can I use old-fashioned rolled oats instead of quick oats?
No, use quick oats for the best texture. Old-fashioned oats are thicker and won't hydrate as effectively, leading to a drier, crumbly texture. If you only have old-fashioned oats, pulse them briefly in a food processor to break them down.
My dough is too crumbly to roll, what should I do?
Add a tablespoon of warm peanut butter or a teaspoon of water. If the dough lacks binder, it will be dry and crumbly. Adding a little more liquid fat or moisture helps the ingredients come together smoothly for easier rolling.
How do I prevent the protein balls from tasting chalky?
Mix the protein powder into the liquid peanut butter first. This step ensures the fats encapsulate the protein particles, preventing that dry, chalky mouthfeel. Hydrating it thoroughly with the binder is key to a smooth finish.
Can I make these peanut protein balls nut-free?
Yes, substitute sunflower seed butter for peanut butter. This nut-free alternative offers a similar fat content and binding capability. Just be aware that sunflower seed butter has a more distinct earthy flavor profile.
What's the best way to store peanut protein balls?
Refrigerate them in an airtight container for up to 2 weeks. Chilling helps maintain their fudgy texture and prevents the chocolate chips from melting. They also freeze well for longer storage.
How long should the peanut protein balls chill before eating?
Chill for at least 30 minutes until firm and matte. This setting time allows the ingredients to fully hydrate and bind, creating the desired chewy texture. Rushing this step can result in a softer, stickier ball.
Can I substitute honey with maple syrup?
Yes, but adjust the oats if needed. Maple syrup is thinner than honey, so your mixture might be slightly wetter. You may need to add an extra tablespoon of oats to achieve the correct rolling consistency, similar to how you'd manage hydration in a Peanut Butter Cookies Recipe: Crispy Edges, Seriously Soft Centres.
Peanut Protein Balls
Ingredients:
Instructions:
Nutrition Facts:
| Calories | 151 kcal |
|---|---|
| Protein | 6.4g |
| Fat | 9g |
| Carbs | 13.1g |
| Fiber | 1.8g |
| Sugar | 7.2g |
| Sodium | 86mg |
