Perfectly Flaky Double Pie Crust
- Flaky Dreams: My Love for the Double Pie Crust Recipe
- A Slice of History Meets Modern Taste
- The Golden Crust Benefits
- Why This Crust Stands Out
- Time to Fill That Crust
- Your Go-To Guide for Essential Ingredients
- Mastering the Art of Professional Cooking
- Pro Tips & Secrets to Mastering the Perfect Pie Crust
- Perfect Presentation
- Storage & Make-Ahead
- Creative Variations
- Complete Nutrition Guide
- Frequently Asked Questions
- 📝 Recipe Card
Flaky Dreams: My Love for the Double Pie Crust Recipe
Oh my gosh, there’s something magical about baking a pie. it takes me back to my grandma’s kitchen, where the air was thick with warmth, laughter, and the smell of fresh baked goods.
I remember standing on my tippy toes, peeping over the counter as she rolled out her famous double pie crust recipe .
Now, every time i whip up a pie, i feel like i’m channeling her spirit.
If you’ve ever tried to bite into a slice of pie only to find the filling sloshing everywhere yikes! don’t worry, let’s make sure that doesn't happen again.
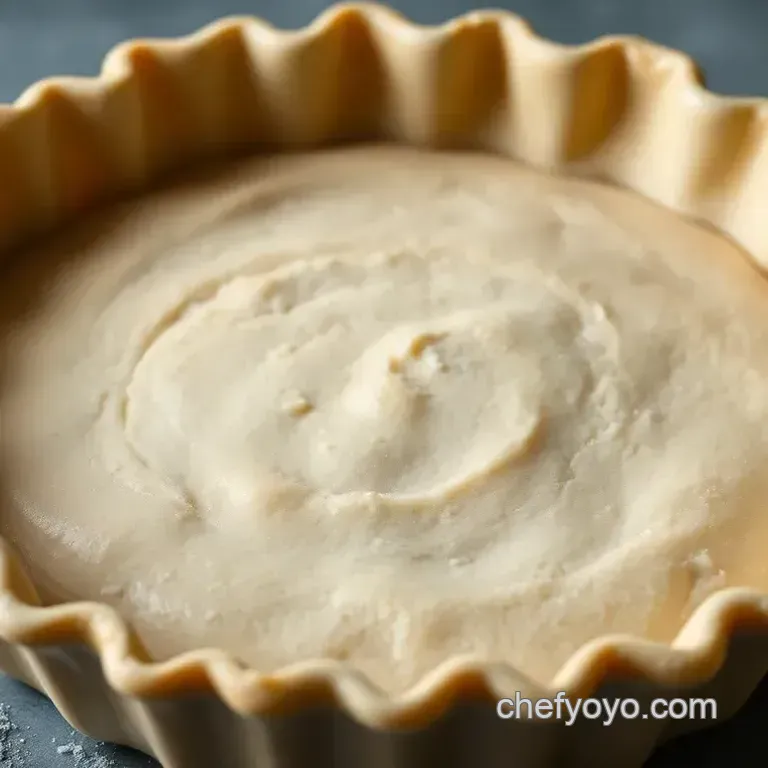
This recipe will get you a perfectly flaky double pie crust that’s just the ticket to holding in all that goodness, whether it’s a sweet apple pie or a savory chicken pot pie.
Seriously, this dough is versatile! plus, it's not as complicated as it sounds. grab your apron and let’s dive into this buttery world of flaky dreams together.
A Slice of History Meets Modern Taste
The history of pie crusts can really be traced back to the days of the romans. they had something called farcimen , which is a fancy way of saying “filling” wrapped in dough.
But today, we’re focused on our trusty double pie crust recipe , which is rooted in french pastry making techniques. fast forward, and here we are enjoying this culinary marvel, now more popular than ever.
I mean, google “best pie dough recipe crusts” and you’ll see just how many people are looking to perfect their pie game!
This recipe isn’t just a time saver, either. it takes about 15 minutes to prepare, plus 30 minutes to chill. just think about it: in a little over an hour, you can have a crust that’s enough for two 9 inch pies! talk about a bargain.
The Golden Crust Benefits
Let’s talk about why this double pie crust recipe is worth your time. first off, it’s a blank canvas for anything your heart desires sweet or savory.
Need to snag the spotlight at a potluck? show up with your homemade pie and watch it disappear faster than you can say “new york times pie crust recipe.
”
And speaking of health, while pies can sometimes get a bad rap, you can totally sneak in some nutrition with the right fillings! load that crust up with fresh fruits or veggies, and you’ve got a delicious dish that feels a little more guilt free.
Plus, nothing says “fancy” quite like homemade pie crust, which elevates any special occasion.
Why This Crust Stands Out
Let’s break it down: the key advantages of using this double pie crust recipe include that flaky texture everyone’s after.
That buttery richness? absolutely divine. i mean, who doesn’t like a warm slice of pie with a crispy, golden crust? yum! plus, unlike some other crusts out there, this one doesn’t require any fancy techniques or equipment.
Your good ole rolling pin will do just fine!
And let’s be real: how many of us have played a kitchen game of “guess what’s in the store-bought dough”? forget about it! there's so much satisfaction in knowing you made it from scratch.
Once you've tried it, you’ll never go back to those pre-packaged impostors.
Time to Fill That Crust
So, now you know why this double pie crust recipe is the real deal. are you ready to make some crust magic happen? next up, we’ll dive into the ingredients! whether you’re a seasoned pro or just venturing into the pie world, i promise this will be a fun journey.
Grab your measuring cups; it’s about to get delicious around here!
Your Go-To Guide for Essential Ingredients
Hey there, pie lovers! if you’re planning to whip up that double pie crust recipe or maybe even dive into a pie that’s bound to impress, you’ve come to the right place.
Let’s break down everything you need to know about essential ingredients, from picking the best ones to smart substitutions and kitchen must haves.
Premium Core Components
First up, let’s talk Premium Core Components . When it comes to pie crust, here’s what you need.
Measurements : for a perfectly flaky double pie crust , you'll need 2 ½ cups (312g) of all-purpose flour , 1 tsp (5g) salt , 1 cup (226g) unsalted butter , and some ice water (about 6-8 tbsp ).
Quality Indicators : Look for butter that’s cold and unsalted. Why unsalted? It allows you to control the salt levels in your dish. Your flour should feel light and not too clumpy.
Storage guidelines : keep your flour in a cool, dry place. when you’re not using your butter, store it in the fridge.
Stick to a use-by-date unsalted butter typically lasts about a month in the fridge .
Freshness Tips : Whiff your flour! If it smells off or stale, toss it. And always check the butter for any funky flavors.
Signature Seasoning Blend
Now onto the Signature Seasoning Blend . You cannot underestimate the power of spices in your pie.
Essential Spice Combinations : Think cinnamon and nutmeg if you’re making a sweet pie. For savory, consider thyme and rosemary!
Herb Selections : Pairing your main ingredients with the right herbs is crucial. Dill works great with chicken pot pie, while basil can elevate your tomato filling.
Flavor Enhancers : Don’t forget your vanilla extract for sweet pies. It brings everything to life!
Regional variations : in the south, you might add a touch of bourbon to your pecan pie for that extra kick.
Meanwhile, a new york times pie crust recipe may focus on simplicity for a classic apple pie.
Smart Substitutions
And, oh boy, were there times I messed up an ingredient or two. Here’s where Smart Substitutions come in clutch!
Common Alternatives : No butter? You can use margarine! A pie crust with margarine recipes works, but it might be a bit less flaky.
Dietary Modifications : For a gluten-free option, swap out all-purpose flour with a gluten-free blend. Just make sure it has xanthan gum in it.
Emergency Replacements : No ice water? Cold soda water can step in. The bubbles help create a nice texture!
Seasonal Options : Use pumpkin in the fall or berries in the summer to give your pies that seasonal touch.
Kitchen Equipment Essentials
Finally, let’s cover those Kitchen Equipment Essentials to set you up for success.
Must Have Tools : A good rolling pin and a sturdy mixing bowl are crucial. Trust me, you’ll need them.
Alternative Equipment Options : If you don’t have a pastry cutter, you can use two forks to combine the butter and flour.
Preparation Tips : Use a light touch when mixing; you don’t want to overwork that dough. Keep that butter cold and be patient!
Storage Solutions : When you’ve got excess dough, wrap it tightly in plastic and pop it in the freezer. It stays good for about three months !
So, there you have it! these essential ingredients and tips will help create that award winning pie crust . this crust will be the star of your dessert spread, whether you're making a traditional sweet pie or a comforting savory one.
With this guide, you're fully geared up to tackle any pie adventure ahead. now, it’s time to roll up those sleeves and dive into those step-by-step instructions that are waiting for you! happy baking!
Mastering the Art of Professional Cooking
When it comes to cooking, especially if you’re baking up something like a double pie crust recipe , there’s a real art to it.
It's more than just tossing ingredients together and hoping for the best. let's break down the essentials and make sure you’re prepared for pie-making glory.
Essential Preparation Steps
Before you even think about mixing flour and butter, you gotta get your mise en place down. french for “everything in its place,” this just means having all your ingredients measured and ready to roll.
Imagine mixing up your sugar only to find you're out of flour. talk about a buzzkill!
Time management is key, too. there’s nothing worse than realizing your pie crust needs chill time but you’ve got a full-on baking panic going on.
A quick tip? if you think you’ll be mixing several dishes, focus on tasks. get that crust chilling while you handle the filling, like a delightful apple mix that's destined for greatness.
Organization matters too! an orderly workspace can save you from flour explosions and panic moments. keep a clean counter, and i promise, your pie-making will feel like a walk in the park not a disaster zone.
Oh, and don’t forget safety! use sharp knives carefully and keep your workspace free of clutter. cut down on risks, folks!
step-by-step Process
When you’re ready to dive in, follow this simple roadmap. step 1: combine those dry ingredients that would be your flour, salt, and maybe a bit of sugar if you’re in the sweet pie territory.
Step 2: cut in the cold butter until it resembles those lovely pea-sized crumbs. here’s a pro tip: keep that butter cold! it'll make your crust flaky and delish.
Next up, step 3 is adding ice water but go easy on it. just a tablespoon at a time until you get that dough to come together without overworking it.
Trust me, we want flaky, not chewy! step 4 is the chill out time; wrap it up and let it rest in the fridge for about 30 minutes .
Now, when you roll it out (that’s step 5 ), do it on a lightly floured surface for best results.
You should aim for about 12 inches in diameter for that bottom crust. pop it into your pie dish, and don’t stress if it cracks a bit.
You can patch that up!
As for temperatures and timing, when it's time to bake, you're looking at about 375° f ( 190° c) for 45- 60 minutes , or until golden brown.
That visual cue of bubbling filling and a golden crown is your green light dig in!
Expert Techniques
Okay, let’s delve into some tricks that can elevate your crust from good to award winning pie crust status! one of the biggest secrets is temperature control throughout the process.
If your kitchen is warm, consider chilling your mixing bowl or even the flour for a bit. every little bit helps!
Another critical step is to thoroughly check for quality. before you roll out that crust, give it a little taste test.
The flavor should be just right! if it’s not, adjust with a dash more salt or sugar based on your filling.
Oh, and if you’re ever in a bind with a dry crust, just add a tiny splash of water! it can salvage a mistake real quick.
But keep it light nobody wants a soggy bottom!
Success Strategies
Now, let’s chat about common mistakes. trust me, the struggle is real! one of the biggest no-nos is overworking the dough.
Seriously, avoid this at all costs; it’s the ticket to a tough crust. also, if you skip the chilling step, your crust will shrink and ruin all your hard work.
For quality assurance, make sure you’re checking your dough for the right texture. it should be soft but not sticky.
And of course, there’s always the option for make-ahead. you can whip up that best pie dough recipe crusts the day before, and let it chill overnight!
By now, with a few simple steps and some love, you’re well on your way to crafting pies that would make even a New York Times Pie Crust Recipe proud.
Additional Information
If you want more tips or even variations on this flaky crust adventure, stick around. We’ve got tons to share that will help you take your baking from casual to gourmet! So, grab your mixing bowl, and let’s keep the pie magic rolling!
Pro Tips & Secrets to Mastering the Perfect Pie Crust
So you wanna whip up the perfect pie crust ? let me tell ya, it’s a game changer. whether you're going for a blueberry delight or a savory pot pie, a top and bottom pie crust recipe will set you up for success.
Here are some personal nuggets of wisdom i’ve picked up along the way!
Chef's Personal Insights
Listen, i’ve had my share of crust fails think tough, dry, or even worse, a soggy bottom. the biggest tip? keep your butter cold ! cut that butter into small cubes and put it back in the fridge while you prep.
You want those little pieces to stay chilled; they’re what create that flaky texture we all drool over.
Time Saving Techniques
Got guests coming over and short on time? no worries! you can make your dough ahead of time, even days in advance.
Just wrap it tight in plastic wrap and keep it in the fridge. when you're ready to bake, just pull it out, let it sit for a few minutes, then roll it out.
Flavor Enhancement Tips
Want to upgrade your crust flavor? sprinkle in a little sugar for sweet pies. and here’s a pro tip add a pinch of salt and some herbs if you’re doing a savory crust.
Trust me the difference is heavenly!
Presentation Advice
You know the saying, “you eat with your eyes first”? it’s true! when you get your crust into the pan, crimp the edges with your fingers or a fork for that bakery look.
Don’t forget to cut those steam vents in the top crust; it not only looks nice but keeps your pie from bubbling over.
Perfect Presentation
Making a pie isn’t just about the taste; it’s also about how it looks on the table.
Plating Techniques
When it's finally out of the oven, let it cool for a bit before slicing. this way, you get clean cuts and avoid a messy slice situation.
A sharp knife is your best friend here makes all the difference.
Garnish Ideas
Top your pie with a scoop of vanilla ice cream or a dollop of whipped cream. you could even sprinkle some cinnamon or a few fresh berries on top for that final touch.
Color Combinations
Use colorful filling! Vibrant fruits like cherries or blueberries peek through the golden crust, creating a feast for the eyes.
Visual Appeal Tips
A brushed layer of egg wash on the crust before baking gives it that golden brown, mouth watering finish. Do it, and you’ll impress your friends and family like a pro.
Storage & make-ahead
Nobody likes a soggy pie, so knowing how to store your precious creation is key.
Storage Guidelines
Once your pie is baked, let it cool completely before wrapping it up. use plastic wrap and store in the fridge, and it should last for about 3-5 days .
Just remember reheating is always best, so heat it gently to bring back that warmth.
Preservation Methods
If you wanna save it for later, you can freeze an unbaked pie! just wrap it snugly and toss it into the freezer.
When the craving strikes, go ahead and bake it straight from the freezer just add an extra 15- 20 minutes to the baking time.
Reheating Instructions
To reheat , pop that bad boy back in the oven at 350° F for about 15- 20 minutes. Your crust will get back its crunch, and you'll be singing, "It’s pie time!"
Freshness Duration
Remember, pies keep best when they’ve got their crust fresh. a baked pie can stay good for about a week in the fridge if stored properly, while an unbaked one can sit in the freezer for up to 3 months .
Just a little planning can help you keep the pie joy alive!
Creative Variations
Feeling adventurous? Let's talk about how you can mix things up with your Award Winning Pie Crust .
Flavor Adaptations
Swap out some of that all-purpose flour for ground nuts for a nutty twist. I love using almond flour in my crust for a slightly sweet, richer flavor.
Dietary Modifications
gluten-free? you bet! use gluten-free flour blends , and you’re good to go. for a lighter crust, consider a parbaked pie crust strategy for fruit pies that are less likely to turn soggy.
Seasonal Twists
In fall, add in some pumpkin spice to your crust for a cozy vibe. Summer? Fresh herbs could bring a refreshing kick to a summer fruit pie.
Regional Variations
Every region has its style! Explore Southern style pies with buttermilk crust or go classic with a New York Times Pie Crust Recipe always a crowd pleaser.
Complete Nutrition Guide
Eating pie doesn’t have to be guilty!
Detailed Breakdown
A slice of pie generally clocks in around 205 calories . But hey, we all know it’s about balance ! Enjoy those treats in moderation!
Health Benefits
Pies can be healthy think fruit fillings full of antioxidants. And if you're using whole grains , you’re boosting your fiber intake too.
Dietary Considerations
Keep an eye on sugar and fat content. You can swap some butter with margarine in your recipe. It’s a small change, but every little bit helps!
Portion Guidance
You're looking at about 8-12 servings from this double pie crust recipe . So, it’s perfect for gatherings or just a week of pie enjoyment at home.
In conclusion, whether you’re mastering the best pie dough recipe crusts ever or trying out a cooks illustrated pie crust , remember that pie-making is all about having fun in the kitchen! don’t stress too much; practice makes perfect, and each pie gets better.
Get ready to impress with that flaky crust the compliments are coming, my friend! happy baking!
Frequently Asked Questions
What is a double pie crust recipe, and when should I use it?
A double pie crust recipe is one that creates enough dough for both the bottom and top crusts of a pie. You typically use it for pies that have a filling that requires a cover, like apple or cherry pies, where the top crust seals in moisture and flavor while providing that beautiful golden finish.
Can I make the double pie crust dough ahead of time?
Absolutely! The dough can be made in advance and stored in the fridge for up to 2 days or frozen for up to a month. Just make sure to wrap it tightly in plastic wrap to prevent freezer burn. When you're ready to use it, allow it to thaw in the refrigerator overnight before rolling it out.
What’s the best way to prevent a soggy bottom crust?
To avoid a soggy bottom, you can blind bake the crust for about 10-15 minutes before adding your filling. Additionally, sprinkle a little flour or cornmeal on the crust before pouring in the filling to create a barrier that keeps it crisp. It’s a classic trick that can save your pie!
How do I get a flaky crust with this double pie crust recipe?
The key to a flaky crust lies in using cold ingredients and not overworking the dough. After mixing the butter into the flour until it resembles coarse crumbs, ensure you're only combining until just mixed.
Also, a good chill before rolling out allows the butter to firm up again, which helps create those lovely flaky layers.
Can I use whole wheat flour in my double pie crust recipe?
Yes, you can substitute a portion of the all-purpose flour with whole wheat flour for added nutrition. A 1:1 ratio should work, but keep in mind that it may yield a slightly denser crust. You might want to include a bit more ice water to help with the dough's consistency.
How should I store leftover pie crust?
If you have leftover pie dough, you can wrap it in plastic wrap and refrigerate it for up to 2 days, or freeze it for longer storage. Just remember to label it! Before using frozen dough, let it thaw in the fridge overnight so it’s easier to roll out.
Perfectly Flaky Double Pie Crust
Ingredients:
Instructions:
Nutrition Facts:
| Calories | 205 |
|---|---|
| Fat | 12g |
| Fiber | 1g |
