Quick Boneless Chicken Thighs: Juicy and Golden
- Time: 5 min active + 20 min cook
- Flavor/Texture Hook: Mahogany crust with velvety, juicy interiors
- Perfect for: Fast weeknight dinners or high protein meal prep
- Easy Pan Seared Boneless Chicken Thighs
- The Secret to Juicy Meat
- Component Analysis
- What Goes Into the Pan
- The Best Tools for Searing
- Step-by-Step Cooking Guide
- Fixing Common Cooking Errors
- Troubleshooting Common Issues
- Adding Your Own Flavor
- Scaling the Recipe
- Truths About Searing Meat
- Keeping Leftovers Fresh
- Perfect Sides for Chicken
- Recipe FAQs
- 📝 Recipe Card
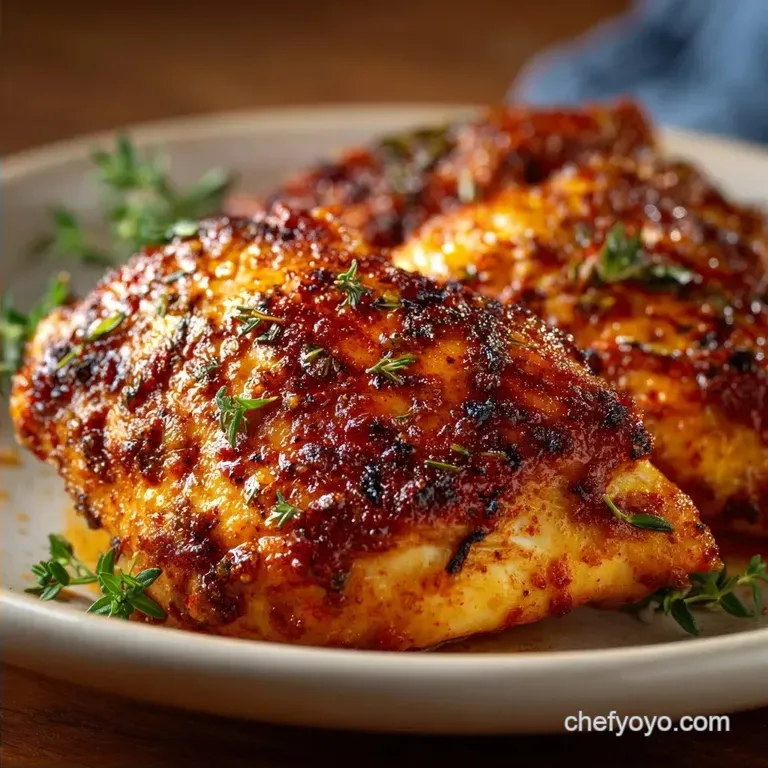
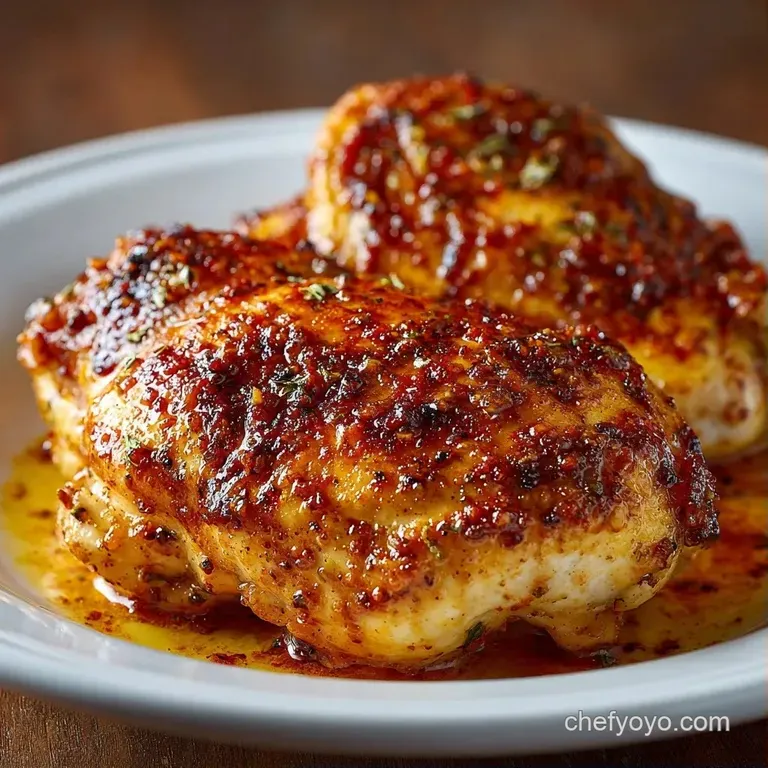
Easy Pan Seared Boneless Chicken Thighs
That aggressive sizzle when the meat hits the hot oil is the only sound I want to hear in my kitchen. But let's be real, we've all been there. You throw your meat into the pan, wait a few minutes, and instead of a gorgeous brown crust, you get a pale, gray, rubbery piece of protein sitting in a pool of cloudy liquid.
It's the classic "steaming" disaster, and it happens because of moisture.
When you don't dry the meat or you crowd the pan, the chicken releases water. That water turns to steam, and steam prevents the surface from ever hitting the temperature needed for a real sear. You end up with something that tastes okay but feels like chewing on a wet sponge.
It's frustrating, especially when you're hungry and just want a quick win.
This recipe is the fix for that specific problem. By focusing on surface dryness and temperature control, we can get those Boneless Chicken Thighs to a deep mahogany color in under 30 minutes.
You'll get that shatter crisp exterior and a center that stays tender, regardless of how many times you've messed it up in the past.
The Secret to Juicy Meat
I used to think searing was just about color, but it's actually about managing moisture and heat. Here is what's actually happening in the pan.
Surface Evaporation: Water is the enemy of browning. By patting the meat dry, we remove the barrier that forces the pan's energy to boil water instead of searing the protein.
Fat Rendering: Thighs have more intramuscular fat than breasts. As they heat up, this fat melts and essentially fries the meat from the inside out, which is why they stay so velvety.
Carryover Cooking: The meat continues to rise in temperature after you take it off the heat. Resting allows the fibers to relax and reabsorb those juices, so they don't all run out on your plate.
Connective Tissue Breakdown: Thighs contain more collagen than white meat. When cooked to 165°F, this collagen softens, giving the meat a more supple, tender feel.
| Method | Time | Texture | Best For |
|---|---|---|---|
| Stovetop | 20 mins | Crisp crust, juicy center | Quick dinners |
| Oven | 35 mins | Evenly cooked, softer skin | Large batches |
Component Analysis
Understanding why we use these specific seasonings helps when you want to swap things out based on what's in your pantry.
| Ingredient | Science Role | Pro Secret |
|---|---|---|
| Smoked Paprika | Color and Depth | Adds a "grilled" flavor without a BBQ |
| Garlic Powder | Savory Base | Doesn't burn as fast as fresh garlic |
| Sea Salt | Moisture Control | Draws out proteins for a better crust |
| Olive Oil | Heat Transfer | Bridges the gap between pan and meat |
What Goes Into the Pan
I've found that keeping the seasoning simple lets the flavor of the meat shine. Honestly, don't bother with expensive organic oils here, just use a standard extra virgin olive oil that can handle the heat.
- 1.5 lb boneless skinless chicken thighs Why this? More fat than breasts, making them harder to overcook
- 1 tbsp extra virgin olive oil Why this? Provides a clean sear and prevents sticking
- 1 tsp smoked paprika Why this? Gives that deep red brown color
- 1 tsp garlic powder Why this? Even distribution of flavor
- 1/2 tsp onion powder Why this? Adds a subtle sweetness to balance the salt
- 1/2 tsp sea salt Why this? Essential for flavor and crust formation
- 1/4 tsp black pepper Why this? Adds a mild, sharp bite
Smart Swaps for Your Budget:
| Original Ingredient | Substitute | Why It Works |
|---|---|---|
| Olive Oil | Avocado Oil | Higher smoke point; great for very high heat |
| Smoked Paprika | Sweet Paprika | Similar color, but loses the smoky notes |
| Sea Salt | Kosher Salt | Coarser grain; easier to control the amount |
The Best Tools for Searing
You don't need a professional kitchen to make this work, but the pan choice actually matters. I always reach for a cast iron skillet because it holds heat like a beast. When you drop a cold piece of meat into a thin non stick pan, the temperature plummets, and you're back to that "steaming" problem we talked about.
If you don't have cast iron, a heavy bottomed stainless steel pan works great. Avoid the thin, cheap pans that warp under heat. You want something that maintains a steady sizzle throughout the process. A digital meat thermometer is also non negotiable. According to USDA FoodData, poultry must reach a specific internal temperature for safety, and the only way to be sure without overcooking the meat is to check it.
Step-by-step Cooking Guide
Let's get into it. Keep your movements efficient and your pan hot.
- Pat the chicken thighs completely dry using paper towels. Note: Any dampness will create steam and prevent browning
- In a small bowl, whisk together olive oil, smoked paprika, garlic powder, onion powder, salt, and pepper.
- Rub the spice paste evenly over both sides of the chicken thighs. Note: This creates a barrier that helps the meat sear
- Heat a cast iron skillet or heavy bottomed stainless steel pan over medium high heat.
- Test the heat by dropping a bit of water in the pan; it should sizzle away instantly.
- Arrange thighs in the pan without overcrowding. Note: Leave space between pieces so they don't steam
- Sear undisturbed for 5-7 minutes per side until a deep mahogany crust forms.
- Reduce heat to medium and cook for another 2-4 minutes, flipping occasionally.
- Use a thermometer to ensure the internal temperature reaches exactly 165°F (74°C).
- Remove chicken from the pan and let the meat rest for 5 minutes.
Chef's Note: If you're using a very crowded pan, work in two batches. It takes an extra 10 minutes, but the difference in texture is massive.
Fixing Common Cooking Errors
Even with a guide, things can go sideways. Usually, it's a temperature or moisture issue.
Troubleshooting Common Issues
| Issue | Solution |
|---|---|
| Chicken steaming instead of searing | This is almost always caused by two things: the pan wasn't hot enough, or the meat was too wet. If you see a pool of liquid forming around the chicken, you've crowded the pan. |
| Why is the outside burnt but the inside raw | Your heat is too high. While we want a sear, "screaming" high heat can char the spices before the heat penetrates the center. |
| Why did the meat stick to the pan | You likely tried to flip the chicken too early. Meat has a natural property where it "releases" from the pan once the crust has fully formed. If you tug on it and it resists, give it another minute. |
Mistakes Checklist:
- ✓ Did I pat the meat bone dry?
- ✓ Is there space between the thighs in the pan?
- ✓ Did I wait for the "release" before flipping?
- ✓ Did I check the temperature with a probe?
- ✓ Did I let the meat rest?
Adding Your Own Flavor
Once you have the base technique for Boneless Chicken Thighs down, you can play with the flavors. I love doing a "honey garlic" finish where I add a tablespoon of honey and a splash of soy sauce to the pan during the last 2 minutes of cooking.
It glazes the mahogany crust into something glossy and sticky.
For a more zesty vibe, squeeze half a lemon over the meat the second it comes out of the pan. The acidity cuts through the richness of the thigh fat. If you're feeling fancy, you can drizzle a bit of homemade balsamic glaze over the top before serving. It adds a tangy sweetness that works perfectly with the smoked paprika.
Dietary Adjustments:
- Keto: This recipe is naturally low carb. To keep it that way, avoid honey glazes and serve with sautéed spinach.
- dairy-free: We use olive oil here, so it's already dairy-free. Avoid adding butter at the end if you're strictly avoiding milk products.
- Low Sodium: Replace the sea salt with a squeeze of lime and extra garlic powder to keep the flavor profile high.
Scaling the Recipe
When you're cooking for a crowd or just for yourself, you can't just multiply everything linearly.
Cooking for One (Half Batch): Use a smaller skillet, like an 8 inch. Since there's less meat, the pan will stay hotter, so you might need to reduce the searing time by about 1 minute per side to avoid overcooking.
Cooking for a Crowd (Double/Triple Batch): This is where people mess up. Do not try to fit 3 lbs of Boneless Chicken Thighs in one pan. You will create a chicken soup. Work in batches. Cook 1.5 lbs, move them to a platter, and then do the second batch.
For the seasonings, don't double the salt exactly. I usually go to about 1.5x the salt and spices when doubling the meat. Liquids (like the oil) can be reduced by about 10% since the fat from the first batch will stay in the pan.
Truths About Searing Meat
There are a few things people tell you in the kitchen that just aren't true. Let's set the record straight.
The "Seal In Juices" Myth: You'll hear people say that searing "locks in" the juices. It doesn't. Searing actually causes some moisture loss. What it does is create a flavor packed crust through a process called browning.
The juiciness comes from the cut of meat and the final internal temperature, not the sear.
The "Room Temp" Myth: Some say you must let meat sit out for an hour to reach room temperature. For thighs, this isn't really necessary and can be a food safety risk. As long as the pan is hot enough, you can cook them straight from the fridge.
Keeping Leftovers Fresh
Store your cooked chicken in an airtight glass container in the fridge for up to 4 days. I prefer glass because it doesn't hold onto the smell of the paprika and garlic.
Freezing: You can freeze these for up to 3 months. Wrap them tightly in foil and then put them in a freezer bag. When you thaw them, do it in the fridge overnight to keep the texture from getting grainy.
Reheating: Avoid the microwave if you can. It turns the meat rubbery. Instead, put the thighs in a pan over medium heat with a teaspoon of water. Cover with a lid for 3-5 minutes. The steam will gently heat the meat through without drying it out.
Zero Waste Tip: Don't throw away the browned bits (the fond) left in the pan. Deglaze the pan with a splash of water or white wine, scrape up the flavor, and pour it over your vegetables. If you have extra trimmings from the chicken, save them in a bag in the freezer to start your own bone broth for future soups.
Perfect Sides for Chicken
Since these Boneless Chicken Thighs are rich and savory, you need sides that provide balance. I usually go for something bright or acidic to cut through the fat.
The Fresh Route: A crisp arugula salad with lemon vinaigrette is spot on. The peppery greens and citrus pop against the smoked paprika.
The Comfort Route: Roasted carrots or garlic mashed potatoes. If you go this way, use the pan juices from the chicken to flavor the potatoes.
The Low Carb Route: Blanched broccoli or sautéed zucchini. Just toss them in the same pan after the chicken is gone for a few minutes to soak up the remaining oil and spice. This saves you from washing another pot and gives the veggies a deep, savory flavor.
Recipe FAQs
What is the quickest way to cook boneless, skinless chicken thighs?
Sear them in a cast iron skillet over medium high heat. This method creates a deep crust and cooks the meat completely in about 20 minutes.
Are chicken thighs good for diabetics?
Yes, they are an excellent protein choice. They are naturally low-carb and contain no sugar, fitting easily into a diabetic friendly meal plan.
How to cook boneless, skinless chicken thighs so they don't dry out?
Cook to an internal temperature of exactly 165°F. Always let the meat rest for 5 minutes before serving to allow the juices to redistribute.
How long do you cook boneless chicken thighs in a skillet?
Sear for 5 7 minutes per side, then finish for 2 4 minutes. Reduce the heat to medium for the final stage to ensure the center is cooked through without burning the spices.
How to prevent chicken from steaming instead of searing?
Pat the chicken thighs completely dry with paper towels. Surface moisture creates steam, which prevents the meat from developing a mahogany crust.
What are some recipe ideas for boneless chicken thighs?
Serve them in tacos or over a bed of rice. If you enjoyed the searing technique here, see how it works in our Restaurant Style Fajitas.
Is it true that you must boil chicken thighs first to make them tender?
No, this is a common misconception. High heat searing with a spice paste preserves moisture and adds far more flavor than boiling.
Quick Boneless Chicken Thighs

