The Effortless Loaf Chefs Noknead Rustic Rye Bread
- Mastering Complexity with Minimal Effort
- Your Ultimate Guide to Perfect No Knead Rye Bread
- The Core Components of Authentic Rye
- Tools of the Trade for Effortless Baking
- Step-by-Step Methodology: Letting Time Do the Work
- Achieving the Signature Crust on Your No-Knead Rye Loaf
- Expert Baker’s Troubleshooting and Advanced Tips
- Customizing and Serving Your Rye Masterpiece
- Recipe FAQs
- 📝 Recipe Card
Mastering Complexity with Minimal Effort
The concept of high-quality, artisan baking often conjures images of sweaty forearms, intensive kneading, and complex sourdough starter maintenance. Yet, the truth is, the most profoundly flavoured bread often requires nothing more than patience and a sturdy bowl.
Our journey into crafting an exceptional No Knead Rye Bread harnesses the revolutionary technique popularized by bakers who recognized that time, rather than effort, is the crucial ingredient.
This approach, often referred to as Peasant Bread because of its simplicity, completely bypasses the messy dough workout, allowing water and yeast to organize the gluten structure automatically over many hours.
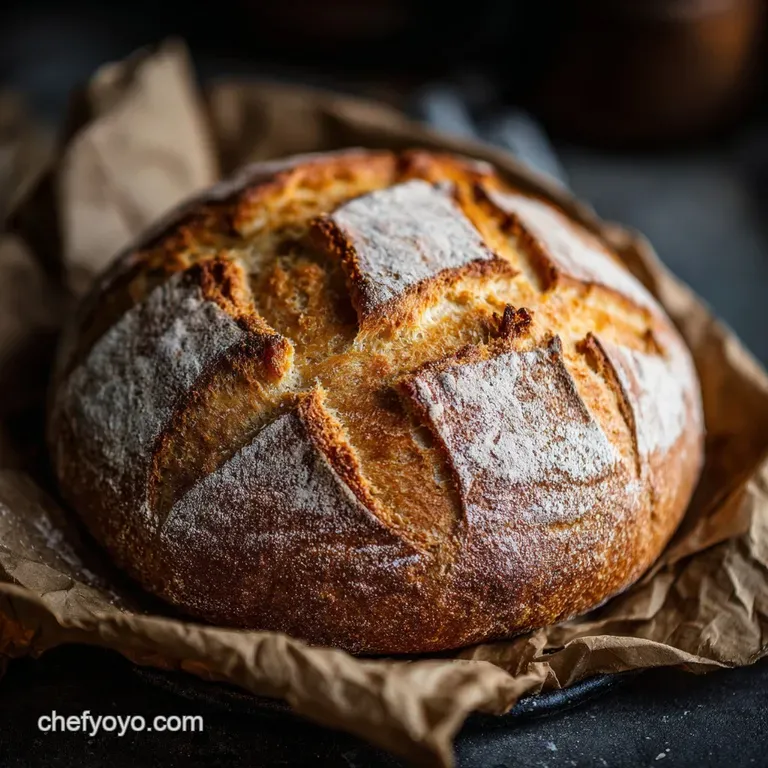
The result is an incredibly deep, rustic flavour profile married to a perfectly chewy, airy crumb and a thick, professional grade crust. If you've been searching for an Overnight Bread Recipe that delivers maximum flavour with less than fifteen minutes of active prep, you’ve found your benchmark.
Your Ultimate Guide to Perfect No Knead Rye Bread
Achieving the dense yet tender structure of true rye bread demands respect for its unique composition. This detailed guide ensures your loaf has the characteristic earthy flavour and substantial bite we all crave, whether you’re a novice or a seasoned home baker.
This specific No knead rye bread recipe is designed for foolproof success, transforming minimal ingredients into a show stopping loaf.
Why Long Fermentation Elevates Rye Flavour
Unlike commercial loaves rushed through proofing, this method requires a long, slow rest, ideally lasting 12 to 18 hours at cool room temperature. This extensive first proof is the secret sauce.
During this period, the yeast slowly consumes the sugars, producing complex organic acids and alcohol. This development is essential for achieving the distinctively tangy, earthy character of traditional rye bread.
It’s this leisurely process that builds structural integrity and flavour depth far beyond what quick rising methods can offer, making it the defining feature of great rustic loaves.
Debunking the Myths of Traditional Bread Making
The philosophy behind the no-knead method, championed by figures like Jim Lahey , rests on the principle of high hydration. By adding a substantial amount of lukewarm water (420 ml) to the dry ingredients (500 g flour total), the dough becomes very wet and sticky.
This excess moisture allows the gluten proteins to hydrate fully and align themselves simply through passive diffusion over time no need for physical force. This simplifies the process for the home cook, showing How To Make Simple Rye Bread without sacrificing quality, thus debunking the myth that exceptional bread demands intensive manual labour.
Essential Equipment for a Rustic Crust
The perfect crust thick, blistered, and crunchy is not achieved through luck but through controlled steam. The single most important piece of equipment for this recipe is the heavy, lidded pot.
Baking the No knead rye bread dutch oven style traps the moisture released by the dough inside the vessel during the initial phase of baking. This simulated steam environment prevents the crust from setting too quickly, allowing the loaf maximum oven spring and yielding that signature crackle.
A 5- to 7-quart cast iron Dutch oven is mandatory for best results.
Understanding the Rye-to-Wheat Ratio
Rye flour, while intensely flavourful, contains less gluten than white bread flour, meaning it cannot support the structure of the loaf entirely on its own. For the ideal balance a flavourful crumb that still manages to be airy we use a precise ratio: 300 grams of high protein white bread flour to 200 grams of medium or dark rye flour.
The strong white flour provides the necessary framework for the abundant bubbles, while the rye lends its characteristic depth, fibre, and moisture retention, resulting in a perfectly textured No-knead Rustic Rye Bread .
The Core Components of Authentic Rye
The ingredients list is intentionally minimal, emphasizing the quality and function of each component. Our base uses 300g strong bread flour, 200g rye flour, 8g fine sea salt, and 5g instant dry yeast.
The key to successful incorporation is using 420 ml of water, which provides the necessary high hydration for the no-knead process.
Tools of the Trade for Effortless Baking

Beyond the Dutch oven, the tools required are basic, though a few specialized items make handling the sticky rye dough much easier. These include a large, non-reactive mixing bowl, parchment paper for easy transfer, and a flexible bench scraper for dealing with the wet mixture.
Selecting the Best Dark Rye Flour
The choice of rye flour dramatically impacts the final loaf. While medium rye offers a balanced flavour, opting for dark rye flour will deepen the loaf’s colour and amplify its malty, earthy notes. Ensure your rye flour is fresh, as older flour can inhibit yeast activity.
The Role of Caraway and Optional Seeds
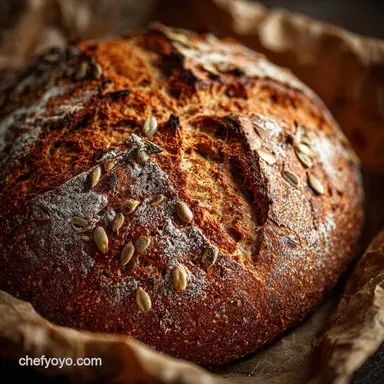
For a classic profile, 15 grams (1 tablespoon) of whole caraway seeds are essential. Caraway seeds cut through the richness of the rye, adding a fragrant, slightly anise like warmth. This is the defining characteristic of a true No knead rye bread with caraway seeds .
If caraway is not your preference, you might experiment with fennel seeds, or enrich the mixture with toasted sunflower or pumpkin seeds for added texture, using up to a quarter cup of each.
Water Temperature and Yeast Activation Secrets
The 420 ml of water should be lukewarm ideally between 95°F and 105°F (35 40°C). This temperature is warm enough to immediately activate the 5 grams of instant dry yeast without stressing or killing the organisms.
Because we are using instant yeast, there is no need to proof it separately; it can be mixed directly with the dry ingredients.
Sourcing and Prepping Your Dutch Oven
A quality cast iron Dutch oven is non-negotiable for the signature crust. It must be heavy to retain heat efficiently. Crucially, the pot, along with its lid, must be placed into the cold oven and preheated to a searing 450°F (230°C) for at least 30 minutes.
This ensures the pot is "screaming hot" when the dough is dropped in, guaranteeing immediate and dramatic oven spring.
Alternative Vessels for Baking Beginners
While the Dutch oven is highly recommended, if one is unavailable, you can substitute a thick walled pizza or baking stone. To compensate for the lack of a lid, place a shallow metal pan on the lowest rack and fill it with boiling water immediately upon loading the bread.
This provides external steam, though the resulting crust will not be as thick or beautifully blistered as the trapped steam method.
Related Recipes Worth Trying
- Grandma Prudys Rustic Caraway Rye Bread The Ultimate Comfort Loaf — This authentic Grandma Prudys Rye Bread is a rustic caraway rye with a soft crumb molasses depth and sturdy crust Perfect for a ploughmans lunch A smashing...
- The Best Moist Zucchini Bread Recipe Foolproof Loaf — Tired of dry baking This Easy Zucchini Bread Recipe guarantees a wonderfully moist loaf perfect with a cup of tea Get the secret trick now
- The Best Crispy Air Fryer Chicken Parmesan Recipe — Ditch the deep fryer This 30minute Air Fryer Chicken Parmesan recipe delivers ultimate crunch without the oil A guaranteed weeknight hero
step-by-step Methodology: Letting Time Do the Work
The active stage of the No Knead Rye Bread process takes mere minutes. Begin by combining all dry ingredients the flours, salt, yeast, and caraway in a large mixing bowl. Once whisked together, pour in the lukewarm water and stir just until a cohesive, shaggy mass forms.
The dough will look excessively wet and sticky; this is exactly right. Avoid the urge to keep mixing or kneading. Once covered tightly, the dough is left alone to ferment for 12 to 18 hours.
Achieving the Signature Crust on Your No-Knead Rye Loaf
The transformation from the shaggy mix to a professional looking loaf relies on careful handling during the final stages and intense heat during baking.
The Initial Shaggy Mix and First Rise (18 Hours)
The first proof requires patience. After covering the bowl, place it in a stable location (ideally 65 70°F). After the long rest, the dough should have roughly doubled in size, be completely covered in visible bubbles, and possess a pronounced, slightly acidic aroma.
This visual confirmation, rather than the clock, is your signal that the dough is ready for shaping.
Shaping the Loaf Without Deflating the Air
When ready, heavily flour a clean surface. Use a bench scraper to gently release the sticky dough and flop it onto the flour. The goal now is to build surface tension without pushing out all the gas created during the overnight rest.
Gently pat the dough into a rough rectangle and perform a simple envelope fold: fold the top third down, the bottom third up, and then fold the sides over, creating a package. Flip this package so the seam is down, tucking the edges beneath to create a taut, smooth round.
Place this shaped dough seam side down onto a sheet of parchment paper, which is resting in your proofing basket or bowl.
Scoring Techniques for Maximum Oven Spring
Scoring, done just before the dough enters the oven, is both functional and aesthetic. Using a sharp razor blade (lame), make a few controlled, shallow cuts across the top of the loaf.
These cuts direct where the loaf will expand under the intense heat (oven spring), preventing uncontrolled tearing and giving your loaf that gorgeous, rustic appearance.
High Heat Baking and Steam Management
While the oven and Dutch oven preheat to 450°F (230°C), the dough receives its final 30-minute rest. Once the pot is hot, use the parchment paper as a sling to carefully lower the dough into the scorching vessel. The initial bake is for 30 minutes with the lid firmly on.
This traps all the moisture, resulting in a steamed environment that maximizes the loaf’s rise and sets the foundation for a thick crust. After 30 minutes, remove the lid and reduce the temperature slightly to 425°F (220°C).
Identifying the Perfect Internal Doneness
The bread requires another 15 to 20 minutes unlidded, allowing the crust to fully brown and crisp. To ensure it is perfectly baked through, the internal temperature must register between 200°F and 210°F (93 99°C).
If the crust is browning too quickly, you can loosely tent the loaf with foil, but do not sacrifice the internal cook.
The Critical Cooling Period (Do Not Skip!)
Once baked, immediately transfer the No-knead Rustic Rye Bread from the Dutch oven to a wire cooling rack. This stage is absolutely critical, especially with rye flour. Rye retains moisture far better than wheat.
If you slice the loaf while it is still warm, the internal structure will condense, resulting in a dense, gummy texture. You must allow the loaf to cool completely for at least 1.5 to 2 hours to let the starches set and the moisture redistribute.
Patience here guarantees a perfect crumb.
Expert Baker’s Troubleshooting and Advanced Tips
Rye dough handles differently than pure wheat dough; it’s naturally stickier. Resist the strong urge to incorporate excessive flour during the initial mix. Use flour sparingly only on the work surface during the final shaping stage to manage the stickiness without sacrificing the necessary hydration level.
Customizing and Serving Your Rye Masterpiece
This versatile bread forms a fantastic canvas for various additions and modifications, whether you are seeking deeper colour or a different flavour profile.
Fixing a Gummy or Too-Dense Crumb
The most common cause of a gummy crumb is slicing the bread before it has fully cooled. If you find your finished loaf is too dense even after proper cooling, consider two factors: either your kitchen was too cold during the bulk fermentation (necessitating a longer proof), or you accidentally deflated the gas bubbles during the gentle shaping phase.
Remember to handle the dough as little as possible during the 30-minute second proof.
Adjusting Hydration for Different Climates
Flour absorbs moisture differently depending on the ambient humidity. If you live in a very dry climate, your dough might feel stiff, and you may need to add an extra tablespoon of water during the initial mix.
Conversely, in very humid climates, you may need to hold back 10 ml of the water to maintain the correct dough consistency. Watch the dough, not just the measurements.
Shelf Life and Optimal Storage Practices
Once completely cool, your No Knead Rye Bread can be stored at room temperature for up to five days. Keep it wrapped tightly in a linen bag or sealed bread box. Avoid refrigeration, as this rapidly stales the bread.
For longer storage, slice the loaf and freeze the slices in an airtight bag; they can be toasted directly from frozen.
Delicious Recipe Variations (Cranberry or Molasses Additions)
To achieve a darker, slightly sweeter flavour reminiscent of pumpernickel or New England rye, substitute 60 ml (1/4 cup) of the lukewarm water with dark molasses. Alternatively, for a festive or breakfast loaf, add 1/4 cup of dried cranberries to the dry mix before hydration.
For the advanced baker, substituting the yeast with an active rye sourdough starter adds incredible depth and tang, though the fermentation times will increase significantly.
Nutritional Breakdown and Dietary Notes
This substantial loaf offers good nutritional value, incorporating the benefits of whole grain rye flour. A typical slice (based on a 1/12th serving) estimates around 190 kcal, providing a healthy 7 grams of protein and 4 grams of fibre, making it a satiating and wholesome choice compared to refined white bread.
It is inherently low in fat (under 0.5g).
Pairing Suggestions for Cheese and Smoked Meats
The sturdy, earthy flavour of this No-knead Rustic Rye Bread makes it the perfect accompaniment for rich, savoury toppings. Serve thinly sliced bread alongside strong, aged cheeses like sharp cheddar or Gruyère, paired with a tangy fruit chutney or robust mustard.
It is also the ideal foundation for classic Scandinavian fare: think thinly sliced and topped with smoked salmon, fresh dill cream cheese, or cured herring. For a hearty meal, serve it toasted alongside a rich French onion soup or a meaty goulash stew.

Recipe FAQs
My dough didn't double during the long rest. What went wrong with my No Knead Rye Bread?
Don't panic! Rye doughs often rise horizontally more than they do vertically, so it might not look like a huge mountain. If your kitchen is a bit chilly (under 65°F), the yeast will be sleepy; give it a few extra hours, up to 24 if needed.
As long as the dough is visibly bubbly and smells slightly acidic like beer it’s spot on and ready for the next stage.
Help! The dough is ridiculously sticky and impossible to handle during shaping. Did I use too much water?
Rye flour is a beast, retaining lots of moisture which naturally makes the dough very wet and sticky that’s exactly what gives this loaf its amazing texture. Embrace the stickiness! Ensure your hands and the work surface are heavily floured, but resist the urge to work extra flour into the dough itself.
Handle it quickly and gently during the folding stage, using a bench scraper as your best friend.
Is a Dutch oven really necessary, or is that just a bit of cooking theatre?
While you can bake bread without one, the Dutch oven is truly non-negotiable for achieving that professional, thick, crackling crust. It acts like a mini steamer, trapping the moisture released by the dough during the initial bake.
If you skip this crucial step, you'll find the oven spring is disappointing and the crust will be thin, resulting in a much drier loaf overall.
I followed the recipe exactly, but the inside of my loaf is a bit gummy or damp. What’s the secret?
Ah, you’ve committed the cardinal sin of rye baking: slicing it while it's still warm! Rye flour holds moisture like a sponge, and the loaf continues to set and cool internally for hours after leaving the oven.
You absolutely must let the loaf cool completely on a wire rack for at least 90 minutes before slicing; otherwise, you’ll end up with a disappointing gummy crumb.
How long does this No Knead Rye Loaf keep fresh, and what’s the best way to store it?
Due to the rye content and thick crust, this loaf keeps exceptionally well. Store it at room temperature, ideally cut-side down on a board, or wrapped tightly in a linen bag for 3 4 days. Never put fresh bread in the fridge, as the cold temperatures speed up staling.
If you can’t get through the whole loaf in time, slice the cooled bread and freeze the slices in an airtight bag to enjoy later.
Rustic No Knead Rye Bread Loaf
Ingredients:
Instructions:
Nutrition Facts:
| Calories | 385 kcal |
|---|---|
| Protein | 7.1 g |
| Fat | 2.1 g |
| Carbs | 19.9 g |
| Fiber | 6.4 g |
| Sodium | 3339 mg |
