The Architects Gingerbread House: Building Sturdy Structures
- The Architect's Gingerbread Manor: Building Sturdy Structures and Splendid Seasonal Joy
- The Architect's Blueprint: An Overview of Your Gingerbread House Project
- Key Information: Difficulty, Yield, and Prep Time
- Gathering the Building Materials: Ingredients and Expert Substitutions
- From Blueprint to Finished Façade: Step and by-Step Gingerbread Construction
- The Science of Sturdiness: Why This Gingerbread House Won't Crumble
- Architect's Toolbox: Troubleshooting Common Gingerbread House Mistakes
- Maintaining Your Masterpiece: Storage, Longevity, and Disposal
- Beyond the Build: Seasonal Pairings and Display Ideas
- Recipe FAQs
- 📝 Recipe Card
The Architect's Gingerbread Manor: Building Sturdy Structures and Splendid Seasonal Joy
You know the smell. That moment when the cold air hits the heat of the oven, and suddenly your whole kitchen is flooded with the deep, warm hug of molasses, ginger, and cinnamon. It’s the official start of the holiday season, and frankly, nothing else comes close.
We’ve all seen the flimsy, slightly sad grocery store gingerbread kits. They’re fine, but they usually collapse the second a rogue candy cane leans too hard on the roof. This recipe? This is different.
This is how you build a Homemade Gingerbread House that is structurally sound, deeply flavourful, and built to last the entire month of December or maybe until New Year’s, if you’re strong and willed.
I’ve learned the hard way that gingerbread architecture requires precision, and I’m spilling every secret I’ve learned about non and warping walls and cement and strong icing. Ready to stop worrying about structural failure and start making something truly spectacular? Let’s crack on.
The Architect's Blueprint: An Overview of Your Gingerbread House Project
This isn't just baking; it’s an engineering project in disguise. We are using specific ratios of ingredients that make the dough behave more like timber than soft cookie batter.
The key is in the deep colour and the minimal rise, ensuring perfectly straight edges every time you make a Gingerbread House .
Key Information: Difficulty, Yield, and Prep Time
| Stage | Estimate |
|---|---|
| Prep Time | 30 minutes active prep + 60 minutes chilling |
| Cook Time | 60– 75 minutes (in batches) |
| Assembly Time | 90 minutes (active gluing and decorating) |
| Drying Time | 4– 6 hours minimum (essential cure time) |
Is This Recipe Right For Me? (Medium and Hard Justification)
I'm calling this Medium and Hard, and not to scare you, but to manage expectations. The dough itself is dead easy. The "hard" part comes down to precision . We need unwarped walls and an icing that sets like concrete.
If you are comfortable following exact measurements and are patient enough for the drying time, you’ll be totally fine.
Essential Tools for Gingerbread Construction
You can get away without a stand mixer, but you absolutely cannot skip the Templates and the Rolling Pin Spacers . Trust me on the spacers (or two identical wooden dowels): a perfectly consistent 1/4 inch thickness is the only way to guarantee the walls align when you stand them up.
Prep Time vs. Build Time Breakdown
Plan to mix the dough one day, bake the pieces the next morning, and then assemble that afternoon, letting it dry overnight. This staggered approach eliminates stress. Attempting this whole process in one afternoon usually ends in tears, warped pieces, and a messy collapse.
I speak from experience (I once tried to assemble a cathedral and sized house in under two hours. Epic fail.).
Gathering the Building Materials: Ingredients and Expert Substitutions
Components of the Structural Gingerbread Dough
This isn't your soft, chewy cookie recipe. We need maximum flavour and minimum spread. That means using the darkest molasses available and slightly less leavening agent (baking soda).
| Ingredient | Role | Substitute Option |
|---|---|---|
| Blackstrap Molasses | Colour, Deep Flavour, Sturdiness | Dark corn syrup or golden syrup (Result will be less dark and slightly softer) |
| All and Purpose Flour | Structure | 1:1 Gluten and free baking blend (Must increase chilling time) |
| Unsalted Butter | Fat/Richness | Equal measure of chilled shortening (Crisco) for less spreading |
| Brown Sugar | Sweetness, Moisture | Granulated sugar, but the dough will be drier and less pliable |
The Load and Bearing Royal Icing Recipe
This is where people fail. Royal Icing needs to be rock solid. It is your structural cement , not just sticky sugar.
CRUCIAL CHEF’S NOTE: If you need a deep dive into ratios and preventing weeping, please check out my detailed guide on FailProof Royal Icing Recipe for Sugar Cookies and Gingerbread . Getting this right makes or breaks the build.
The use of meringue powder is non and negotiable for structural pieces. It provides the protein stability that allows the icing to set hard quickly and safely.
Essential Decorative Elements (Non and Structural)
Don’t just buy random junk. Think about geometry!
- Roofing: Shredded coconut (snow), Necco wafers (shingles), or mini pretzels (tudor style).
- Windows: Hard candies (like jolly ranchers or boiled sweets) crushed and melted into the window cutouts before baking. (This is brilliant.)
- Landscaping: Licorice, green dyed icing, and of course, candy canes.
From Blueprint to Finished Façade: Step and by-Step Gingerbread Construction

Stage 1: Mixing and Chilling the Structural Dough
- Dry Mix First: Sift your flour and combine all the spices, salt, and baking soda. The rich, heady scent of the ginger, cinnamon, and cloves should hit you immediately.
- Cream Carefully: Beat the chilled, cubed butter and brown sugar until just combined. Unlike cake, we don't want maximum fluffiness. Minimal air means minimal spread in the oven.
- Wet Ingredients: Beat in the molasses until totally incorporated, then the eggs one at a time.
- Form and Chill: Add the dry mix slowly until a stiff dough forms. Divide into two flat discs, wrap tightly, and chill for a minimum of 60 minutes. This step helps manage sticky dough and prevents spreading during baking.
Stage 2: Cutting, Shaping, and Baking the Components
- Roll Precisely: Grab your chilled dough and your spacers. Roll the dough out firmly and evenly to exactly 1/4 inch (6 mm) thick on parchment paper. This is the secret to non and warping walls.
- Cut and Remove: Place your Gingerbread House Template pieces onto the dough and cut sharply using a pizza cutter or sharp paring knife. Remove the excess dough immediately so the pieces don't distort when you lift the scraps.
- Bake and Re and Trim: Bake at 350°F / 175°C for 12– 15 minutes until the edges are deep golden brown. Immediately remove the tray from the oven. While the pieces are still searing hot and slightly malleable, place the templates back on top and use your knife to re and trim every edge . This removes any slight puffiness or spread and guarantees a perfect alignment later.
- Cool Flat: Let the pieces cool completely on the tray before handling. Warped pieces are structural failures waiting to happen.
Stage 3: Preparing the 'Mortar' (Royal Icing)
You need two consistencies for this job.
- The Cement (Structural Icing): Very stiff peaks. This should feel like toothpaste coming out of the piping bag. It holds the walls together.
- The Glue/Flood (Decorative Icing): Medium consistency. Add a few drops of water at a time until a line of drizzle melts back into itself after 8 10 seconds. Use this for attaching candies and flooding large areas.
Stage 4: Wall Assembly and Drying Time
This is where your patience gets tested.
- Set the Base: Pipe a thick bead of the structural icing ("cement") onto your prepared base (plywood or cake drum) where the walls will stand.
- Glue the Walls: Pipe a generous bead along the bottom and side edges of the first wall. Press it down onto the base and immediately attach the perpendicular side wall. Hold them firmly together for at least 30 seconds.
- Brace and Cure: Quickly assemble all four walls. Use soup cans, spice jars, or heavy mugs as external supports. Place these flush against the walls to hold them upright. Walk away for 2 hours. Seriously. Let that structural icing harden. If you don't allow this initial cure, the roof weight will crush the walls.
Stage 5: Adding the Roof and Final Decorative Touches
- The Roof: Once the walls are solid, pipe a thick line of cement along the top edges. Carefully place the two roof panels on. They should meet at a stable peak. Hold them in place for a minute, and use supports underneath them if the span is large. Allow another 2– 4 hours of cure time. This is critical for the main structure to hold firm.
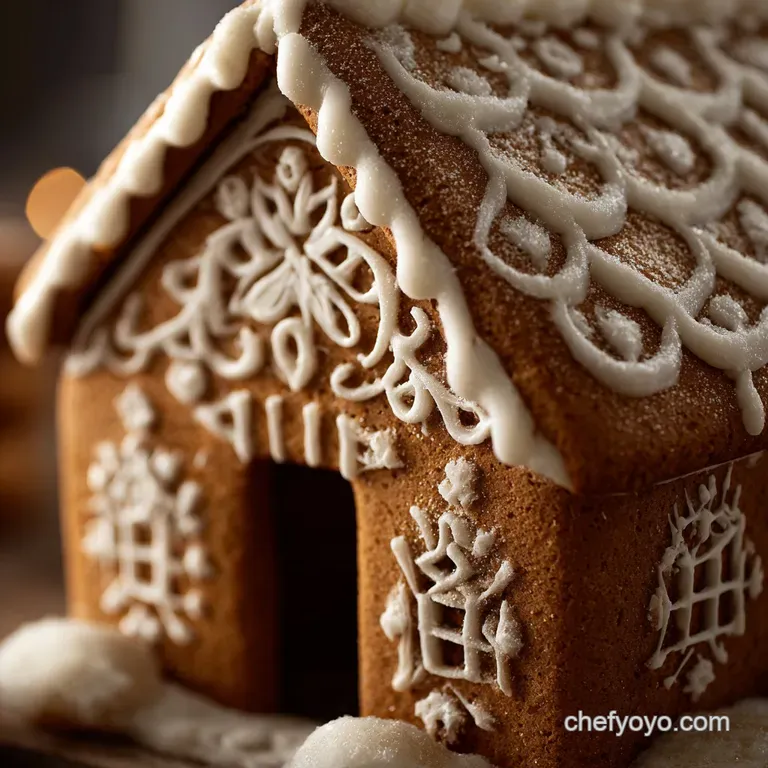
- Decorate: Now the fun starts! Use the decorative icing (the runnier one) to outline windows and attach smaller candies. For big roof tiles, I love using wafer cookies and piping a generous zigzag of cement under them.
The Science of Sturdiness: Why This Gingerbread House Won't Crumble
The Molasses Advantage: Deep Flavor and Durability
We use dark molasses because it has a lower water content than regular syrup and a higher concentration of natural sugars that harden when baked. This creates a dense, sturdy cookie that is resistant to humidity, which is the nemesis of all Homemade Gingerbread Houses .
Achieving the Perfect Snap (Texture Science)
The goal is crisp, not soft. We roll the dough thinner (1/4 inch) than standard cookies and bake until deeply coloured. The immediate re and trimming while hot also helps flatten and set the structure.
Royal Icing Secrets for Structural Bonding
The key ingredient is meringue powder. It’s pasteurized egg white solids that provide extreme stability and tensile strength to your sugar paste. Without it, you’re just dealing with runny icing sugar that will buckle under pressure. Don't skimp here!
Architect's Toolbox: Troubleshooting Common Gingerbread House Mistakes
Preventing Walls from Warping During Baking
This is the number one disaster. If your walls aren't flat, they won't meet at the corners. The Fix: Use those rolling pin spacers! And always, always, always re and trim the pieces the second they come out of the oven, while they are still hot enough to be flexible.
This guarantees laser and straight edges.
Solving the Icing Consistency Crisis
If your icing is sliding down the walls, it’s too thin. The Fix: Add more sifted confectioners’ sugar, a tablespoon at a time, until it holds a stiff, vertical peak. The piping should feel difficult that’s how you know it’s cement, not frosting.
The Importance of the Overnight Cure (Patience is Key)
Don't rush the assembly. I know you want to see the finished product, but the weight of the roof and decorations is substantial. The Fix: Assemble the walls and leave them undisturbed for a few hours (or better, overnight). Then assemble the roof and leave that for a few hours.
This multi and stage setup guarantees a sturdy, heirloom and quality Gingerbread House Design .
Maintaining Your Masterpiece: Storage, Longevity, and Disposal
A properly built Gingerbread House acts as its own preservative due to the high sugar and molasses content.
- Longevity: If kept in a cool, dry place (away from direct sunlight or humid kitchens), it will happily last for 4 6 weeks as a centerpiece. In fact, many people keep them for the entire season and only discard them because they get dusty, not because they spoil.
- Storage: The biggest threat is moisture. Do not place it in an airtight container, as moisture could condense and soften the pieces. Simply cover it loosely with a sheet of foil or plastic wrap to protect from dust.
- Freezing: Don't bother. The decorations will sweat and bleed upon thawing, and the gingerbread structure will likely soften too much.
- Reheating (If you must eat it): The gingerbread parts are incredibly hard after several weeks. If you want to sample a piece, you must break it off and microwave it for 10 15 seconds to soften it up enough to chew safely.
Beyond the Build: Seasonal Pairings and Display Ideas
Once your architectural marvel is complete, you need to celebrate.
- The Toast: This sturdy gingerbread pairs beautifully with a warm, spiced beverage. I highly recommend serving a batch of my favourite winter warmer alongside it my recipe for The Bakers Secret Gingerbread Rum Punch Recipe is a total showstopper.
- The Plate: While the house itself is the star, think about complementary sweets. If you’re hosting a holiday party, consider making a smaller, bite and sized treat like Christmas Macarons Mastering Gingerbread Shells White Chocolate Filling to offer your guests while they admire your Gingerbread House Decorating Ideas .
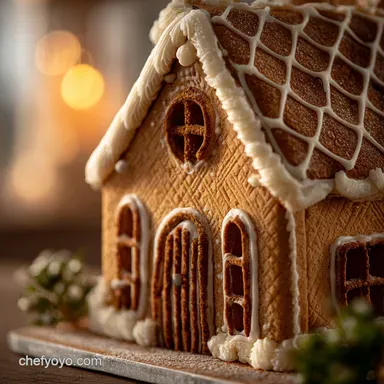
- Display: Place your structure on a mirrored platter to reflect the light, or cover the display board with cotton wool and fairy lights for that classic snowy village effect.

Recipe FAQs
Why did my gingerbread walls warp or slump during baking?
Warping is usually caused by the dough being too warm before entering the oven or excessive handling. Ensure your cut pieces are thoroughly chilled (at least 30 minutes) right before baking, and check your oven temperature for accuracy, as temperatures too low can also cause spreading.
If pieces slightly warp, you can gently sand them flat immediately after removing them from the oven while they are still hot.
How can I ensure my pieces fit together accurately before assembly?
Precision is key for a sturdy manor. Use a fine rasp or microplane to gently sand down the edges of the baked pieces while they are still slightly warm, creating perfect 90-degree angles.
Lay the pieces flat against your template after baking to confirm alignment, adjusting the edges with a sharp serrated knife if necessary.
Can I substitute the molasses (treacle) for a lighter syrup?
It is strongly advised against substituting the molasses or dark treacle in this recipe. Molasses provides the required deep flavor and, more importantly, the low moisture and high sugar content necessary for the structural hardness and stability of the "architectural" dough.
Lighter syrups will result in a softer, weaker gingerbread that will not support the weight of the structure.
How far in advance can I bake the gingerbread house pieces?
You can bake the gingerbread pieces up to 2 to 3 weeks before you plan to assemble them. Once fully cooled, store them wrapped tightly in plastic wrap and placed in an airtight container at room temperature. Keep the pieces away from any sources of humidity to maintain their crisp, sturdy texture.
My assembled house is starting to feel soft. How do I prevent gingerbread from becoming soggy?
Gingerbread softens due to exposure to humidity. Display your manor in a cool, dry area, far away from dishwashers, boiling pots, or steamy kitchen environments. For long term display (non-edible), a thin coat of clear food safe varnish or shellac can seal the pieces against atmospheric moisture.
How long will the constructed Gingerbread Manor last for display?
If constructed properly and kept in a dry environment, the "Architect's Manor" can last for several months, often hardening into a permanent fixture. If you plan to consume the house, it is generally recommended to do so within 2 to 4 weeks of assembly, ensuring all edible decorations and royal icing are still fresh.
Sturdy Architects Gingerbread House Recipe
Ingredients:
Instructions:
Nutrition Facts:
| Calories | 6013 kcal |
|---|---|
| Protein | 63.0 g |
| Fat | 102.0 g |
| Carbs | 1221.0 g |
