Brownie Truffles: the Ultimate Decadent and Fudgy Homemade Candies
- Beyond the Box: Why Homemade Brownie Truffles Trump Store-Bought
- The Science of Fudgy Perfection: Flavor and Texture Breakdown
- Essential Components for the Ultimate Brownie Truffles
- The Complete Method: Creating Brownie Truffles from Scratch
- Expert Tips and Troubleshooting Common Truffle Mistakes
- Shelf Life and Storage: How to Preserve Your Decadent Bonbons
- Pairing Perfection: Elegant Ways to Serve Your Homemade Treats
- Recipe FAQs: The Ultimate Fudgy Brownie Truffles
- 📝 Recipe Card
Beyond the Box: Why Homemade Brownie Truffles Trump store-bought
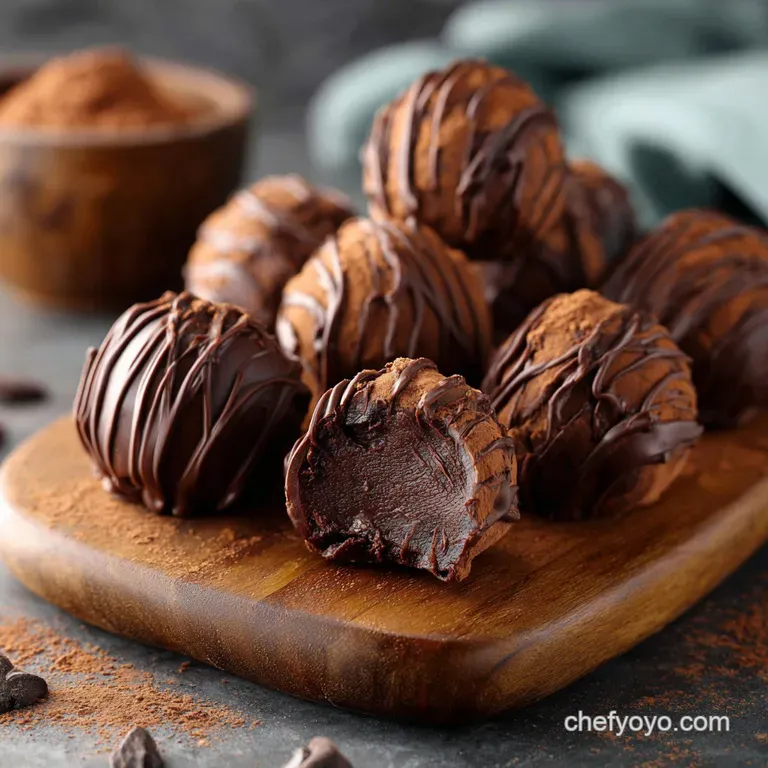
That moment when you bite through a crisp, snappy chocolate shell and hit the core of dense, dark fudge it’s pure decadence. The aroma of rich cocoa and melting butter fills the whole house before they even bake, setting the stage for these perfect homemade candies .
These aren't just regular dessert balls; they are little chocolate bonbons disguised as easy, Bite Sized bliss.
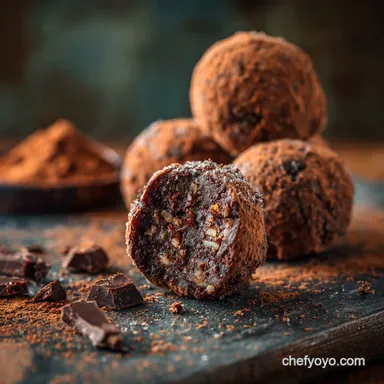
Life is complicated, but dessert shouldn't be, right? This recipe is the ultimate dessert shortcut, taking simple pantry staples and transforming them into something incredibly elegant. Plus, if you’re one of those people who always ends up with slightly leftover brownies (I know, who does that?), this is the perfect solution for transforming them into luxurious Brownie Strawberry Santa Hats: The Best Fudgy Holiday Finger Food or simply sophisticated treats.
Forget those pricey little petit fours from the fancy bakery. We’re making Fudgy Brownie Truffles that look utterly professional but require zero technical pastry training. We just need to understand the magic formula for that perfect, pliable dough.
The Science of Fudgy Perfection: Flavor and Texture Breakdown
Decoding the 'Bite Sized Blitz' Confectionery Concept
The reason this technique works so brilliantly is simple: you are maximizing the fat and sugar content of the brownie base itself. Unlike a traditional cake pop which often needs thick frosting to bind the crumbs, our rich brownie requires only a minimal binder. We are going for a very dense, almost flourless feel.
The Anatomy of a Perfect Chocolate Truffle Core
A perfect truffle core needs to hold its shape at room temperature, but melt beautifully in your mouth. This structure is achieved by first baking a very fudgy, under baked brownie like the base for my The Best Fudgy Brownies Recipe Guaranteed Crinkly Top — and then using a high fat binder like cream cheese. The combination keeps the crumbs moist and malleable, preventing dryness when chilled.
Achieving the Ideal Dough Consistency (The Role of the Creamy Binder)
Our binder, a mix of cream cheese and condensed milk, is the secret weapon for these brownie truffles with cream cheese . The cream cheese adds necessary acidity and structure, while the condensed milk provides just enough moisture and sweetness to create a play dough-like consistency.
The goal is a mixture that you can squeeze firmly in your hand without it crumbling apart.
Why Scratch Made Brownies Deliver Maximum Depth of Flavor
Using a box mix is fine if you're in a total rush, but homemade simply tastes better, and here’s why: quality dark chocolate. By melting high-quality dark chocolate into the butter for the base, you infuse the truffles with a depth of flavor that cocoa powder alone can’t match.
Since this is the only flavor profile we have, we gotta make it count.
Essential Components for the Ultimate Brownie Truffles
Butter vs. Oil: Optimizing the Brownie Base for Rolling
I stick to butter for the base, always. Using melted butter in the brownie contributes to a superior, fudgier texture over oil, which is essential for that dense Fudgy Brownie Truffles center. Oil-based brownies tend to be lighter and more cake like, which would result in crumbly, dry truffles.
The Creamy Binder: Choosing Your Secret Ingredient (Cream Cheese or Ganache)
I love the cream cheese/condensed milk combo because it sets up beautifully and tastes a little tangy, but you have options. If you prefer a pure chocolate hit, you could totally use 2 tablespoons of thick, chilled chocolate ganache instead.
Dipping Chocolate Deep Dive: Tempering Alternatives and Best Brands
Let’s be real, nobody wants to temper chocolate for a casual batch of brownie truffles . I rely on high-quality chocolate melting wafers or good compound chocolate like Ghirardelli or Guittard. The key tip?
Add a teaspoon of neutral oil or cocoa butter to the melted chocolate; it thins it out beautifully for a smooth coat.
Allergy Friendly Swaps for Dairy and Gluten in Truffle Making
| Ingredient | Viable Substitution | Notes |
|---|---|---|
| Butter (in Brownie) | Vegan butter sticks or high-quality refined coconut oil. | Use 1:1 ratio. |
| Cream Cheese/Condensed Milk | Cashew butter mixed with 1 tsp maple syrup. | Start small, only add until the dough binds. |
| All-Purpose Flour | high-quality 1:1 gluten-free baking blend. | The amount of flour is small, so GF swaps work well here. |
The Complete Method: Creating Brownie Truffles from Scratch

Phase 1: Baking and Cooling the Fudgy Foundation
Remember, we want a fudgy base, not a cakey one, so do not overbake! When the toothpick comes out with moist, sticky crumbs (not liquid batter, but definitely not clean), pull it immediately. This slight underbaking is crucial for moisture retention, making the crumbling process easy.
After baking, always cool the brownie completely and chill it for 45 minutes this firming process is non-negotiable before crumbling.
Phase 2: Crumbling, Combining, and Chilling the Core Mixture
Crumble the entire chilled brownie base into a fine meal; you want zero chunky lumps remaining. Then, add your binder mixture the softened cream cheese and condensed milk. I use my hands here, because they are the best mixing tools we have.
Mix until the mass holds together tightly, feeling exactly like very dense cookie dough.
Chef’s Note: If your brownie mixture feels too sticky or wet (maybe you over measured the binder), you can easily rescue it by stirring in 1 tablespoon of finely crushed graham cracker crumbs or a tiny bit of extra cocoa powder. Problem solved!
Phase 3: Perfect Rolling Techniques for Uniform Spheres
The small cookie scoop (1 tablespoon size) is your hero for uniform brownie truffles . Scoop all the dough onto your tray first, then start rolling. Roll quickly and tightly between your palms to generate a bit of heat that smooths the surface.
Once rolled, they must go back into the fridge (or freezer for 20 mins) until they are rock solid. This ensures they don't melt the chocolate coating right off.
Phase 4: Mastering the Chocolate Shell Dipping Process
The dipping process is where we create those beautiful petit fours . Melt your coating chocolate slowly, ensuring it’s thin and fluid remember the added oil trick! Use a fork or a dipping tool to submerge the chilled truffle completely.
Tap gently against the side of the bowl to allow excess chocolate to drip off. Garnish immediately, or the chocolate will set, especially if you’re using very cold centers.
Expert Tips and Troubleshooting Common Truffle Mistakes
Why Is My Chocolate Coating Seizing or Cracking?
Seizing happens when even a tiny drop of water hits the melted chocolate it turns into a grainy cement instantly. Fix: Use a clean, dry bowl and avoid steam.
Cracking happens when the truffle center is too cold and the coating is too thick; the sudden temperature difference causes the shell to contract and break. Fix: Thin the chocolate (use that oil!) and let the rolled balls sit out for maybe 5 minutes before dipping.
The Best Way to Handle Sticky Brownie Dough (Temperature Control)
If the brownie truffles with leftover brownies dough starts sticking to your hands during rolling, your hands are too warm. Wash your hands in cold water, dry them completely, and maybe rub a tiny amount of cocoa powder on your palms before starting again.
Cold hands make rolling blissfully easy.
Elevating the Coating: Double Dipping for a Professional Finish
For a truly stunning, bakery worthy finish, try a double dip. Dip the chilled truffle once and let that coating set completely ( 10 minutes in the fridge). Then, dip it again. This creates an incredibly thick, glossy, and durable shell. This technique works wonders on something like my Little Debbie Christmas Tree Cake Truffles: Easy No-Bake Holiday Recipe , too, if you’re looking for other Christmas ideas.
Shelf Life and Storage: How to Preserve Your Decadent Bonbons
Refrigerator vs. Countertop: Optimal Short Term Storage
Because these are brownie truffles with cream cheese , they must be stored in the refrigerator. They will last beautifully for 7 10 days when kept in an airtight container.
If you leave them out, the chocolate coating might bloom (get white streaks), and the creamy core won’t be safe for very long.
Guide to Freezing Brownie Truffles for Long Term Enjoyment
But does it freeze well? You bet! Place the finished, coated truffles on a baking sheet and freeze them solid (about 2 hours). Then transfer them to a freezer bag or airtight container, separated by wax paper, and they will keep for up to 3 months.
To serve, thaw them overnight in the refrigerator, or let them stand at room temperature for 30 minutes before serving. Do not attempt to reheat them.
Pairing Perfection: Elegant Ways to Serve Your Homemade Treats
Best Drink Pairings: What to Serve Alongside Rich Chocolate Truffles
Since these are intensely rich Fudgy Brownie Truffles , you need something that cuts through the sweetness and fat. A dark, robust espresso or a strong, tannic black tea works perfectly.
For a boozy pairing, a chilled glass of ruby port or a smoky Scotch pairs surprisingly well, balancing the chocolate beautifully.

Recipe FAQs: The Ultimate Fudgy Brownie Truffles
Why is my truffle mixture too crumbly or too sticky after combining the ingredients?
If the mixture is too dry and crumbly, gradually incorporate a teaspoon of melted butter or milk until the dough easily holds its shape when pressed. Conversely, if the mix is excessively sticky, add 1-2 tablespoons of powdered sugar or unsweetened cocoa powder until the dough is firm enough to roll without sticking to your hands.
The perfect consistency should resemble firm cookie dough.
Can I use store-bought brownies instead of baking them from scratch?
Absolutely; using high-quality, dense store-bought brownies is an excellent time saving shortcut, but ensure they are fudgy rather than cakey for the best texture. Since commercial brownies often contain more fat and binders, you may need to reduce the amount of cream cheese or frosting used as the binder in the recipe.
Adjust the quantity until the mixture reaches the desired rollable density.
How do I prevent my chocolate coating from cracking after the truffles are dipped?
Cracking usually occurs due to a dramatic temperature difference between the very cold truffle core and the warm melted chocolate shell. When chilling the rolled truffles, do not over chill them; let them sit out for 5 to 10 minutes before dipping.
Additionally, ensure your melted chocolate is tempered or includes a stabilizer (like coconut oil) to promote a stable, elastic coating.
My melted chocolate is too thick for a smooth dip. How do I thin it out?
To achieve a thin, glossy coating, add 1 teaspoon of a neutral oil, such as refined coconut oil or vegetable shortening, per cup of melted chocolate. Stir thoroughly until the chocolate becomes fluid and coats the back of a spoon in a thin layer. Avoid adding water or milk, as this will seize the chocolate immediately.
How long will these brownie truffles last, and how should I store them?
Finished truffles should be stored in an airtight container in the refrigerator due to the presence of cream cheese or frosting binders. When stored correctly, they will remain delicious for up to 10 days. For the best flavor and texture, allow them to sit at room temperature for about 15 minutes before serving.
Can I make these brownie truffles gluten-free or completely vegan?
Yes, these truffles are highly adaptable to dietary needs. To make them gluten-free, simply use a certified gluten-free brownie recipe or mix as your base. For a vegan version, use a plant based brownie (made with oil) and bind the mixture using a firm vegan cream cheese alternative or rich coconut cream, ensuring the chocolate coating is dairy-free dark chocolate.
Ultimate Fudgy Brownie Truffles
Ingredients:
Instructions:
Nutrition Facts:
| Calories | 2167 kcal |
|---|---|
| Protein | 23.0 g |
| Fat | 100.0 g |
| Carbs | 294.0 g |
