The Classic Crumb Ultimate Vanilla Bean Layer Cake
- Mastering the Moist Crumb: Why the Reverse Creaming Method Wins
- The Anatomy of the Ultimate Celebration Vanilla Cake
- Sourcing the Gold Standard: Quality Ingredients for Your Vanilla Cake Base
- Equipment Checklist: Tools for Taming the Batter
- Step-by-Step: Constructing the Perfect Batter (The Reverse Creaming Walkthrough)
- Baking, Cooling, and Preparing for Assembly
- Extending the Life of Your Bake: Storage and Freezing Advice
- Advanced Baker Resources: Scaling and Troubleshooting Your Recipe
- Recipe FAQs
- 📝 Recipe Card
Mastering the Moist Crumb: Why the Reverse Creaming Method Wins
Achieving the perfect, light, and supremely moist texture is the primary challenge in any high-quality baking project. While the classic creaming method builds structure by incorporating air into butter and sugar, we rely on a sophisticated technique the reverse creaming method to craft this magnificent
vanilla cake from scratch
. This approach is the secret to limiting gluten development in the batter. By first mixing the softened, cubed butter (227g) directly into the dry ingredients (330g cake flour, 350g sugar), the fat coats the flour particles. This physical barrier ensures that when the liquid is introduced, the flour cannot absorb too much water too quickly, which is what typically creates a tough, chewy structure. The result is a uniformly tender, velvety crumb that defines the
Perfect Vanilla Cake
.
The Anatomy of the Ultimate Celebration Vanilla Cake
This isn't merely a cake; it’s the sturdy yet elegant centerpiece you can rely on for any major event. The carefully balanced ratios and the unique mixing technique make this
vanilla cake recipe
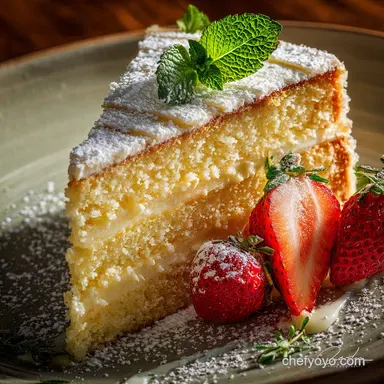
stand out, creating a sponge that is robust enough to handle the weight of heavy buttercream or even a tart fruit filling, such as a delightful
vanilla cake with strawberry filling
, without collapsing.
Defining Deep Flavour: The Power of Pure Vanilla Bean Paste
When designing the foundational
vanilla cake
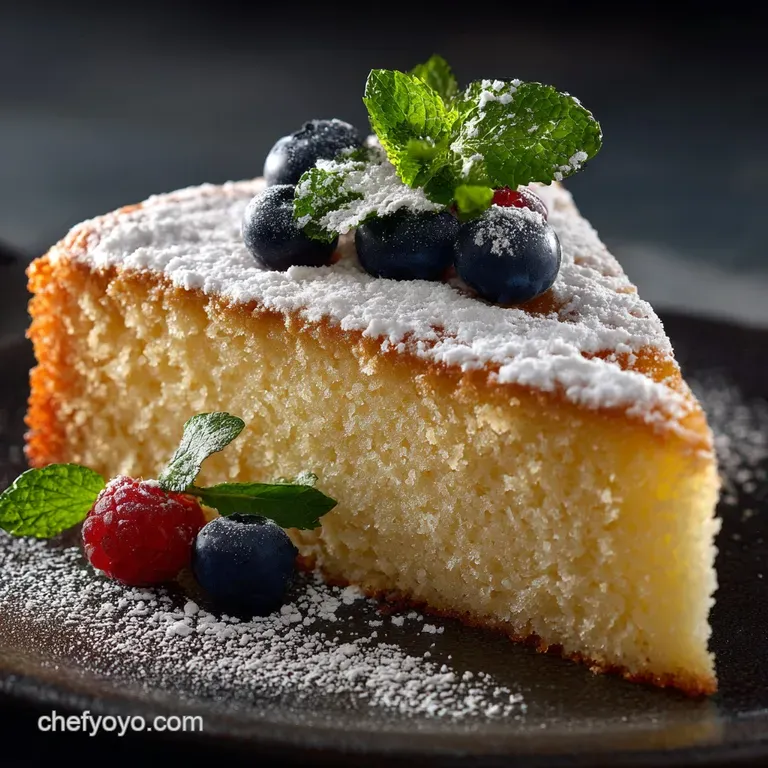
, the source of vanilla flavour is paramount. We specify the use of pure vanilla bean paste (15ml) in addition to high-quality vanilla extract (10ml). The paste contains microscopic vanilla seeds suspended in a concentrated syrup, delivering a far deeper, more rounded, and floral aroma than extract alone. This dual approach ensures the finished cake tastes profoundly of true vanilla, leaving those attractive, sophisticated black speckles throughout the finished crumb.
Why This Tender Texture Beats Standard Recipes
Standard creaming methods often lead to a drier crumb over time because the air pockets created during the mixing process allow moisture to escape quickly. Conversely, the high fat, high sugar content combined with the controlled gluten development from the reverse creaming method ensures moisture is locked within the structure. This results in an almost velvety mouthfeel and guarantees that the
Best Vanilla Cake Recipe
remains deliciously moist for days after baking.
Speed vs. Quality: Prepping Your Ingredients Like a Pro
The single most common mistake home bakers make is using cold ingredients. For the reverse creaming method to succeed, the four large eggs, 227g of unsalted butter, and 240ml of whole milk must be at true room temperature.
Cold dairy will seize the butter and prevent the fats and liquids from emulsifying properly, leading to a lumpy, broken batter and a denser, less successful bake. Invest 30 minutes to bring everything to temperature before you start measuring.
Essential Tools for Effortless Layer Assembly
To achieve a professional looking
vanilla layer cake
, preparation extends beyond the batter. Ensure you have the right equipment for the post bake stage. A small offset spatula is necessary for achieving smooth application of the vanilla buttercream, especially when applying the crucial crumb coat. On top of that,, having a digital scale handy to weigh the batter as you divide it between your two 8 inch or three 6 inch pans guarantees perfectly uniform layers that stack neatly.
Sourcing the Gold Standard: Quality Ingredients for Your Vanilla Cake Base
Building the perfect sponge starts with selecting the best components. The foundation requires precisely 330g of sifted cake flour, which offers minimal protein for a delicate structure, perfectly balanced by 350g of granulated sugar for moisture and tenderness.
We use a full tablespoon of baking powder (15g) for reliable lift, seasoned with a half teaspoon of fine sea salt to enhance the overall profile. The richness comes from 227g of unsalted butter and four large eggs, emulsified with 240ml of whole milk.
Crucially, the flavour profile is cemented by a generous measure of 10ml vanilla extract alongside 15ml of potent vanilla bean paste.
Equipment Checklist: Tools for Taming the Batter

While a simple hand whisk can work, a stand mixer equipped with the paddle attachment is highly recommended, making the process of creating the ideal batter swift and effortless. A digital scale is not optional for this level of baking; it is essential for accurately measuring ingredients like flour and ensuring even layers when portioning the batter.
Don't forget the practical necessities: reliable round cake pans (two 8 inch or three 6 inch), quality parchment paper circles for clean releases, and a robust wire rack for cooling.
The Importance of Room Temperature Dairy and Eggs
As mentioned, cold components severely compromise the texture of this
vanilla layer cake
. When milk (240ml) and eggs (4 large) are incorporated into the butter coated flour, they must be warm enough to bond with the fat structure instantly. If they are cold, the fat mixture tightens up and prevents the proper formation of a smooth emulsion, resulting in a batter that looks curdled and yields a significantly inferior, dense final product.
Flour Power: Choosing the Right Type for Structure
The specification of cake flour (330g) is deliberate. Its low protein percentage inherently resists the formation of strong gluten networks, which is the exact property we capitalize on with the reverse creaming method.
If you cannot find cake flour, a widely accepted substitution is to replace 2 tablespoons of all-purpose flour per cup with 2 tablespoons of cornstarch, then sift the mixture repeatedly. This starch addition mimics the tenderness achieved by professional cake flour.
Recommended Products: Vanilla Extract vs. Bean Paste Showdown
When making a simple
vanilla cake
, the difference between average extract and premium vanilla bean paste is vast. While the 10ml of extract offers basic vanilla flavour, the 15ml of paste provides the genuine, complex flavour profile and the visual proof of purity. For the
Best Vanilla Cake Recipe
, always opt for the deepest flavour you can afford; the speckled appearance is an added bonus.
Measuring Accuracy: Weights and Volume Conversion Table
In professional baking, weight is king. Volumetric measurements (cups) are notoriously inaccurate, especially for flour, which settles and compacts dramatically. To ensure your cake rises correctly and maintains the intended tender crumb, always rely on the metric weights provided: 330g for cake flour, 350g for sugar, and 227g for butter.
This discipline eliminates the primary variable in baking failure.
Setting Up Your Workspace for Seamless Baking
Preparation starts long before the mixing bowl. Preheat the oven to a stable 350°F (175°C). Ensure your cake pans are generously greased, floured, and lined with parchment rounds. Having your wire racks and offset spatula ready nearby minimizes frantic movement and ensures the process of creating your
vanilla cake recipe
flows smoothly from start to finish.
Related Recipes Worth Trying
- The Best Moist Vanilla Pound Cake Recipe Perfect for a Proper Cuppa — Our classic buttermilk vanilla pound cake from scratch delivers a rich supremely moist crumb Learn the creaming method secrets for the best pound cake...
- Foolproof Dutch Baby Pancakes Recipe MileHigh Puff Perfection — Forget flat flapjacksour simple Dutch Baby recipe delivers breakfast theatre Get the best German Pancakes Recipe with crisp edges and a custardy center...
- The Ultimate Puff Classic Lemon Sugar Dutch Baby Pancake Recipe — Achieve maximum height with this foolproof Dutch Baby Pancake recipe Its light custardy and puffs dramatically in the oven Learn the hot skillet secret for...
step-by-step: Constructing the Perfect Batter (The Reverse Creaming Walkthrough)
Understanding
How To Make A Vanilla Cake
using the reverse creaming method means moving past traditional assumptions. We tackle the mixing process in highly specific phases to guarantee success.
Phase One: Coating the Flour in Fat
Begin by combining the dry components sifted cake flour, sugar, baking powder, and salt in the bowl of your stand mixer. Next, add the soft, cubed butter. Mix on the lowest speed using the paddle attachment for 2 to 3 minutes until the entire mixture has a uniform, sandy, or crumbly appearance, ensuring every particle of flour is encased in fat.
Phase Two: Gradually Incorporating Wet Ingredients
In a separate jug, whisk together the four eggs, milk (240ml), and both types of vanilla. With the mixer still on low speed, add precisely half of the wet mixture to the dry-fat blend. Increase the speed to medium and beat for a full 60 seconds.
The batter should look light and fluffy, having achieved a robust emulsion. Scrape down the bowl thoroughly. Finally, return the speed to low and slowly stream in the remaining wet mixture until just combined.
Avoiding Overmixing: The Key to a Delicate Crumb
The final step is the most critical: stop mixing the moment you no longer see streaks of dry flour. Any further agitation will begin to develop the gluten in the cake flour, rapidly transforming your perfect, tender batter into a tough one.
For the ultimate delicate result, it’s always better to slightly undermix than to overmix.
Baking, Cooling, and Preparing for Assembly
Testing for Doneness and the Clean Toothpick Trick
After equally portioning the batter into your prepared pans weighing them guarantees consistency bake the layers for 30– 35 minutes at 350°F (175°C). The true test of doneness is inserting a thin wooden skewer or toothpick into the center.
If it emerges completely clean, your layers are ready. If there are moist crumbs or batter clinging to it, continue baking in short bursts.
Cooling Protocols: How to Prevent Sunken Layers
Once removed from the oven, resist the urge to immediately turn the cakes out. Allow them to cool in their pans for 10– 15 minutes. This thermal relaxation allows the delicate internal structure, which is still very fragile, to stabilize.
After this rest, invert them onto a wire rack, peel off the parchment, and let them cool completely a minimum of 60 minutes before attempting to handle or frost them. Warm cakes will instantly melt the buttercream.
Trimming and Leveling for Professional Results
To ensure your final
vanilla layer cake
sits straight and looks polished, you must level the tops. Use a sharp, long serrated knife, or a dedicated cake leveler, to carefully slice away any doming. For the most stable stack, you can also gently peel away the dark outer crust if desired, leaving only the pristine, light sponge.
Extending the Life of Your Bake: Storage and Freezing Advice
The high fat content of this
Perfect Vanilla Cake
makes it an excellent candidate for advance preparation. Unfrosted, fully cooled layers should be wrapped tightly in several layers of plastic wrap, then sealed in an airtight freezer bag or container. They can be safely frozen for up to three months. Thaw frozen layers overnight in the refrigerator, then let them come to room temperature on the counter before frosting. A finished, frosted cake should be kept refrigerated and tastes best when allowed to sit at room temperature for
30
minutes before serving.
Advanced Baker Resources: Scaling and Troubleshooting Your Recipe
This robust
vanilla cake recipe
is highly scalable, but for larger or thicker layers (9 inch or deeper pans), consider employing the flower nail trick. Inserting a clean metal flower nail, point down, into the center of the batter acts as a heat conductor, ensuring the dense middle cooks evenly and prevents a gooey center while the edges dry out.
Common Baking Errors and Quick Fixes
The primary errors in making a
vanilla cake from scratch
usually stem from temperature or technique. If your finished cake is dense or has tunnels, you likely either used cold ingredients leading to a poor emulsion, or you overmixed the batter, activating too much gluten. If the cake sinks in the middle, ensure your oven thermometer is accurate and that you did not open the oven door during the critical initial
20
minutes of baking.
Calculating Nutritional Information Per Slice
While this is an indulgent celebration bake, based on a yield of 12 generous slices, the estimated nutritional content per serving (including the vanilla bean buttercream frosting) ranges between 450 520 calories.
It contains approximately 24 28g of total fat and roughly 60 68g of carbohydrates, providing context for portion control.
From Classic Buttercream to Ganache: Frosting Pairings
The classic pairing for this sponge is the incredibly rich vanilla bean buttercream (made with 340g butter and 600g icing sugar). However, the neutrality of the vanilla base makes it incredibly versatile. For a bright, refreshing contrast, pair it with a tangy lemon curd filling and a simple Swiss meringue buttercream.
Alternatively, for a sophisticated dessert, envelop the cake in a decadent, poured dark chocolate ganache.
Recommended Recipes: What to Bake After the Ultimate Vanilla
Once you’ve successfully mastered this
Best Vanilla Cake Recipe
and the reverse creaming technique, look to other refined baking challenges. We highly recommend attempting a traditional English sticky toffee pudding or an intricate raspberry frangipane tart, both of which require precise measurement and execution similar to this foundational layer cake.
Featured Products: Where to Buy Specialty Flours and Vanillas
For home bakers looking to replicate the professional quality of this
Perfect Vanilla Cake
, investing in specialty products is crucial. Pure vanilla bean paste is often stocked by gourmet grocers or specialized online baking suppliers. high-quality bleached cake flour can typically be found in larger supermarket chains, but if you struggle to source it locally, dedicated baking ingredient retailers often carry it in bulk, ensuring your tender crumb is always achievable.

Recipe FAQs
What on earth is the 'reverse creaming method' and is it worth the faff?
It sounds frightfully complicated, but it’s actually a brilliant way to guarantee a tender crumb! Unlike traditional creaming, here we mix the softened butter into the dry ingredients first. This coats the flour particles in fat, which restricts gluten development and prevents the sponge from getting chewy.
It’s absolutely worth the tiny bit of extra effort for that perfectly velvety, melt-in-the-mouth texture.
I don't have cake flour, is there an easy substitution for this vanilla cake recipe?
If you're in a bit of a pickle and can’t get hold of actual cake flour, you can whip up your own simple substitute. For every cup of plain (all-purpose) flour required, remove two tablespoons and replace them with two tablespoons of cornflour (cornstarch). Sift this mixture together thoroughly before using.
This substitution lowers the protein content, which is key for getting that light and airy sponge.
Why is my sponge coming out dense or dry even though I followed the instructions?
The usual culprits are overmixing and ingredient temperature. Once you add the liquid, mix only until the flour streaks have just disappeared overmixing develops too much gluten and makes the cake tough.
Crucially, ensure your butter, eggs, and milk are at true room temperature; cold ingredients stop the emulsion process dead, resulting in a heavier, less reliable bake.
Can I make the vanilla cake layers ahead of time, or freeze them for later?
Absolutely, prepping ahead is a lifesaver, especially for a layer cake! Once the layers are baked and completely cool, wrap them tightly in two layers of cling film or foil. They will happily keep in the fridge for up to three days, or they can be frozen for up to three months.
Just make sure to thaw them fully before you start slathering on the buttercream!
How should I store this cake once it’s fully frosted with the vanilla buttercream?
If you’ve used the classic buttercream provided, the cake is happiest stored covered at room temperature for 3 to 4 days. If your kitchen is hotter than a summer holiday in the Med, or if you’ve used a fresh cream filling, pop it into the fridge.
However, always bring the cake out at least an hour before serving so the sponge can soften up again nobody wants a cold, firm slice of cake!
Ultimate Vanilla Layer Cake Recipe
Ingredients:
Instructions:
Nutrition Facts:
| Calories | 336 kcal |
|---|---|
| Protein | 3.6 g |
| Fat | 16.4 g |
| Carbs | 32.7 g |
| Fiber | 0.3 g |
| Sodium | 3396 mg |
