Zesty Pickled Garlic: a Tangy Addition to Any Dish
- look into Into the Zesty World of Pickled Garlic
- The Charm of Pickling Garlic
- Why You Need Zesty Pickled Garlic in Your Life
- Now, Let's Talk Ingredients
- Essential Ingredients Guide: Spice Up Your Cooking Game!
- Mastering the Art of Cooking: Professional Techniques to Transform Your Kitchen Game
- Additional Recipe Information
- Frequently Asked Questions
- 📝 Recipe Card
look into Into the Zesty World of Pickled Garlic
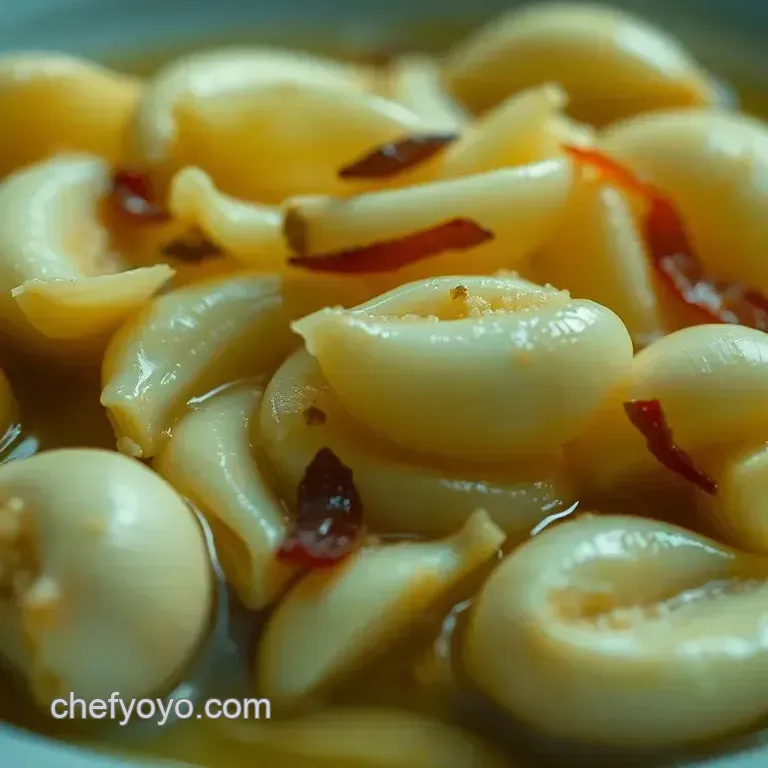
Oh my gosh, have you ever bitten into a dish that just needed something more ? picture this: you’re at a party, munching on a boring old platter of snacks, and then someone busts out a jar of homemade zesty pickled garlic.
Bam ! every bite transforms into a flavor explosion! if you've ever wondered how to pickle garlic recipe fits into your cooking repertoire, you’re in the right place.
Trust me, this is one culinary adventure you won't want to miss.
The Charm of Pickling Garlic
Pickling garlic is as much about memory as it is about flavor. it goes way back, like, centuries back, to when folks realized they could preserve their food through clever brining techniques.
Originally, it started in places like the mediterranean and asia. now, it’s found its way into american kitchens, making a splash in everything from sandwiches to fancy antipasto platters.
Today, the popularity of pickled garlic has surged, thanks to its versatility and health benefits.
Now, if you’re wondering about the ease of this dish, let me break it down for you: it’s about as simple as it gets.
You’re looking at just 15 minutes of prep time , followed by a quick 5 minutes to whip up the brine.
And voilà! in about 50 minutes , you’ll be ready to see your friends' eyes light up when they taste your creation.
Cost wise, making a pint jar won’t break the bank just a few bucks for fresh garlic and basic pantry staples.
Why You Need Zesty Pickled Garlic in Your Life
Let’s chat about the perks because there are some serious gains here! first off, pickled garlic is packed with health benefits.
Garlic itself is a superstar; it can boost your immune system and has fantastic antibacterial properties. adding that tangy, zesty kick not only makes your dishes pop but also gives you a nutritional boost.
What’s more, pickled garlic is perfect for all occasions from a casual sunday cookout to a fancy dinner party. you can use it as a vibrant topping on bruschetta, or serve it on a charcuterie board.
Honestly, it’s a game changer for grilled meats and roasted veggies too.
Compared to other pickling projects, this one has its own unique points. while everyone boasts about their easy dill pickles canning , pickled garlic spices things up.
This isn't just about crunch; it’s about that zesty kick that no one saw coming. plus, you can experiment endlessly think about adding mustard seeds, red pepper flakes, or even slices of chili for those who like a fiery touch.
Now, Let's Talk Ingredients
Before we dive into the nitty gritty of how to make this spectacular zesty pickled garlic, let's gather our ingredients. you’re gonna need 2 cups of peeled garlic cloves yes, that’s right, you’ll probably need to shove about 12-15 whole bulbs in your kitchen arsenal.
Then, make sure you have a mix of vinegar, water, salt, and sugar for that perfect brine. feeling adventurous? toss in some optional flavorings like red pepper flakes or mustard seeds to create your signature flavor.
So, whether you're a novice kitchen novice or a pro who's just looking for a fun twist, pickling garlic can be your new favorite pastime.
Trust me; you’ll never look at plain garlic the same way again!
Alright, grab your jar, and let’s pickle!
Essential Ingredients Guide: Spice Up Your Cooking Game!
Let’s dive right into the essential ingredients guide . you know, the magic behind everything delicious? whether you’re a seasoned cook or just starting out, knowing your kitchen staples is fundamental.
I remember when i first started cooking; i felt like i was in a cooking competition but without the judges or fancy prize! so let's make this easy and fun, shall we?
Premium Core Components
First up, let’s nail down those premium core components . It’s all about having everything you need at your fingertips.
Detailed measurements can make or break your dish! think about it a dash of this and a pinch of that.
For those keeping score, that’s 1 cup of white vinegar (240 ml) or a solid 2 tablespoons of kosher salt (30 g).
When you’re getting the hang of your measurements, everything will just flow, and cooking will feel less like a chore and more like an art.
Be picky about quality too! fresh ingredients make a significant difference. look for vibrant veggies and spices that smell like they just jumped out of a spice jar directly into your dish.
When it comes to storage guidelines , remember: herbs in the fridge , spices in a cool dark place , and always check that shelf life .
Ever had sour pickles that just tasted...not right? Yeah, freshness is key. Your ingredients should feel fresh, vibrant, and downright exciting to use. Don't forget: seriously check before you chop!
Signature Seasoning Blend
Next, let’s sprinkle in some signature seasoning blends . oh my gosh, the right spices can elevate any dish! i’m talking about essential spice combinations like combining paprika with garlic powder instant love at first bite! and what about herbs?
you can’t go wrong with pairing basil and oregano in your sauces or dill when making something classic like easy dill pickles canning .
If you’re feeling adventurous, add some flavor enhancers and aromatics . i mean, a pinch of cayenne or some lemon zest can turn a bland meal into a taste bud fiesta! don’t forget about regional variations !
appreciate that southern bbq flavor by adding smoky paprika or that fresh brightness of the mediterranean with rosemary.
There are endless possibilities, my friend!
Smart Substitutions
Sometimes, life throws a curveball, and you find yourself short on an ingredient. no sweat! that’s where smart substitutions come into play.
If you’re out of fresh garlic, grab that garlic powder instead. when you're whipping up a sour dill pickle recipe canning , and you run out of dill, you can even use fennel seeds as a substitute!
If you’re faced with dietary restrictions, you can tweak recipes to fit your needs. gluten-free soy sauce? yes, please! and when you’re in a pinch, consider those emergency replacements .
Have a craving for pickled garlic? you can use apple cider vinegar if white vinegar is mia. flexibility is key!
Want some seasonal options ? Here’s a juicy tip: Use fresh herbs in summer meals and dried ones in winter for that cozy vibe.
Kitchen Equipment Essentials
Let’s not forget your kitchen equipment essentials . you don’t need a high tech kitchen to create magic, but having a few must have tools makes a world of difference.
A good chef’s knife can become your best friend, and a sturdy cutting board is non-negotiable.
If you want a simpler option, you can even use a food processor for chopping things like garlic hello, by the way, i’m here for your how to pickle garlic recipe ! and don’t forget about prep tips that help streamline the process!
clean as you go because, trust me: a tidy workspace brings good energy.
For storage, consider investing in good quality glass containers. They’ll keep your pickles crunchy and flavorful, especially when making that canning pickles recipe dill .
With all these ingredients and tips at hand, you’ll be ready to take on any recipe that comes your way.
The next section will break down instructions on how to craft your own culinary masterpiece, including the ever popular how to make homemade dill pickles .
Get ready to step into your kitchen and get that pickle jar rolling!
Mastering the Art of Cooking: Professional Techniques to Transform Your Kitchen Game
Hey there! if you’re like me, you love diving into the world of kitchens and creating some mouth watering magic. i recently embarked on a little culinary adventure, learning about professional cooking methods .
I’ll tell you, it’s like unlocking a secret door that leads to a whole new level of flavor. so grab your apron because we’re diving right in!
Essential Preparation Steps
Before you get to the fun part, you gotta set the stage. enter mise en place which is just a fancy french term for having everything ready to roll before you start cooking.
Make sure your ingredients are prepped, chopped, and measured out. trust me, when you're in the heat of the moment, a little prep goes a long way.
Time management is key too! i learned a trick: always have a timer handy. whether you're whipping up a quick dinner or working on that sour dill pickle recipe canning , timing can make or break your dish.
Set that timer for a quick reminder to check on things, especially the delicate stuff.
And organization? oh boy. keep your workspace tidy. a cluttered kitchen is like trying to find your way out of a maze blindfolded.
Keep everything within arm’s reach, and don’t forget to clean as you go. safety’s crucial; always use oven mitts and keep those knives sharpened but safely stowed away.
step-by-step Process
Alright, let’s get to the heart of the matter. when tackling any recipe, including something as delightful as a one jar dill pickle recipe , clear, numbered instructions are your best friend.
Trust me, it keeps chaos at bay.
- Prepare your ingredients. Focus first on that garlic.
- Control your temperature. For the brine, heat that vinegar mixture until it hits a boil (around 212° F or 100° C ).
- Timing precision is a must when you’re pickling, so give those garlic cloves a quick 5-minute boil , just enough to soften up that pungent flavor.
- Visual cues for doneness? You'll know your garlic is ready when it’s just tender but still crisp. We want crunch, not mush!
Expert Techniques
Now, let’s sprinkle in some expert techniques ! for instance, if you want pickles with an extra crunch, try quick pickling .
The method is simple but effective. pay attention to your quality checkpoints like making sure your brine covers the garlic completely.
Nobody wants half drowned garlic!
Feeling adventurous? switch it up with flavor! toss in some chili flakes or mustard seeds to give your pickled garlic a fun twist.
And if something goes awry? no worries! if your brine's too salty, simply dilute it with a bit of extra water.
Success Strategies
We all stumble at times, right? some common mistakes include overcrowding your jars, burning your brine, or rushing the pickling process.
For top-notch results, give those garlic cloves at least 24 hours to soak up the flavors in the fridge.
Trust me, patience is key here, folks!
A good tip is to check for quality assurance after a day. open the jar, give it a whiff, and see if it’s got that zesty smell.
Don’t skip on the make-ahead options; these pickled delights can last well in your fridge for weeks.
Bonus Recipe: Zesty Pickled Garlic
Since we're knee deep in this cooking journey, I’ve got to share with you my go-to how to pickle garlic recipe .
- Start with prep : Peel 2 cups of garlic cloves.
- Whip up the brine : Combine 1 cup of white vinegar , 1 cup of water , and season with 2 tbsp of kosher salt and 2 tbsp of sugar .
- Boil that mixture (it’s hard to mess up at 212° F !) for about 5 minutes .
- Toss in your optional spices like red pepper flakes or mustard seeds for pizzazz.
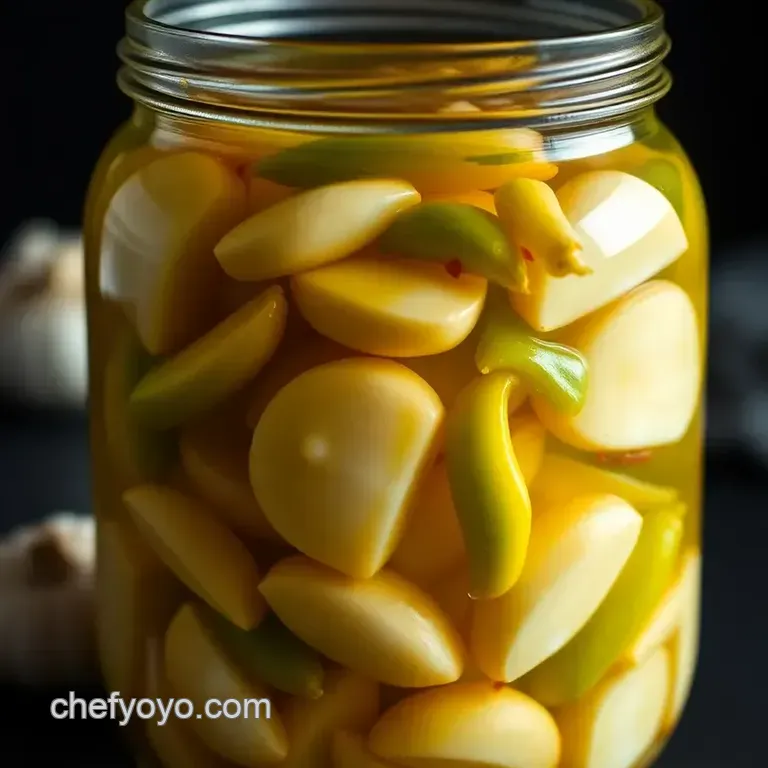
- Pack those glorious garlic cloves tightly into a clean jar and pour your brine over them.
- Seal, chill, and let them marinate for at least a day!
And voilà! You’ve got some zesty pickled garlic that’s ready to jazz up everything from sandwiches to grilled veggies.
Additional Information
So there you have it! opening the door to professional cooking methods doesn’t have to be intimidating. whether you’re trying out an easy dill pickles canning or diving into complementary peel garlic techniques, a little preparation goes a long way.
Remember to have fun, taste as you go, and don’t fear the experiments every great chef has their share of mishaps.
Now, go forth and pickle like a pro!
Additional Recipe Information
Pro Tips & Secrets
Oh my gosh, if you're diving into this how to pickle garlic recipe , i’ve got some golden nuggets for you! first off, always go for fresh garlic.
Unblemished cloves pack a crunch that's to die for! now, if you wanna save time, peel those garlic cloves in advance.
Sit back, relax with a podcast, and get those cloves looking good. when it comes to flavor enhancement, don’t be shy with those spices! a pinch of red pepper flakes gives your brine a nice kick.
Tip: allow your pickled garlic to chill for at least 24 hours . trust me, the flavor gets better and better!
Perfect Presentation
Next up, let’s talk about plating techniques . when you’re ready to serve, consider using a rustic wooden board for that homestyle feel.
Place your jar of zesty pickled garlic in the center, surrounded by some crusty bread and cheese. not only does it look inviting, but it’ll have your friends snacking in no time!
And speaking of garnishes, a sprinkle of fresh dill or some mustard seeds can really pop against the bright pickled garlic.
Color combinations matter too pair that golden garlic with bright greens and deep reds to create a feast for the eyes.
Remember, the more visually appealing, the more your guests will wanna dig in!
Storage & make-ahead
You’re gonna want to know about storage, right? after you’ve perfected your one jar dill pickle recipe , it’s all about keeping that flavor alive! store your pickled garlic in the fridge, and it’ll stay good for about 3 weeks .
If you plan to make a big batch (and you should!), stick to glass jars. they preserve flavors better!
When reheating, there’s really no need unless you want them warm, which is a whole different vibe. just enjoy them cold straight out of the jar, or throw them on a sandwich for a punchy addition.
Creative Variations
Honestly, the beauty of this recipe is how flexible it is. want a twist? try adding thyme or dill to your brine for some herbal notes.
If you're feeling spicy, slices of fresh chili can take these bad boys to a whole new level! and hey, for a fall vibe, swap out the white vinegar for some balsamic vinegar for a richer, sweeter take on pickling.
Regional variations can be fun, too! Southern friends, what about adding cayenne to give those garlic cloves a real kick? Get creative make it yours!
Complete Nutrition Guide
Now, let’s talk nutrition. for each serving of pickled garlic (think two tablespoons), you’re looking at roughly 30 calories . not too shabby, right? it’s pretty low in carbs too, which makes it a guilt free topping, even for those watching their waistline.
The health benefits? garlic has a whole host of perks, from heart health to immune support. enjoying a few cloves not only zips up your dishes but can be beneficial for your body.
Just remember, moderation is key, especially when it comes to sodium levels 350 mg in a serving, so plan wisely if you're watching that salt intake.
Wrapping It Up
So there you have it, folks! this how to pickle garlic recipe is not just about preserving it’s about embracing flavors, having fun in the kitchen, and sharing good times with friends.
Whether you're looking for easy dill pickles canning tips or just trying to spice up your snacks, pickled garlic offers a little something for everyone.
So, grab those jars, unleash your creativity, and let’s pickle our way to flavor town! happy cooking and happy crunching!
Frequently Asked Questions
What is the best way to store pickled garlic?
Once you've made your pickled garlic, store it in the refrigerator. It should be kept in a sealed jar, and it can last for several months when properly stored. Just make sure the garlic is fully submerged in the brine to prevent any spoilage.
How long does pickled garlic need to sit before eating?
For the best flavor, let your pickled garlic chill for at least 24 hours before tasting. However, if you wait a week, the flavours will develop even more, providing a tangy kick that's simply delightful!
Can I use this how to pickle garlic recipe for different vegetables?
Absolutely! This pickling method works wonderfully with a variety of vegetables such as carrots, cucumbers, and even onions. Just remember to adjust the pickling time according to the vegetable's size and type for the best results.
What are some variations I can make to this pickled garlic recipe?
You can get creative! Try adding different spices like dill or coriander seeds, or switch up the vinegar with apple cider or balsamic for a unique flavour. If you're feeling adventurous, a hint of ginger or citrus zest can also elevate the taste!
Is pickled garlic healthy? Are there any nutritional considerations?
Pickled garlic is relatively low in calories and provides some essential nutrients, but keep an eye on the sodium content due to the salt in the brine. Garlic itself is known for health benefits, including potential antibacterial properties, so it's a zesty addition to a healthy diet!
Can I reuse the brine after pickling garlic?
While it’s tempting, it’s best not to reuse the brine after pickling garlic, as it may contain garlic particles and lose its original potency. To ensure safety and flavor, it's advisable to prepare a fresh batch each time you pickle new garlic or other vegetables.
Zesty Pickled Garlic A Tangy Addition To Any Dis

Ingredients:
Instructions:
Nutrition Facts:
| Calories | 30 |
|---|---|
| Protein | 1 g |
| Fat | 0 g |
| Carbs | 7 g |
| Fiber | 0 g |
| Sugar | 2 g |
| Sodium | 350 mg |
