The Sixminute Bobs Your Uncle Microwave Sea Salt Caramels
- Mastering Ultra-Fast Microwave Caramels
- Essential Elements for Bob’s Sea Salt Caramels
- Key Equipment for Easy Microwave Caramels
- Sequential Steps for Flawless Microwave Caramels
- Safety Protocols and Common Timing Mistakes
- Troubleshooting and FAQ for Better Microwave Caramels
- Creative Flavor Twists on Classic Microwave Caramels
- Recipe FAQs
- 📝 Recipe Card
Mastering Ultra Fast Microwave Caramels
Making Microwave Caramels fundamentally changes how we approach high-quality confectionery. Gone are the days of constant stirring and worrying about scorching the sugar base on the stovetop.
This modern microwave caramels recipe delivers deep flavor and perfect chew in under ten minutes of active cooking time. We are successfully eliminating kitchen anxiety and maximizing delicious returns on your time investment.
Why the Microwave Beats the Stovetop Every Time
The primary advantage of using the microwave is unparalleled speed and consistent, centralized heat application. Unlike a stovetop, which distributes heat unevenly across the bottom of a pan, the microwave cooks the ingredients from within.
This method dramatically speeds up the evaporation process required to concentrate the sugar syrup.
Stovetop methods require rigorous scraping to prevent crystals from forming on the sides of the pot. Our microwave approach uses a deep bowl, allowing the mixture to foam and boil safely without constant interference. This dramatically reduces the likelihood of crystallization, guaranteeing a smoother final product.
Meet "Bob’s Your Uncle": Our Promise of Six-Minute Confectionery
Our signature recipe, affectionately named "Bob's Your Uncle," delivers chewy, flavorful Sweet Snacks faster than ordering takeout or delivery. The active cook time is shockingly short, ranging between six and eight minutes depending on your microwave wattage.
This rapid cooking cycle means you are mere moments away from deeply satisfying, homemade Microwave Caramels .
The Chewy Science Behind Perfect Sea Salt Caramel
Achieving that ideal chewy texture is entirely dependent on reaching the "Firm Ball" stage, which occurs at precisely 245°F (118°C). The inclusion of corn syrup here is non-negotiable, acting as an interfering agent to stop sugar crystals from binding together.
This ensures the final microwave caramels with condensed milk retain their buttery, smooth mouthfeel.
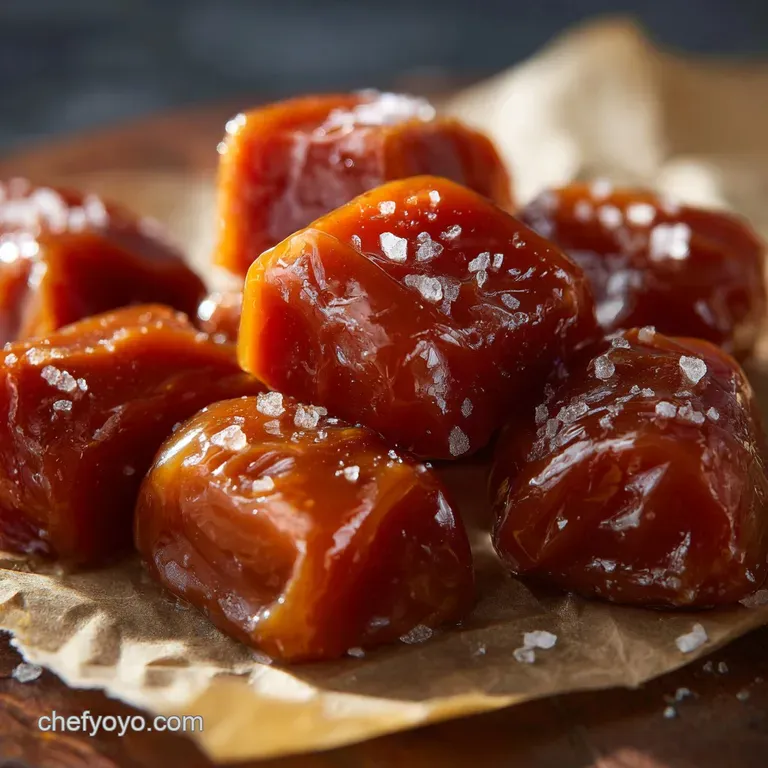
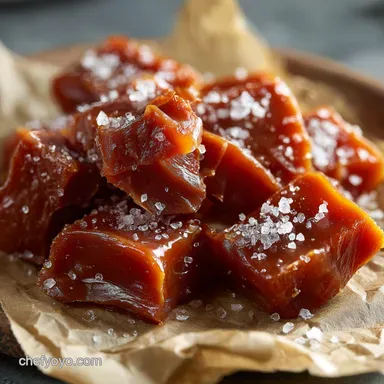
The condensed milk contributes crucial fat and moisture, slowing down the temperature rise just enough to build complex flavor before the setting point. Finally, topping the finished product with flaky microwave caramels with sea salt provides a perfect counterpoint to the intense sweetness.
Essential Elements for Bob’s Sea Salt Caramels
The beauty of this approach is the simplicity of the components required to make truly decadent Caramel Recipes . We rely on standard pantry staples like granulated and brown sugar, unsalted butter, and the binding power of sweetened condensed milk.
You will also need light corn syrup and high-quality vanilla extract to round out the flavor profile. The specific measurements, including two full sticks of butter and a standard can of condensed milk, ensure a large, gift worthy batch.
Key Equipment for Easy Microwave Caramels
Shopping List: The Shortest Ingredient Line-up Ever
The ingredient list is minimal, which is part of the appeal of these quick Microwave Caramels . The use of both white and brown sugar provides both structural sweetness and deep, molasses rich undertones. The balance of fat (butter) and sugar is optimized for the microwave’s intense heat.
| Ingredient | Role in Texture |
|---|---|
| Condensed Milk | Creaminess, moisture, and density |
| Light Corn Syrup | Prevents crystallization and graininess |
| Brown Sugar | Adds molasses flavor and depth of color |
| Sea Salt | Flavor balance and garnish |
Upgrading Your Butter and Cream: Quality Matters
While this specific recipe utilizes sweetened condensed milk for guaranteed richness and ease, the quality of your butter is paramount. Choose a high fat, unsalted European style butter if possible, as it dramatically enhances the caramel's depth of flavor.
Since we are not making microwave caramels with heavy cream here, the butter is the primary source of creamy richness and mouthfeel.
Always use pure vanilla extract, not imitation vanilla essence, adding it only after the cooking process is complete. This prevents the delicate flavors of the vanilla from evaporating in the intense heat of the microwave.
Prepping Your Pan: Achieving the Perfect Release
Proper pan preparation guarantees a flawless release and uniform caramel squares. Use an 8x8 inch baking pan, lining it completely with parchment paper. Ensure the paper overhangs slightly on two sides to create handles for lifting the set caramel slab.
Lightly grease the parchment paper itself with cooking spray or a thin smear of butter before pouring the molten mixture. A light dusting of flaky sea salt on the bottom adds an extra layer of gourmet flavor to the base of every piece.
Choosing the Right Heat Safe Mixing Bowl
Selecting the correct mixing vessel is absolutely critical to preventing dangerous and messy kitchen accidents. You must use a deep, heavy duty microwave safe bowl with a minimum capacity of three quarts. This large size accommodates the rapid and significant expansion of the mixture during the boiling process.
Pyrex or thick, quality ceramic bowls are ideal because they retain heat well and can withstand the extreme temperature fluctuations. Never attempt this recipe in a shallow or small bowl, as boil overs are highly likely when cooking Microwave Caramels .
Dispelling the Myth: Do I Need a Candy Thermometer?
For candy making of any kind, the difference between failure and professional success is a reliable candy thermometer; it is a non-negotiable tool here. The goal is to hit 245°F (118°C) precisely, which corresponds to the perfect chewy "Firm Ball" stage.
Relying solely on visual cues or time is a gamble that rarely pays off in complex Caramel Recipes .
Related Recipes Worth Trying
- Quick Fluffy Baked Potato in Microwave Ready in Minutes — Craving a fluffy baked potato in microwave fast This easy method delivers perfect results in minutes Ditch the oven grab your toppings and dig in
- Microwave Sweet Potato Time Saver Ready in Minutes — Need a quick healthy side My microwave sweet potato time recipe is ready in minutes Soft fluffy and delicious Perfect for busy weeknights Get the secret
- Microwave Corn on the Cob Easiest HuskOn Method — Craving sweet corn pronto This microwave corn in husk recipe is a gamechanger Ready in minutes juicy delicious Ditch the pot keep the husk and enjoy
Sequential Steps for Flawless Microwave Caramels

Executing the steps quickly and precisely ensures a perfect batch of these six-minute caramels. Always have your thermometer and prepared pan standing by before you even begin microwaving.
- Combine and Initial Melt: Place all sugars, corn syrup, condensed milk, and cubed butter into the deep bowl. Microwave at 100% power for 2 minutes, then stir thoroughly until the butter is mostly melted.
- Controlled Boil: Switch to 70% power and cook in continuous 2-minute intervals, stirring vigorously after each time.
- Temperature Check: After approximately 4– 6 minutes total cooking time, begin monitoring the temperature closely using the candy thermometer until it reaches 245°F (118°C).
- Finish and Pour: Immediately remove the extremely hot bowl and quickly stir in the vanilla extract and the fine sea salt. Pour the liquid caramel into the prepared 8x8 pan without scraping the bowl sides.
- Chill and Cut: Sprinkle with flaky sea salt and allow the batch to cool for at least one hour in the refrigerator until completely firm before cutting into squares.
Safety Protocols and Common Timing Mistakes
Stage One: The Initial Meltdown and Combining
The initial stage focuses on dissolving the sugars and melting the butter fully before the mixture reaches a hard boil. Microwave the combined ingredients on high power for the first two minutes only.
Upon removal, stirring vigorously ensures the ingredients are homogeneous, preparing the mixture for the temperature critical cooking stages ahead.
Timing the Cook: Recognizing the Golden Amber Stage
We move to 70% power for the controlled boiling phase to prevent scorching the milk solids in the condensed milk. This is where the caramel color develops, shifting from pale yellow to a rich, golden amber stage over 4 to 6 minutes of intermittent cooking.
Never assume the color is enough; you must use your thermometer to confirm the essential 245°F target.
Success in making these Microwave Caramels hinges on these specific 2-minute intervals. Adjusting to 30-second bursts as you approach the target temperature allows for ultra fine control, especially if your microwave operates at a high wattage.
The Crucial Final Stir and Pour
The moment the caramel hits 245°F, you must work swiftly and with extreme caution. Immediately remove the bowl from the microwave and gently stir in the vanilla extract and the fine sea salt. This quick integration stops the cooking process and completes the complex flavor profile.
Immediately pour the hot liquid into the prepared pan, but resist the urge to scrape down the sides of the mixing bowl. Any residue clinging to the sides may contain crystallized sugar that could seed the batch and turn your smooth caramel grainy.
Preventing Boil Overs: Tips for High Powered Microwaves
High powered microwaves (1200+ watts) can reach boiling point faster, increasing the risk of overflow. Always use a bowl much deeper than you think necessary, at least three times the volume of the raw ingredients.
If bubbling seems too aggressive during the cook time, simply pause the microwave mid-cycle and stir briefly to deflate the foam before resuming.
Safety Note: Microwave caramel gets significantly hotter than boiling water. Always handle the bowl with heavy, insulated oven mitts and keep children and pets away from the work area during and immediately after microwaving.
How to Test for Soft Ball Stage Without Immersion
While a thermometer is mandatory for precision, understanding the traditional cold water test offers a helpful secondary check. Drop a small spoonful of the hot caramel into a bowl of ice-cold water.
If the mixture forms a cohesive, firm ball that holds its shape when pressed between your fingers, you have achieved the desired 245°F setting point.
Troubleshooting and FAQ for Better Microwave Caramels
Why Did My Caramel Crystallize? (And How to Fix It)
Crystallization typically happens when stray sugar granules cling to the bowl sides and fall back into the mixture, seeding a chain reaction. This is usually prevented by the light corn syrup which inhibits crystal formation.
If your caramel seems grainy after cooling, it means the crystallization process was successful and the batch is likely ruined.
If you insist on making microwave caramels no corn syrup , crystallization is almost guaranteed unless you rigorously wipe the sides of the bowl with a wet pastry brush before the boiling begins. Corn syrup is truly the easiest route to smooth candy.
Smart Storage: Keeping Your Caramels Fresh and Chewy
Proper storage preserves the chewy texture and prevents the Sweet Snacks from sticking together. Once cut, individual pieces should be wrapped tightly in waxed paper, cellophane, or specialized twist wrappers.
Stored in an airtight container at cool room temperature, the caramels will stay fresh for about two weeks.
How Do I Cut and Wrap My Candy Pieces Neatly?
For the cleanest cuts, ensure the caramel is completely chilled and firm, preferably after an hour in the refrigerator. Use a large, sharp chef's knife or a heavy duty pizza wheel for efficient slicing. Lightly oiling the blade with a neutral flavor oil before each major cut prevents dragging and sticking.
Creative Flavor Twists on Classic Microwave Caramels
Nutty Additions: Pecan, Almond, and Peanut Variations
Introducing nuts adds a delightful textural contrast to these smooth Microwave Caramels . Before pouring the mixture into the prepared pan, scatter one cup of lightly toasted pecans or chopped almonds evenly across the bottom.
The heat of the caramel will adhere the nuts perfectly to the base of the candy pieces.
Spice Rack Experiments: Cinnamon and Cardamom Infusions
Elevate the deep molasses notes of the brown sugar with warm spice infusions. Add half a teaspoon of ground cinnamon or a quarter teaspoon of finely ground cardamom right into the sugar and butter mixture before the initial microwave step.
These spices marry beautifully with the rich, buttery profile of the final Caramel Recipes .
Diet Swaps: Adapting This Recipe for Sugar Alternatives
While this recipe is optimized for success using traditional sugar and condensed milk, swaps are possible, though they require temperature adjustments. If attempting microwave caramels without condensed milk , substitute with an equal volume of canned full fat evaporated milk plus half a teaspoon of baking soda to prevent separation, though cooking time will increase.
Achieving the Firm Ball stage with sugar substitutes requires precise testing.
| Substitution | Standard Ingredient | Note on Usage |
|---|---|---|
| Liquid Glucose | Light Corn Syrup | Use an equal amount to maintain structure. |
| Evaporated Milk | Condensed Milk | Results in a richer caramel; cook longer to thicken. |
| Golden Syrup | Light Corn Syrup | Excellent flavor alternative, use equal volume. |

Recipe FAQs
Do I really need a candy thermometer for these Microwave Caramels, or can I just guess?
Absolutely, yes! Hitting 245°F (118°C) is the crucial difference between chewy perfection and a sticky, soft mess; think of the thermometer as your trusty co-pilot it's non-negotiable for consistent success.
My finished caramel turned out grainy and sugary oh dear, what went wrong?
This common tragedy, often called crystallization, usually happens if you scrape the bowl sides when pouring or if dry sugar granules splash back into the mixture during cooking; use the corn syrup diligently and avoid scraping the sides when transferring the mixture to the pan to keep things smooth as silk.
My caramel is setting, but it seems far too soft, like proper runny toffee sauce. Did I mess it up?
If the caramel is refusing to firm up, it means you likely pulled it off the heat too soon (below 245°F); you can usually rescue it by carefully popping it back in the microwave for short 30-second bursts until you hit the precise temperature, then re-chill.
Can I try different flavour variations, like swapping the sea salt for chocolate or espresso?
Crikey, yes! This recipe is extremely versatile; try swapping the vanilla for 1 tablespoon of high-quality instant espresso powder for a grown-up treat, or stir in 1/2 teaspoon of ground cinnamon for a fabulous autumn flavour.
Once they’re cut, how should I store these delicious little nuggets?
Wrap each caramel individually in wax paper or cellophane to prevent them sticking together like tiny, buttery presents and store them in an airtight container at cool room temperature for up to two weeks, or in the fridge for even longer keeping.
6minute Microwave Sea Salt Caramels
Ingredients:
Instructions:
Nutrition Facts:
| Calories | 192 kcal |
|---|---|
| Protein | 0.5 g |
| Fat | 5.2 g |
| Carbs | 9.2 g |
| Fiber | 0.1 g |
| Sugar | 4.5 g |
| Sodium | 15 mg |
