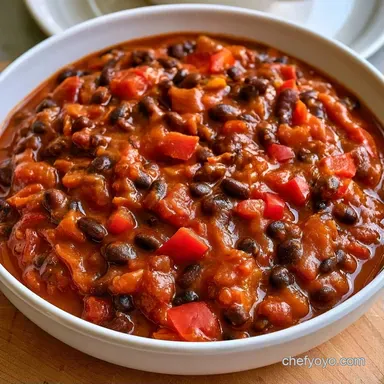
Award Winning Black Bean Fall Chili
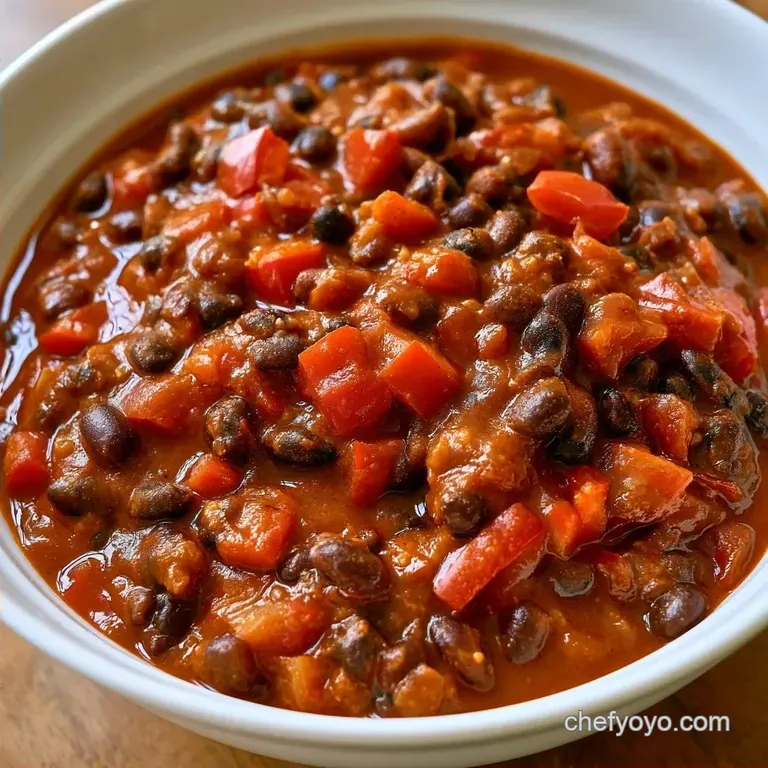
- Time: 10m prep + 30m on heat
- The Highlight: Thick, smoky, and mahogany dark
- Perfect for: Weeknight dinners or meal prep
Listen closely that's the sound of a bubbling pot making your home smell like a Mexico City street market. I once believed that any "award winning" chili required an eight hour simmer that practically welded the pot to the burner.
I spent years assuming that deep richness only came from endless patience and high electricity bills.
Forget the "low and slow" dogma. You don't need to sacrifice your whole Saturday to get a complex, earthy profile. This Black Bean Chili proves that a few specific methods, like blooming your spices, can do the work of a slow cooker in a fraction of the time.
We're talking about a dish that is vibrant, bold, and honestly, a bit addictive. Whether you're a lifelong vegetarian or just looking for a Meatless Monday victory, this version delivers a heavy hit of protein and smoke.
Easy and Bold Black Bean Chili
The Bean Mash: Mashing some beans releases starches. This makes the liquid thick and glossy instead of watery.
Spice Blooming: Stirring dry spices in hot oil for a minute wakes up the flavors. It removes that "raw" powder taste and makes the profile much deeper.
Acid Finish: Adding lime juice at the very end cuts through the heavy beans. It brightens the whole pot and makes the spices pop.
| Method | Time | Texture | Best For |
|---|---|---|---|
| Stovetop | 40 mins | Thick and glossy | Quick weeknight meals |
| Oven | 2 hours | Concentrated/Reduced | Large batches/Party prep |
Believe it or not, you can actually move this to the oven at 180°C for a couple of hours if you have the time. It concentrates the flavors even more, but for most of us, the stovetop is the way to go.
Gathering Your Essentials
I've discovered through trial and error that bean quality varies. For this Black Bean Chili, canned beans are the quickest option just be sure to rinse them thoroughly to eliminate any metallic tin flavor.
For the Flavor Base
The onion and bell pepper build a sweet, fragrant foundation. I recommend a red bell pepper for a touch more sweetness, though green is a perfectly fine alternative.
For the Signature Seasoning
The blend of smoked paprika and cumin is what evokes that cozy "autumn" feeling. It smells like a campfire in the most delicious way.
For the Hearty Body
Crushed tomatoes provide the necessary acidity and volume. To keep the flavor authentic, I suggest using a brand with no added sugar.
| Ingredient | What It Does | Best Swap |
|---|---|---|
| Black Beans | Primary protein and substance | Kidney beans (firmer texture) |
| Vegetable Broth | Adds liquid and complexity | Water + 1 tsp salt |
| Tomato Paste | Thickens and boosts richness | Extra crushed tomatoes |
| Smoked Paprika | Provides a wood fired aroma | Regular paprika + pinch of chipotle |
The Ingredients List
- 2 tbsp olive oil
- 1 medium yellow onion, diced
- 3 cloves garlic, minced
- 1 bell pepper, diced
- 2 cans (15 oz each) black beans, drained and rinsed Why this? Creates the earthy, dark base
- 1 can (14.5 oz) crushed tomatoes
- 1 cup vegetable broth
- 1 tbsp tomato paste Why this? Intensifies the tomato flavor
- 2 tbsp chili powder
- 1 tsp ground cumin
- 1 tsp smoked paprika
- 1/2 tsp salt
- 1/4 tsp cayenne pepper
- 1 tbsp lime juice Why this? Crucial for balancing the earthy notes
If you're out of lime, a splash of apple cider vinegar works as a substitute, though it has a slightly sharper bite.
Recipe Specs
This recipe is designed for a standard 5 quart pot. If you're using a smaller pot, you might need to simmer it slightly longer to reach that mahogany thickness.
- Prep time: 10 minutes
- Cook time: 30 minutes
- Total time: 40 minutes
- Yield: 6 servings
Equipment Needed
Standard kitchen tools will do. A heavy bottomed pot is recommended to distribute heat uniformly and prevent the tomato paste from burning.
- Large Pot: A Dutch oven or stainless steel pot is ideal.
- Wooden Spoon: For mixing and mashing.
- Chef's Knife: To handle the chopping.
- Measuring Spoons: To keep your seasoning precise.
The Cooking Process
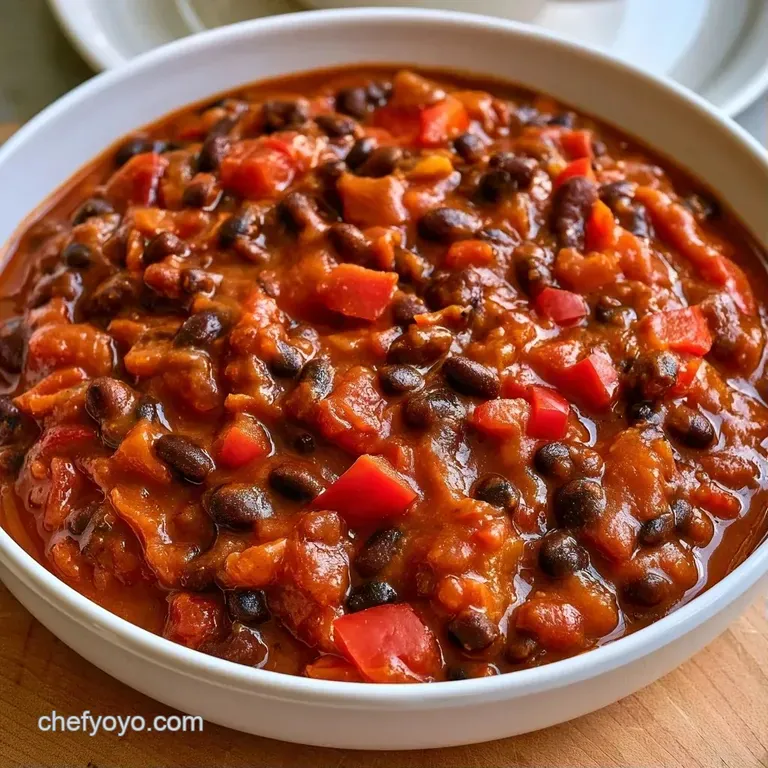
Let's begin the actual cooking. Keep the temperature steady; we want the vegetables to soften without scorching.
Phase 1: Sautéing the Aromatics Heat olive oil over medium heat. Add the diced onion and bell pepper, stirring until they become translucent and soft (about 5 minutes). Mix in the minced garlic and cook for 60 seconds.
Note: Garlic burns quickly, so only keep it in for a minute.
Phase 2: Blooming the Spices Move the vegetables to the edge of the pot. Add the chili powder, cumin, smoked paprika, salt, and cayenne directly into the oil. Stir constantly for 1 minute until the spices smell toasted and aromatic.
Phase 3: Building the Body Stir in the tomato paste and cook for 2 minutes. Pour in the crushed tomatoes, vegetable broth, and the black beans. Let the mixture reach a gentle bubble, then lower the heat.
Phase 4: The Texture Finish Remove 1/2 cup of the beans and mash them into a paste with a fork. Stir this paste back into the pot. Simmer uncovered for 15–20 minutes until the chili reaches a thick, mahogany consistency.
Mix in the lime juice just before serving.
Chef's Note: To prepare this as a beef based chili, brown your ground meat first and then proceed with the vegetable steps. Just ensure you drain the excess fat before adding the spices.
Common Mistakes & Troubleshooting
Most issues with this dish come down to texture or a lack of balance. It's a very forgiving recipe, but a few things can go sideways.
If the Chili is Too Watery
This usually happens if you used a very thin vegetable broth or didn't mash enough beans. Don't reach for the flour or cornstarch. Just let it simmer uncovered for another 10 minutes to let the water evaporate.
If the Flavor Feels "Flat"
When a dish tastes "flat," it usually needs acid or salt. If the Black Bean Chili doesn't taste "bright," add another squeeze of lime or a pinch more salt. It's like turning the lights on in a dark room.
When the Spices Taste Bitter
This happens if the spices burned during the blooming phase. If you see black specks or smell something scorched, it's best to start over. The oil should just be shimmering, not smoking.
| Problem | Root Cause | Solution |
|---|---|---|
| Watery base | Not enough simmering | Cook uncovered for 10 more mins |
| Bland taste | Lack of acid | Add 1 tsp more lime juice |
| Bitter flavor | Burnt spices | Start over with lower heat |
| Beans too mushy | Over mashing | Use whole beans next time |
Once you've got the hang of the texture, you can start playing with the heat. If you want a more aggressive kick, add a pinch of crushed red pepper flakes during the blooming phase.
Freezing and Reheating Guide
This Black Bean Chili is even tastier the following day. The flavors have more time to meld and deepen, making the second helping better than the first.
Refrigeration Store the chili in an airtight glass container. It will keep for 4 to 5 days. Because it tends to thicken as it sits, simply stir in a splash of broth or water when reheating to thin it out.
Freezer Instructions This recipe freezes wonderfully. Place the cooled chili in freezer safe bags or containers for up to 3 months. I find that freezing single servings is perfect for a fast lunch.
Reheating Protocol For the best results, thaw the chili in the refrigerator overnight. Heat it in a pot over medium low heat. A microwave is also an option, but stir every 2 minutes to ensure it heats evenly.
Zero Waste Tip Instead of tossing leftover lime wedges, freeze them in a small bag for later. You can also save onion scraps in a freezer bag to whip up a quick veggie stock.
Pairing Ideas
The presentation is where you can really make this dish shine. Because the Black Bean Chili is so dark and rich, adding bright, colorful toppings creates a stunning contrast.
The Classic Comfort Pair Serve this with a side of warm corn bread and a dollop of cool sour cream. The sweetness of the bread balances the smoky heat of the beans.
The Fresh Contrast Top your bowl with diced avocado, fresh cilantro, and my Pickled Red Onions recipe. The pink of the onions against the black beans looks incredible on the plate.
Plating Levels
| Plating Level | Key Tweak | Effect |
|---|---|---|
| Simple | Bowl + Spoon | Cozy, homey vibe |
| Polished | Garnish Ring | Professional look |
| Restaurant | Micro greens + Swirl | High end, artistic |
For the restaurant look, use a spoon to create a small swirl of creme fraiche on top and place a few sprigs of micro cilantro in the center. It's a simple trick that makes the dish look like it costs $25.
Creative Twists and Swaps
Once you've tried the base version, you can start modifying it. This recipe is a great canvas for different flavors.
For a Slow Cooker Black Bean Fall Chili You can definitely adapt this for a Crockpot. Sauté the vegetables and bloom the spices in a pan first, then dump everything into the slow cooker. Cook on low for 6 hours or high for 3 hours.
For an Extra Smoky Profile Add a teaspoon of liquid smoke or a chopped chipotle pepper in adobo sauce. This turns the "smoky" note into a full on bonfire experience.
For a Meaty Texture If you want it to be a Black Bean Chili with Ground Beef, use 1/2 lb of lean beef. Brown it first, then proceed with the onion and pepper.
For a Hearty Variation If you're not in the mood for beans today, you might enjoy my Hearty No Bean Chili for a different kind of protein hit.
| Premium Ingredient | Budget Alternative | Impact | Savings |
|---|---|---|---|
| Organic Black Beans | Store Brand Beans | None (if rinsed) | ~$1.50 |
| Fresh Lime Juice | Bottled Lime Juice | Slightly less zing | ~$0.50 |
| Vegetable Broth | Water + Salt | Less depth | ~$2.00 |
Decision Shortcut
- Extra tang? → fold in 1 tsp lemon zest
- More heat? → add 1/4 tsp extra cayenne
- Thicker body? → mash an extra 1/4 cup of beans
Common Misconceptions
Let's clear up a few things about bean based cooking.
The "Long Simmer" Myth: You'll hear that chili needs hours to develop flavor. While a long simmer reduces liquid, blooming your spices in oil provides an immediate, deep flavor that simulates hours of cooking.
The "Canned Beans are Bad" Myth: Some people swear by soaking dry beans. While that's a great process, canned beans are perfectly fine as long as you rinse them. The nutritional difference is minimal for a weeknight meal.
The "Thickener" Myth: Many recipes tell you to add cornstarch or flour to a Black Bean Chili. This often results in a gummy, artificial texture. Mashing the beans themselves is the only way to get a natural, smooth thickness.
Right then, you're all set. This Black Bean Chili is a reminder that cooking doesn't have to be a chore or a marathon event. It's about using a few smart tricks to get bold, vibrant flavors on the table quickly. Grab a bowl, pile on the toppings, and enjoy!
Recipe FAQs
Do black beans work well in chili?
Yes, they create a rich, earthy base and hold their shape during simmering. If you enjoyed balancing bold flavors here, see how we use similar acid cues in our Baja fish taco recipe.
How to prepare canned black beans?
Drain and rinse the beans in a colander to remove the canning liquid. This removes excess salt and prevents the chili from tasting metallic.
Which mistakes often lead to thin chili?
Skipping the mashing step often results in a watery consistency. Mashing a small portion of the beans creates a natural thickener for the broth.
Is it true that canned beans cannot provide a thick texture?
Actually, no. Mashing a half cup of canned beans into a paste creates a thick, velvety consistency without needing dried legumes.
Black Bean Chili