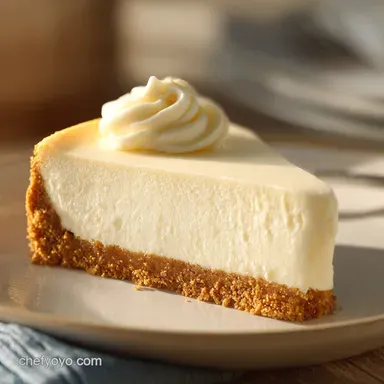
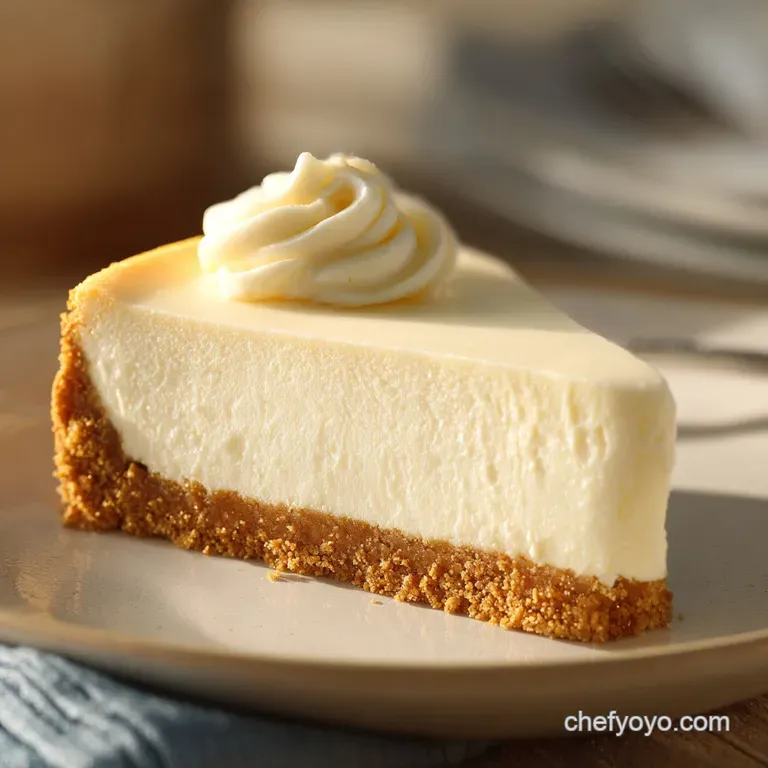
Cheesecake Cupcakes: Creamy and Rich
- Time: 20 min active + 4 hours chilling = Total 4 hours 40 mins
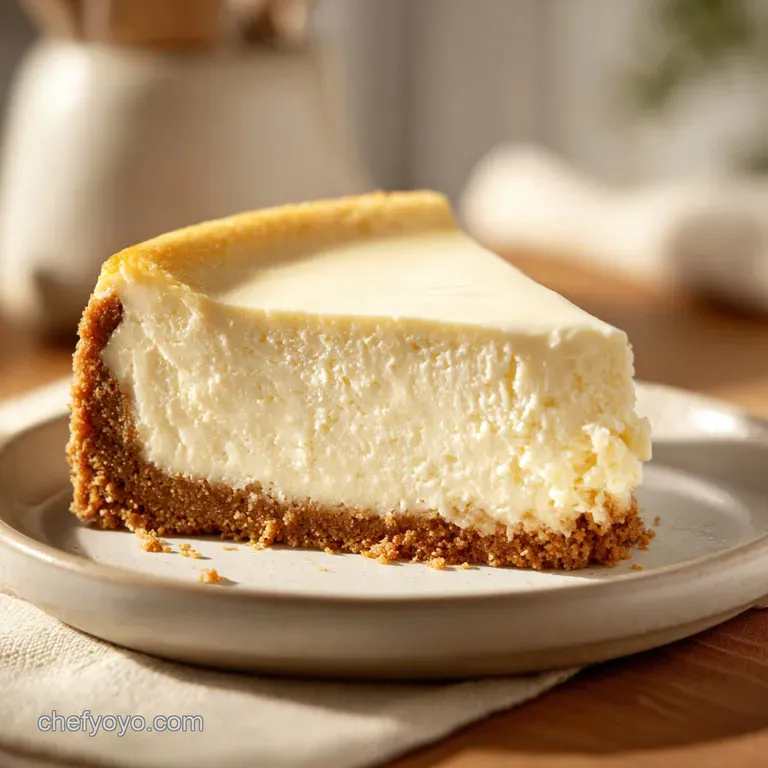
- Flavor/Texture Hook: Velvety filling with a shatter crisp buttery base
- Perfect for: Mini cheesecake party treats or a budget-friendly dessert spread
- The Secret to Velvety Cheesecake Cupcakes Every Time
- The Little Tricks That Make the Filling Silky Smooth
- Planning Your Party Treat Portions
- The Component Analysis for a Better Bite
- Selecting Your Wholesome Ingredients
- Step-by-Step Guide to Perfect Cheesecake Cupcakes
- Handling Common Texture Troubles
- Adjusting the Batch Size
- Debunking Common Bakery Myths
- Storage and Zero Waste Guidelines
- Serving Suggestions for Your Treats
- Recipe FAQs
- 📝 Recipe Card
The Secret to Velvety Cheesecake Cupcakes Every Time
The smell of toasted graham crackers and melted butter hitting the oven air is, for me, the ultimate comfort scent. I remember the first time I tried making these for a friend's baby shower.
I was so excited that I rushed the process, using cream cheese straight from the fridge and pulling them out of the oven the second the timer dinged. The result? A lumpy filling and a few sad, cracked tops that looked like a miniature earthquake had hit my dessert tray.
But once I slowed down and respected the temperature of the ingredients, everything changed. There is something so satisfying about that first bite where the velvety filling just gives way, contrasted by the salty sweet crunch of the crust.
It's a rustic kind of luxury that doesn't require a professional kitchen, just a bit of patience.
You can expect a treat that feels a bit more sophisticated than a standard cupcake but stays budget friendly. These Cheesecake Cupcakes aren't about fancy decorations, they're about that classic, creamy tang and a texture that feels like it came from a high end bakery.
Trust me, once you get the hang of the "jiggle" test, you'll be making these for every gathering.
The Little Tricks That Make the Filling Silky Smooth
I used to think you needed a water bath for every single cheesecake, but for these mini versions, you actually don't. The key is all in the thermodynamics of your ingredients and how you handle the air.
Room Temp Magic: When cream cheese is truly soft, it blends into the sugar without leaving those tiny white pebbles. According to Serious Eats, keeping your fats at a consistent temperature is the best way to ensure a stable emulsion.
Air Control: Beating eggs on high speed traps too many air bubbles. These bubbles expand in the oven, push the cake up too high, and then collapse, which is exactly how you get those annoying cracks on top.
The Gradual Cool: Moving a hot cake directly into a cold fridge shocks the proteins. Leaving the oven door cracked lets the temperature drop slowly, keeping the surface smooth.
The Jiggle Factor: Overbaking is the enemy of a velvety texture. You want the edges to be set, but the center should still wobble slightly like gelatin when you shake the pan.
Planning Your Party Treat Portions
Before we get into the ingredients, let's talk about how to scale this for your specific crowd. Since these are mini, people usually grab two or three.
| Servings | Ingredient Adjustments | Pan Size | Cook Time |
|---|---|---|---|
| 18 people | Standard recipe | 18 slot mini muffin pan | 20 minutes |
| 36 people | Double all ingredients | Two 18 slot pans | 22-25 minutes |
| 9 people | Half all ingredients | 9 slot mini muffin pan | 18-20 minutes |
Right then, now that we have the proportions sorted, we can look at what actually goes into the bowl. I've found that using full fat ingredients is the only way to get that authentic mouthfeel, so don't be tempted by the low-fat alternatives here.
The Component Analysis for a Better Bite
I like to think of a dessert like a construction project. If the foundation (the crust) is weak, the whole thing falls apart. If the walls (the filling) are too airy, it loses its richness.
| Ingredient | Science Role | Pro Secret |
|---|---|---|
| Cream Cheese | Structural Fat | Let it sit out for 2 full hours before using |
| Sour Cream | Acidic Tenderizer | Adds a subtle tang and prevents a "rubbery" set |
| Eggs | Protein Binder | Add them one by one to maintain the emulsion |
| Graham Crumbs | Texture Base | Press them harder than you think you need to |
Selecting Your Wholesome Ingredients
Here is everything you'll need. I've kept this budget smart, using standard pantry staples that still deliver a high end result.
- 1.5 cups (150g) graham cracker crumbs Why this? Classic honey wheat flavor that complements the tang.
- 3 tbsp (42g) unsalted butter, melted Why this? Binds the crumbs into a shatter crisp base.
- 2 tbsp (25g) granulated sugar Why this? Caramelizes slightly during the pre bake.
- 16 oz (450g) full fat cream cheese, softened Why this? Essential for the velvety, rich texture.
- 0.5 cup (100g) granulated sugar Why this? Balances the acidity of the cheese.
- 2 large eggs, room temperature Why this? Provides the lift and structure.
- 1 tsp (5ml) vanilla extract Why this? Rounds out the flavor profiles.
- 0.5 cup (120g) sour cream, room temperature Why this? Keeps the filling moist and silky.
Smart Ingredient Swaps
If you're missing something or want a different vibe, these swaps work without ruining the batch.
| Original Ingredient | Substitute | Why It Works |
|---|---|---|
| Graham Crumbs | Digestive Biscuits | Similar texture. Note: Slightly saltier, more rustic taste |
| Sour Cream | Greek Yogurt (Full Fat) | Similar acidity and thickness. Note: Slightly more tart |
| Unsalted Butter | Melted Coconut Oil | Similar fat content. Note: Adds a very subtle tropical note |
Honestly, don't even bother with low-fat cream cheese. It changes the chemistry of the bake and often results in a grainy texture that just isn't worth the few saved calories.
Step-by-step Guide to Perfect Cheesecake Cupcakes
Let's crack on with the actual making. The key here is to follow the order strictly, especially with the egg incorporation.
Phase 1: Prepping the Golden Base
- Preheat your oven to 350°F (175°C). Note: Make sure the oven is fully preheated to avoid a soggy crust.
- Combine graham cracker crumbs, melted butter, and sugar in a bowl until it feels like wet sand.
- Divide the mixture evenly among 18 cupcake liners and press the crumbs firmly into the bottom using the flat bottom of a measuring cup. Note: Firm pressure prevents the crust from crumbling when you bite in.
- Bake the crusts for 5-6 minutes until they smell nutty and look slightly golden, then remove and let cool. For more tips on crusts, check out King Arthur Baking's guide on crumb consistency.
Phase 2: Creating the Velvety Filling
- Beat the softened cream cheese and sugar on medium high until completely smooth and zero lumps remain.
- Add eggs one at a time, beating on low speed just until combined to avoid incorporating too much air.
- Stir in the vanilla extract and sour cream using a rubber spatula until the batter is a uniform, pale ivory color.
Phase 3: The Bake and Set
- Spoon about 2 tablespoons of filling over each pre baked crust for these Cheesecake Cupcakes.
- Gently tap the muffin pan on the counter 3-4 times to force air bubbles to the surface.
- Bake for 18-20 minutes until the edges are set and slightly puffed, but the center still has a slight jiggle.
- Turn off the oven and crack the door open slightly for 10 minutes to let the cupcakes cool gradually.
- Transfer to the fridge for at least 4 hours to fully set.
Chef's Tip: If you see any tiny bubbles on top after spooning the batter, just pop them with a toothpick before baking. It makes the finished top look like polished marble.
Handling Common Texture Troubles
Even the best of us hit a snag now and then. Most issues with Cheesecake Cupcakes come down to temperature or over mixing.
Why Your Filling Has Lumps
This almost always happens because the cream cheese was too cold. If you see lumps after step 5, don't keep beating it on high speed, or you'll add too much air. Instead, let the bowl sit for 10 minutes and then stir gently by hand.
If the Tops Crack
Cracks are usually the result of overbaking or a sudden temperature drop. If the center is firm and not jiggling, you've gone too far. Next time, trust the jiggle!
If the Crust is Too Crumbly
This happens when the butter didn't fully coat the crumbs or you didn't press them down hard enough. Use a flat bottomed glass or measuring cup to really pack that base in.
| Problem | Root Cause | Solution |
|---|---|---|
| Cracked Tops | Overbaked or cooled too fast | Use the "oven door crack" method for 10 mins |
| Grainy Texture | Cold cream cheese | Ensure ingredients are room temp (65-70°F) |
| Sinking Centers | Too much air beaten into eggs | Mix eggs on low speed just until combined |
Preventive Checklist for Success:
- ✓ Room temperature cream cheese (no cold lumps!)
- ✓ Firmly pressed crusts to prevent crumbling
- ✓ Eggs added one by one on low speed
- ✓ Tapping the pan to remove trapped air
- ✓ Cooling gradually in the oven before the fridge
Adjusting the Batch Size
Whether you're making these for a tiny tea party or a huge bash, you can adjust the volume. Just keep the ratios the same.
Scaling Down (Half Batch) If you only need 9 treats, halve all ingredients. For the egg, crack one egg into a bowl, whisk it, and use exactly half by weight or volume. Use a smaller muffin tin and reduce the bake time by about 2 minutes.
Scaling Up (Double Batch) When doubling, I recommend working in batches unless you have a very large stand mixer. If you bake two pans at once, rotate them halfway through the cooking time to ensure even heat.
Lower the oven temp by 25°F and extend the bake time by 3-5 minutes to account for the extra mass in the oven.
But what about the flavor? If you're making a huge batch, I usually add a pinch of salt to the crust to balance the sugar, as the flavor can become one dimensional in larger quantities.
Debunking Common Bakery Myths
There's a lot of conflicting advice out there. Let's set the record straight.
The Water Bath Myth: You'll often hear that you MUST use a water bath for cheesecake. While great for large, deep cakes, mini Cheesecake Cupcakes have a higher surface area to volume ratio, meaning they cook faster and don't trap as much steam.
A water bath is overkill here and often makes the crusts soggy.
The "low-fat" Shortcut: Some blogs suggest using low-fat cream cheese to "lighten" the recipe. In reality, the fat is what carries the flavor and provides the velvety texture. low-fat versions often release more water during baking, leading to a weepy filling.
Storage and Zero Waste Guidelines
To keep these tasting fresh, you need to manage the moisture.
Fridge Storage: Store your treats in an airtight container for up to 5 days. I recommend placing a piece of parchment paper between layers so they don't stick together.
Freezer Storage: These freeze brilliantly. Wrap each one individually in plastic wrap, then place them in a freezer bag for up to 2 months. Thaw them in the fridge overnight for the best texture.
Zero Waste Tips: - Crumb Scraps: If you have leftover graham cracker crumbs, toast them in a pan with a bit of butter and cinnamon to use as a topping for yogurt or oatmeal.
- Butter Drips: Don't waste the melted butter left in the bowl; stir it into your morning coffee or use it to grease your pan for the next batch.
Serving Suggestions for Your Treats
These are great on their own, but a few additions can make them feel more like a professional dessert. I love topping mine with a single fresh raspberry and a tiny sprig of mint for a pop of color.
If you want something more indulgent, a drizzle of melted dark chocolate or a dollop of whipped cream works wonders. For those who love a variety of flavors, you could try making a batch of these alongside some Vanilla Cupcakes to offer a mix of textures on your dessert table.
If you're in the mood for something even more decadent, my Strawberry Cheesecake Dump Cake is a great alternative for when you don't want to deal with individual liners.
Right then, you're all set. Once you've mastered these Cheesecake Cupcakes, you'll realize that the secret isn't some fancy tool, it's just about respecting the ingredients and trusting the jiggle. Happy baking!
Recipe FAQs
Can I make cheesecakes in cupcake tins?
Yes, you can. This method creates individual portions that bake faster than full cakes; if you like these mini bites, try the same filling style in our cheesecake strawberries.
What are common cheesecake cupcake mistakes?
Overbeating the eggs and using cold cream cheese. High speeds incorporate too much air, and cold cheese creates lumps that will not disappear during baking.
Do cheesecake cupcakes need a water bath?
No, they don't. Because of their small size and short 18-20 minute bake time, they stay creamy without the need for extra moisture.
Is cheesecake good for heart patients?
No, generally not. These are high in saturated fats from full fat cream cheese and butter, which may conflict with heart healthy dietary restrictions.
How to store cheesecake cupcakes to keep them fresh?
Place them in an airtight container in the fridge. They last up to 5 days; use parchment paper between layers to prevent them from sticking together.
How to prevent the tops from cracking?
Turn off the oven and crack the door open slightly. Let them cool gradually for 10 minutes to prevent a sudden temperature shock that causes cracks.
Is it true that I must use cold cream cheese for a stable filling?
No, this is a common misconception. Room temperature cream cheese is essential to ensure the batter is smooth and completely lump free.
Creamy Cheesecake Cupcakes