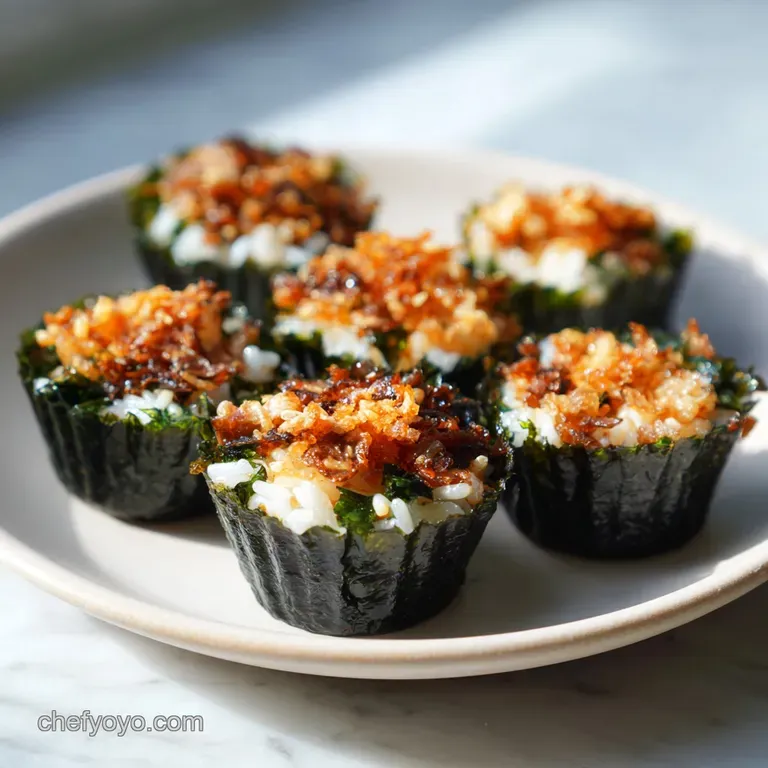
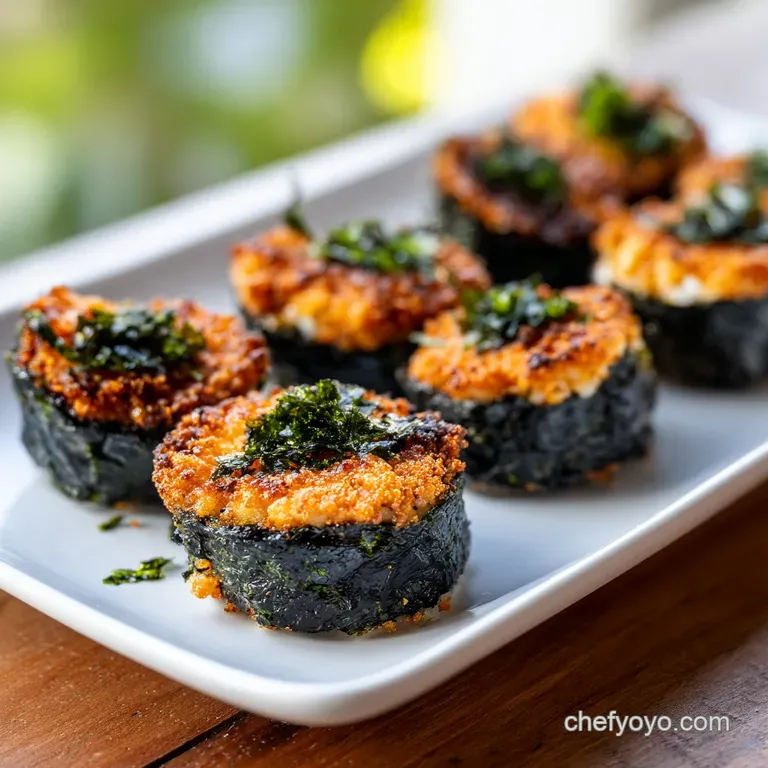
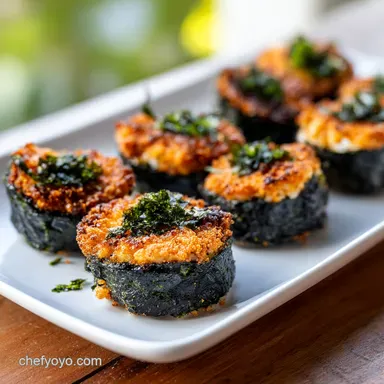
Sushi Cups: Crispy Nori Shells with Spicy Salmon
- Time: Active 20 minutes, Passive 15 minutes, Total 35 minutes
- Flavor/Texture Hook: Shatter crisp nori with a velvety spicy salmon center
- Perfect for: Creative appetizers or a contemporary weeknight dinner
- Creating the Ultimate Flavor Packed Sushi Cups
- Science of the Signature Crunch
- Analyzing Our Contemporary Components
- Ingredients and Creative Substitutions
- Step-by-Step Construction Guide
- Fixing Common Texture Mistakes
- Adjusting Recipe for Crowds
- Debunking Common Preparation Myths
- Storage and Zero Waste Tips
- Recipe FAQs
- 📝 Recipe Card
Creating the Ultimate Flavor Packed Sushi Cups
The first time I attempted these, the air in my kitchen was thick with the nutty, toasted aroma of roasted seaweed and sesame oil. I remember the distinct "shatter" sound as my husband took the first bite, a sharp contrast to the silence of the room as we both realized these were a complete upgrade from my usual clumsy rolling attempts.
We’d spent years struggling with bamboo mats, ending up with loose, soggy rolls that fell apart before reaching the soy sauce, but these little cups changed everything.
This recipe is really about the interplay of temperatures and textures, moving from the hot, crispy nori base to the chilled, creamy avocado topper. You'll find that the contemporary presentation makes them look like they came from a high end fusion bistro, yet the process is surprisingly low stress.
We're moving away from the pressure of "perfect" sushi aesthetics and focusing on building layers of authentic flavor that actually work in a home kitchen.
Whether you're hosting a get together or just want a fun Friday night meal, these little bites offer a creative way to enjoy salmon and rice without the fuss. I've learned through a few messy trials that the secret lies in the moisture control of the rice and the precision of the nori cut.
It's a contemporary take on a classic that honestly makes the whole "sushi at home" concept feel accessible and, dare I say, fun again.
Science of the Signature Crunch
Hygroscopic Stiffening: As the nori bakes, the moisture in the rice underneath evaporates, causing the seaweed fibers to contract and harden into a rigid, structural "cup" shape. This creates a permanent crispness that resists the weight of the toppings.
| Method | Time | Texture | Best For |
|---|---|---|---|
| Quick Baked | 15 minutes | Shatter crisp and warm | Parties and appetizers |
| Traditional Raw | 0 minutes | Soft and chewy | Immediate snacking |
| air-fried | 8 minutes | Extra bubbly and light | Maximum crunch lovers |
Choosing the right method depends on your guest list. If you want a dish that stays structural for an hour on a platter, the baked method is the clear winner because it physically alters the nori's cell structure.
Chef Tip: Lightly brush the muffin tin with a tiny drop of neutral oil before inserting the nori squares. This prevents any sticking and adds a micro layer of heat conduction for an even crunchier base.
Analyzing Our Contemporary Components
When we dig into the physics of this dish, it's not just about putting things in a bowl. Each piece of the puzzle plays a specific role in ensuring the final bite doesn't just taste good but feels right in the mouth. We're looking for that specific fusion of oily fish, acidic rice, and earthy seaweed.
| Ingredient | Science Role | Pro Secret |
|---|---|---|
| Sushi Rice | Starch Gelatinization | Rinse 5 times to remove excess surface starch for a cleaner, non gummy bite. |
| Rice Vinegar | pH Balancing | The acidity tightens the rice proteins, preventing the grains from turning into a mushy paste. |
| Kewpie Mayo | Fat Emulsification | The egg yolk only base provides a richer mouthfeel that coats the spicy sriracha heat. |
The way the sugar and salt dissolve into the vinegar is crucial for that authentic "shari" flavor. If you skip the seasoning of the rice, the entire dish will taste flat, no matter how much sriracha you add. It's that seasoning that makes the rice grains glisten and pop against the dark nori.
Ingredients and Creative Substitutions
For this recipe, we are focusing on high-quality basics that combine into something sophisticated. You can find most of these at a standard grocery store, but the authentic Kewpie mayo really makes a difference in the creaminess of the salmon.
- 2 cups cooked short grain sushi rice (400g): Essential for stickiness. Why this? The high amylopectin content ensures the rice holds its shape in the cup.
- 3 tbsp seasoned rice vinegar (45ml): Adds the signature tang. Why this? Provides the necessary acidity to balance the fatty salmon.
- 1 tbsp granulated sugar (12g): Softens the vinegar bite.
- 0.5 tsp kosher salt: Sharpens all other flavors.
- 4 large nori sheets: Cut into 4 inch squares.
- 1 tbsp furikake seasoning: Adds savory "umami" notes.
- 0.5 lb fresh Atlantic salmon: Skinless and cubed into 0.5 inch pieces.
- 2 tbsp Kewpie mayonnaise (30g): For a velvety texture.
- 1 tbsp Sriracha (15g): Controlled heat.
- 1 tsp toasted sesame oil (5g): Deep, nutty aroma.
- 1 ripe avocado (150g): Diced small.
- 0.5 English cucumber (150g): Finely diced for crunch.
- 2 tbsp unagi sauce (eel sauce): A sweet, thick glaze.
- 1 tbsp thinly sliced green onions: For a fresh, sharp finish.
- 1 tsp toasted sesame seeds: Final texture layer.
If you can't find fresh salmon, I've seen great results using high-quality canned tuna or even cooked shrimp. For a different spin on the flavor profile, you might enjoy looking at this Salmon Avocado Sushi recipe which uses similar ingredients in a bowl format.
| Original Ingredient | Substitute | Why It Works |
|---|---|---|
| Atlantic Salmon | Firm Tofu (cubed) | Absorbs marinade well. Note: Press tofu for 30 mins first to remove water. |
| Kewpie Mayo | Plain Greek Yogurt | High protein and tangy. Note: Will be significantly more acidic and less rich. |
| Nori Sheets | Soy Paper | Neutral flavor and colorful. Note: Won't get as crispy as seaweed when baked. |
step-by-step Construction Guide
1. Prepping the Seasoned Rice
Start by folding the 3 tbsp rice vinegar, 1 tbsp sugar, and 0.5 tsp salt into your 2 cups of warm rice. Use a slicing motion with a spatula to avoid mashing the grains, which keeps the texture light. If you need a refresher on getting the base right, this My Foolproof Method recipe covers the rice to water ratios perfectly.
2. Constructing the Nori Shells
Cut your 4 large nori sheets into 4 inch squares. Place each square into a muffin tin slot, pressing down firmly to create a cup shape. Make sure the corners stick up, as these will become beautifully crispy "shards" that add visual height to your sushi cups.
3. Marinating the Protein
In a small bowl, whisk together the 2 tbsp Kewpie mayo, 1 tbsp sriracha, and 1 tsp sesame oil. Gently fold in the 0.5 lb cubed salmon until every piece is coated in the velvety orange sauce. You want the cubes small enough (about 0.5 inch) so they sit comfortably inside the rice wells.
4. Baking to Golden Perfection
Fill each nori cup with about 2 tbsp of the seasoned rice, then top with a generous spoonful of the salmon mixture. Bake at 400°F for 15 minutes until the salmon is opaque and the nori edges are stiff and dark.
5. Executing the Final Garnish
Once out of the oven, let them sit for 2 minutes to allow the nori to fully crisp up. Top with the 150g diced avocado and 150g finely diced cucumber. These cold additions provide a necessary temperature contrast to the warm salmon.
6. The Signature Drizzle
Finish each cup with a drizzle of the 2 tbsp unagi sauce. This adds a sweet, syrupy layer that ties the spicy salmon and creamy avocado together. Don't be shy with it; the viscosity is key here.
7. Adding the Finishing Touches
Sprinkle the 1 tbsp green onions, 1 tbsp furikake, and 1 tsp sesame seeds over the top. These provide a sharp "bite" and a final layer of crunch that completes the contemporary look.
8. Serving the Platter
Transfer the cups to a flat board or platter. Serve immediately while the nori is at its peak "shatter" point and the salmon is still warm.
Fixing Common Texture Mistakes
The most common hurdle with sushi cups is the dreaded soggy bottom. This usually happens when the rice is too wet or the cucumber is added before baking. Remember, we want the heat to drive moisture out, not trap it in.
Preventing Soggy Bottoms
If your nori is turning soft and chewy instead of crispy, it's likely due to steam. Make sure the rice has cooled slightly before putting it into the nori, and never cover the muffin tin while it's in the oven. The air needs to circulate around the nori corners to dry them out.
Handling Overcooked Protein
Salmon can go from velvety to rubbery in just a couple of minutes. We use a high temperature (400°F) for a shorter time to sear the outside while keeping the center tender. If your salmon looks dry, you can add an extra dollop of Kewpie mayo on top after baking to restore some moisture.
| Problem | Root Cause | Solution |
|---|---|---|
| Rice falling out | Too much surface starch | Rinse rice until water runs clear before cooking. |
| Nori is chewy | Not enough heat/time | Ensure oven is fully preheated to 400°F. |
| Bland flavor | Skipping the vinegar sugar | Season the rice while it is still warm to absorb flavors. |
Common Mistakes Checklist
- ✓ Always use short grain rice; long grain won't stick together.
- ✓ Pat the cucumber dry with a paper towel after dicing to remove excess water.
- ✓ Cut nori squares precisely to 4 inches; too small and they won't hold the rice.
- ✓ Don't skip the sugar in the rice; it's what provides the authentic "sushi" taste.
Adjusting Recipe for Crowds
If you're making these for a big party, you can easily double the batch. Just be aware that most standard ovens can't handle two muffin tins on the same rack without affecting the airflow.
Rotate the tins halfway through the 15 minutes to ensure the ones in the back don't burn while the front ones stay soft.
For a smaller snack, you can halve the recipe, but since you're already cooking the rice, I find it's easier to make the full amount and just store the components separately. When scaling up the spices, like sriracha, stick to a 1.5x ratio rather than doubling it exactly to avoid overwhelming the delicate flavor of the salmon.
Serving Size Calculator
| Servings | Ingredient Adjustments | Tin Size | Cook Time |
|---|---|---|---|
| 6 people | 0.25 lb salmon, 1 cup rice | 6 slot tin | 15 minutes |
| 12 people | 0.5 lb salmon, 2 cups rice | 12 slot tin | 15 minutes |
| 24 people | 1 lb salmon, 4 cups rice | Two 12 slot tins | 18 minutes |
Debunking Common Preparation Myths
One major myth is that sushi must always contain raw fish to be authentic. In reality, "sushi" refers to the seasoned rice, not the topping. Baking the salmon makes this dish much safer for potlucks and accessible for those who aren't fans of raw textures.
Another misconception is that you need a special "sushi grade" label for everything. While quality matters for salmon, "sushi grade" is actually a marketing term rather than a legal FDA requirement.
Focus on finding the freshest, high-quality Atlantic salmon from a reputable fishmonger, and you'll be perfectly fine for this baked application.
Storage and Zero Waste Tips
These are best eaten fresh, but you can store leftovers in an airtight container in the fridge for up to 1 day. Be warned: the nori will lose its "shatter" and become soft. To revive them, pop them into an air fryer at 350°F for 3 minutes.
This will crisp up the seaweed without overcooking the salmon too much.
To avoid waste, save any leftover nori scraps (the bits left after cutting your 4 inch squares). You can crumble them over salads or use them as an extra garnish for ramen. If you have extra rice, it's the perfect base for a quick fried rice the next morning.
Leftover avocado pits can be placed in a bowl with the diced avocado to slow down browning, though it's always better to just eat the avocado immediately!

Recipe FAQs
Can I substitute the nori sheets with standard rice paper wraps?
No, for optimal crunch you must use nori. Rice paper absorbs moisture too easily and will result in a soft, gummy wrapper instead of the desired crisp shell.
How do I prevent the sushi rice from becoming too sticky in the cups?
Rinse the sushi rice thoroughly before cooking and season while warm. Washing the rice removes excess surface starch, which is the primary cause of gumminess, similar to managing starch in our Low Sodium Sushi meal.
Is it true that I must use a bamboo mat for this recipe?
No, this is a common misconception. This recipe uses a muffin tin to bake the nori into a cup shape, eliminating the need for any rolling or traditional mat handling.
How long can I safely assemble these cups before they get soggy?
For peak crispness, assemble and serve within one hour of baking. If topping with cold ingredients like cucumber, wait until the nori cups have cooled for at least five minutes out of the oven.
What temperature should I bake the cups at for the best texture?
Bake at 400°F (200°C) for 15 minutes for a perfect balance. This high heat rapidly dehydrates the edges of the nori while gently warming the salmon filling without overcooking it.
Can I use imitation crab instead of fresh salmon?
Yes, imitation crab works well, but adjust the mixing time. Since imitation crab is already cooked, only mix it lightly with the mayonnaise dressing for 30 seconds to avoid shredding the texture.
How do I incorporate the spicy element if I prefer less heat than Sriracha provides?
Reduce the Sriracha to one teaspoon and add chili garlic paste for flavor depth. This allows you to control the Scoville units while maintaining the complex savory undertones found in recipes like the Spicy Canned Salmon recipe.
Crispy Sushi Cups Recipe
Ingredients:
Instructions:
Nutrition Facts:
| Calories | 144 kcal |
|---|---|
| Protein | 5.2 g |
| Fat | 7.1 g |
| Carbs | 15.4 g |
| Fiber | 1.3 g |
| Sugar | 3.2 g |
| Sodium | 285 mg |
