The Essential Royal Icing Perfectly Piped or Poured
Mastering Royal Icing: The Decorator's Essential Foundation
Royal Icing is the undisputed champion of decorative confectionery. This glossy, pristine white glaze dries quickly and sets "rock hard," making it the indispensable foundation for everything from intricate detailing on biscuits and complex gingerbread houses to providing a flawless, porcelain finish on petit fours.
Achieving mastery with this specific Icing Recipe For Cookie Decorating transforms simple baked goods into works of edible art, demanding a base consistency that is stiff enough to hold a precise peak but flexible enough to thin down for a smooth, velvety finish.
Why Meringue Powder Delivers Superior Safety and Stability
While some classic methods detail a royal icing recipe without meringue powder, relying instead on raw egg whites, our formula champions stability and safety. We use 3 tablespoons (45 ml) of meringue powder combined with 4 cups (480 g) of powdered sugar.
This blend ensures the icing remains food safe and provides the reliable binding necessary for consistent structure. The stability provided by the royal icing with meringue powder guarantees a bright white colour and a structure that hardens perfectly, avoiding the risks and variability associated with the traditional royal icing with egg whites .
A Historical Nod to the Queen's Favorite Decorative Glaze
This decorative technique has been employed by European confectioners for centuries. However, the glaze truly earned its royal moniker when it was famously used to crown Queen Victoria’s wedding cake in 1840.
The hard, durable finish and brilliant white colour cemented its status as the definitive choice for sophisticated, celebratory confectionery, maintaining its dominance in fine baking ever since.
Understanding the Stages: Piping Consistency vs. Flooding Consistency
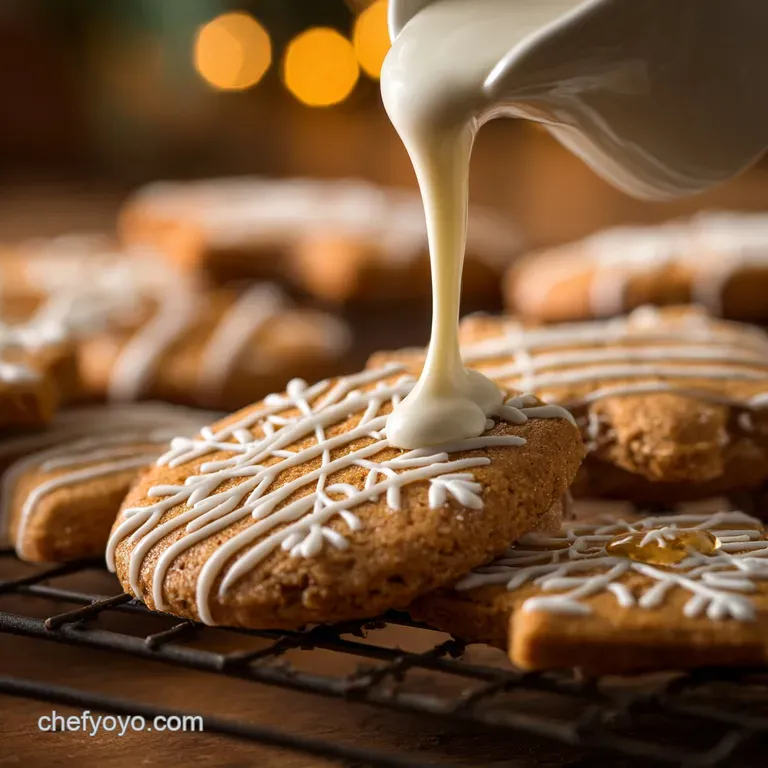
The greatest skill in working with Royal Icing is manipulating its thickness. The initial finished mix is the stiff consistency , which is perfect for outlining, creating borders, and performing delicate detail work required for precise Royal Icing Decorations Cake designs.
This base is then incrementally thinned with water to achieve the flooding consistency . This crucial, thinner stage allows the icing to self level, filling in the outlined areas to create that signature smooth, flawless background, making it the Best Royal Icing For Sugar Cookies .
Essential Supplies for Flawless Icing Preparation
The quality of your royal icing recipe is determined not only by the ingredients but also by the preparation tools you select. Ensuring your environment and equipment are completely free of grease is paramount, as any trace of fat will prevent the meringue powder from activating properly and ruin the final hardening process.
The Critical Difference: Powdered Sugar Quality and Sifting
The success of your glaze hinges on the quality of your confectioner’s sugar and, more importantly, its preparation. We call for 4 cups (480 g) of sugar, and this quantity must be passed through a fine mesh sifter do not skip this step.
Sifting removes any microscopic lumps that would otherwise clog the delicate piping tips, leading to frustration and an uneven finish. The resulting powder, combined with the meringue powder, forms the perfectly smooth base.
Mixing Equipment That Ensures Peak Volume and Structure
For optimal results and volume, a stand mixer is the preferred tool. Crucially, attach the paddle rather than the whisk. The whisk incorporates too much air, which leads to troublesome air bubbles that can cause unsightly pinholes and craters as the icing dries.
The paddle attachment ensures sufficient aeration for volume while maintaining the dense, smooth structure needed for piping.
Water Temperature and Precise Hydration Control
The initial liquid component used to activate the 3 tablespoons of meringue powder is 1/2 cup (120 ml) of warm water and 1 teaspoon (5 ml) of clear vanilla extract. Using warm water aids in activation, while clear extract is mandatory to maintain a brilliant, pure white icing base.
Once the initial structure is built, precise hydration control is managed by adding tiny amounts (1 to 3 teaspoons total) of water or lemon juice incrementally to adjust the consistency for outlining and flooding.
Related Recipes Worth Trying
- Silky Swiss Meringue Buttercream Stable Smooth Icing for Cake SMBC — Ditch the sickly sweet icing This professional Swiss Meringue Buttercream is perfectly stable less sweet and transforms into a velvety smooth icing recipe...
- Moist Carrot Cake with Maple Cream Cheese Icing Recipe — Make the best carrot cake ever This super moist carrot cake recipe is topped with a silky maple cream cheese frosting perfect for any potluck or Sunday tea
- Decadent Cream Cheese Icing Recipes: My Easy & Delicious Method — Discover my creamy and tangy cream cheese icing recipes! Easy to make, perfect for decorating cakes and cupcakes. Elevate your bakes today!
Whipping Up Stability: step-by-step Method
Achieving the perfect texture requires patience and careful timing during the mixing phase, turning the dry ingredients into a brilliant white, stable glaze.
Activation and Initial Mixing Protocol
Begin by sifting the confectioner’s sugar and meringue powder together into the mixing bowl. Add the warm starter water and the clear vanilla extract. Start the mixer on the lowest speed (often Speed 1 or 2) and mix only until the liquid is just incorporated.
The mixture will appear thick, pasty, and slightly lumpy, but do not panic; this is merely the activation phase.
Achieving Stiff Peaks for Precision Detailing Work
Immediately following activation, increase the mixer speed to medium (Speed 4 6). Beat the mixture rigorously for 5 to 7 minutes. This extended beating time is essential; you will notice the mixture increase slightly in volume and transform into an opaque, brilliant white.
The icing is ready when you pull the paddle away and the peak stands straight up without curling or collapsing this is the base stiff piping icing consistency required for outlining and delicate lace work.
The 10-Second Rule: Testing Your Flood Consistency
After setting aside your stiff piping base, the remaining icing must be thinned for flooding. Add the adjuster liquid water or lemon juice— drop by drop , stirring frequently.
To check for the perfect flooding consistency , employ the “10-second rule”: draw a line through the icing with a spoon or spatula. The resultant gap should completely disappear, self leveling smoothly, in 8 to 12 seconds. If it takes longer, add another tiny drop of water.
If it disappears faster, you have gone too thin and must stir in a small amount of your reserved stiff icing or powdered sugar to thicken it again.
Expert Techniques and Troubleshooting Your Batch
Working with this hard drying glaze requires specific handling techniques to ensure a flawless finish and efficient workflow.
Preventing Cratering and Controlling Color Bleeding
Two common issues decorators face are cratering and color bleeding. Cratering (small holes in the smooth surface) is often caused by air bubbles escaping the icing as it dries. Prevent this by using the paddle attachment and gently tapping your decorated cookie to help bubbles rise before drying.
To control color bleeding especially when pairing a dark colour detail on a lighter flooded base ensure the base flooding consistency layer is absolutely bone dry (which can take 12 to 24 hours depending on humidity) before applying any contrasting colours on top.
Best Practices for Storing Finished Royal Icing
Because Royal Icing forms a crust instantly when exposed to air, proper storage is crucial. Immediately transfer any unused icing into an airtight container. Press plastic wrap directly onto the surface of the icing to eliminate any air pockets, which prevents crusting.
Stored this way at cool room temperature, the icing remains usable for up to a week. If you used the riskier royal icing with egg whites variation, refrigeration is necessary, but the meringue powder recipe is stable outside the fridge.
Incorporating Gel Colors for Vibrant Finishes
Always use highly concentrated gel paste food colors, not liquid drops, when coloring your icing. Liquid colors introduce too much moisture, which degrades the structure and compromises the hard setting quality of the royal icing recipe .
For deep, intense shades like black, navy, or deep red, mix the colour into the icing 12 hours before use. The color pigment will deepen overnight, allowing you to achieve the desired vibrancy without adding excessive gel that could weaken the icing’s integrity.
Creating Dimensional Royal Icing Flowers and Structures
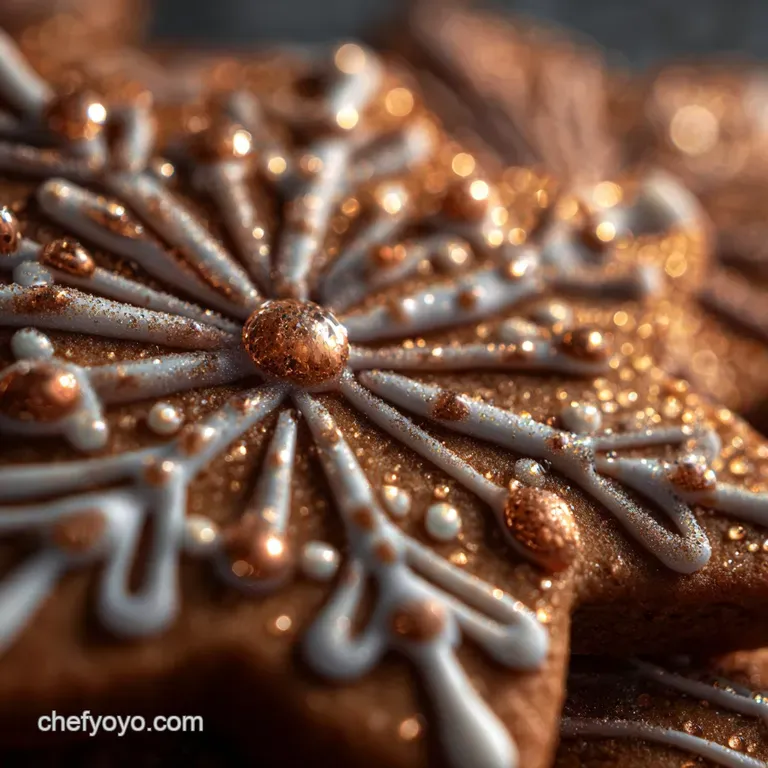
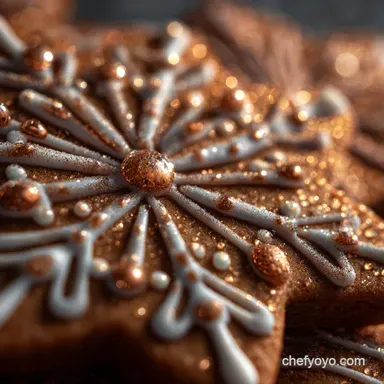
The unmatched structural integrity of this Best Royal Icing For Sugar Cookies makes it ideal for more ambitious projects. The stiff consistency is used not only for simple outlining but also for intricate, dimensional piping like flowers, lace work, and even freestanding figures.
These Royal Icing Decorations Cake elements must be piped onto parchment paper and allowed to dry fully, often 24 hours or more, until they are robust enough to be handled and placed onto a finished cake or cookie.
Recipes Recommended for This Icing Style
The durability and pristine finish of this glaze make it the traditional pairing for holiday baking. It is essential as the glue and snowy detail on classic gingerbread houses. On top of that,, it provides the definitive, elegant hard shell for delicate sugar cookies and can be used to quickly coat small pastries like madeleines or petit fours, providing that unmistakable smooth, opaque finish.
For a subtle twist on the flavour, substitute the clear vanilla extract with clear almond extract for an enhanced, classic bakery aroma.

Recipe FAQs
I've waited ages, but my Royal Icing isn't setting! What gives?
If your icing isn't drying rock hard, the usual culprit is grease, old chap! Any residue of fat even tiny traces on your bowl or tools will prevent the meringue powder from activating and inhibit the set.
Also, humidity is a big factor; if it’s a damp day, it might need a good 24 hours in a cool, dry area to properly cure and achieve that brilliant finish.
How long can I keep Royal Icing once it's made?
Stiff Royal Icing is surprisingly robust and can last up to two weeks stored in an airtight container at cool room temperature. The trick is preventing air exposure: always press cling film directly onto the surface of the icing to avoid crusting, even if it's only for a quick tea break.
If you need it longer, refrigeration extends its life to about three weeks, but remember to let it warm up thoroughly before you use it.
How do I know if I’ve hit the '10-second rule' for flooding consistency?
Achieving the perfect flooding consistency for Royal Icing relies on that famous 10-second check. To test, draw a clean line right across the surface with a spoon or knife. The gap should completely level itself out and disappear back into a smooth sheen within 8 to 12 seconds.
Too fast means it will run off your biscuits; too slow means you'll end up with lumps and an uneven finish.
I've got loads of annoying little air bubbles in my icing how do I get rid of them?
Air bubbles often crop up if the icing was beaten too vigorously or if you used the whisk attachment instead of the gentler paddle. To help them escape, cover your prepared icing and let it rest on the counter for a good 15 minutes before use.
Once you've applied the icing to a biscuit, give the biscuit a gentle but firm tap against the counter a few times to encourage those pesky bubbles to rise and pop before the icing sets.
Can I just use my standard liquid food colouring to jazz it up?
You’d be wise to stick to gel paste colours, mate! Liquid food colouring introduces too much water, which can drastically destabilise the icing structure and ruin the vital hard setting properties.
Highly concentrated gel paste ensures vibrant colour with just a tiny amount, keeping the consistency exactly where you need it for perfect piping and flooding.
Essential Meringue Royal Icing
Ingredients:
Instructions:
Nutrition Facts:
| Calories | 49 kcal |
|---|---|
| Protein | 0.9 g |
| Fat | 0.3 g |
| Carbs | 15.8 g |
| Fiber | 0.0 g |
| Sodium | 33 mg |
