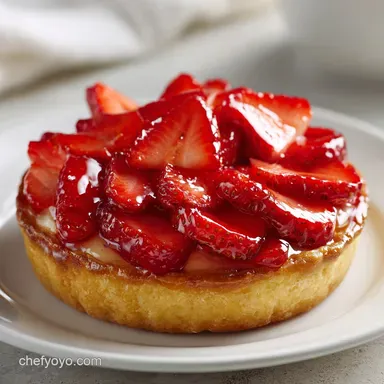
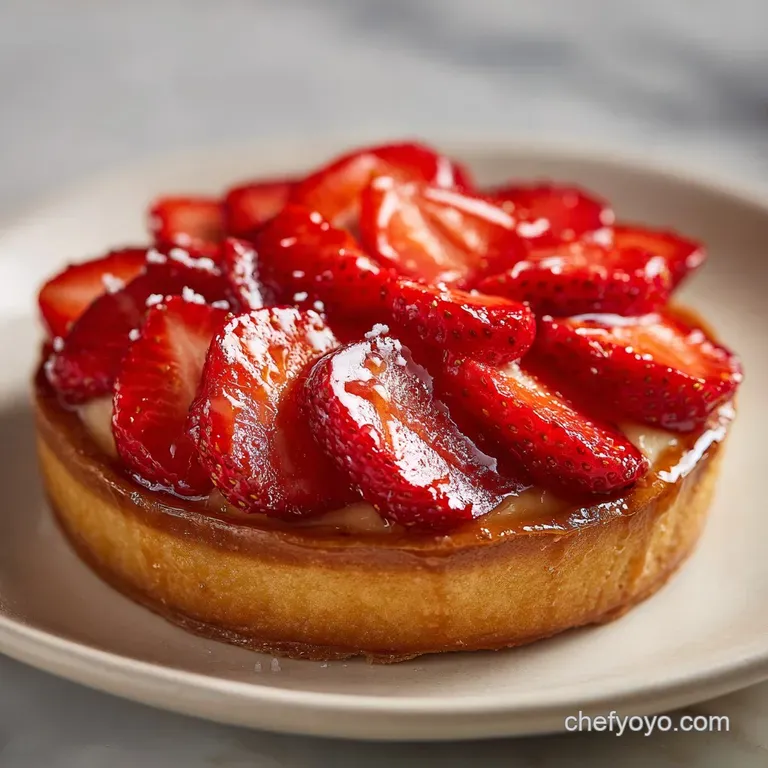
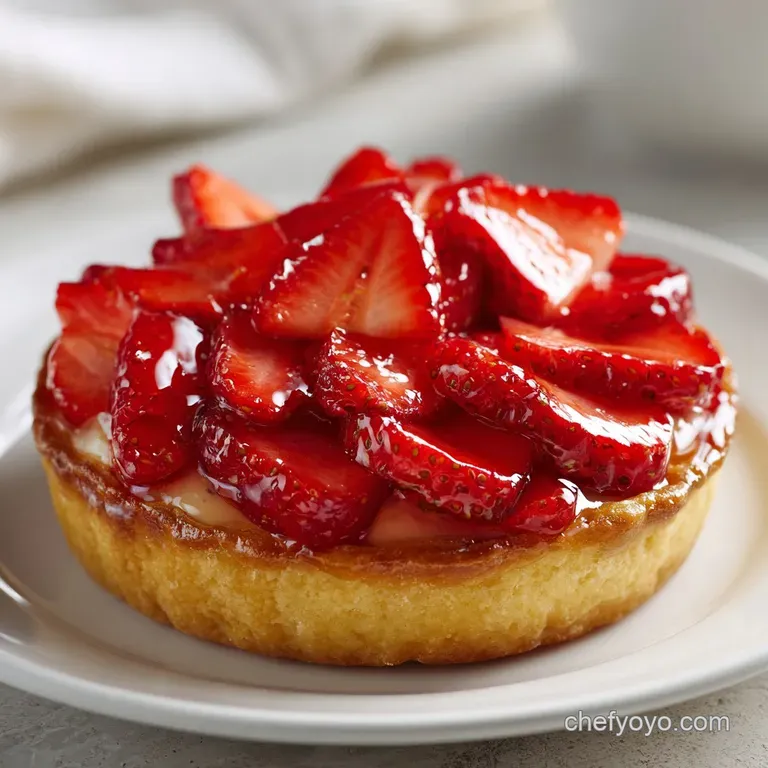
Failure-Proof Strawberry Tart: Silky and Golden
- Time: 30 min active + 4 hrs 20 min chilling/baking = Total 4 hours 50 mins
- Flavor/Texture Hook: Shattering buttery crust with a silky, vanilla rich center
- Perfect for: Sunday brunch, dinner parties, or a high effort treat for someone special
- Creating a Shattering Strawberry Tart
- The Essential Recipe Specs
- The Secret Behind the Texture
- Selecting Your Rustic Ingredients
- The Essential Baking Tools
- Step by Step Assembly
- Fixing Common Baking Blunders
- Troubleshooting Common Issues
- Customizing Your Sweet Treat
- Adjusting the Batch Size
- Freshness and Zero Waste
- The Best Side Pairings
- Truth About Tart Baking
- Recipe FAQs
- 📝 Recipe Card
Creating a Shattering Strawberry Tart
That first "crack" when your knife hits the crust, followed by the scent of warm butter and vanilla, is honestly the best part of baking. I remember the first time I tried a French style tart; I thought I could just use a pre made pie crust and call it a day. Let me tell you, it was a disaster.
The crust was tough, the berries leaked, and it felt more like a soggy pie than a refined tart. It took me a few tries to realize that the secret isn't fancy equipment, it's just about controlling the temperature of your fat.
Forget everything you've heard about pastry being some mysterious, untouchable art reserved for people in white hats. You don't need a professional kitchen to get that bakery style finish. The real trick is simply giving the dough and the cream enough time to chill.
If you try to rush it, the crust shrinks and the cream slides. But if you're patient, you'll end up with a dessert that looks like it cost 40 bucks at a bistro.
Trust me on this, the effort is totally worth it. We're going for a rustic but polished vibe here. It's not about being mathematically perfect; it's about that contrast between the crisp, salty sweet shell and the cool, velvety filling.
Right then, let's get into how we actually make this happen without losing our minds in the process.
The Essential Recipe Specs
Before we crack on, let's be real about the timing. This isn't a "throw it together in ten minutes" kind of dish. While the actual work is pretty low, the resting times are non negotiable. If you skip the chill, the butter melts too fast in the oven, and you'll lose that shatter.
Since we're aiming for a budget smart approach, I've focused on ingredients you can find at any grocery store, but I'll show you where a tiny upgrade makes a big difference. We're making a 9 inch tart that serves 10 people, which makes it a great centerpiece for a get together.
| Method | Time | Texture | Best For |
|---|---|---|---|
| From Scratch | 4 hrs 50 min | Shattering & Velvety | Special occasions |
| Semi Homemade | 1 hr 30 min | Soft & Creamy | Quick cravings |
| store-bought Shell | 45 min | Dense & Sandy | Last minute guests |
The Secret Behind the Texture
I'm always curious about why some tarts feel like cookies and others feel like clouds. It comes down to a few simple things that happen in the pan.
- Cold Fat Suspension
- Keeping butter cold ensures it creates tiny pockets of steam in the oven, which is what gives us that shattering effect instead of a dense, hard crust.
- Starch Stabilization
- Cornstarch doesn't just thicken the cream; it prevents the milk from separating when we add the eggs, keeping it silky.
- The Tempering Trick
- Slowly adding hot cream to the yolks prevents them from scrambling, ensuring a smooth, glossy finish.
- Moisture Barrier
- Baking the crust completely (blind baking) creates a seal that stops the pastry cream from soaking into the dough.
Selecting Your Rustic Ingredients
I've found that using standard all purpose flour works best here because it doesn't make the crust too tough. Honestly, don't even bother with low-fat milk or light butter; this is a dessert, and the fat is where the flavor lives.
For the Sweet Crust
- 1.5 cups all purpose flour Why this? Balanced protein for a crisp but tender bite
- 0.5 cup powdered sugar Why this? Dissolves faster than granulated for a smoother dough
- 0.25 tsp salt Why this? Cuts through the richness of the butter
- 0.5 cup cold unsalted butter, cubed Why this? Essential for the flaky, shattering texture
- 1 large egg yolk Why this? Adds richness and helps bind the dough
- 1 tbsp heavy cream Why this? Provides just enough moisture to clump
For the Velvety Filling
- 2 cups whole milk Why this? Full fat creates a more stable emulsion
- 0.5 cup granulated sugar Why this? Classic sweetness that doesn't overpower the berries
- 0.25 cup cornstarch Why this? Provides the necessary structure to hold the berries
- 4 large egg yolks Why this? Creates that deep yellow, custard like richness
- 4 tbsp unsalted butter, room temperature Why this? Gives the cream a glossy, professional finish
- 1 tsp vanilla extract Why this? Essential aromatic base
- 1 pinch salt Why this? Enhances the vanilla and milk flavors
For the Topping
- 1 lb fresh strawberries, hulled and halved Why this? Fresh berries provide the necessary acidity
- 0.25 cup apricot preserves Why this? Traditional glaze that adds a subtle tang
- 1 tbsp water Why this? Thins the preserves for easy brushing
| Original Ingredient | Substitute | Why It Works |
|---|---|---|
| All purpose flour | Almond flour (half) | Adds nuttiness. Note: Makes the crust more fragile |
| Whole milk | Coconut milk (full fat) | Similar fat content. Note: Adds a tropical flavor |
| Apricot preserves | Raspberry jam | Similar acidity. Note: Changes the color to a deeper red |
| Powdered sugar | Superfine sugar | Similar dissolve rate. Note: May result in a slightly grainier crust |
The Essential Baking Tools
You don't need a fancy kit, but a few things make this a lot easier. If you don't have a food processor, you can use a pastry cutter or even two forks, but it'll take a bit more arm strength.
I highly recommend a 9 inch tart pan with a removable bottom. If you use a standard pie dish, you can still do it, but you won't get those clean, sharp edges. Also, don't forget the pie weights. If you don't have them, just use dried beans or uncooked rice in a pinch.
Step by step Assembly
Let's crack on with the actual making. Take your time with the cooling steps, as putting hot cream in a warm crust is a recipe for a soggy bottom.
1. Crafting the Shattering Crust
Combine flour, powdered sugar, and salt in a food processor. Pulse in cold butter until the mixture resembles coarse crumbs. Add the egg yolk and heavy cream; pulse until the dough just begins to clump together. Note: Don't over process or the crust will be tough.
Press the dough into a disk, wrap in plastic, and refrigerate for at least 1 hour. This lets the gluten relax and the butter firm up.
Roll the dough into a 9 inch tart pan. Line with parchment and pie weights. Bake at 350°F (175°C) for 15 minutes, remove weights, and bake for another 5-8 minutes until pale gold. Cool completely.
2. Simmering the Stabilized Filling
In a saucepan, whisk sugar and cornstarch, then slowly whisk in milk and salt. Heat over medium, stirring constantly, until the mixture thickens and begins to bubble.
Remove from heat and slowly whisk in egg yolks to temper. Note: This prevents the eggs from cooking instantly into chunks. Return to heat for 1-2 minutes until velvety and thick.
Stir in butter and vanilla until glossy. Transfer to a bowl, cover with plastic wrap touching the surface, and chill for 2 hours. Note: Touching the surface prevents a skin from forming.
3. The Final Assembly
Spread the chilled cream evenly into the cooled crust using a spatula. Arrange strawberry halves in concentric circles, starting from the outside and working inward.
Heat preserves and water in the microwave for 20 seconds and gently brush the glaze over the berries. Refrigerate for 1 hour before slicing.
Fixing Common Baking Blunders
Even for those of us who live in the kitchen, things go sideways. The most common issue is usually related to temperature. If your kitchen is too hot, the butter in the dough melts before it hits the oven, and you lose that "shatter."
Troubleshooting Common Issues
| Issue | Solution | |||||
|---|---|---|---|---|---|---|
| Why Your Crust Shrank | If the sides of your tart slid down during baking, it's usually because the dough wasn't chilled enough or was stretched too thin. When the butter melts too quickly, the flour contracts. | Problem | R | |||
| Why Your Filling is Lumpy | Lumps in pastry cream usually happen when the cornstarch isn't fully dissolved or the eggs weren't tempered. If you see little bits of cooked egg, you've overheated the yolks too quickly. | Problem | ||||
| Why Berries are Leaking | Strawberries release water when they hit sugar or glaze. If you glaze them too early or use overripe berries, you'll get a pool of red liquid at the bottom. | Problem | Root Cause | Solution | :--- |
Customizing Your Sweet Treat
Once you've got the basics down, you can really play with this. If you want a more intense berry flavor, you could try a Strawberry Mousse recipe for an even lighter filling, though the pastry cream is the classic choice for a tart.
If you're feeling adventurous, try adding a pinch of cinnamon or nutmeg to the crust. It gives it a slightly warmer, autumnal feel that pairs beautifully with the fresh berries. For those who prefer a different fruit, blueberries or raspberries work perfectly with this same cream base.
Decision Shortcut If you want a more "rustic" look, leave the crust edges slightly uneven and use whole berries. If you want a "boutique" look, use a ruler to space your berry concentric circles perfectly. If you're short on time, use a high-quality store-bought shortcrust, but still blind bake it.
Adjusting the Batch Size
Scaling a tart is a bit trickier than scaling cookies because you're dealing with the surface area of a pan. If you're making a smaller version, you'll need to adjust your timing.
Scaling Down (½ batch) Use a 6 inch tart pan. Reduce the bake time by about 20% and keep a close eye on the color. Since you can't easily split one egg yolk, beat it in a small bowl first and use exactly half.
Scaling Up (2x batch) If you're making two 9 inch tarts, don't just double the salt and spices; go with 1.5x to avoid over seasoning. You'll likely need to work in batches for the pastry cream to ensure it thickens evenly without burning on the bottom.
Baking Large Batches If you're baking multiple crusts at once, lower the oven temperature by 25°F (about 10°C) and extend the bake time. This prevents the ovens from having "hot spots" that burn one tart while leaving the other raw.
Freshness and Zero Waste
To keep your tart in peak condition, store it in the fridge. It'll stay fresh for about 3 days. I don't recommend freezing the assembled tart because the strawberries will release all their water once they thaw, leaving you with a soggy mess. However, you can freeze the unbaked crust disks for up to 3 months.
When it comes to zero waste, don't toss those strawberry tops! You can simmer the green tops and any bruised berry bits with a bit of sugar and water to create a simple strawberry syrup. This syrup is great over pancakes or stirred into yogurt.
For the leftover pastry cream, if you didn't use it all in the tart, put it in a jar and use it as a dip for fresh fruit or a filling for homemade eclairs. Just make sure it's sealed tightly so it doesn't pick up any "fridge smells."
The Best Side Pairings
Because this tart is so rich and creamy, it pairs best with things that provide a sharp or refreshing contrast. A crisp glass of Prosecco or a tart lemon tea cuts right through the butter.
If you're serving this as part of a larger dessert spread, I'd recommend something with a different texture. My Strawberry Cake recipe is a great companion because it offers a softer, spongier experience compared to the shatter of the tart.
For a simpler accompaniment, a dollop of unsweetened crème fraîche or a sprinkle of fresh mint leaves on top of the tart adds a sophisticated, clean finish that balances the sweetness of the apricot glaze.
Truth About Tart Baking
There are a few common misconceptions that I see floating around the internet. Let's clear those up so you don't waste your ingredients.
"Searing the crust prevents sogginess": You'll see people talking about "sealing" the crust with egg wash. While it helps with color, the only real way to prevent a soggy bottom is the blind bake.
Without those first 15 minutes of weights, the moisture from the cream will win every time.
"You must use a tart pan": You don't have to, but you'll regret it if you don't. A pie dish has sloped sides, which means your filling to crust ratio will be off, and you won't get those professional slices. A tart pan is a small investment that makes a massive difference.
"Frozen berries are a direct swap": They aren't. Frozen berries release significantly more liquid as they thaw. If you use them, you'll need to cook them down into a jam first, otherwise, your velvety cream will turn into a pink soup within an hour.
Recipe FAQs
How do I make a strawberry tart?
Pulse flour, powdered sugar, and salt with cold butter, then add egg yolk and heavy cream. Chill the dough for one hour, blind bake at 350°F, fill with a custard chilled for two hours, and top with glazed fresh strawberries.
Why did my tart crust shrink during baking?
The dough likely wasn't chilled enough or was stretched too thin. When the butter melts too quickly in the oven, the flour contracts and pulls the sides down.
How do I prevent lumpy pastry cream?
Whisk cornstarch and sugar thoroughly before adding milk and temper the egg yolks slowly. Lumps occur if the cornstarch isn't fully dissolved or if the yolks are overheated too quickly.
What are common strawberry tart mistakes?
Putting hot cream in a warm crust is the most frequent error. This creates a soggy bottom; always ensure both the crust and the filling are completely cooled before assembly.
Is it true that I must glaze the strawberries to keep them from spoiling?
No, this is a common misconception. The glaze provides a professional glossy finish and slows moisture loss, but the berries are perfectly edible without it.
Can I use frozen strawberries for the topping?
No, stick with fresh. Frozen berries release too much moisture and bleed color into the cream; if you want a different berry treat, try these creamy summer dessert bites.
How do I fix strawberries that taste too tart?
Toss them in a small amount of granulated sugar. This balances the natural acidity and helps the berries blend better with the sweet pastry cream.
Failure Proof Strawberry Tart