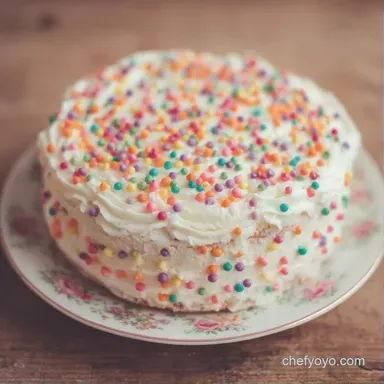
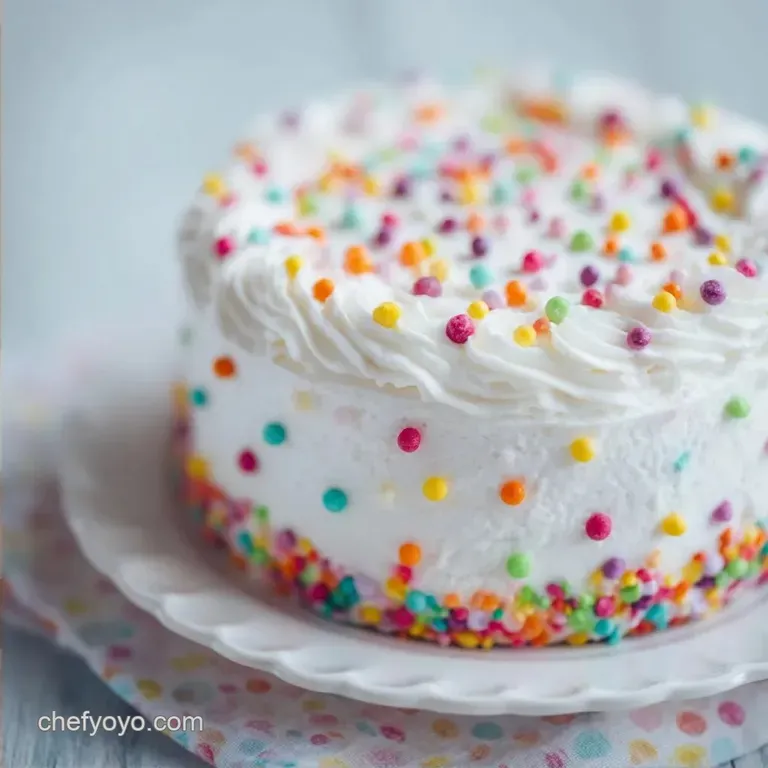
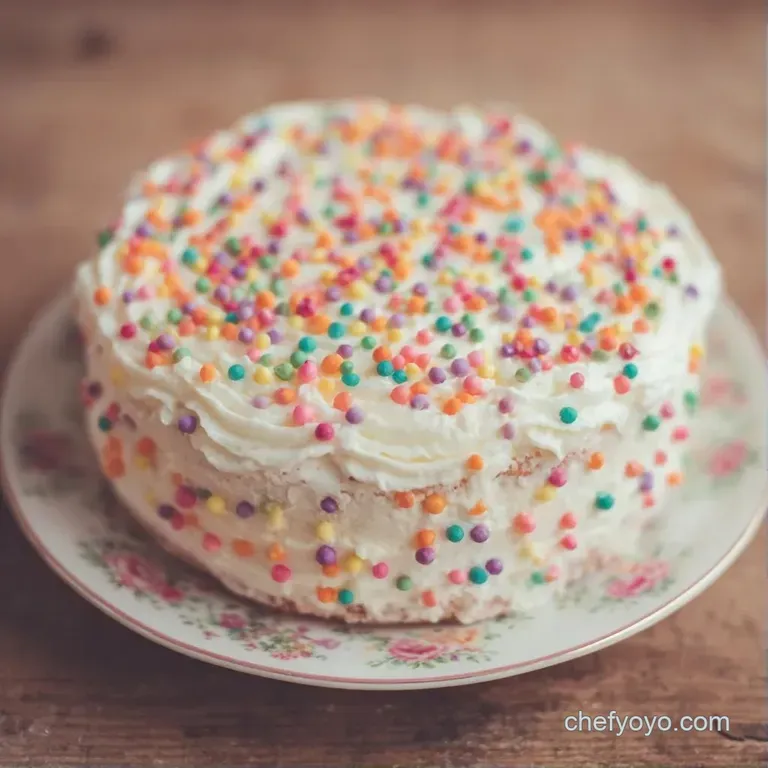
Festive Birthday Dot Cake: Buttery and Colorful
- Time: 15 min active + 130 min cooling/chilling
- Flavor/Texture Hook: Buttery vanilla sponge with a crisp, candy shell
- Perfect for: Kids' parties, colorful dessert platters, or beginner bakers
The smell of warm vanilla fills the kitchen, and there is a colorful pile of rainbow sprinkles waiting on the counter. I remember the first time I tried making these; I thought I had to bake tiny individual cakes, but that was a nightmare. The timing was off, and half of them came out like hockey pucks.
I shifted to a sheet cake method, and it changed everything. This Festive Birthday Dot Cake gives you that viral look without the stress of twenty different cake tins. It's basically a high reward, low stress way to make something that looks like it took hours.
You get small, handheld portions that look like little confetti bombs. It is a simple win for anyone who wants a showstopper on the table but doesn't actually have all day to spend in the kitchen.
Festive Birthday Dot Cake
Cold Cake: Chilling the sponge before cutting stops it from crumbling, which keeps those circles looking sharp.
Buttercream Grip: The fat in the frosting acts as the glue to hold the nonpareils in place.
Sheet Baking: Baking one large slab means the edges stay moist and the cutting process is much faster.
| Approach | Prep Effort | Texture | Best For |
|---|---|---|---|
| Fresh Homemade | Medium | Tender & buttery | Special birthdays |
| Box Mix Shortcut | Low | Spongy & light | Last minute parties |
What Each Ingredient Does
I like to understand why we use certain things. Unlike the soak in a Tres Leches cake, this cake relies on a stable crumb to hold the weight of the frosting and sprinkles.
| Ingredient | What It Does | Best Swap |
|---|---|---|
| All Purpose Flour | Provides the structure | Cake flour for a finer crumb |
| Unsalted Butter | Adds richness and tenderness | Margarine (though flavor drops) |
| Nonpareil Sprinkles | Creates the colorful "dot" shell | Sanding sugar for a subtle glint |
| Heavy Cream | Stabilizes the buttercream | Full fat coconut milk |
Shopping List Breakdown
For the vanilla sponge: - 280g all purpose flour Why this? Standard protein level for a sturdy but soft cake - 300g granulated sugar - 12g baking powder - 3g salt - 170g unsalted butter, softened Why this? Room temp butter creams better with sugar - 240ml
Whole milk, room temperature - 12ml pure vanilla extract - 2 large eggs, room temperature
For the stabilized buttercream: - 225g unsalted butter, softened - 420g powdered sugar, sifted - 30ml heavy cream Why this? Prevents the frosting from being too stiff - 5ml vanilla extract - 1g salt
For the finish: - 350g rainbow nonpareil sprinkles Why this? They are small enough to coat the cake densely
Equipment Needed
You don't need a professional kitchen for this. A standard 9x13 inch (23x33 cm) baking pan is the core of the operation. I highly recommend using parchment paper to line the pan, or you'll be fighting the cake to get it out.
The most important tool is a 3 inch circular biscuit cutter. If you don't have one, a wide mouth drinking glass can work, but the edges might be less crisp. A hand mixer or a stand mixer such as KitchenAid will make the buttercream much easier to whip.
The Cooking Process
Let's get into the flow. I find it's easiest to bake the cake first, let it chill, and then handle the decorating as a separate phase.
Phase 1: Baking the Base
- Preheat your oven to 175°C (350°F) and line a 9x13 inch baking pan with parchment paper.
- Cream the 170g softened butter and 300g granulated sugar together until the mixture looks pale and fluffy.
- Beat in the 2 eggs one at a time, then stir in the 12ml vanilla extract.
- Alternately add the dry ingredients (280g flour, 12g baking powder, 3g salt) and the 240ml milk to the butter mixture, mixing until just combined. Note: Overmixing here makes the cake tough.
- Spread the batter evenly in the prepared pan and bake for 25-30 minutes until a toothpick inserted in the center comes out clean.
- Allow the cake to cool completely on the counter, then chill in the refrigerator for 30 minutes.
Phase 2: Cutting and Frosting
- Use your 3 inch circular biscuit cutter to press straight down into the chilled sheet cake to create 8 uniform rounds.
- Whip the 225g buttercream butter until smooth.
- Gradually add 420g powdered sugar, 30ml heavy cream, 5ml vanilla, and 1g salt until the frosting is stiff but spreadable.
- Apply a generous layer of buttercream to the top and sides of each cake round.
Phase 3: The Nonpareil Coating
- Immediately press each frosted cake round into the 350g rainbow nonpareil sprinkles.
- Ensure the entire exterior is completely and densely coated until no frosting peaks are visible.
Fixing Common Cake Issues
The Festive Birthday Dot Cake is straightforward, but a few things can go sideways, especially with the frosting.
Troubleshooting Common Issues
| Issue | Solution |
|---|---|
| Why Your Cake Crumbles | If the cake falls apart when you use the cutter, it's usually because it was too warm. Warm cake is fragile. The 30 minute chill is not optional; it firms up the fats and makes the sponge stable. |
| Why Your Sprinkles Slide | Sprinkles slide when the buttercream is too soft or "soupy." If your kitchen is hot, the butter in the frosting melts, and the nonpareils will just slip off the sides. Keep the frosted rounds cool. |
| Why Your Frosting Separates | This happens when the butter and cream are at wildly different temperatures. Make sure your heavy cream is not ice cold when adding it to the whipped butter. |
Fun Flavor Ideas
While vanilla is the standard, you can easily tweak this. For a chocolate version, replace 30g of flour with cocoa powder. I've found that using dark chocolate sprinkles on a chocolate base looks very elegant.
If you want something more seasonal, try adding a pinch of cinnamon to the batter. You could also pair these with some Chocolate Crinkle Cookies for a full dessert spread.
Theme Color Palettes
Instead of rainbow sprinkles, try a monochrome look. Use only white and gold nonpareils for a wedding vibe, or blue and silver for a winter birthday. It changes the whole feel of the Festive Birthday Dot Cake without changing the recipe.
Adding a Filling
If you want to be fancy, slice each dot in half horizontally. Add a thin layer of jam or lemon curd before frosting the outside. Just make sure the filling doesn't leak out, or the sprinkles won't stick.
Adjusting the Batch Size
Scaling this recipe requires a bit of care because it's a sheet cake.
Cutting Down (1/2 Batch): Use an 8x8 inch square pan instead of the 9x13. Your baking time will likely drop by about 20%, so start checking for doneness at 20 minutes. Since you can't easily halve an egg, beat one egg in a bowl and use half of the liquid.
Scaling Up (2x Batch): Use two 9x13 inch pans. Do not try to put double the batter into one pan, or the center will stay raw while the edges burn. Increase the salt and vanilla by only 1.5x to avoid overpowering the flavor.
| If you want... | Do this... |
|---|---|
| More servings | Use a 2 inch cutter instead of 3 inch |
| Thinner cakes | Spread batter slightly thinner in the pan |
| Higher cakes | Increase flour and sugar by 20% |
Cake Myths
Sifting flour is not always mandatory, but for a Festive Birthday Dot Cake, it helps avoid lumps in the batter. Some say you must use a stand mixer, but a hand mixer works just fine as long as you cream the butter thoroughly.
Another common thought is that room temperature eggs are just a suggestion. In reality, cold eggs can curdle the creamed butter, leading to a grainy texture. Warm them in a bowl of lukewarm water for 5 minutes if you forgot to take them out.
Storage Guidelines
Keep these cakes in an airtight container. In the fridge, they stay fresh for about 4 days. The buttercream acts as a protective seal, which keeps the sponge from drying out.
For the freezer, wrap each dot individually in plastic wrap before placing them in a freezer bag. They last for up to 2 months. When you're ready to eat, let them thaw in the fridge overnight. Do not microwave them, or the buttercream will melt and the sprinkles will slide off.
To reduce waste, use any leftover cake scraps as a base for cake pops. Mix the crumbs with a bit of the remaining frosting, roll them into balls, and dip them in melted chocolate.
Great Serving Pairings
Since these are quite sweet, I like to serve them with something tart. A fresh raspberry coulis or a side of sliced Granny Smith apples cuts through the sugar.
The party platter approach is the way to go. Arrange the dots on a wooden board with fresh strawberries and mint leaves. It makes the Festive Birthday Dot Cake look like a professional catering spread.
For a drink, a cold glass of milk is a classic, but a tart lemonade or a sparkling water with lime works wonders to cleanse the palate between bites.
Recipe FAQs
How do you make a dot cake?
Bake a 9x13 sheet cake at 350°F for 25-30 minutes. After chilling for 30 minutes, cut rounds using a 3 inch cutter, frost with buttercream, and coat in rainbow nonpareil sprinkles.
What is the 4 day cake rule?
These cakes stay fresh for 4 days in the refrigerator. The buttercream acts as a protective seal that prevents the sponge from drying out.
Why does my cake crumble when using the cutter?
The cake was likely too warm. The 30-minute chill is mandatory because it firms up the fats and stabilizes the sponge for clean cuts.
Why are my sprinkles sliding off the frosting?
The buttercream is too soft or "soupy." In hot kitchens, the butter melts, causing the nonpareils to slip off the sides of the rounds.
Is it true I can microwave these cakes to thaw them from the freezer?
No, this is a common misconception. Microwaving melts the buttercream and ruins the sprinkle coating; thaw them in the fridge overnight instead.
How do I store leftover cake scraps?
Mix the crumbs with remaining frosting to make cake pops. If you enjoyed mastering the festive coating technique here, see how we apply similar dessert layering in our Cranberry Bliss Bars.
Can I make these cakes ahead of time?
Yes, wrap them individually in plastic wrap and freeze. They stay fresh for up to 2 months when stored in a freezer bag.
Festive Birthday Dot Cake