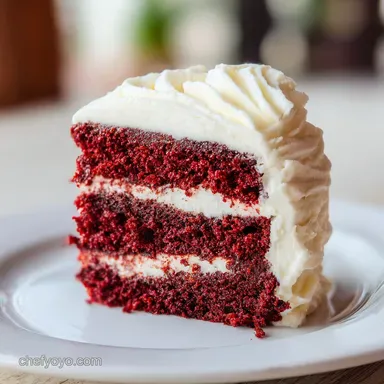
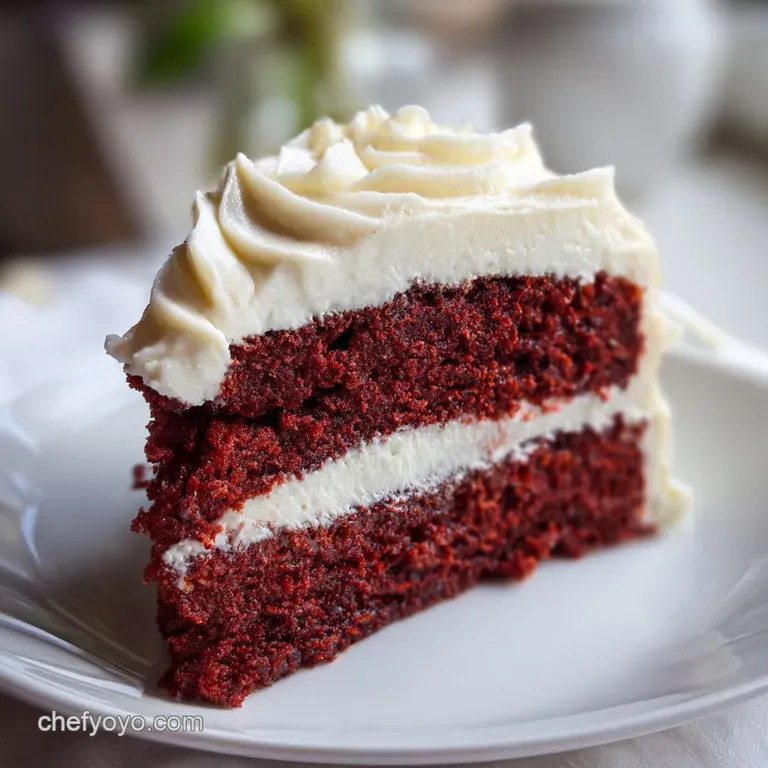
Red Velvet Cake: Moist and Tender
- Time: 15 min active + 30 min baking + 2 hours cooling = Total 180 mins
- Flavor/Texture Hook: Tangy, silky crumb with a velvety cream cheese finish
- Perfect for: Birthday parties, Valentine's Day, or a cozy weekend treat
The biggest tragedy in baking is the red velvet cake that looks like a bright red sponge but tastes like a rubbery eraser. I've seen it happen way too often, usually because the batter was overmixed or the acid balance was off, leaving you with a dense, gummy texture that just doesn't feel right.
You want that classic, soft feel that almost melts when it hits your tongue, not something you have to chew through.
The secret to fixing this is all in the chemistry of the buttermilk and the oil. Most people try to use butter for everything, but in this specific dish, oil is the real hero. It keeps the sponge moist even after a few days in the fridge, and when paired with the right amount of vinegar, it creates a lift that is airy yet substantial.
This red velvet cake recipe is designed to be straightforward and affordable. We aren't using expensive specialty flours or rare extracts here, just wholesome pantry staples. You'll get a deep, rustic color and a tangy flavor profile that cuts right through the richness of the cream cheese frosting.
The Best Red Velvet Cake Recipe
Right then, let's get into the details. The first thing you'll notice about this version is the balance. Many cakes are just "chocolate cake with red dye," but a true red velvet should have a distinct tang and a silky, tight crumb.
By using a specific ratio of cocoa to flour, we ensure the chocolate doesn't overpower the velvet feel.
I remember one time I tried to skip the vinegar because I thought it would make the cake taste sour. Big mistake. The cake didn't rise properly and ended up feeling like a thick pancake. Trust me on this, the vinegar is non negotiable.
It reacts with the baking soda to create those tiny air bubbles that make the cake feel light.
If you're looking for other decadent desserts to pair with this, my Chocolate Crinkle Cookies recipe are a fantastic companion for a dessert platter. Both bring that rich, chocolatey vibe but with completely different textures.
Why the Texture Works
When you're making this red velvet cake recipe, a few invisible things are happening in the bowl to make it work.
- Acid Base Spark: The baking soda reacts instantly with the buttermilk and vinegar, creating carbon dioxide bubbles that lift the batter.
- Oil Hydration: Unlike butter, oil stays liquid at room temperature, which means the cake feels moist even when chilled.
- Cocoa Interaction: A small amount of cocoa powder provides flavor without interfering with the bright red color or the structure.
- Protein Softening: The acidity in the buttermilk breaks down some of the gluten in the flour, preventing that "rubbery" feel.
| Method | Time | Texture | Best For |
|---|---|---|---|
| Fresh Buttermilk | 180 mins | Silky & Tangy | Traditional celebrations |
| Milk + Lemon Swap | 180 mins | Slightly denser | Quick pantry bakes |
| Oil based Sponge | 180 mins | Ultra moist | Fridge storage |
The Ingredient Breakdown
I like to think of the ingredients as a team. If one person doesn't show up or does their job wrong, the whole thing falls apart. For instance, if your eggs are cold, they won't incorporate with the oil, and you'll end up with little pockets of unmixed fat.
Component Analysis
| Ingredient | Science Role | Pro Secret |
|---|---|---|
| Buttermilk | Tenderizer | Use room temp to prevent batter splitting |
| Baking Soda | Leavening | Sift it to avoid bitter clumps in the sponge |
| Vegetable Oil | Moisture | Don't swap for butter if you want that velvety feel |
| Vinegar | Activator | Essential for the "lift" and a bright color |
Necessary Baking Gear
You don't need a professional kitchen to pull this off, but a few tools make it way easier. I usually use a stand mixer such as a KitchenAid for the frosting, but a hand mixer works just fine too. The most important thing is having two 9 inch round pans.
If you only have one, you'll have to bake in batches, which can make the batter sit too long and lose some of its bubbles.
I always recommend lining the bottom of the pans with parchment paper. I've had too many cakes shatter when trying to flip them out of the pan, and it's a heartbreak you just don't need. A simple piece of greaseproof paper is like an insurance policy for your dessert.
Step-by-step Baking Guide
Let's crack on with the actual process. Take your time with the mixing, and pay attention to the visual cues.
For the Velvet Sponge
- Preheat your oven to 175°C (350°F). Grease two 9 inch round cake pans and line the bottoms with parchment paper. Note: Preheating ensures the cake starts rising the second it hits the heat.
- Whisk together 310g all purpose flour, 300g granulated sugar, 5g baking soda, 2g salt, and 15g unsweetened cocoa powder in a large bowl.
- In a separate bowl, beat 350ml vegetable oil and 2 large eggs until smooth.
- Stir in 240ml room temperature buttermilk, 15ml white distilled vinegar, 5ml vanilla extract, and 30ml red food coloring until the mixture is consistent.
- Gradually pour the wet ingredients into the dry ingredients. Mix on medium low speed just until combined; stop immediately when no flour streaks remain. Note: Overmixing here is what leads to that rubbery texture.
- Pour the batter evenly between the two prepared cake pans.
- Bake for 30 minutes until the center springs back when lightly touched and a toothpick comes out clean.
- Let the cakes cool in the pans for 10 minutes before flipping them onto a wire rack to cool completely.
For the Tangy Cream Cheese Frosting
- Beat 450g softened full fat cream cheese and 115g softened unsalted butter until the mixture is velvety and pale.
- Gradually add 500g sifted powdered sugar, 5ml vanilla extract, and a pinch of salt. Beat on high for 2 minutes until the frosting looks fluffy and holds its shape.
Chef's Note: If your frosting feels too soft, pop it in the fridge for 15 minutes before piping. It'll make the edges much sharper.
Fixing Common Cake Issues

Even the best of us hit a snag now and then. With a red velvet cake recipe, the most common issues usually come down to temperature or mixing time. If your cake is too dense, you likely overworked the flour, which developed too much gluten.
Why Your Cake Sank
This usually happens because the oven door was opened too early, letting out the heat, or the baking soda was expired. When the structure hasn't set yet, a sudden drop in temperature causes the air bubbles to collapse.
Why Your Frosting Is Runny
This is almost always because the butter or cream cheese was too warm. If they are melting while you beat them, the frosting won't hold its peak.
| Problem | Root Cause | Solution |
|---|---|---|
| Gummy Crumb | Overmixing batter | Mix only until flour disappears |
| Dry Edges | Oven too hot | Use an oven thermometer to verify 175°C |
| Frosting Splits | Ingredients cold | Let butter/cheese reach true room temp |
Common Mistakes Checklist
- ✓ Sifted the powdered sugar to avoid lumps
- ✓ Used room temperature buttermilk and eggs
- ✓ Stopped mixing the moment flour streaks vanished
- ✓ Cooled cakes completely before frosting
- ✓ Used full fat cream cheese for stability
Fun Flavor Twist Ideas
While the classic version is hard to beat, I love playing around with the flavor profile. If you want something with a bit more depth, try adding a teaspoon of espresso powder to the dry ingredients. It doesn't make it taste like coffee, but it makes the cocoa flavor pop.
For those who want a more rustic, fruity vibe, you could add a layer of fresh raspberries between the sponges. The tartness of the berries complements the cream cheese perfectly. This actually reminds me of the flavor balance in a Hummingbird Cake, where the fruit and frosting work together to keep things from being too sweet.
Making it Eggless or dairy-free
If you're looking for an eggless red velvet cake recipe, you can substitute the eggs with a "flax egg" (1 tbsp ground flaxseed + 3 tbsp water per egg). It adds a slightly nuttier flavor but keeps the moisture. For a version without buttermilk, you can make a quick substitute by adding 1 tablespoon of lemon juice to 1 cup of whole milk and letting it sit for 5 minutes. According to King Arthur Baking, this mimics the acidity needed for the leavening process.
Adjusting the Batch Size
Depending on the occasion, you might not need a massive double layer cake. Here is how to handle the math.
Scaling Down (Half Batch) If you're using 6 inch pans, just halve everything. For the eggs, beat one egg in a small bowl and use exactly half of it by weight. Reduce the baking time by about 20% and start checking for doneness at 20 minutes.
Scaling Up (Double Batch) When doubling, don't just double the salt and baking soda increase them by about 1.5x instead to avoid a metallic aftertaste. I suggest working in batches for the frosting so you don't overload your mixer.
If you're baking more layers, lower the oven temperature to 160°C and extend the time slightly to ensure the middle cooks through without burning the edges.
| Component | Single Layer | Double Layer | 3 Layer Party |
|---|---|---|---|
| Flour | 310g | 310g (shared) | 465g |
| Sugar | 300g | 300g (shared) | 450g |
| Prep Time | 15 mins | 15 mins | 25 mins |
Debunking Baking Myths
There are a lot of old wives' tales about red velvet. Let's clear a few things up.
One big myth is that red velvet is just chocolate cake with food coloring. That's not true. The specific combination of buttermilk, vinegar, and cocoa creates a different chemical structure and a distinct flavor that is tangier and more "velvety" than a standard cocoa cake.
Another one is that you must use a specific "red velvet" cocoa powder. You don't. Any standard unsweetened cocoa powder works perfectly. The color comes from the food coloring and the reaction of the acid, not a special type of chocolate.
Storage and Waste Tips
To keep your cake from drying out, I recommend storing it in an airtight container in the fridge. Because of the cream cheese frosting, this cake must be refrigerated. It stays fresh and silky for about 5 days.
If you can't finish it all, this cake freezes beautifully. Wrap individual slices in plastic wrap and then foil. When you're ready to eat, let them thaw in the fridge overnight. To reheat a slice, I usually pop it in the microwave for about 10-15 seconds just to take the chill off without melting the frosting.
As for zero waste, don't throw away any leftover frosting! You can swirl it into a bowl of fresh strawberries or use it as a dip for apple slices. If you have a few scraps of cake left over, crumble them up, mix with a bit of extra frosting, and roll them into cake pops.
It's a great way to make the ingredients stretch further.
Serving Your Cake
When it comes to serving, temperature is everything. While the cake needs to stay in the fridge, I find that the flavors are much more vibrant if it sits at room temperature for about 30 minutes before slicing. The butter in the frosting softens, and the sponge becomes more tender.
For a clean slice, dip your knife in hot water and wipe it dry between every single cut. This prevents the frosting from smearing into the red layers, giving you those sharp, professional looking slices.
If you're serving this for a party, a few fresh berries on top or a dusting of cocoa powder adds a nice rustic touch. It's a simple way to make the dish feel more special without spending more money.
This red velvet cake recipe is all about that balance of simple ingredients and smart techniques, resulting in a treat that feels truly wholesome and artisanal.
Recipe FAQs
What's the secret to red velvet cake?
The chemical reaction between buttermilk, vinegar, and cocoa. This creates the signature tender crumb and subtle tang. If you enjoyed balancing these acidic notes here, see how the same principle works in our creamy garlic sauce.
What are the main ingredients of red velvet cake?
Flour, sugar, cocoa powder, buttermilk, vegetable oil, and red food coloring. The recipe also requires cream cheese, butter, and powdered sugar for the frosting.
Is red velvet really just chocolate cake with red dye?
No, this is a common misconception. While it contains cocoa, the specific addition of buttermilk and vinegar alters the chemistry and flavor, making it distinct from standard chocolate cake.
How to freeze red velvet cake for later?
Wrap individual slices in plastic wrap and then foil. Thaw them in the fridge overnight and microwave for 10-15 seconds to remove the chill without melting the frosting.
How to mix the batter without overworking it?
Mix on medium low speed just until combined. Stop immediately when no flour streaks remain to prevent the cake from becoming tough.
How to ensure the cake is baked perfectly?
Bake at 350°F (175°C) for approximately 30 minutes. Check for doneness with a toothpick to ensure the center is set without drying out the edges.
Should red velvet cake be stored on the counter?
No, it must be refrigerated. Because of the cream cheese frosting, an airtight container in the fridge is necessary to keep it fresh and silky for up to 5 days.
Red Velvet Cake Recipe