Rustic Rye Bread – a Wholesome Loaf for Every Table
- A Slice of Comfort: Whipping Up Rustic Rye Bread
- The Heart of Rye
- Why You’ll Fall for This Bread
- Essential Ingredients Guide: The Secret to Flavorful Cooking
- Mastering the Professional Cooking Method: Your Ultimate Guide
- The Secret to Homemade Rye Bread – More than Just Dough
- Frequently Asked Questions
- 📝 Recipe Card
A Slice of Comfort: Whipping Up Rustic Rye Bread
Picture this: it's a chilly sunday afternoon. the leaves are starting to turn, and i’ve got this craving for something warm, comforting, and oh-so-hearty.
You know that kind of craving? i mean, you could go for takeout, but there's nothing quite like the smell of homemade bread baking in the oven.
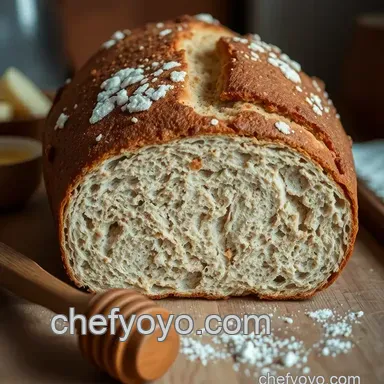
So, i rolled up my sleeves and decided to whip up some rustic rye bread . trust me, it’s like a warm hug in loaf form!
Right from the first mix of the dough, i was reminded why recipes for rye bread hold such a special place in my heart and in many kitchens across america.
There’s just something about that tangy flavor combined with its chewy texture that makes it so darn satisfying. plus, it’s a nod to its eastern european roots , where they’ve been perfecting it for centuries.
So whether you’re stacking it high with pastrami or slathering it with butter, it’s a definite winner.
The Heart of Rye
Let’s talk history for a sec. this bread dates back to ancient times, mainly crafted in regions like germany and russia.
Folks back then knew a thing or two about using local grains, and rye was abundant. fast forward to today, and it’s made a major comeback in artisanal bakeries everywhere.
People are realizing that this rustic, hearty bread pairs perfectly with wines and soups, making it a staple for gatherings or cozy dinners at home.
Now, don’t fret this recipe isn’t some top chef level complex like those fan-favorite pecan hand pies . it’s got a medium difficulty level , which just means you’ll need a little patience.
With about 2 hours and 55 minutes from start to finish (including cooling), you’ll be rewarded with a loaf that’s as lovely as it is tasty.
And let's be real, how much are you willing to fork over for store-bought? this one's cost effective, too, yielding about 8 to 10 slices for your crew or for you to hoard in your pantry!
Why You’ll Fall for This Bread
Okay, let’s get into the good stuff. one of the most beautiful things about rustic rye bread is its health benefits.
Packed with fiber thanks to that rye flour, it’s going to keep your tummy happy. it’s also lower in gluten compared to regular bread, which can be beneficial for those looking to ease their digestion without giving up carbohydrates entirely.
Plus, it’s a great fit for special occasions think holiday dinners or sunday brunch. slap some hearty toppings on it, and you’ll have guests swooning! and let’s be real here, it totally beats those overly sweet oreo cookie truffles at your next potluck.
Honestly, who doesn’t love a good slice of homemade goodness?
Now, don't forget those little perks you won’t find in other bread recipes. unlike the standard baguette or sandwich bread, this rye has a distinct taste and texture that stands out.
You can easily jazz it up with add-ins like caraway or sunflower seeds, giving it that extra something special.
So enough chit chat! let’s get ready to dive into the ingredients so you can make this soul nourishing rustic rye bread yourself.
You’ll find it easy to throw together, and your kitchen will smell divine even if it means putting off that netflix binge just a bit longer.
Essential Ingredients Guide: The Secret to Flavorful Cooking
Cooking at home can be a joyful adventure, especially when you have the right ingredients at your fingertips! let’s take a close peek at the essential components you need to level up your dishes, be it for those delicious recipes for rye bread or any of your favorite bake goods to sell .
We want the best flavor, texture, and freshness in everything we whip up. so, let’s dive in!
Premium Core Components
When starting any recipe, the quality of your ingredients can make or break your dish. for measuring, you’ve got to have both us & metric jotted down.
I once made a cake without checking the grams, and oh boy, it turned out to be a slapstick dessert.
Looking for quality indicators? freshness is key! check for bright colors and firm textures. have you ever been to a farmers' market? that’s where you can spot quality ingredients.
And don’t forget the storage guidelines: most spices sit about 1-3 years depending on the type. store them in a cool, dark place .
Signature Seasoning Blend
Ah, the magic of spices! think about those signature seasoning blends that elevate your home cooked meals from bland to grand.
Grab a mix of smoky paprika, garlic powder, and cumin to create a flavor explosion. or you can stick to a classic like italian herbs you know, basil, oregano, and a pinch of rosemary.
Always consider regional variations too. Southern cooking? Add some cayenne for that kick. Making some decadent Pecan Hand Pies ? Toss in a hint of cinnamon for warmth.
Smart Substitutions for Pantry Perks
Let's be honest; we’ve all been there. halfway through a recipe, you realize you’re out of something crucial. no worries, i feel you! most recipes can handle some smart substitutions .
If you're out of yeast , you can try baking soda with a bit of acid. got almond milk instead of dairy? perfect for a vegan baking scenario!
Remember seasonal options too! use fresh herbs in spring and pumpkin puree in the fall. the beauty of cooking is adapting and experimenting, much like whipping up oreo cookie truffles on a whim when the sweet tooth strikes.
Kitchen Equipment Essentials
Okay, let’s talk tools! you don’t need the fanciest gadgets, but some must have tools will keep your kitchen running like a well oiled machine.
A mixing bowl ? absolutely essential. a good wooden spoon ? you can’t go wrong. and don’t skimp on a kitchen scale if you’re serious about your bread game.
For smaller tasks, you may even find alternatives lurking in your drawers! That old mason jar can double as a measuring cup in a pinch! Oh, and always have a clean towel handy it's a game changer for rising dough!
Wrap Up
By understanding these essential building blocks, you can tackle even the most complex recipes with ease and confidence. Combine quality ingredients with the smart substitutions and the right tools, and you’ll be ready to bake up a storm!
So, whether it’s preparing that homemade rye bread to go with your favorite spread or crafting luscious bake goods to sell , you’re now armed with the insider tips to kick your kitchen skills up a notch.
And with that, let’s roll into the instructions for that delightful Rustic Rye Bread , shall we? You'll want to gather everything and get ready to knead your way to bread making bliss!
Mastering the Professional Cooking Method: Your Ultimate Guide
Cooking is more than just a chore; it can be an art form! sure, we all know that feeling of throwing together a quick meal, but there's something special about taking the time to follow professional cooking methods.
Trust me, once you get the hang of it, your dishes will shine like a star on broadway!
Essential Preparation Steps
Before diving into any recipe especially for hearty delights like homemade rye bread you’ll want to go the extra mile to get organized.
Enter the magical world of mise en place . this french term simply means “everything in its place.” so, gather your ingredients, measure them out, and get your tools ready.
It saves you from that frantic scramble mid-recipe. can we say, “pro-level”?
Now let’s talk time management . set a timer, people! if a recipe says to let your yeast rise for about 60- 90 minutes , don’t just guess.
Use a timer. honestly, it makes your life easier and allows you to multitask. that means while your dough is rising, you can slip out and grab the ingredients for some pecan hand pies or whip up a quick batch of oreo cookie truffles !
Organization strategies can also help. Create a clean workspace. Clutter can lead to mistakes, and nobody wants that when you’re baking goods to sell or impress your dinner guests.
And let's not forget about safety considerations . Make sure your area is safe and clean. Wash your hands, use a clean cutting board, and always keep sharp knives away from places where they can slide off! You want to avoid a trip to the ER while preparing your next loaf of outback bread !
Step-by-step Process
Here comes the fun part. Let’s break it down!
- Mix Dry Ingredients : In a large bowl, combine your flours, salt, and instant yeast.
- Combine Wet Ingredients : In another bowl, whisk your warm water (aim for 40° C/ 105° F ), honey, and oil until mixed.
- Form the Dough : Pour the wet mixture into the dry and stir! You want a shaggy dough, nothing fancy here.
- Knead the Dough : Time for some elbow grease! Knead it on a floured surface for about 8- 10 minutes until it’s smooth.
- First Rise : Place your dough in a greased bowl, cover it, and let it rise for 60- 90 minutes .
Keep an eye on it the dough should double in size. 6. shape the loaf : punch it down (a great stress reliever) and shape it.
You can either put it in a loaf pan or go freeform. 7. second rise : cover and let it rise for an additional 30- 45 minutes .
8. preheat the oven : at this point, crank the oven to 220° c ( 428° f) . 9. bake the bread : bake for about 35- 40 minutes , and listen for that hollow sound when you tap the bottom.
10. cool : let your creation cool on a wire rack don’t rush; it’ll be worth it!
Expert Techniques
Now, if you’re looking to add a professional touch to your rye bread recipes , consider adding some caraway seeds or sunflower seeds.
It’s these little seasonal touches that can elevate your bread!
Remember quality checkpoints. Take a moment to pull out a toothpick or knife and check the center of your bread. If it comes out clean, you're golden!
Troubleshooting tips : If your dough isn’t rising, check that your yeast is fresh. Sometimes, even a good recipe falls flat if you don’t use good ingredients.
Success Strategies
Let’s not make the same mistakes that we all do, like not checking ingredient freshness! use fresh yeast, and if you see anything funky, toss it.
Also, water matters. rye flour can absorb more liquid, so don’t hesitate to adjust if your dough feels too dry.
For a quality assurance tip, keep a kitchen scale handy. Precise measurements mean a happy loaf not a brick!
If you need to prepare for a dinner party, think of make-ahead options . You can freeze this bread! Just slice it up and pop it in the freezer. Easy peasy!
Now that you’ve got a handle on the basics, how about we dive deeper?
Additional Information
Cooking is a journey, and there's always something new to learn especially when you're whipping up delicious recipes for rye bread! Whether you’re diving into vegan baking recipes or figuring out the best way to make your own bread from scratch, keep experimenting! Happy cooking!
The Secret to Homemade Rye Bread More than Just Dough
Making bread is like unleashing a little magic in your kitchen. seriously, there’s something about mixing simple ingredients like flour, water, and yeast that can make your home smell divine.
Today, i'm diving into my rustic rye bread recipe with tons of tips and tricks! i promise it’s easier than ordering take out.
So grab your apron, and let’s get baking!
Pro Tips & Secrets
Oh boy, let’s talk pro tips , shall we? first off, fresh ingredients are key. if your yeast is older than your last birthday, toss it! you want that yeast to be full of life to ensure your bread rises beautifully.
To save time, consider making a double batch ! you can freeze one loaf for later. just wrap it tightly in plastic wrap, then pop it in a freezer bag.
When you're ready, let it thaw in the fridge overnight and pop it in the oven for a quick revive!
Want to enhance flavors ? try adding some caraway seeds or sunflower seeds to your dough. the subtle nuttiness adds a nice twist.
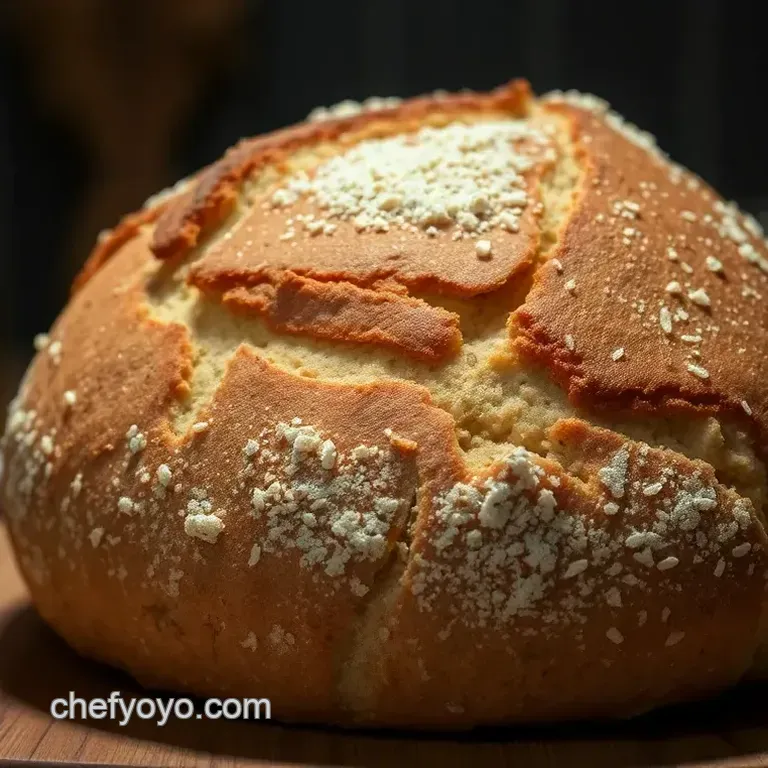
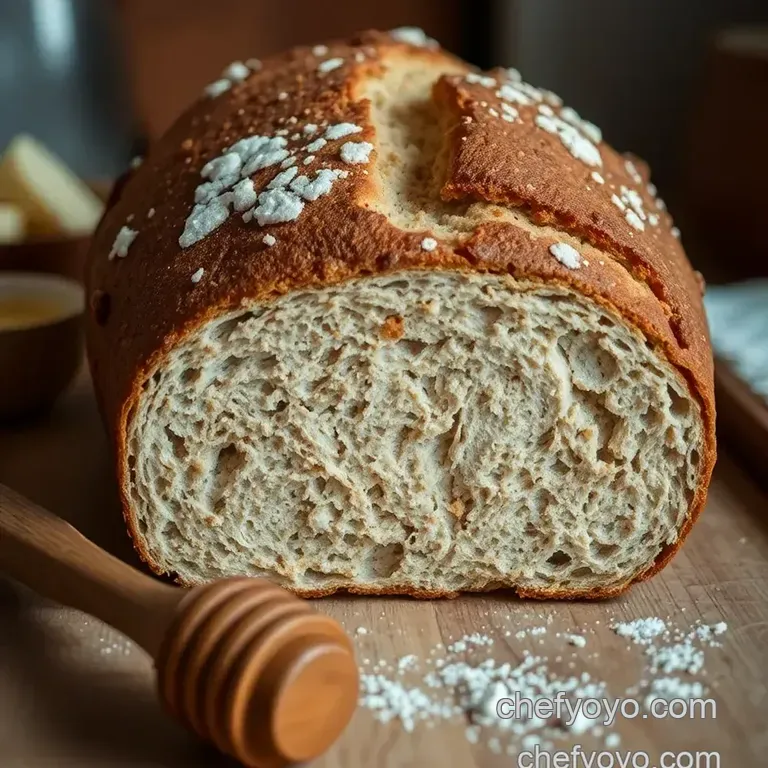
As for presentation, nothing beats a good dusting of flour on top before baking. it gives your loaf that rustic, “i just pulled this from a wood fired oven” vibe.
Perfect Presentation
Speaking of presentation, let’s not skip this step! the way you plate your rustic rye bread can really make it pop.
Always slice the bread after it has fully cooled not only for those perfect bread selfies, but it prevents your loaf from getting gummy.
Consider a simple garnish with a sprinkle of sea salt or even a handful of herbs like rosemary. For color combos , how about pairing that dark rye with some bright red cherry tomatoes and a drizzle of olive oil? Your friends and family will think you’ve taken a culinary course or two!
Storage & make-ahead
Now, let’s chat storage. store your homemade rye bread at room temperature in a kitchen towel . this keeps it soft.
If you think it won’t be eaten within a few days, wrap it in plastic and freeze. trust me; frozen bread can last up to 3 months and still taste just as delightful when reheated.
For reheating, you can pop a slice in the toaster or warm it in the oven for 5- 10 minutes at 350° F . Golden perfection every time!
Creative Variations
Feeling adventurous? let’s get creative with some variations ! if you're a fan of sweet flavors , you can mix in a touch of molasses for a twist.
Or go seasonal how about pumpkin seeds in the fall or a sprinkle of rosemary during the holidays?
For dietary modifications, you could easily transform this into a gluten-free flavor bomb by using a gluten-free flour mix. Just keep an eye on that water ratio it’s a little different with gluten-free baking!
Complete Nutrition Guide
So, what's in this wholesome loaf? each slice offers around 190 calories packed with 6g of protein and 4g of fiber .
That's a win in my book! plus, rye flour is known to have lots of health benefits, like helping digestion and keeping you full longer.
Honestly, when bread tastes this good, it feels even better knowing it’s healthy ish .
But let’s be real; nobody's counting calories when you’re slathering on some butter or making Pecan Hand Pies with your leftovers. Try to indulge, but you know, in moderation!
Wrap-Up
There you have it, folks! whipping up a loaf of rustic rye bread isn’t just for the pros. with these tips, you'll be baking bread that's good enough to share or keep all to yourself! try it out, give it a twist, and maybe serve it up with a side of oreo cookie truffles for dessert.
Trust me, your taste buds will thank you!
So roll your sleeves up, and remember: great things take time. whether you're preparing for a dinner party or just keeping the house smelling amazing, this place will be your new favorite hangout.
Happy baking!
Frequently Asked Questions
What are some common recipes for rye bread?
Common recipes for rye bread can vary widely, but a classic one is the Rustic Rye Bread we’ve featured, made with both bread and rye flours. You might also try pumpernickel, which incorporates coarsely ground rye for a denser loaf, or a simpler soda bread variation if you’re short on time.
Each recipe brings out the distinct, hearty flavors unique to rye!
How can I ensure my rye bread rises properly?
To ensure your rye bread rises well, make sure you’re using fresh yeast and providing enough warmth for fermentation. Rye flour absorbs more water than wheat, so adjusting hydration levels in your dough can make a significant difference.
Also, be patient during the rising stages; a warmer environment, like your kitchen in the summer, can be ideal!
What should I serve with rye bread?
Rye bread pairs beautifully with sharp cheeses like cheddar or creamy spreads such as goat cheese. It’s also fantastic with hearty soups, particularly beetroot or potato soup.
You could even load it up with your favourite sandwich fillings for a more substantial meal think smoked salmon and dill or pastrami and mustard!
Can I freeze rye bread, and how should I store it?
Absolutely! You can freeze rye bread to keep it fresh for up to 3 months. Just slice it beforehand, wrap it tightly in plastic wrap or foil, and then place it in a freezer bag. For short term storage, wrap the bread in a kitchen towel to maintain moisture and place it in a bread box or simply on the counter for up to a week.
What nutritional benefits does rye bread have?
Rye bread is generally higher in fiber than regular white bread, which aids digestion and helps you feel fuller for longer. It also contains important nutrients such as B vitamins, iron, and magnesium. Plus, the complex carbohydrates in rye may help stabilize blood sugar levels, making it a healthier option for many.
Can I try any variations of this rye bread recipe?
Definitely! You can add seeds like caraway or sunflower for an extra flavor punch, or substitute molasses for honey for a deeper, richer taste. If you want a gluten-free option, you can experiment with a gluten-free flour blend; just keep in mind that you may need to tweak the amount of water used to get the right consistency.
Rustic Rye Bread A Wholesome Loaf For Every Tabl