Bone Broth: the Essential Golden Elixir Recipe
- The Pursuit of Culinary Gold: Why Mastered Bone Broth is Essential
- Unlocking Maximum Umami: The Science of Great Bone Broth
- Essential Components: Sourcing the Best Foundation for Your Broth
- The Slow Art of Simmering: Detailed Method for the Liquid Gold
- Troubleshooting and Refining: Perfecting Your Bone Broth
- Preserving Your Batch: Safe Storage and Freezing Methods
- Integrating Your Culinary Base: Beyond the Sipping Cup
- Recipe FAQs
- 📝 Recipe Card
The Pursuit of Culinary Gold: Why Mastered Bone Broth is Essential
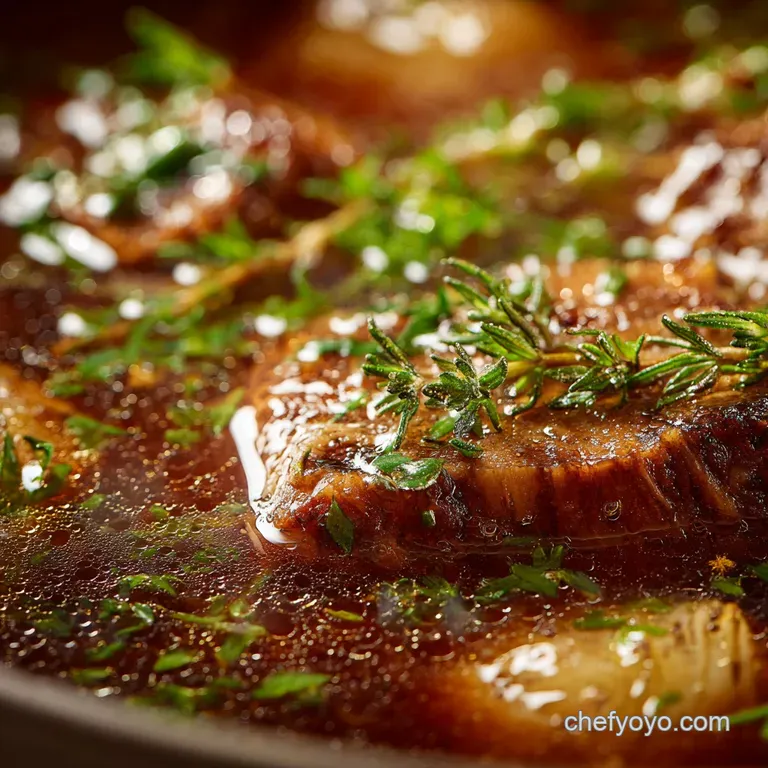
When that deeply savory, almost hypnotic scent starts to drift through the house a low, rumbling promise of deep nourishment you know you've got liquid gold simmering.
That aroma is the hallmark of proper, slow cooked Bone Broth , a culinary staple that transforms simple home cooking into something magnificent. Forget those watery, flavorless cartons you grab at the supermarket; we are chasing the real deal: a viscous, wobbly elixir packed with essential nutrients and flavor.
I’m serious when I tell you that mastering this technique changed my entire approach to the kitchen. It’s not a fast process, but it is incredibly passive, cheap, and undeniably essential for building flavor depth in everything from sauces to simple sipping cups.
Think of it as a low-effort, high reward kitchen cheat code.
If you’ve ever wondered why your homemade soups taste "fine" instead of "phenomenal," the answer is often the base. This step-by-step guide cuts through the noise, offering my hard won secrets for achieving the ultimate, deeply gelatinous, clear, and perfectly balanced homemade Bone Broth .
We're going to dive into the real mechanics now, so grab your biggest stockpot and let's get simmering.
Unlocking Maximum Umami: The Science of Great Bone Broth
This isn't just about throwing some bones in water and hoping for the best. Making truly incredible Bone Broth is a science project, but a fun one that results in unbelievable flavor.
We need to understand why we simmer for so long and how to achieve that gorgeous, signature jiggle.
Defining the Gelatinous Difference: Broth vs. Thin Stock
You hear the terms "broth" and "stock" thrown around interchangeably, but they are absolutely not the same thing. Stock is usually cooked for a shorter period, maybe four to six hours, often focusing primarily on flavor extraction from meat and aromatics.
Bone Broth , however, is simmered for an extended time often 18 to 24 hours specifically to break down collagen and connective tissue into gelatin.
That extraction is the key difference; it’s what gives the final liquid body, richness, and that coveted jiggle when chilled. If it doesn't wobble, it's just sad, thin stock.
The Time Commitment: Why a 12 to-24 Hour Simmer Matters
Patience, my friend, is non-negotiable here. Twelve hours is the bare minimum required to leach the minerals and protein out of those dense bones and connective tissues. If you cut the time short, you end up with good, but not great, liquid.
The real magic happens between hours 18 and 24, especially when making robust Bone Broth . This extended, gentle process is the only way to ensure maximum collagen extraction, turning cartilage into the glorious gelatin that makes your mouth water.
The Health Secrets Locked in the Marrow and Collagen
Why do people rave about Bone Broth benefits? It’s simple: collagen. When that connective tissue breaks down, it releases gelatin, which is loaded with amino acids. These aren't just great for making creamy sauces; they are incredibly restorative.
We're talking about a powerhouse of deeply nourishing goodness, all because we were patient enough to let the chemistry happen.
Collagen Conversion: Achieving That Signature Jiggle (Gelatin)
The sign of success in homemade Bone Broth is the chill test. Once refrigerated, your liquid should set up, becoming thick and jiggly. If it’s still thin and watery after a night in the fridge, you missed the mark.
Tip: The best way to ensure maximum gelatin extraction is to use plenty of structural bones, like knuckles, feet, or joints, which are rich in cartilage. If you nail this, your chilled Bone Broth will be almost solid.
The Maillard Reaction: Roasting the Bones for Deep Flavour Notes
This is the most critical step many beginners skip, and it makes all the difference. Roasting the bones for 45 minutes until they are deeply brown isn't just for colour; it's the Maillard Reaction at work. This high heat caramelization creates hundreds of new flavour compounds.
If you skip roasting, your Bone Broth will taste clean, perhaps, but ultimately flat and lacking the profound savory depth we are aiming for. Roasting is the secret sauce that transforms your broth from pale to profoundly golden.
The pH Balance: Why Acid (Vinegar) Helps Maximize Extraction
I know it sounds weird to dump vinegar into a pot you're simmering for 24 hours. But trust me on this one: the small amount of acid, like Apple Cider Vinegar (ACV), is absolutely essential. It helps break down the structural materials of the bones and connective tissues.
Think of it as a gentle nudge to the chemistry, helping to leach those valuable minerals and collagen out of the marrow and into the liquid. You won’t taste the acid in the final, complex Bone Broth , but you would certainly notice its absence in the extraction.
Essential Components: Sourcing the Best Foundation for Your Broth
You can’t make gold out of gravel, right? The quality of your ingredients dictates the quality of your finished product. A proper foundation is the start of any incredible Bone Broth .
Selecting the Optimal Structure: Knuckles, Joints, and Feet
Don't be shy; ask your butcher for the boney parts most people ignore. We are looking for high collagen content, so knuckles, joints, and especially feet (if you can get them) are your best friends. They contain the highest concentration of connective tissue, guaranteeing that beautiful, thick gelatin we want.
A mixture of marrow bones (for flavour) and joint bones (for gel) creates the perfect balance for deep flavour and texture in your Bone Broth .
The Aromatic Trinity: Mirepoix and Fresh Herb Bundles
We call the combination of carrots, celery, and onions "mirepoix," and it’s the standard aromatic base. Crucially, leave the skin on the onions! The papery, outer layers contain natural pigments that deepen the beautiful golden hue of the broth.
I use herb bundles sparingly thyme and bay leaves are classic but I stick to the parsley stems . The leaves can impart a slight bitterness after a 24 hour simmer, and we want none of that in our perfect Bone Broth .
Water Quality and Mineral Content Considerations
If your tap water tastes bad, guess what? Your Bone Broth will taste bad. Use cold, filtered water if possible. Starting with cold water is non-negotiable, too.
It allows the temperature to rise slowly, which is necessary for the proteins and impurities to coagulate at the top, making the crucial skimming process much easier and guaranteeing a clear broth.
Ingredient Swaps: Customizing Your Elixir Base
Need to adjust based on what you have? That’s totally fine. Here are my favorite substitutions for a high-quality broth:
| Ingredient | Substitute/Alternative | Notes |
|---|---|---|
| Knuckle Bones (Structural) | Pork trotters, poultry feet, or neck joints | Focus on structural joints for max gelatin. |
| Apple Cider Vinegar | White wine vinegar or 1 tbsp lemon juice | Any acid will help, but ACV is mildest. |
| Carrots/Celery | Parsnips and leeks | Adds sweetness and aromatic complexity. |
| Parsley Stems | Cilantro stems (for an Asian profile) | Skip the leaves stems only for long simmers. |
The Slow Art of Simmering: Detailed Method for the Liquid Gold
This is where the magic happens. Follow these steps meticulously, and you will achieve spectacular results and the deepest, most restorative batch of Bone Broth you've ever made.
Ingredients List (For a 6 8 Litre Batch)
- 4 5 lbs (2 kg) Structural and Marrow Bones
- 1 Tbsp Olive Oil
- 6 quarts (6 litres) Cold Filtered Water
- 2 Tbsp Apple Cider Vinegar (ACV)
- 2 Large Yellow Onions (quartered, skin on)
- 2 Medium Carrots (roughly chopped)
- 3 Celery Stalks (roughly chopped)
- 1 Bunch Parsley Stems
- 1 Tbsp Whole Black Peppercorns
- 3 Bay Leaves
- 4 5 Fresh Thyme Sprigs
- Sea Salt (Added after straining)
Instructions
Phase I: Roasting and Preparation (The Flavour Base)
- Preheat and Prep: Preheat your oven to a blazing 400°F (200°C). Lightly coat your structural and marrow bones with olive oil and spread them on a roasting tray.
- Achieve Maillard: Roast the bones for 45 minutes. They must be deeply golden and caramelized; this is the crucial step for depth of flavour in your Bone Broth .
- Transfer and Deglaze: Move the roasted bones into your largest stockpot. Now, pour 1 cup of water into the roasting pan while it's still hot, scraping up every single brown bit (the fonds ). This concentrated flavor is a treasure pour it immediately into the pot with the bones.
Phase II: The Simmer
- Cover and Acid Soak: Cover the bones entirely with the 6 litres of cold filtered water. Stir in the 2 tablespoons of Apple Cider Vinegar. Let the pot sit cold for 30 minutes ; this allows the ACV to begin its mineral leaching work before the heat turns on.
- Initial Skimming (The Crucial Cleanse): Turn the heat to medium high and SLOWLY bring the water just to the boil. As the temperature rises, foam and gray, scummy impurities will float to the top. This is coagulated protein you absolutely must remove for a clear, clean Bone Broth . Meticulously skim off and discard all the scum until the surface is relatively clean.
- Reduce to Simmer: Immediately reduce the heat to the absolute lowest setting. We are aiming for the gentlest "shiver" simmer you should only see a tiny bubble break the surface every 5 to 10 seconds.
- Add Aromatics: Drop in the roughly chopped onions (skin on!), carrots, celery, parsley stems, thyme, bay leaves, and peppercorns.
- The Long Cook: Cover the pot loosely (or leave the lid slightly ajar) and simmer for a minimum of 12 hours, targeting 18 to 24 hours for maximum extraction and the best possible Bone Broth . Check every few hours and top up with hot water if the bones become exposed.
Phase III: Finishing and Storage
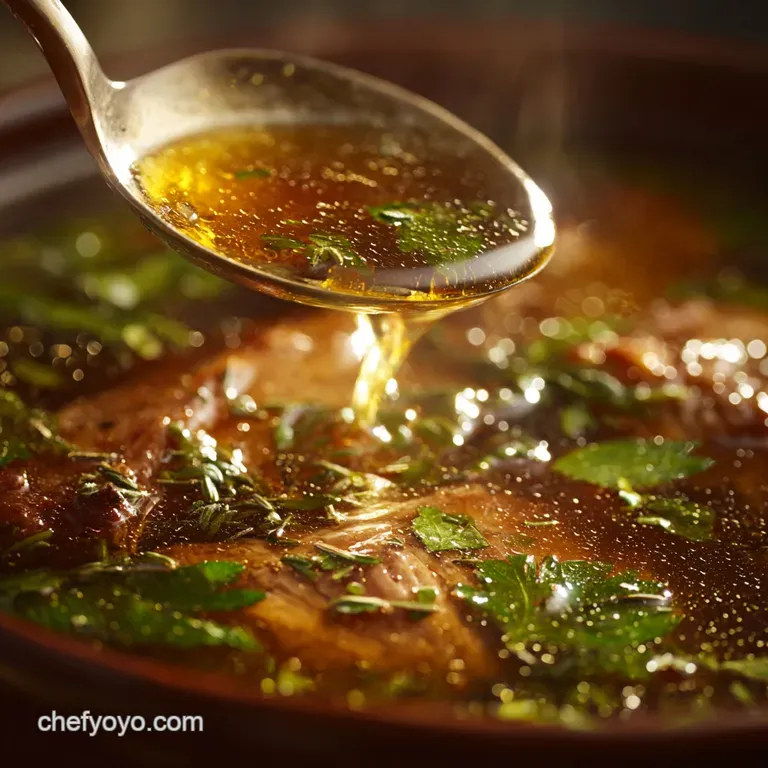
- Strain and Clarify: Remove the pot from the heat. Carefully strain the liquid through a fine mesh sieve into a clean container. If you want ultra clear Bone Broth , line the sieve with cheesecloth. Discard all solids the bones are spent!
- Season: Taste your broth. Now is the time to season with sea salt. Wait to season until this point, as reducing salted broth can make it intensely oversalted.
- Chill and De-Fat: Cool the broth rapidly (more on safety later). Refrigerate until fully chilled. Once cold, the residual fat will form a solid cap on top. Lift and discard this layer for a clean, non-greasy finish.
- Store: Behold, your finished, gelatinous homemade Bone Broth !
Troubleshooting and Refining: Perfecting Your Bone Broth
Even seasoned cooks hit snags. Here are the most common pitfalls and how we fix them to ensure your next batch of Bone Broth is flawless.
Preparation Mastery: Blanching and Roasting the Framework
Some purists blanch their bones first (boiling them briefly and discarding the water) to remove more impurities before roasting. I find that a good, deep roast coupled with a meticulous cold start skim (Step 5) is usually enough.
If you use intensely fatty bones or blood stained joints, blanching first is a solid safety step to guarantee the cleanest possible base before proceeding with the rest of the Bone Broth preparation.
The Initial Setup: Bringing the Elements Together (The Cold Start)
Starting with cold water and the acid (ACV) gives you a huge advantage in clarity. When you use hot water, the proteins and fats disperse and emulsify almost immediately, leading to a cloudy broth. The cold start ensures that the proteins coagulate slowly at the top, making them easy to scoop out.
This simple technique is vital for achieving a beautiful, clear golden Bone Broth .
The Low Bubble Rule: Preventing a Cloudy and Greasy Broth
The number one mistake people make is letting their broth boil vigorously. A rolling boil agitates the fat and proteins, causing them to emulsify into the liquid, which results in a milky, cloudy, and sometimes greasy Bone Broth .
Remember the rule: the simmer should look like a nervous shiver, not a dance. If your pot starts rumbling, turn the heat down immediately, even if it means moving the pot partly off the burner.
When to Add Salt (And Why You Should Wait)
Do NOT salt your broth at the beginning or halfway through the simmer. Since we are reducing the liquid dramatically over 24 hours, any salt added early will become intensely concentrated and ruin the entire batch.
Add your salt only after you have strained the finished Bone Broth and determined its final volume. This gives you complete control over the final seasoning profile.
Chef’s Note: If your finished, chilled broth doesn't "jiggle," don't panic! You can pour it back into a clean pot and reduce it further over high heat for about 30 minutes.
This concentrates the existing collagen, often achieving the desired gelatinous texture for your second chance Bone Broth .
Preserving Your Batch: Safe Storage and Freezing Methods
You just spent 24 hours creating this amazing elixir; don't let it go bad! Proper chilling and storage are essential for safety and retaining the quality of your gelatinous Bone Broth .
Rapid Cooling Techniques for Maximum Food Safety
Food safety dictates that liquids must pass through the "danger zone" (40°F to 140°F or 4°C to 60°C) quickly. The best method for large volumes of Bone Broth is an ice bath.
Place the pot into a sink filled with ice and a little water, stirring the broth frequently until it cools down to below 70°F (21°C). Once cooled, it goes straight into the fridge.
Optimal Storage Containers (Jars vs. Freezer Trays)
For fridge storage, airtight mason jars work perfectly (lasts 5 7 days). For freezing, I highly recommend using silicone muffin trays or ice cube trays for small, single serving portions. Once frozen, pop the cubes out and transfer them to a freezer bag labeled with the date.
For larger amounts, I freeze the broth in thick, sealed freezer bags, laid flat like little golden tiles. This makes thawing easy, and ensures my stash of precious Bone Broth is ready when I need it (keeps 6 8 months).
Defrosting and Reheating Without Compromising Gelatin
The best way to defrost is slowly in the fridge overnight. If you're in a hurry, you can place a frozen block of Bone Broth directly into a small saucepan over very low heat. Never microwave large frozen blocks in plastic!
When reheating, use gentle heat; boiling aggressively can sometimes thin the gelatin structure unnecessarily, though it won't ruin the flavour.
Integrating Your Culinary Base: Beyond the Sipping Cup
You've made a magnificent batch. Now, how do you use this superpower? Bone Broth is your culinary secret weapon for depth and richness.
Using the Gelatin in Sauces and Pan Deglazing
When you deglaze a pan after searing meat, throw in a cube of frozen Bone Broth instead of wine or thin stock. The gelatin melts down, creating a rich, glossy, and naturally thickened pan sauce without needing a drop of flour or cornstarch. It makes gravies unbelievably silky.
As a Restorative Drink: Establishing Sipping Protocols
Many people drink a cup of warm Bone Broth daily for its soothing qualities. Keep it simple: heat gently, add a pinch of flaky sea salt, a crack of fresh pepper, and maybe a dash of turmeric or cayenne for a warming sip.
It’s deeply satisfying and much more restorative than coffee on a chilly morning.
Enhancing Risottos, Soups, and Stews
This is where your effort truly pays off. When a recipe calls for liquid, use your homemade Bone Broth . It adds an unparalleled depth of savory, meaty complexity. Instead of water in your next rice dish, use broth. Planning a comforting soup? The gelatin in the Bone Broth will give your liquid foundation a professional, restaurant quality body that is completely unmatched. It works wonders, whether you're making a simple classic like a deeply satisfying Classic Italian Wedding Soup Deeply Savory Broth Tender Meatballs or a complex Asian favourite like my perfect Wonton Soup Recipe Easy Achieve RestaurantQuality Broth at Home . Your base is finally worthy of these stellar recipes.
Go forth and simmer! Making a big batch of this incredibly nourishing and flavorful Bone Broth is one of the most rewarding things you can do for your cooking and your well being. Once you taste the homemade difference, you'll never look back.

Recipe FAQs
Why didn't my bone broth turn gelatinous, and how can I fix it?
Gelatinization depends entirely on the extraction of collagen from the bones and connective tissues. Ensure you are using bones rich in collagen, such as chicken feet, knuckles, or marrow bones, rather than just large, flat bones.
If your batch is already finished, try reducing the liquid further to concentrate the existing collagen, or add a packet of high-quality unflavored gelatin for a quick fix.
Is it safe to simmer the broth for 24 hours or longer?
Yes, simmering bone broth for an extended time (up to 36 hours for beef bones) is standard practice and completely safe, provided the broth remains at a very gentle, low simmer (never a rolling boil). The key is maintaining a consistent temperature and keeping the liquid level sufficiently above the bones at all times.
Use a slow cooker or check your stovetop regularly if simmering overnight.
Do I really need to use apple cider vinegar?
While not strictly mandatory, adding a tablespoon of apple cider vinegar (ACV) at the beginning is highly recommended. The mild acidity helps break down the connective tissue and leach the valuable minerals and collagen from the bones into the simmering water.
Don't worry, the vinegar flavor dissipates entirely during the long cooking process.
When should I add the vegetables, and what can I do about bitterness?
Vegetables like carrots, celery, and onions should be added only during the last 2 to 3 hours of cooking to prevent them from breaking down entirely and releasing bitter flavours. Bitterness usually occurs if vegetable scraps or herbs (especially bay leaf) have been simmered for the full duration of 18+ hours.
If the broth tastes bitter, try balancing it with a pinch of salt or a splash of fresh lemon juice at the end.
What is the best way to store large batches of bone broth?
Once strained and chilled, bone broth will last 5 to 7 days in the refrigerator. For long term storage, pour the broth into freezer safe containers, leaving about an inch of headspace for expansion.
Frozen bone broth maintains its quality perfectly for 6 to 12 months, allowing you to easily thaw individual portions as needed.
Can I use an Instant Pot or pressure cooker instead of slow simmering?
Absolutely; a pressure cooker significantly speeds up the process by creating higher temperatures that rapidly extract collagen. You can achieve the density of a 24-hour simmer in just 3 to 4 hours under high pressure.
Ensure you still skim impurities during the depressurization phase before straining the finished broth.
Should I remove the solid fat cap after the broth has chilled?
Yes, once the broth has cooled completely in the refrigerator, a solid layer of fat will rise to the surface. While some people prefer to keep it for flavour, scraping off this solid fat layer is advisable for a cleaner taste and reduced saturated fat content.
This rendered fat (schmaltz or tallow) can be saved and used separately for cooking.
Slow Simmered Bone Broth Elixir
Ingredients:
Instructions:
Nutrition Facts:
| Calories | 50 kcal |
|---|---|
| Fat | 2 g |
| Fiber | 0 g |
