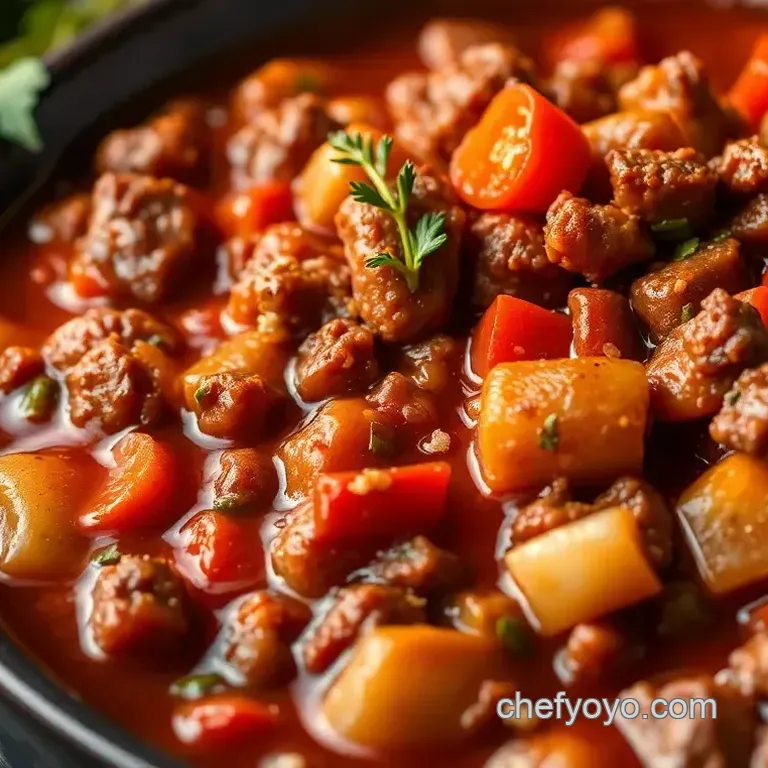
Venison Deer Camp Chili
What’s the secret ingredient that turns a standard bowl of chili into a flavor packed delight that’ll have your friends begging for the recipe? it’s a question that's stumped many home cooks but trust me, it’s all about the meat.
If you’ve ever tried a venison deer camp chili recipe , you know there’s something special about using wild game that brings an earthy richness to the dish.
Not only is it a hearty comfort food that pays homage to the hunting tradition, but making this chili is an enjoyable, low-key way to spend an afternoon.
It typically takes just about 15 minutes to prepare and then, with a little patience, simmers for an hour and a half.
So, why is this chili so special, you ask? for one, the use of ground venison gives it a robust flavor that’s hard to beat.
And while the dish is easy, it’s not lacking in complexity perfect for novice cooks and seasoned kitchen veterans alike. plus, it’ll easily satisfy a crowd, making it a great option for game day gatherings or chilly night dinners at home.
When you step back and take a look at the history of chili, it’s a fascinating tale that stretches back to the culinary roots of the americas.
Originally brought to the southwest by spanish colonists, chili has evolved through the addition of local ingredients and techniques, transforming into regional favorites that reflect the culture and flavors around them.
The inclusion of venison, a frequent staple for many campers, gives this particular deer camp recipe a deep connection to outdoor traditions and communal meals.
Now, what makes venison deer camp chili so appealing? for starters, it’s loaded with nutrients. venison is lower in fat and higher in protein than traditional ground beef, which means you’re indulging in something that not only satisfies your hunger but also matches with a nutritious diet.
Plus, you can easily customize it with your favorite beans or toppings.
There’s something truly heartwarming about a big pot of chili bubbling away on the stove. maybe it's the comforting aroma wafting through the kitchen or the memories of gathering around a campfire with friends, sharing stories over steaming bowls.
And let's not forget the cultural significance chili is often known as a communal dish, with each family adding its unique spin through spices and toppings.
Why should you dive headfirst into this recipe? first off, the combination of spices is absolutely mouthwatering. with spices like chili powder, smoked paprika, and oregano, each bite has layers of flavor that warm the soul.
And don’t worry, i’ve got a few foolproof techniques up my sleeve to ensure it turns out perfect every time.
My own experience with chili involves a learning curve; i've burned and over seasoned more than once, but now i feel confident i could whip this up with my eyes closed.
Speaking of confidence, this chili’s health benefits are noteworthy too. not only is venison a lean meat packed with protein, but you’ll also find fiber from the beans and vitamins from the peppers making this a well rounded meal.
Whether you’re counting macros or just trying to eat well, this recipe has a place in your kitchen.
This venison deer camp chili recipe is not just a dish; it’s a labor of love that merges history, health, and heart.
With a total preparation time of about 15 minutes and a cooking time of 1 hour and 30 minutes, you’ll be serving six hearty portions that are both cost effective and satisfying.
So, are you ready to gather the ingredients? below, i’ll list everything you need to create this classic campfire taste all while enjoying the comfort of your home kitchen.
Let’s get cooking and create something that’s sure to impress!
Quality Ingredients Breakdown
When it comes to crafting our venison deer camp chili recipe , i can’t stress enough the importance of choosing the right ingredients.
The base of any great chili is, of course, its core ingredients. here’s how to pick the best!
Premium Core Ingredients
Ground venison : you’ll need 2 lbs of either ground or finely diced venison. look for cuts that are deep red with a fresh scent avoid anything too brown or slimy.
If you can, buy from a local butcher; they usually have great quality game meat. i once got some deer meat that was tougher than a boot because it sat in the fridge too long lesson learned! store it in the freezer if you don’t plan to use it within a couple of days.
Olive Oil : Just 1 tablespoon to start, but make sure it’s a good, high-quality one. You can tell it’s good if it has a robust smell and a rich taste.
Vegetables : you’ll need 1 medium onion , 3 cloves garlic , and 2 bell peppers . for storage, keep onions in a cool, dry place, while peppers do better in the fridge.
I can’t count the number of times i forgot about my onions, only to find them sprouting in the back of the pantry!
Canned goods : for a rich base, grab two 14.5 oz cans of diced tomatoes and a 15 oz can of tomato sauce .
A tip here is to look for low-sodium versions. my brother once ignored this and added straight-up salt, turning our dinner into a salt lick yikes!
Beans : You’ll want 1 can each of kidney and black beans. Rinse them well to wash off the gunk no one wants that in their chili.
Broth : go for 2 cups of low-sodium beef or venison broth ; it really makes a difference. if you have leftover broth, store it in ice cube trays for easy future use.
Signature Seasoning Blend
Now let’s chat about what really gives this chili its zing!
Spice combinations : For this recipe, you’ll use 2 tablespoons chili powder, 1 teaspoon ground cumin , and a dash of smoked paprika . These spices give it a hearty, smoky flavor.
Herb selections : Toss in 1 teaspoon dried oregano ; it’s a lovely addition. Once, I tried fresh oregano, and although it was aromatic, it was a bit too strong for the blend fresh can be tricky!
Aromatic additions : Don’t forget that cayenne pepper ! Start with 1/2 teaspoon and adjust to suit your heat preference. Remember, once it’s in, it’s hard to take it out!
Smart Substitutions
I get it life happens, and you might not have everything on hand.
Alternative options : If you have no ground venison and only ground beef knocking around, use that! It works just fine.
Dietary swaps : For a vegan option? Swap out the meat for additional beans and maybe some corn.
Seasonal variations : In summer, why not throw in some fresh diced zucchini or peppers? It'll up the veggie factor and add a nice touch.
Kitchen Equipment Essentials
Before diving into the cooking process, let’s ensure you have the right tools.
Must have tools : A large pot or Dutch oven is essential for simmering. I’ve learned the hard way that a smaller pot can lead to spills.
Recommended appliances : If you’ve got a slow cooker, use it! The flavors meld beautifully over time. On camping trips, though, I’ve resorted to using a campfire pot.
Helpful gadgets : A good chopping knife and a sturdy wooden spoon are a must. Honestly, I once tried using a flimsy plastic spoon and ended up with splinters in my chili.
Home alternatives : No Dutch oven? No problem! A large saucepan works just fine for cooking, but keep a close eye on it.
Pro Ingredient Tips
Selection secrets : When choosing meat, check for the freshest and leanest cuts. Grass fed or pasture raised is often better quality.
Quality markers : Trust your instincts smell, touch, and visuals matter! If it doesn’t look good, don’t buy it.
Storage solutions : Leftover chili? Store it in an airtight container in the fridge for up to four days or freeze for a delicious meal later.
Money saving tips : Buy in bulk! A large package of beans or canned goods can be much more economical than single cans.
Now that we’ve got our ingredient game on point, it’s time to roll up our sleeves and dive into crafting this comforting bowl of venison deer camp chili .
You'll find the full step-by-step instructions next. trust me, this hearty chili is just what you need to warm you up after a chilly day at deer camp, or any day, really!
Expert Cooking Method for Venison Deer Camp Chili Recipe
Chili has always held a special place in my heart (and stomach). it brings back memories of cold, crisp nights spent around the campfire, laughing with family and friends while the hearty aroma wafted through the air.
So today, let’s dive into this venison deer camp chili recipe that’s perfect for any gathering, whether it’s in the great outdoors or at home.
Trust me, you’ll want to keep this in your recipe book!
Essential Preparation Steps
Before we dive into cooking, let’s chat about mise en place —that fancy French term for getting your ingredients ready. This makes everything smoother, and honestly, it’s a total lifesaver.
Mise en place details : chop your onion, mince your garlic, and dice those bell peppers. measure out your spices, too.
Trust me, never underestimate the power of being organized you’ll thank yourself when everything is within reach.
Prep Techniques : If you’ve got a little extra time, consider marinating the venison in some spices or broth. It'll absorb even more flavor!
Time Management : This recipe takes about 15 minutes of prep and 1.5 hours of cooking. Multitask when you can; for instance, while the onions are sautéing, chop your peppers.
Organization Tips : Keep your knife block and cutting board nearby, and don’t forget to clear as you go. No one wants to navigate a kitchen disaster with chili on the stove!
Professional Cooking Method
Now, let’s get cooking!
Sauté the aromatics : start by heating that tablespoon of olive oil over medium heat in your favorite pot or dutch oven something that can handle a fair bit of simmering.
Toss in the onion and let it sweat for 3-4 minutes. smells amazing already, right? add garlic for the last minute.
Brown the venison : crank it up to medium high and add your ground venison. you want to break it up and cook until there’s no pink left.
This should take about 6-8 minutes. if you’re using chunks of venison, make sure they’re seared golden brown.
Add Peppers : Toss in those colorful bell peppers and let them soften for about 5 minutes.
Incorporate Tomatoes and Sauce : Next, we add the star ingredients canned diced tomatoes and tomato sauce. Stir well; it should look rich and vibrant.
Mix in Beans & Broth : Now, gently fold in your canned beans (make sure they’re rinsed), and pour in that lovely broth.
Season the Chili : Here’s where it gets fun add all your spices. Give it a good stir to ensure everything is evenly coated, and then let it come to a simmer.
Simmer : this is the part you’ll want to keep an eye on; reduce to low and simmer for an hour.
Stir occasionally so nothing sticks. if it gets too thick, don’t hesitate to splash in a bit more broth or water.
Taste and Adjust : Near the end of your cooking time, taste your chili. If you need more zing, add cayenne. Don’t worry if it’s not perfect chili is forgiving!
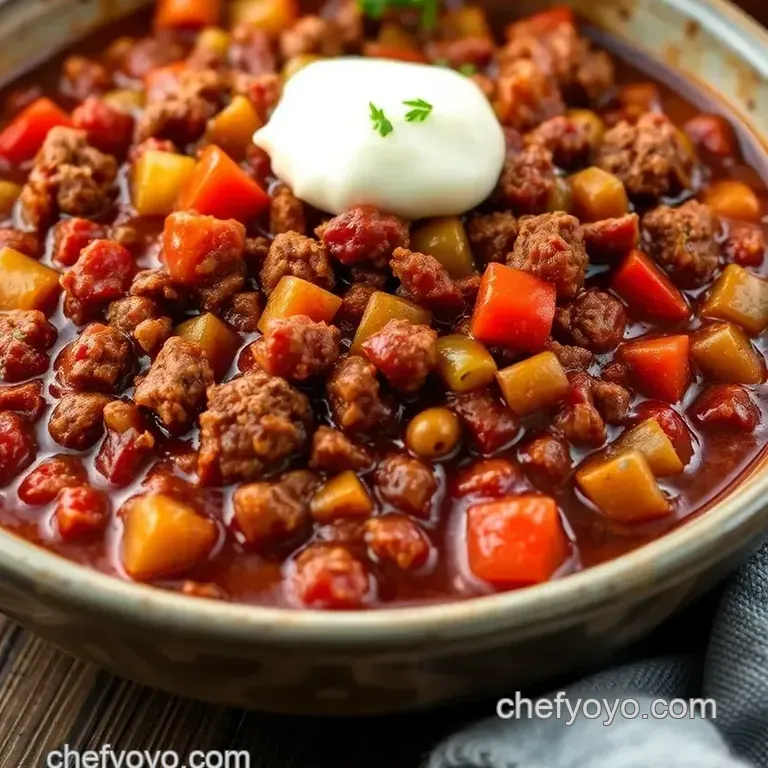
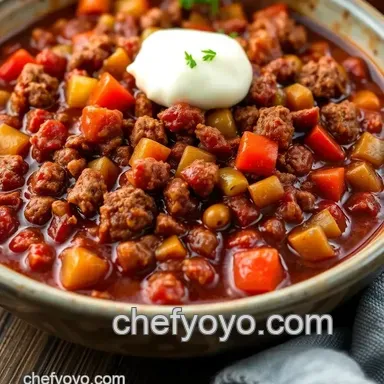
Serve : Ladle into bowls and top with shredded cheese, a dollop of sour cream, or whatever you fancy.
Expert Techniques
Here are some extra tips to make your venison chili even better:
Critical Steps : Make sure to brown the venison properly. This adds a depth of flavor that’s hard to beat.
Precision Points : Keeping an eye on the heat is crucial. Too high, and you can burn the bottom; too low, and it won’t cook properly.
Quality Checks : After an hour, taste your chili. Flavor deepens with the simmer, but if it’s off, don’t hesitate to toss in more seasoning!
Success Strategies
Even seasoned cooks can hit a snag, so here’s how to troubleshoot:
Troubleshooting tips : if your chili is too thick, add more liquid slowly until you hit your desired consistency. conversely, if it’s too soupy, leave it simmer without a lid for a while.
Quality Assurance : Look for that deep, rich color. If it’s too pale, it might need more spice or simmer time.
Perfect Results Guide : Letting the chili rest for 15 minutes after cooking helps flavors meld together beautifully. If you can, make it a day ahead!
Well, there you have it! your next steps will include tasting that beautiful chili and perhaps contemplating what to serve alongside it.
We’ll talk about some fun side dish ideas and the best chili toppings to take this comforting meal to the next level in the next section.
Trust me, you won't want to miss out on those delicious pairings!
Expert Kitchen Wisdom
When i first dove into making my venison deer camp chili recipe , i thought i knew what i was doing with chili.
But boy, was i in for a surprise! understanding kitchen wisdom is essential, especially when working with wild game. the first professional tip i picked up was to brown the venison properly.
Use medium high heat and ensure not to overcrowd the pan. otherwise, you’ll end up steaming instead of browning, and we want that beautiful caramelization for depth of flavor.
Another gem i learned is to arm yourself with a good quality meat thermometer. it ensures you cook the venison to a tender state without overdoing it.
Also, don’t be afraid to get your hands dirty by mixing your seasonings into the meat before cooking. this technique keeps your flavors well integrated right from the start!
Perfect Presentation
Now, let’s talk about plate appeal. when i first served chili, i just plopped it in a bowl without a care.
But then i discovered plating techniques that elevate a dish from “meh” to “wow!” a simple yet effective way is to place the chili off-center in the bowl and let the toppings cascade like a waterfall over the side.
Think shredded cheese, a dollop of sour cream, and a sprinkle of green onions or cilantro for a pop of color.
So, before you put that ladle down, consider garnishing with a few crispy tortilla chips for texture or a jalapeño slice for heat.
The visual layering adds a rustic charm, and trust me, folks will be snapping photos faster than you can say “campfire meals.
”
Storage and make-ahead
Who doesn’t love a good batch of make-ahead chili? i often whip up a huge pot and let it cool, then store it in the fridge for later.
Just a little note here: cool the chili to room temperature before sticking it in the fridge to preserve its freshness.
For storing, i recommend using airtight containers. it can easily be stored in the fridge for up to three days, or you can freeze it for up to three months! and here’s a tip i learned the hard way - when reheating, do it slowly over low heat; don’t blast the microwave.
Otherwise, you end up with a sad, dried out chili instead of your hearty goodness.
Creative Variations
Let’s face it; we all love a good chili, but it doesn’t hurt to mix things up. one of my favorite flavor adaptations is adding a bit of cocoa powder or dark chocolate.
I know, right? sounds weird, but it brings an incredible richness!
If you want a lighter version, swap out half the venison for lentils. yes, it holds the rustic vibes while sneaking in some nutritious goodness.
Seasonal twists? try tossing in butternut squash or sweet potatoes in the fall for sweetness. you could even embrace your area’s cultural influences by throwing in ingredients that reflect your regional tastes, like some local smoked paprika or chili sequences.
The sky's the limit!
Complete Nutrition Guide
When you’re cooking, especially with venison, it’s crucial to know what you’re eating. this chili packs about 350 calories per serving, and what’s more impressive is the whopping 30 grams of protein! venison is leaner than most meats, meaning you get more protein without all that extra fat.
Plus, there’s a good mix of fiber from the beans, helping with digestion.
If you’re watching sodium levels, opt for low-sodium broth and beans. these small changes help keep things healthier without sacrificing taste.
Just keep an eye on your portions; a big bowl is good and all, but it’s easy to overdo it.
Expert FAQ Solutions
Ah, the million dollar question: why did my chili turn out too watery? i’ve been there. it’s all about the simmering process.
If you add too much liquid, just let it simmer longer to reduce.
Another frequent concern is the spice level. not all taste buds are created equal! i always advise starting small with cayenne or chili powder and adjusting throughout the cooking process.
That way, you can cater to even the pickiest eaters in your crew.
Troubleshooting your chili can be an adventure don’t feel bad if you have to adjust. That’s part of the fun of cooking, right?
Wrapping it all up, cooking is like an adventure, and whether you’re nestled in a deer camp or just home for a cozy night, a good bowl of venison deer camp chili recipe will warm you from the inside out.
So get chopping, sautéing, and don’t forget to make it your own! it's okay to make mistakes; they're just part of the journey.
Happy cooking!
Venison Deer Camp Chili Recipe 10 Tips For The B
Ingredients:
Instructions:
Nutrition Facts:
| Calories | 350 |
|---|---|
| Protein | 30g |
| Fat | 15g |
| Carbs | 30g |
| Fiber | 10g |
| Sugar | 6g |
| Sodium | 500mg |
