Vibrant Homemade Pickled Beetroot: a Taste of Tradition
Discovering the Joy of Homemade Pickled Beetroot
Oh my gosh, have you ever tasted pickled beetroot? i can still remember the first time i took a bite it was like a flavor explosion, sweet and tangy all in one.
Honestly, that burst of color and crunch hit me right in the feels. it transformed my boring sandwich into something i actually looked forward to.
That’s why i’m so excited to share how to make pickled beetroot. it’s not just about the taste. it’s about adding a splash of vibrancy to our meals, just like an unexpected burst of laughter in a quiet room.
A Taste Steeped in Tradition
Let me tell ya, pickled beetroot isn’t just a trendy food choice. nope! this beauty has roots deep in eastern european kitchens.
Generations have enjoyed it, and it shows up in all kinds of family style dishes. today, it’s a hit in american homes, popping up as a fantastic addition to salads, sandwiches, and even as a surprising side at barbecues.
And the best part? it’s super easy to whip up!
So, how much time do you need to create this delicious crunchy treat? well, you’ll need about 15 minutes for prep, 30 minutes to cook the beets, and about an hour to let it chill and do its magic.
You get about 4 cups of pickled goodness. that’s perfect for sharing with a crowd, or, you know, keeping it all to yourself like i often do.
Why You Should Get Pickled
Now, let me take a moment to rave about the benefits of pickled beetroot. first off, these little gems are packed with vitamins and minerals.
They’re low in calories but full of fiber, making them a healthy sidekick to any meal. plus, the sweet and-sour flavor is like sunshine in a jar.
You might wonder when to serve this gem. honestly, any occasion is a perfect one! they’re great at summer barbecues, thanksgiving feasts, or just as a fancy addition to tuesday night tacos.
And between you and me, they’re a fantastic alternative to regular snacks. think about it why just munch on chips when you can savor some tangy, crunchy pickled beets instead?
Unique and Unmatched
Okay, let’s get down to why this pickled beet recipe really stands out compared to other recipes. for starters, you can customize it! like your style? how about adding pickled onion for some extra zest? you can make this your own by switching it up with spices, or even tossing in some apples for a sweet twist.
Plus, not to mention, they work seamlessly with refrigerator pickles if you're lazy like the rest of us sometimes. yes, please!
Another thing i just love about this dish is its versatility. you can use it in so many ways. toss it in salads, or how about pairing it with your keto biscuits? seriously, the blend of flavors will blow your mind.
Let’s Get Cooking!
So, you might be asking yourself, “What do I need to make this pickled beetroot?” Here's the simple list:
- Fresh ingredients like 3 medium beetroots
- Distilled white vinegar
- Sugar and salt
- Seasonings like black peppercorns and garlic
See? Super easy!
Now that i’ve got your taste buds tingling, let’s dive into the ingredients and get this tangy adventure started! grab your apron because we’re about to whip up some vibrant, homemade pickled beetroot that will light up your meals.
Trust me; it’s gonna be so worth it. don't you just love that feeling of crafting something delicious? let’s do this!
Your Essential Ingredients Guide for Home Cooks
Hey there, fellow food lovers! today, we’re diving into the world of essential ingredients that make your kitchen adventures delightful and delicious.
Whether you’re a seasoned chef or a newbie with dreams of cooking like a pro, you’ll need the right tools and ingredients by your side.
Plus, i’ll sprinkle in some personal anecdotes because, let’s be real, cooking is all about sharing experiences (and occasionally mischief!).
Premium Core Components
First thing’s first, let’s chat about premium core components . You want your dishes bursting with flavor, right? Then the star ingredients need to be top-notch!
Detailed measurements: always have both us & metric measurements handy. want to make a classic pickled beetroot ? you’ll need to know your beetroots' weight in pounds or grams, whichever you’re comfortable with.
Quality Indicators: Look for vibrant colors and pleasant aromas . Fresh herbs should look lively, not wilted.
Storage guidelines: some ingredients, like that fresh basil you just bought, can wilt quickly. store in a damp paper towel in the fridge.
Others, like dried spices, stay fresh for a while but should live in a cool, dark place.
Freshness Tips: Always check the expiration dates on packaged items. Spoiled ingredients can totally ruin a harmonious dish.
When I first got into cooking, I bought a bunch of spices on a whim, only to find they had expired. Lesson learned!
Signature Seasoning Blend
Alright, let’s jazz things up with a signature seasoning blend . The right mix can elevate any dish from bland to grand!
Essential Spice Combinations: Think cinnamon, cumin, or a dash of smoked paprika. These bad boys can make your usual veggies sing.
Herb Selections: Fresh is best, but dried herbs can save the day sometimes. Thyme pairs perfectly with roasted chicken, while basil spruces up any tomato dish.
Flavor enhancers: a sprinkle of salt can bring everything to life. but also consider how a pinch of black pepper or a squeeze of lemon enhanced flavor in my refrigerator pickled beets .
Total game changer!
Regional Variations: Ever thought about adding a bit of chili powder to those Southern style biscuits? The world of spices is yours to explore!
Smart Substitutions
Now, we all know food plans can go awry. So, let’s talk smart substitutions for those, “Oh no, I’m out of this” moments.
Common Alternatives: Need pickled onion but don’t have any? Sweet onions mixed with vinegar can do the trick.
Dietary Modifications: Going keto? Swap traditional flour for almond flour in recipes like keto biscuits .
Emergency Replacements: If you’re out of granulated sugar for that pickled onions recipe , honey can often work wonders.
Seasonal Options: Using seasonal produce not only saves money but can amp up flavor. Fall is the prime time to experiment with beets, especially in my favorite beet recipes !
Kitchen Equipment Essentials
Let’s not forget about the kitchen equipment essentials that keep the wheels turning.
Must Have Tools: A sharp knife, a good cutting board, and a solid pot are must haves. When I first started cooking, I thought I could get away with dull knives. Big mistake!
Alternative Equipment: No food processor? No problem! Get your elbow grease working and chop manually.
Preparation Tips: Mise en place! It means "everything in its place." Having your ingredients prepped will save time and prevent chaos.
Storage Solutions: Clear containers save time it’s easier to find those spices that somehow hide from you in a cluttered cupboard.
Wrapping it Up
So there you have it! a quick and cheerful rundown of the essentials. cooking is not just about following recipes; it’s a journey of exploration.
Now, let’s transition into that amazing vibrant homemade pickled beetroot ! trust me, these cheeky little roots, with their sweet and-sour vibe, will add a zing to salads, sandwiches, and way beyond.
Get your jars ready, because this recipe is about to become a staple in your kitchen. happy cooking, friends!
Mastering Professional Cooking: The Journey to Perfect Pickled Beetroot
Cooking isn’t just about following a recipe; it’s an adventure! today, let’s dive deep into how to make pickled beetroot, bringing that vibrant color and flavor right into your kitchen.
Honestly, this dish had me at the first bite. it’s like a sweet and-sour explosion, perfect for any meal or just as a snack.
Let’s get started!
Essential Preparation Steps
Before you even think about cooking, let’s chat about mise en place . this fancy french term just means “everything in its place.
” get your ingredients ready beetroots, vinegar, sugar, and spices, all set up before you start cooking. trust me, this keeps chaos at bay and helps you manage time better.
Time management is critical, especially when you’re multitasking in the kitchen. i learned the hard way; once i burnt my lunch because i was too busy scrolling through social media.
Set a timer for 30- 40 minutes for boiling your beets and keep track of the pickling brine.
Organization is key, too. have a clear workspace. i’m talking about having your pot on the stove, measuring cups at the ready, and a clean counter no one likes cooking in clutter! and safety? keep those kitchen accidents at bay by being careful with sharp knives and hot pots.
Just be smart about what you're doing, okay?
step-by-step Process
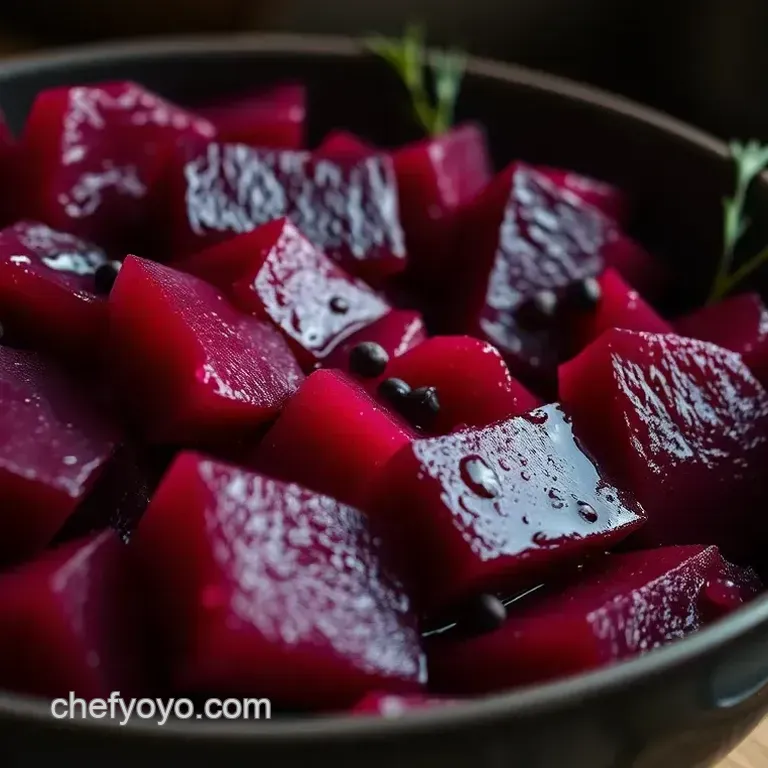
Prepare the Beetroots: First, scrub and rinse your beets under cold water. That dirt? Bye-bye! Peel them using a vegetable peeler.
Cook the beetroots: now, place those beets into a medium pot, cover them with water, and bring it to a boil.
Reduce to a simmer and let them hang out for 30- 40 minutes . to check if they’re done, poke them with a fork if it goes in easily, you’re golden!
Slice the Beets: Drain the cooked beets and let them cool. When they’re at a manageable temp, slice them up into thin rounds or wedges. Totally up to you!
Make the Pickling Brine: In the same pot, mix your vinegar, water, sugar, salt, black peppercorns, and garlic. Bring that baby to a boil and stir until everything’s dissolved.
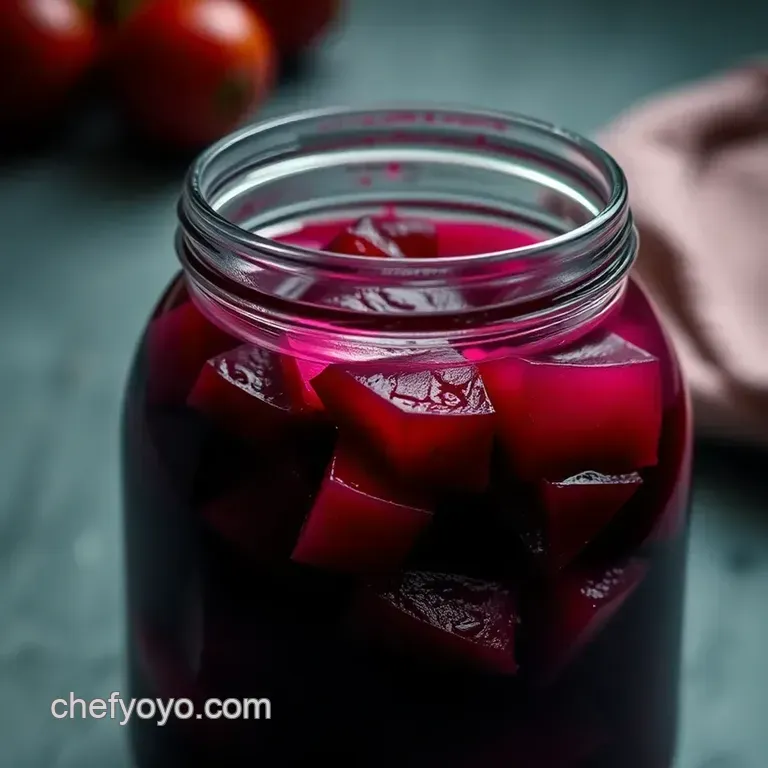
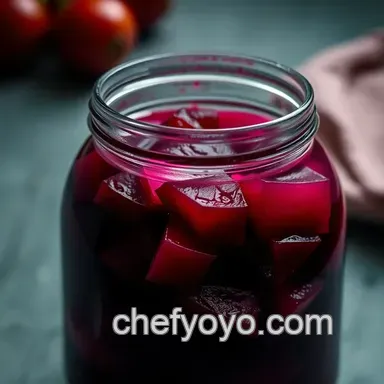
Pack the Jar: Get a sterilized glass jar and layer your sliced beets in there. Pour in the hot brine until they’re completely submerged.
Cool and chill: let the jar cool to room temperature; then seal it up and pop it in the fridge for a minimum of 24 hours .
This is where the magic happens flavors meld and deepen.
Expert Techniques
Don’t you love learning those little tricks? here’s a pro tip: temperature control is everything. when boiling your brine, keep it at a hard simmer, not a rolling boil.
This ensures your pickles don’t get mushy.
Timing precision is vital. Let those beets chill for at least 24 hours before digging in. This gives them time to soak up all that tangy goodness.
Also, keep an eye on visual cues. You want those beets to maintain a vibrant color. If they look dull, something went wrong!
Success Strategies
Avoid common pitfalls, like forgetting to sterilize your jars. Nothing makes me cringe more than the thought of spoilage! Trust me, a quick rinse and boil can save your masterpiece.
For quality assurance, always taste your brine. Adjust to your liking for sugar and salt it’s your creation after all!
And if you want to make-ahead, these pickled beauties last ages in the fridge, so you can whip them out for fall gatherings or Sunday brunches.
Conclusion: Let's Keep Cooking!
So there you have it your new go-to pickled beets recipe! this little jar of joy offers a punch of color and flavor to any dish.
It’s so easy that even someone like me, who once set a kitchen towel on fire (don’t ask), can handle it.
You’ll be impressing your friends and family before you know it!
As we wrap up this culinary adventure, remember there’s more to discover. Get ready for some additional information on recipes and cooking techniques coming your way.
Pro Tips & Secrets for Making Pickled Beetroot
You know when you find that one recipe that just makes your taste buds do a happy dance? that’s what i feel about how to make pickled beetroot ! not only is it super easy, but it’s also packed with flavor and oh-so-colorful.
Let’s dive into some pro tips and tricks to elevate your pickled beet game!
Chef's Personal Insights
First off, choose the freshest beets you can find. honestly, it makes a world of difference! i once grabbed a bag of beets that looked like they’d been through a war, and trust me, the pickles ended up a bit lackluster.
Also, when you're slicing those beets after cooking, keep it uniform. it makes your pickled beets recipe not just tasty but also a feast for the eyes because who doesn’t love a bit of food art?
Time Saving Techniques
If you're pinched for time, here’s a little secret: use a microwave to steam them instead of boiling. just a quick zap in a covered dish with water, and you'll have tender beets in a fraction of the time talk about a dump recipe winner!
it’s a game changer, especially on those busy weeknights when you still want something homemade.
Flavor Enhancement Tips
Make sure to let your pickled beetroot chill for at least 24 hours . the flavors develop and meld into something magical.
Also, don’t shy away from adding spices to your brine! a pinch of chili flake or a fresh herb like dill can kick it up a notch.
You’ll be surprised how a little twist can change the whole vibe.
Perfect Presentation
Now, let's talk about how to make that plate look instagram worthy. first, use a beautiful glass jar to showcase those vibrant colors.
When you're bottling up your refrigerator pickled beets , layer them in the jar to create a colorful stripe effect yes, please! garnishing is huge too.
Try a sprinkle of pickled onion slices on top for that pop of contrast. you’re basically a food stylist now!
Storage & make-ahead
These pickled beauties last up to three weeks when stored in the fridge, but honestly, they rarely last that long in my house! for best results, keep them in a clean, airtight glass jar.
And if you're ever overwhelmed by leftover beets or just have a temporary memory lapse you can always whip up a batch of refrigerator pickles by using the same brine treatment.
Creative Variations
Feeling adventurous? check out some variations! swap half the vinegar for apple cider vinegar for a sweeter twist, reminisce about fall flavors by adding allspice, or even throw in some orange peel for a citrus kick.
You can also use beet recipes as a base for a salad with goat cheese for a delightful contrast!
Complete Nutrition Guide
Not to get too serious, but these vibrant little guys are packed with nutrients. just one serving (about ½ cup ) contains roughly 70 calories and gives a nice little fiber boost perfect for your gut health! plus, they're a fabulous source of antioxidants, making them not just tasty but also healthy.
Closing Thoughts
So what do you say? are you ready to give this pickled beetroot a go? it's such a versatile recipe that can elevate any meal, whether it’s a casual dinner or a fancy brunch.
Remember, cooking is all about creativity and having a little fun. embrace the process, enjoy the vibrant colors, and soak up the sweet and-sour goodness of your homemade beets! trust me, your taste buds will thank you! happy pickling, friends!
Frequently Asked Questions
How to make pickled beetroot taste sweeter or spicier?
To adjust the flavour of your pickled beetroot, you can simply add more sugar if you want it sweeter or throw in some chili flakes or fresh sliced chilies for a spicy kick. You can also explore using honey or maple syrup as alternatives to granulated sugar for a unique twist.
Just remember, tasting the brine before pouring it over the beets can help you find your perfect balance!
What are some great serving suggestions for pickled beetroot?
Pickled beetroot is incredibly versatile! It goes wonderfully with grilled meats, adds a zing to salads especially with goat cheese and walnuts and makes a delightful topping for cheese platters.
You could even use it to brighten up a classic ploughman’s lunch or serve it alongside a dollop of Greek yogurt for creaminess!
How long can I store pickled beetroot, and how should I do it?
Your pickled beetroot can last up to two to three weeks in the fridge, provided you keep it in a sterilised jar with a tight lid. Just make sure to always use clean utensils when serving to avoid contamination.
For long term storage, you could try a hot water bath canning process, but that requires a bit more equipment and know how!
Can I make pickled beetroot without using vinegar?
While vinegar is the traditional agent used in pickling, if you prefer to avoid it, you can try using lemon juice as a substitute for a different flavour profile, although the final result may vary slightly. However, be warned that it might not preserve the beets as long as vinegar does, so best to consume them sooner!
Can I make pickled beetroot in advance, and how far ahead of time?
Absolutely! In fact, it’s best to make pickled beetroot at least a day in advance of serving, as the flavours meld and develop wonderfully over time. You could even make it a week ahead to allow for deeper flavour infusion just store it in the refrigerator until you're ready to enjoy it.
Your taste buds will thank you!
What nutritional benefits does pickled beetroot offer?
Pickled beetroot is not only low in calories but also offers several health benefits, including being high in dietary fiber, which supports digestive health. It’s packed with antioxidants and can contribute to lowering blood pressure, thanks to the natural nitrates found in beets.
Just keep an eye on the sugar and sodium content, especially if you’re watching your intake!
Vibrant Homemade Pickled Beetroot A Taste Of Tra
Ingredients:
Instructions:
Nutrition Facts:
| Calories | 70 |
|---|---|
| Fat | 0 g |
| Fiber | 3 g |
