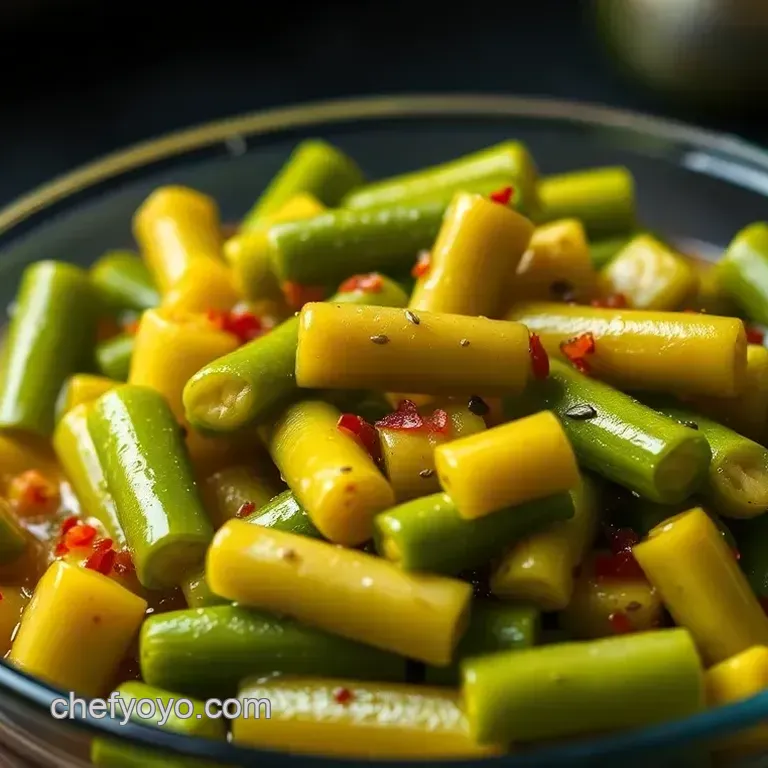
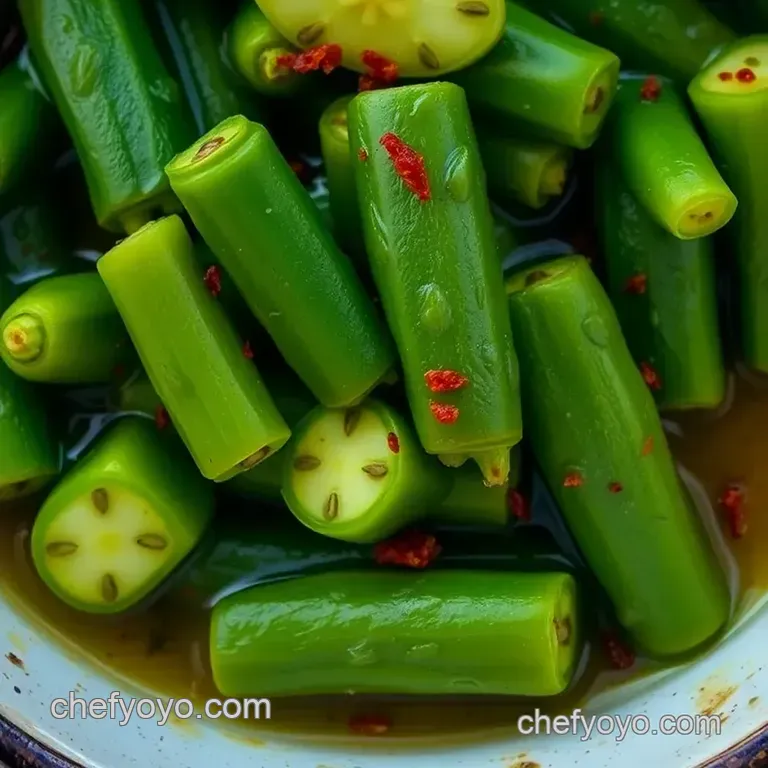
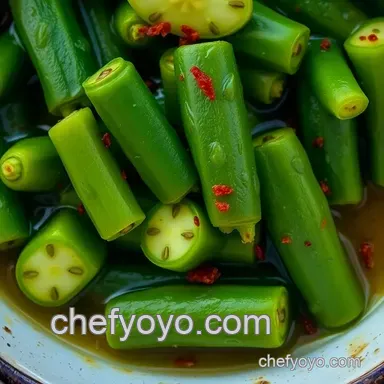
Zesty Southern-Style Pickled Okra
- look into into Pickled Perfection: The Story of Zesty Southern-Style Pickled Okra
- A Bite of History: The Charm of Pickling
- Why You’ll Love This Recipe
- Are You Ready? Let’s Get to the Ingredients!
- Essential Ingredients Guide: Getting Started with Pickling
- Mastering the Art of Cooking: Your Go-To Guide
- look into into Deliciousness: Your Guide to Zesty Southern-Style Pickled Okra
- Frequently Asked Questions
- 📝 Recipe Card
look into into Pickled Perfection: The Story of Zesty Southern Style Pickled Okra
Oh my gosh, let me tell you about the first time i tried pickled okra . it was at a backyard bbq, and i was hanging out with friends, munching on all sorts of stuff.
Someone handed me a jar of pickled okra, and i was like, what even is this? but after one crunchy bite, i was sold! the zesty flavor hit me in the best way possible.
It’s a memory that always pops up during summer cookouts, and ever since, i’ve been on the hunt for the ultimate okra pickling recipes .
This southern classic turns fresh okra into a vibrant snack or a delicious side dish.
Now, before you think, “ugh, pickling sounds too complicated!”, let me put your mind at ease. if you thought boiling water was challenging, i've got good news: making pickles is way easier than you think! this recipe is super straightforward and actually a lot of fun.
So, if you’re ready to impress your friends or just jazz up your snack game, you’re in for a treat!
A Bite of History: The Charm of Pickling
Let’s rewind a bit. pickling has been a part of american cooking since, well, pretty much forever. back in the day, folks relied on this method to preserve vegetables in the summertime so that they could enjoy them all year round.
The south, in particular, has a rich history with pickling , from pickled things on the side of every feast to special family recipes passed down through generations.
Today, pickled okra is enjoying a modern revival, popping up in homes and restaurants alike. talk about a timeless classic!
So, how much time do you need for this little adventure? you can have everything prepped in about 15 minutes, plus maybe a little waiting for the brine to cool.
The best part? once it’s in the fridge, you can forget about it for a day while it works its magic.
Seriously, you’re looking at a super simple and relaxing process here.
Oh, and let’s chat about cost. This recipe yields about four pint jars, and trust me, those fancy pickles in stores don’t come cheap! You can make a stack of your own for a fraction of the price win-win!
Why You’ll Love This Recipe
Now, let’s get to the good stuff: the benefits of making zesty southern style pickled okra . first off, let’s talk health.
Okra is low in calories and packed with fiber, making it a solid choice if you're looking for something crunchy and nutritious.
Plus, with our magical pickle brine, you add flavor without a ton of calories. it’s like a guilt free snack that pleases your palate!
But it’s not just about nutrition. imagine serving these vibrant green beauties at your next family gathering or holiday. they’ll be the talk of the celebration perfect for summer cookouts, thanksgiving feasts, or just anytime you want to impress your crew.
And if you’re looking for something unique, pickled okra is a notable compared to those same old pickle recipes. move over, bland pickles!
What makes this recipe special? it’s a blend of the tangy vinegar, fresh garlic, and just the right kick of red pepper flakes that makes each bite a delightful explosion of flavor.
Folks won’t just enjoy them; they’ll be asking you for your secret recipe!
Are You Ready? Let’s Get to the Ingredients!
Now that you’re all pumped about making this zesty treat, here’s what you’ll need for your okra recipe :
- Fresh okra (1 pound)
- Water (2 cups)
- White vinegar (2 cups)
- Granulated sugar (¼ cup)
- Kosher salt (2 tablespoons)
- Garlic (2 cloves, smashed)
- Dill seeds (2 teaspoons)
- Red pepper flakes (1 teaspoon, or more if you love heat)
Grab your jars and get everything ready, because we’re diving into the delicious world of home canning recipes that’ll have you hooked in no time! whether you're a seasoned canner or just trying your hand at it for the first time, believe me, this one’s a keeper.
Ready, set, pickle!
Essential Ingredients Guide: Getting Started with Pickling
So, are you as excited as i am to dive into the world of pickling? trust me, you're going to want to bookmark this stuff, especially when those okra pickling recipes start calling your name.
Let’s cover your go-to ingredients, must have tools, and those sneaky substitutions that will keep your pickle game strong.
Premium Core Components
First up, the core ingredients ! it's like building a lego set; you've gotta have the right pieces to craft your masterpiece.
For any pickle recipe, including our upcoming zesty pickled okra, you need to keep a few essentials on hand.
Water: Here’s the deal don’t just grab any ole water. Use filtered or distilled for sparkling clean flavors.
Vinegar: White vinegar is the champ here with its sharp, tangy personality. But if you're feeling adventurous, apple cider vinegar adds a mild sweetness.
Salt: This isn’t just any salt. Go for kosher or pickling salt. They dissolve better and help with flavor.
Sugar: A little sweetness balances the acidity. You can use white sugar or get funky with brown sugar for a caramel twist.
Now, let me give you some tips on freshness. always choose the freshest ingredients! for example, you want that crisp, plump okra none of that wilting nonsense.
If the okra bends or feels mushy, trust me, just walk away.
Signature Seasoning Blend
Next up is the flavor party! your seasoning blend might just be what sets your pickled creations apart. think garlic, dill, and spices like red pepper flakes.
Oh, and my favorite? toss in a bay leaf or two for added depth.
Don’t forget you can swap herbs too! if dill isn’t your vibe, try basil or coriander for a unique twist.
Also, regional variations can add that local flair to your pickles. southern bell? add some spices with a touch of heat!
Smart Substitutions
Now, let’s chat about substitutions. Life happens, and sometimes you’re in the middle of a recipe and realize you’re out of something. Don’t freak out! Here are some common switch ups:
- Instead of white vinegar , use distilled malt vinegar.
- No poly salt? Just add a touch of soy sauce for a nice umami kick.
- If okra isn’t in season, try green beans or even cauliflower instead they’ll soak up all those delightful flavors!
Dietary modifications ? Absolutely! For a low-sodium version, cut down on the salt by half. Oh, and if you have a sweet tooth, you can swap out sugar with honey for a whole different twist!
Kitchen Equipment Essentials
Moving on to the tools of the trade, because let’s face it no chef wants to wrestle with shabby equipment. you’ll want some canning jars with lids (hello, mason jars), a medium saucepan, and measuring tools.
And honestly, a funnel makes life so much easier when you’re pouring brine into jars.
Pro tip: Whenever you're cooking, it’s vital to keep your workspace clean. Always sterilize your jars for that extra safety measure.
Storage solution: once your jars are packed tight, refrigerate 'em! they should last up to a month. and if you’re feeling adventurous with home canning recipes , explore water bath canning for longer shelf life.
Wrapping It Up
All right, folks, you’re equipped with the essentials to tackle those pickled okra recipes . now, it’s time to dive into the instruction section.
Grab your fresh veggies, gather your tools, and let's get pickling! you'll be the neighborhood pickle connoisseur before you know it! happy cooking!
Mastering the Art of Cooking: Your Go-To Guide
Cooking can feel like both an art and a science, right? Well, if you want to step up your kitchen game, let’s talk about some professional cooking methods that transform the mundane into something mouthwatering!
By the way, I totally went from kitchen klutz to a self proclaimed home chef on this journey so, buckle up for some big-time tips and tricks!
Essential Preparation Steps
Okay, first things first mise en place , my friends! it’s a fancy french term that basically means “setting everything in place.
” gather your ingredients before diving in. you don’t want to realize halfway through your okra pickling recipes that you’re missing garlic, right?
Time management is crucial. set the timer on your phone for different stages oh gosh, i’ve burnt more than one dish because i got distracted! and don’t forget about organization .
If you’re like me, you need a clean workspace to keep things flowing smoothly. lost your spatula again? yeah, i thought so!
And safety? Major key! Always, always use pot holders and keep your knives sharp. A dull knife can be way more dangerous than a sharp one. Trust me on this!
step-by-step Process
Now, let’s break it down with some clear, numbered instructions . I swear by this when I’m whipping up something like my zesty Southern style pickled okra .
- Prepare the Brine: Mix together water, vinegar, sugar, and salt in a saucepan. Bring it to a gentle boil for 10- 15 minutes , stirring to dissolve everything.
- Cool it Down: Remove from heat and let it chill for about 10 minutes . Just enough time to do a little happy dance it’s pickle time!
- Pack the Jars: As you pack your trimmed okra standing upright, think of how gorgeous they'll look in jars. Make sure they don’t topple over!
- Fill ‘Em Up: Pour that cool brine on top, leaving about ½ inch of headspace. A good seal is like a hug for your pickles!
- Refrigerate and Wait: Let them sit for at least 24 hours . Trust me; the waiting is the hardest part!
Expert Techniques
Those who dare to try my techniques will reap the rewards. one crucial tip is to check the temperature control points when you’re canning things like okra, you want your brine to be hot but not boiling.
Pay attention to your timing precision ; even a few minutes can change everything. lastly, keep an eye on the visual cues for doneness .
Does it look glossy? perfect! is it saggy? no bueno, my friend!
Success Strategies
So, what are the common mistakes to avoid? one rookie error is letting your jars cool too slowly. you want them nice and sealed, right? also, ensure everything’s sanitized.
Give your jars and lids a hot water bath to reduce any risk of spoilage.
For perfect results, always taste your brine . If it’s too vinegary, add a bit more sugar. Not enough spice? Toss in a pinch of those red pepper flakes!
If you’re eager to get a jump on things, i love a good make-ahead option . whip up a double batch and share with friends.
Trust me, they’ll be begging for your pickle recipes homemade .
Wrapping It Up
At the end of the day, cooking should be fun. i've been there recipes flopped, dishes burned, and messy kitchens galore! but the joy of creating something delicious? totally worth it! so don’t shy away from the process, whether making pickled foods or a hefty casserole.
Ready for more tips? Check out the last section for some Additional Information on perfecting your culinary skills. look into in, and happy cooking, friends!
look into into Deliciousness: Your Guide to Zesty Southern Style Pickled Okra
Let’s be real there’s something about pickling that just screams summer. maybe it’s the fun of transforming those crunchy veggies into something tangy and absolutely irresistible.
If you’re looking for some killer okra pickling recipes , you’ve stumbled upon a gem. these babies are not only easy to whip up, but they also pack a punch of flavor.
Trust me, your taste buds will thank you and your friends just might declare you the pickle king/queen .
Pro Tips & Secrets to Elevate Your Pickled Okra Game
Chef's Personal Insights: Honestly, the key to success lies in fresh produce. If you can snag some young, vibrant okra, you’re golden. This isn’t just a recipe; it's a medley of flavors!
Time Saving Techniques: If you're short on time, chop the prep time by using store-bought pickling spices for the brine instead of measuring out individual herbs. Life’s too short for stress, right?
Flavor Enhancement Tips: The garlic and red pepper flakes? They work wonders together! But don't just stop there; experiment! How about tossing in some mustard seeds for a little extra zing?
Presentation Advice: Don't underestimate the power of a little garnish. A sprinkle of dill or a few slices of fresh chili peppers on top of your jars can turn an ordinary dish into something worthy of your Instagram feed!
Perfect Presentation: Make Your Pickles Pop!
As they say, we eat with our eyes first. So, if you want your pickled okra to wow the crowd, here are a few tricks:
Plating Techniques: For a stunning display, line your pickled okra up on a platter with some cheese cubes and crackers. Looks gourmet, doesn’t it?
Garnish Ideas: Fresh dill sprigs are a classic. You could also add a few colorful peppers to your jars for visual appeal.
Color Combinations: The bright green of the okra with the rich auburn tones of the brine? Major eye candy!
Visual Appeal Tips: Clear jars let people see the all the colors don’t hide them under those metal lids!
Storage & make-ahead: The Gift That Keeps Giving
Storage Guidelines: Once pickled, these jars can go in your fridge for 3-4 weeks.
Preservation Methods: If you're thinking long term and eyeing home canning, follow safe canning procedures to get months of flavor. Always be sure to sterilize your jars to keep everything fresh.
Reheating Instructions: No need to reheat these bad boys enjoy them straight from the jar!
Freshness Duration: But let’s be honest; they probably won’t last long once folks find out how delicious they are!
Creative Variations: Switch It Up!
Do you want to tailor the flavor of your okra? Let’s get creative:
Flavor Adaptations: Mix it up by adding a little chipotle for a smokier taste.
Dietary Modifications: Need to keep it low-sodium? Just reduce the salt in the brine (though, let’s face it, salt is what gives pickles their oomph).
Seasonal Twists: In spring, toss in some fresh radishes or asparagus.
Regional Variations: In the South, you might add hot peppers, while in the Midwest, maybe some dill pickling spice.
Complete Nutrition Guide: Guilt Free Snacking
Let’s break it down— Healthy Eating 101 !
- Calories: Each serving is about 60 kcal —perfect for guilt free snacking.
- Health Benefits: Okra’s loaded with fiber and vitamins, making these pickles not just tasty but also good for you.
- Dietary Considerations: gluten-free and perfect for low-carb diets!
- Portion Guidance: One serving is about 2-3 pieces; that's plenty to satisfy that crunchy craving.
Wrap-Up: Be Bold, Be Pickled!
So there you have it, folks! this zesty southern style pickled okra is the perfect recipe to get you started on your pickling journey.
With a few pro tips in your back pocket and some creativity, you can have a batch ready in a day.
Whether you’re hosting a barbecue or just snacking on some tasty, crunchy goodness, these pickles are sure to impress.
Grab that okra and get to pickling honestly, you’ll be the star of the potluck in no time! After all, who doesn’t love a homemade touch? 🍴Happy pickling!
Frequently Asked Questions
What are some popular okra pickling recipes I can try?
There are many delightful variations of okra pickling recipes! Some common ones include pickling with lemon slices, spices like mustard or coriander seeds, or even experimenting with different vinegars like apple cider.
You can also find recipes that incorporate other veggies, like carrots or bell peppers, for a mixed pickle jar!
How long should I leave my okra to pickle for the best flavor?
For optimal flavor, let your pickled okra sit for at least 24 hours in the fridge. However, you’ll get an even deeper flavor if you can wait a week! The acidity of the brine really enhances the taste of the okra over time, making it a perfect crunchy treat.
Can I adjust the spice level in my pickled okra?
Absolutely! Adjusting the spice in your pickled okra is easy - simply modify the amount of red pepper flakes you use. For an extra kick, consider adding sliced jalapeños or a pinch of cayenne. Just remember, you can always add more heat, but it’s hard to take it out!
How should I store my pickled okra, and how long will it last?
Store your pickled okra in the refrigerator, and it will typically last for about 1-2 months. Make sure the jars are sealed tightly and always use clean utensils when removing pickles to keep them safe and fresh!
Are there any nutritional benefits to pickled okra?
Yes, pickled okra can be a nutritious snack! It's low in calories and provides some dietary fiber. Additionally, the fermentation process may provide probiotics that are beneficial for gut health. Just be mindful of sodium levels in the brine, especially if you're watching your salt intake.
Can I reuse the brine for other vegetables?
Definitely! Don’t let that flavorful brine go to waste. You can reuse it for pickling other veggies like carrots, green beans, or even radishes. Just make sure to use it within a week or so for the best flavor and freshness!
Zesty Southern Style Pickled Okra
Ingredients:
Instructions:
Nutrition Facts:
| Calories | 60 kcal |
|---|---|
| Protein | 1 g |
| Fat | 0 g |
| Carbs | 15 g |
| Fiber | 2 g |
| Sugar | 5 g |
| Sodium | 330 mg |
