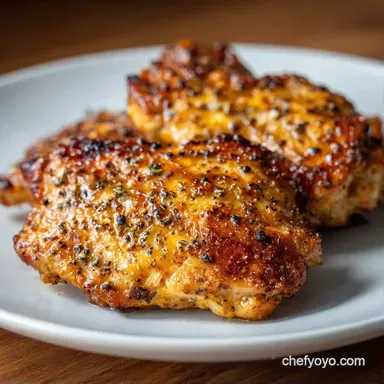
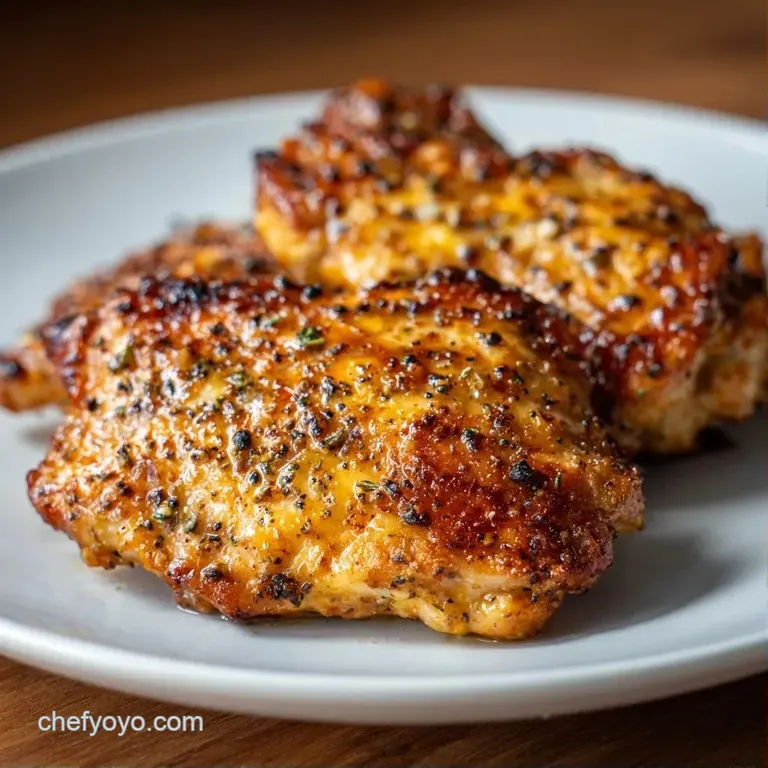
Cast Iron Chicken Thighs: Crispy and Juicy
- Time: 5 min active + 25 min cook
- Flavor/Texture Hook: Mahogany, crackling skin with juicy, tender meat
- Perfect for: Weeknight dinner or a low stress date night
That loud, aggressive sizzle the second the skin hits the hot oil is the only sound that matters. For me, it's the smell of garlic powder hitting a hot pan that signals dinner is actually happening.
There's something about the way the fat renders out of the skin, turning it into a golden, salty crust that you just can't get in a regular frying pan.
I remember the first time I tried to do this in a thin non stick skillet. The skin was limp, barely gold, and honestly kind of rubbery. I switched to a heavy cast iron skillet, and suddenly I got that mahogany crust that actually shatters when you bite into it.
It's all about the heat retention and the weight of the pan.
You're going to get a dinner that feels high end but takes almost zero effort. We're talking about Cast Iron Chicken Thighs that stay juicy inside while the outside becomes a crisp, savory shell. Trust me on this, once you move away from the baking sheet, you'll never go back.
Cast Iron Chicken Thighs
Thermal Mass: Cast iron holds heat better than any other pan, meaning the temperature doesn't drop when you add the cold meat.
The Maillard Reaction: High heat transforms proteins and sugars into a brown crust, creating a savory, complex taste according to Serious Eats.
Fat Rendering: Starting skin side down allows the subcutaneous fat to melt, effectively frying the skin in its own juices.
Carryover Cooking: Resting allows the internal temperature to stabilize, ensuring the meat stays tender.
| Choice | Prep Style | Skin Texture | Best For |
|---|---|---|---|
| Fresh | Dry brined 24h | Ultra shatter | Special dinner |
| Shortcut | Pat dry now | Crispy | Weeknight |
Ingredient Science Breakdown
| Ingredient | Science Role | Pro Secret |
|---|---|---|
| Avocado Oil | High smoke point | Prevents acrid, burnt flavors |
| Garlic Powder | Flavor concentration | Sticks better than fresh garlic |
| Kosher Salt | Moisture draw | Creates a drier skin surface |
The Building Blocks
For the chicken, we keep it simple. You don't need a twenty ingredient rub to make this work.
- 4 bone in, skin on chicken thighs (approx. 2 lbs) Why this? Bone in stays juicier during high heat.
- 1 tsp kosher salt Why this? Coarser grains distribute more evenly.
- ½ tsp cracked black pepper Why this? Fresh crack adds a floral heat.
- 1 tsp garlic powder Why this? Won't burn as fast as minced garlic.
- 1 tbsp avocado oil Why this? Can handle 500°F without smoking.
| Original Ingredient | Substitute | Why It Works |
|---|---|---|
| Avocado Oil | Grapeseed Oil | Similar high smoke point. Note: Neutral flavor profile. |
| Garlic Powder | Onion Powder | Similar savory depth. Note: Slightly sweeter, less pungent. |
| Kosher Salt | Sea Salt | Same mineral base. Note: May be saltier by volume. |
Right then, before we move to the steps, make sure your chicken is at room temperature for about 15 minutes. If it's ice cold from the fridge, the pan temperature will plumment and you'll lose that sizzle.
The Required Gear
You only need a few things, but the pan is non negotiable. I use a 12 inch Lodge skillet, but any heavy duty cast iron works.
- 12 inch Cast Iron Skillet
- Digital Meat Thermometer
- Heavy duty Paper Towels
- Tongs or a sturdy spatula
Chef Note: If you don't have a thermometer, press the thickest part of the thigh. It should feel firm but with a slight spring, like the base of your thumb when your hand is relaxed.
Searing and Roasting Steps
- Pat the chicken thighs aggressively dry with paper towels. Note: Moisture is the enemy of a crisp crust.
- In a small bowl, combine salt, pepper, and garlic powder.
- Season both sides of the chicken liberally, ensuring the skin is evenly coated.
- Preheat the cast iron skillet over medium high heat until the oil shimmers and just begins to wisp smoke.
- Place thighs skin side down. Press them down slightly for 10 seconds to ensure full contact.
- Sear undisturbed for 7–9 minutes until the skin is mahogany colored and releases easily from the pan.
- Preheat oven to 400°F (200°C).
- Flip the chicken thighs over and transfer the entire skillet into the oven.
- Roast for 12–15 minutes until the thickest part of the thigh reaches 165°F (74°C).
- Transfer the chicken to a plate and let it rest for 5 minutes to allow internal juices to redistribute.
Solving Cooking Mishaps
But what about the sticking? Or the burnt garlic? It happens to the best of us. The biggest issue is usually the temperature of the pan. If the chicken clings to the iron, it's usually because you tried to flip it too early. The meat will naturally release once the crust has formed.
Troubleshooting Common Issues
| Issue | Solution |
|---|---|
| Why Your Skin Sticks | If the meat won't budge, you're likely fighting the pan. The proteins need time to caramelize and release. |
| Why Garlic Burns | Overheating the pan before adding the oil can scorch the garlic powder instantly. |
| Why Meat Stays Raw | Using thighs that are too thick can leave the bone side underdone while the skin burns. |
- ✓ Pat skin bone dry
- ✓ Don't crowd the pan
- ✓ Use a high smoke oil
- ✓ Let the meat release naturally
- ✓ Rest before slicing
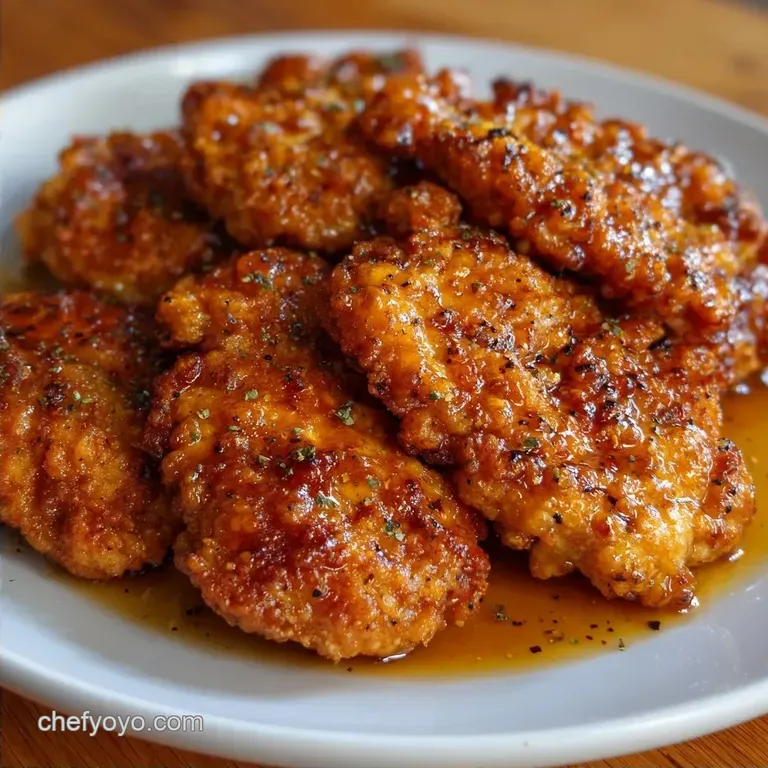
Flavor Variations
If you want to switch things up, this recipe is a great base. I love adding a splash of white wine and a knob of butter to the pan after removing the chicken to make a pan sauce. If you're into something creamier, you can check out my creamy chicken mushrooms for a different vibe.
Adding Root Vegetables
Toss in halved baby potatoes and carrots after you flip the chicken. They'll roast in the rendered chicken fat, which is basically liquid gold.
Using Boneless Thighs
If using Cast Iron Chicken Thighs Boneless Skinless, reduce the oven time to 8-10 minutes. Since there's no bone, they cook much faster.
Glaze Options
Brush on a honey soy mixture during the last 3 minutes of roasting. The sugars will bubble and caramelize into a sticky, vibrant lacquer.
Storage and Waste
Don't throw away the pan drippings! That brown stuff at the bottom is called fond, and it's the secret to the best gravies. I usually deglaze the pan with a bit of water or stock to scrape it all up.
Store leftovers in an airtight container in the fridge for up to 4 days. To keep the skin from getting soggy, reheat them in a toaster oven or air fryer for 5 minutes at 350°F. You can freeze cooked thighs for 2 months, but the texture of the skin will change.
Best Side Pairings
Since these are rich and savory, you need something bright to cut through the fat. A zesty salad or some steamed greens work wonders.
I highly recommend serving this alongside a Grilled Vegetable Platter for a balanced, vibrant meal. The tang of a yogurt dip plays off the salty chicken skin beautifully.
Decision Shortcut
- If you want a one pan meal, add potatoes to the skillet.
- If you want a lighter meal, serve over a bed of arugula.
- If you want a feast, add a side of creamy polenta.
Recipe FAQs
How do you fry chicken thighs in a cast iron skillet?
Sear skin side down for 7 9 minutes, then roast at 400°F for 12 15 minutes. Pat the chicken dry and season liberally with salt, pepper, and garlic powder before adding to shimmering avocado oil.
Can a diabetic eat baked chicken?
Yes, this is a diabetic friendly meal. It relies on basic seasonings and healthy fats without added sugars or refined carbohydrates. For another high protein option, try our bavette steak.
What are common mistakes with cast iron chicken?
Crowding the pan or adding meat to a cold skillet. Both errors lead to steaming instead of searing, which prevents the skin from achieving a mahogany, crisp texture.
Are chicken thighs ok for heart patients?
Consult your physician first. While avocado oil is heart healthy, chicken thighs and skin contain significantly more saturated fat than skinless breasts.
How to pan cook chicken thighs so they don't burn the pan?
Use avocado oil and allow the meat to release naturally. Forcing the chicken off the pan too early or using oils with low smoke points causes sticking and scorching.
What kind of skillet is best to use for frying chicken?
Cast iron is the gold standard. Its heavy mass maintains a consistent high heat, ensuring an even sear and a seamless transition into the oven.
How long do chicken thighs take to cook in a frying pan?
Budget about 25 minutes of total cooking time. This includes a 7 9 minute initial sear followed by 12 15 minutes of roasting until the internal temperature reaches 165°F.
Cast Iron Chicken Thighs