Crispy Skillet Chicken Thighs: Golden and Juicy
- Time:10 minutes active + 25 minutes cook
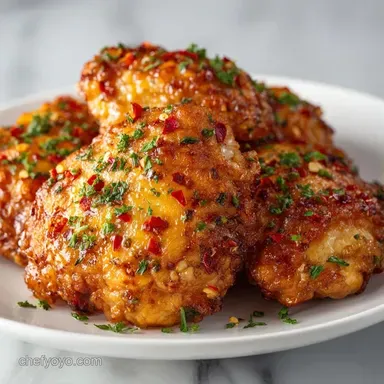
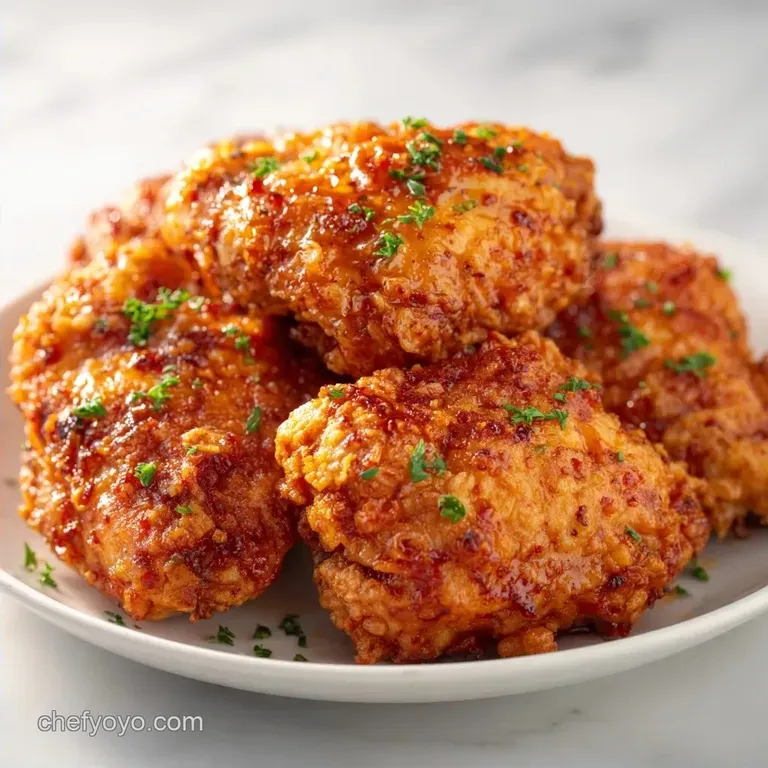
- Flavor/Texture Hook: Mahogany colored, shatter crisp skin with buttery, juicy meat
- Perfect for: A high impact weeknight dinner that feels like a restaurant meal
Crispy Chicken Thighs
That first crackle of the skin is everything. I remember a few years back, I tried to make these for a date, but I was in a rush. I didn't pat the chicken dry, and I tossed them into the pan while they were still damp.
Instead of a sizzle, I got a sad, grey, steaming mess that looked more like boiled chicken than a sear. It was a total disaster, but it taught me the most important lesson in my kitchen: moisture is the enemy of the crunch.
Now, I treat paper towels like they're the most expensive tool in my arsenal. When you see that oil shimmer and hear the chicken hit the pan, you know you're on the right track. There's something so satisfying about watching the skin turn from pale pink to a deep, rich mahogany without moving a single piece of meat.
This approach gives you a result that's far superior to the oven. We're talking about skin that actually shatters when you bite into it, paired with meat that's velvet soft. If you've struggled with rubbery skin or overcooked meat in the past, this method is for you.
Trust me on this, the patience during the first ten minutes is where the magic happens.
Why You'll Love This
Most people overthink chicken, but the beauty here is in the simplicity. You aren't dealing with complex brines or fancy equipment, just heat and fat. It's the kind of meal that makes you feel like a pro without actually needing a culinary degree.
But what about the risk of drying out the meat? That's where the carry over cooking comes in. By pulling the chicken early, we ensure the center stays moist while the outside remains a crisp shell. It's a balance of textures that you just can't get from a slow cooker or a standard bake.
Also, the flavor profile is classic. The smoked paprika adds a hint of wood fired depth, and the butter baste at the end creates a rich, nutty finish. It's comforting, seasonal, and works with almost any side dish you have in your fridge.
The Recipe Specs
This is a straightforward plan. You've got a quick prep phase to get the skin ready, a over high heat searing phase, and a gentle butter finish to lock in the flavor.
- 1. Prep Flow
- 10 minutes to dry and season.
- 2. Cooking Flow
- 10 minutes skin side down, then 15 minutes flip and baste.
- 3. Finish
- 5 minutes of resting to let the juices redistribute.
Fast vs. Classic Comparison:
| Feature | Pan Seared (This Recipe) | oven-roasted |
|---|---|---|
| Skin Texture | Shatter crisp | Leathery/Tough |
| Total Time | 35 minutes | 45-60 minutes |
| Effort | Medium (active) | Low (passive) |
| Flavor | Buttery & Intense | Mellow & Even |
What Makes It Work
I used to think it was just about the heat, but it's actually about managing the water and the fat. Here is the breakdown of why these Crispy Chicken Thighs actually work.
- The Moisture Purge: Surface water turns to steam, which creates a barrier between the meat and the pan. By drying the skin, you allow the heat to hit the protein directly.
- Fat Rendering: Cooking skin side down slowly melts the subcutaneous fat. This essentially lets the chicken fry in its own grease, leading to that glass like texture.
- Thermal Buffer: Using a cast iron skillet holds heat more consistently than stainless steel. This prevents the pan temperature from dropping when the cold meat hits the oil.
- The Butter Finish: Adding butter at the end provides a sudden burst of flavor and helps brown the edges of the meat through a quick, intense heat transfer.
The Ingredient Deep Dive
You don't need a long list here, but the quality of the fat matters. I use avocado oil because it can handle the high heat without smoking or tasting burnt.
Component Analysis:
| Ingredient | Science Role | Pro Secret |
|---|---|---|
| Avocado Oil | Heat Conductor | Higher smoke point than olive oil; stays neutral |
| Kosher Salt | Moisture Draw | Coarser grains draw out surface water more effectively |
| Smoked Paprika | Color & Depth | Adds a "grilled" aroma without an actual grill |
| Unsalted Butter | Flavor Finisher | Basting adds a nutty, velvety coating to the skin |
The Gear Needed

You can use any heavy pan, but a 12 inch cast iron skillet is the gold standard. It distributes heat evenly and doesn't warp under high temperatures.
If you don't have cast iron, a heavy bottomed stainless steel pan works, though you'll need to be a bit more careful about the chicken sticking. Avoid non stick pans if possible, as they often can't handle the heat required to get a truly shatter crisp skin without releasing chemicals.
I also recommend a digital meat thermometer. Guessing the doneness of a bone in thigh is a gamble, and a few degrees can be the difference between juicy and dry.
The Cooking Process
Right then, let's crack on with the actual cooking. Follow these steps exactly, especially the "no touching" rule during the first sear.
- Dry the chicken thighs aggressively with paper towels until the skin feels tacky. Note: Any moisture left will steam the skin instead of searing it.
- Apply the dry rub (salt, pepper, paprika, garlic powder, and onion powder) to all sides, pressing spices into the skin.
- Place 1 tbsp avocado oil in a 12 inch cast iron skillet over medium heat until the oil shimmers.
- Place chicken thighs skin side down in the skillet.
- Cook undisturbed for 8-10 minutes until the skin is mahogany colored and releases easily from the pan.
- Flip the thighs and add 2 tbsp unsalted butter to the skillet.
- As the butter foams, spoon it over the crispy skin for 1-2 minutes. Note: This creates a velvety finish and deepens the color.
- Cook until the internal temperature reaches 165°F (74°C).
- Remove the chicken from the pan when it hits 160°F (71°C) until it rests for 5 minutes.
Pro Tips and Pitfalls
One mistake I once made was overcrowding the pan. If the thighs are touching, they trap steam between them, and you lose that crunch. Give them space to breathe.
Chef's Note: For an even more intense crunch, put your salted chicken thighs on a wire rack in the fridge, uncovered, for 2 hours before cooking. This air dries the skin completely.
Another common trap is the "early flip." If you try to flip the chicken and it resists, it's not ready. The meat will naturally release from the pan once the skin has properly seared. If you force it, you'll leave the best part of the crust stuck to the skillet.
Fixing Common Problems
When things go sideways, it's usually a temperature or moisture issue. Here is how to pivot.
| Problem | Root Cause | Solution |
|---|---|---|
| Skin is rubbery | Low pan heat or damp skin | Increase heat and dry skin more aggressively |
| Meat is dry | Overcooked/No resting | Pull from pan at 160°F and rest for 5 mins |
| Skin sticking | Flipped too early | Wait for mahogany color; it will release itself |
Common Mistakes Checklist:
- ✓ Skin was patted bone dry before seasoning
- ✓ Oil was shimmering (not smoking) before adding meat
- ✓ Chicken remained undisturbed for the full 8-10 mins
- ✓ Internal temperature was checked with a thermometer
- ✓ Thighs were rested for 5 mins before serving
Variations and Substitutions
Depending on what you have in the pantry, you can tweak this recipe. If you're looking for a different vibe, you might enjoy my Chicken Shawarma recipe which uses a completely different spice profile but similar searing principles.
Substitution Guide:
| Original Ingredient | Substitute | Why It Works |
|---|---|---|
| Avocado Oil (1 tbsp) | Grapeseed Oil (1 tbsp) | Similar high smoke point. Note: Completely neutral flavor |
| Smoked Paprika (1 tsp) | Sweet Paprika (1 tsp) | Provides the same color. Note: Loses the smoky depth |
| Unsalted Butter (2 tbsp) | Ghee (2 tbsp) | Higher smoke point than butter. Note: Richer, more toasted flavor |
| Kosher Salt (1 tsp) | Sea Salt (1 tsp) | Similar mineral profile. Note: Adjust quantity if using fine table salt |
If you want to change the flavor entirely, try adding a squeeze of lemon and a sprinkle of fresh parsley right after the butter baste. Or, for a spicy kick, add a pinch of cayenne pepper to the dry rub.
Adjusting the Portion Size
Scaling this recipe is easy, but you have to manage your pan space. Don't just double the chicken in the same skillet, or you'll end up with steamed meat.
Scaling Down (1/2 or 1/4): Use a smaller skillet to keep the oil depth consistent. Reduce the cooking time by about 20% since smaller loads of meat don't drop the pan temperature as much.
Scaling Up (2x or 4x): Work in batches. This is non negotiable. Sear 3-4 thighs at a time, move them to a plate, and then repeat. When all are seared, you can put them all back in for the final butter baste if your pan is large enough.
Baking Adjustment: If you decide to move this to the oven for a larger crowd, lower the temperature to 375°F (190°C) and extend the time to 35-40 minutes. You'll lose some of the shatter crisp texture, but it's more convenient for 12+ thighs.
Leftovers and Storage
Store your leftovers in an airtight container in the fridge for up to 4 days. To keep the skin from getting soggy, let the chicken cool completely before sealing the lid.
Reheating for Crunch: Avoid the microwave at all costs; it will turn your Crispy Chicken Thighs into rubber. Instead, pop them in an air fryer at 375°F (190°C) for 4-5 minutes, or sear them in a hot skillet for 2 minutes per side.
Zero Waste Tip: Don't throw away the bones from your thighs. Collect them in a freezer bag and use them as the base for a bone broth recipe to get that deep, mineral rich liquid gold for future soups.
Perfect Complements
Since this dish is rich and buttery, you need sides that cut through that fat. A bright, acidic salad or some roasted root vegetables work wonders.
I love serving these with a side of garlicky sautéed kale or a crisp apple slaw. If you're feeling like a full feast, some oven-roasted Brussels sprouts with a drizzle of honey provide a great sweet and salty contrast to the smoked paprika.
If you have a bit of the pan drippings left over, don't waste them. Toss some baby spinach or sliced mushrooms into that leftover butter and chicken fat for a quick, flavor packed side dish that takes only 3 minutes.
Recipe FAQs
How to cook chicken thighs in a pan?
Heat avocado oil in a cast iron skillet over medium heat. Place thighs skin side down and cook undisturbed for 8 10 minutes before flipping and finishing with butter.
What is the best pan for browning chicken?
A 12 inch cast iron skillet. Its superior heat retention ensures the skin becomes mahogany colored and crispy without creating cold spots in the pan.
How long do chicken thighs take to cook on the stove?
About 25 minutes total. Sear the skin side for 8 10 minutes, then flip and continue cooking until the internal temperature reaches 165°F.
How to pan cook chicken thighs so they don't burn the pan?
Use a high smoke point fat like avocado oil. Ensure the oil shimmers before adding the meat and maintain medium heat to prevent the dry rub spices from scorching.
How to cook four chicken thighs on a griddle?
Arrange the thighs with ample space between them to avoid steaming. Follow the same searing process, ensuring the skin side down phase lasts 8 10 minutes for maximum crunch.
Is it true that you should flip chicken thighs frequently to prevent sticking?
No, this is a common misconception. Leave the meat undisturbed for 8 10 minutes; the chicken will naturally release from the pan once the skin is properly seared.
Can I use this searing method for other chicken recipes?
Yes, the skin-on method works for most poultry. For more ways to prepare high heat poultry, check out our grilling juicy chicken guide.
Crispy Chicken Thighs